GeistHaus
log in · sign up

waiyan.yoon

Part of waiyanyoon.com

<div class="whoami-prompt">$ whoami</div> Wai Yan Yoon<span class="caret"></span> Senior software engineer exploring agentic dev workflows — building, wr...

stories primary
Building Audist with AI
aiai-agentsclaude-codegenerative-aivibe-coding
Show full content

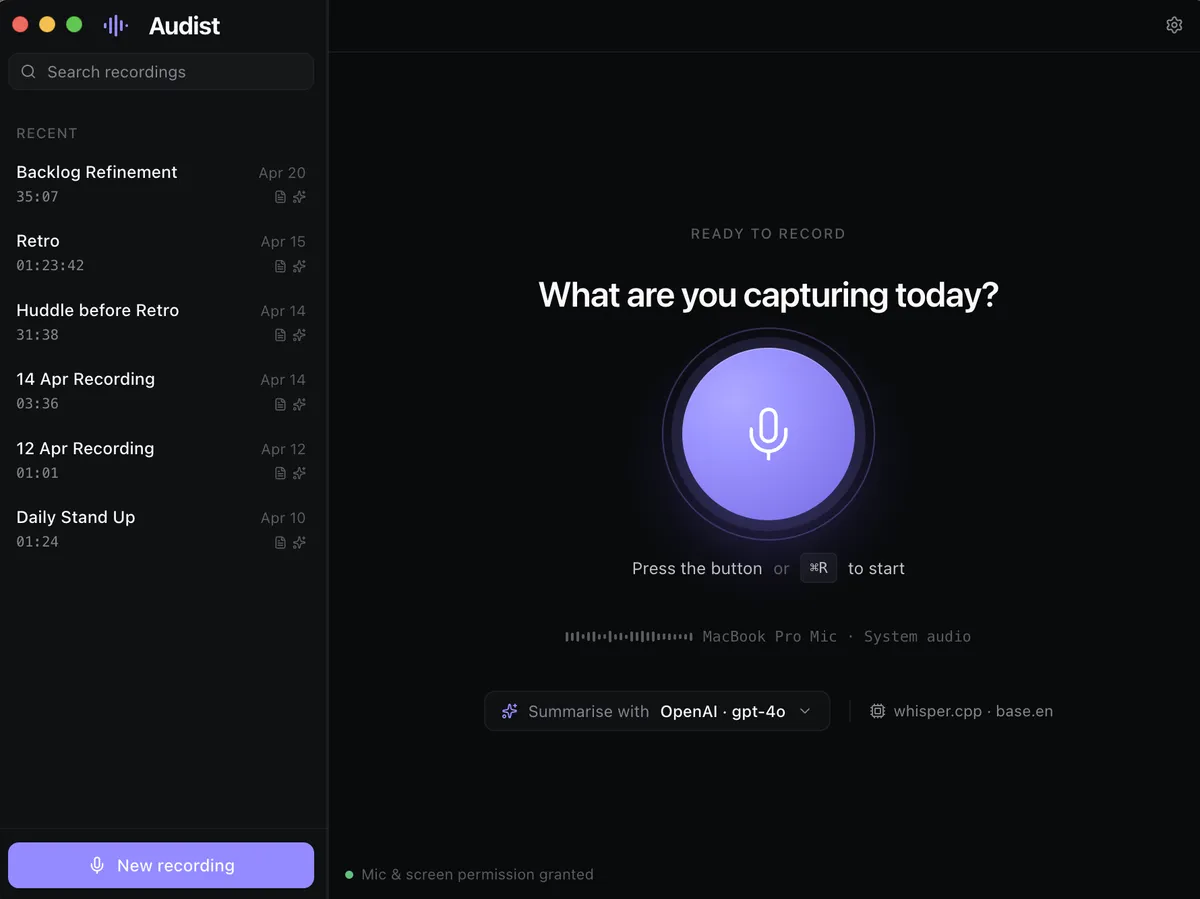
I've been building Audist — a macOS app for recording and transcribing meetings — as a solo side project. It started as an attempt to replace Granola, a meeting notes app I was using but wanted more control over. Rather than keep paying for a subscription, I decided to build my own. AI tooling made that feel achievable as a solo developer, and I used it throughout the entire development process. The repo is open at github.com/yoonwaiyan/audist. It's still in alpha, actively being developed, and I'm working on expanding platform support. If you want to try it and give me feedback, I'd genuinely appreciate it.

audist-screenshot

This is a write-up of the honest, practical lessons I picked up — not a hype piece. A lot of it is about where AI genuinely helped, where it fell short, and what workflows I'd set up differently if I started again.

Start with structure, not code

The single most valuable thing I did early on was write a PRD before touching any code. I used Claude Chat (Opus) to draft it, then used it again to break the PRD down into Linear tickets that I could prioritize and work through one at a time.

This sounds obvious, but it's easy to skip when you're excited about a new project and AI makes it feel like you can just start building. The problem is that vibe-coding without a clear scope produces noisy, hard-to-control sessions. Having a PRD gave every session a specific, bounded goal — and that made a measurable difference in both output quality and token efficiency.

The lesson: AI is an accelerator inside a structured process, not a replacement for one. Without structure, you're just moving fast in a random direction.

Small tickets are not just good practice — they're a token strategy

On Claude Code Pro, I didn't hit token exhaustion in a 2-hour development cycle as long as the work was properly scoped. When I tried to do too much in one session — multiple features, unclear requirements, exploratory debugging — the sessions became noisier, more expensive, and produced worse output.

Splitting work into small, well-defined tickets isn't just good engineering hygiene. In the context of AI-assisted development, it's also how you get predictable, efficient sessions. The ticket scope becomes the session scope, and that alignment matters.

Hardware-dependent features are where vibe-coding breaks down

The hardest part of building Audist was the mic capture. Audio device handling in Electron sits at an awkward intersection of Chromium's MediaStream APIs, macOS permission scoping, and Electron's sandboxing model — and none of that is easy to test programmatically.

Both Codex and Claude Code struggled with this. Not because the AI was bad, but because there was no fast feedback loop. Every hypothesis required a manual test cycle. Token costs climbed quickly without clear progress.

E2E tests help in general, but they can't simulate a real microphone in a way that catches the class of bugs I was dealing with. The root cause wasn't something you could write a deterministic test for.

The lesson: Vibe-coding is most efficient when the feedback loop is tight. For hardware I/O, audio devices, camera access, or anything that requires physical interaction to verify, budget significantly more time and expect manual debugging to be unavoidable.

Design-to-code requires a deliberate handoff

I designed Audist in Figma Make. The problem is that AI-generated design files can't be directly handed to a coding agent — the file formats are structurally incompatible. The workable path was to export the Figma Make output into a sibling repo, which let Claude Code read the design files as regular files during implementation.

Keeping both the design prototype and the production codebase on the same UI stack (React, same component library) also mattered. It reduced the translation gap and made porting more consistent. Where the stacks diverged, Claude needed more manual correction.

One other limitation: some interactions that Figma Make generates are too implicit for a coding agent to follow without explicit instruction. Those had to be handled manually rather than delegated.

AI design tools burn quota fast

Both Claude Design and Figma Make have generous-feeling quotas until you start using them seriously. Iterating on a non-trivial app from scratch exhausts both quickly.

This isn't a dealbreaker, but it changes how you use them. They're best suited for high-value, directional decisions — initial layout, component structure, visual language — rather than pixel-level iteration. For detailed refinement, manual work is still necessary regardless of tool.


Claude vs Codex: mostly even on code, not on writing

For UI implementation tasks, I genuinely couldn't tell a consistent quality difference between Codex (GPT-4.5) and Claude Code (Sonnet 4.6). Both produced reasonable output and both needed manual refinement on details.

The clearer difference showed up on writing and structural tasks. When I asked Codex to write the first draft of my AI learnings notes and then asked Claude to improve the structure, Claude's output was noticeably better. A useful workflow from this: Codex for fast first drafts, Claude for restructuring and refinement.


The Claude tooling ecosystem has real fragmentation

A few practical friction points worth knowing about:

Account switching: Claude Code CLI handles this cleanly (claude auth login). Claude desktop does not — there's no easy way to switch accounts, which is a real limitation when working across personal and work contexts.

Skills and MCP servers don't travel between tools. Claude Code, Cursor, Cline, and other agents each have their own config format and location. Adding an MCP server in one doesn't add it to the others. My solution was to centralize everything in ~/.agents/mcp-servers.json as a single source of truth, with a sync-mcp Python script that converts and pushes the config to each tool's expected format. It handles field differences (e.g. Cline has autoApprove, disabled, and timeout fields that Claude Code doesn't use) and uses file modification times to resolve conflicts.

Desktop vs CLI tradeoffs: Claude desktop is better for mixed research and planning workflows — connectors like Notion and Linear are available across platforms without per-project setup, and you can drag and drop screenshots directly. Claude Code CLI is better for anything involving the repo directly.

You learn domains you didn't expect to

One thing I didn't anticipate: working with AI on a real project teaches you things you weren't trying to learn. The learning is applied and context-driven, which makes it stick differently than reading documentation.

From building Audist:

  • Mic capture internals — Debugging the audio issue forced me to actually understand how Chromium's MediaStream API works, how Electron layers on top of it, and where macOS permission boundaries sit in that stack.
  • macOS notarization — Distributing without Apple's Developer Program means users have to manually bypass Gatekeeper (right-click → Open, or xattr -rd com.apple.quarantine). It works, but it's not a sustainable UX for real users. Notarization is a necessary step before any serious distribution.
  • QEMU for lightweight VMs — I needed a Linux environment and didn't want the overhead of VirtualBox. I asked AI to give me the minimal setup steps and exact commands for QEMU, and it produced a working guide that compressed what would have been hours of documentation into a single, actionable session.

AI is particularly good at this: generating step-by-step guides with exact commands for unfamiliar tooling, scoped to what you're actually trying to do.

What I'd do differently
  • Set up skills earlier. I only configured the changelog skill initially. Adding skills for token efficiency practices, coding standards, and release standards earlier would have reduced overhead across more of the development cycle.
  • Establish the MCP sync setup from day one. Fragmentation across tools is a real cost that compounds over time. A centralized config from the start saves repeated work.
  • Don't try to debug hardware paths with AI alone. Plan for manual time on anything that can't be tested programmatically.

Audist is at audist.app and the source is at github.com/yoonwaiyan/audist. It's still alpha — I'm actively adding features and working on multi-platform support. If you try it, I'd love to hear what you think.

https://waiyanyoon.com/building-audist-with-ai/
Experimenting with Cline Workflows for Git Branching and QA Tickets
automationclinegenerative-aimcpsdlc
Show full content

Over the past couple of weeks, I’ve been experimenting with Cline, a workflow automation layer that connects natural language to developer tools. My goal was simple: reduce repetitive steps in my software development cycle by codifying them into reusable workflows.

Why Cline Workflows?

As part of a typical SDLC, there are a few tasks I perform over and over:

  • Creating a new Git branch from a ticket ID
  • Following naming conventions for feature/bugfix/hotfix branches
  • Preparing a QA ticket (what we call an RTT: Ready to Test) with the right context for our testers

None of these are difficult, but they’re easy to get wrong under pressure, and they take time away from actual engineering work.

Cline workflows let me formalize those steps in Markdown-based templates that the agent can follow consistently, while still prompting me for the details that change each time.

Automating Git Branch Creation

The first workflow takes a YouTrack task ID and suggests a branch name based on:

  • The task type (feature, bugfix, chore, etc.)
  • A slugified version of the task title

For example, given a ticket like YT-1234: Add analytics dashboard, the workflow proposes something like:

feature/YT-1234-add-analytics-dashboard

It asks me to confirm before running the git commands to create and push the branch. This way, I don’t have to remember the exact naming rules—Cline enforces them for me.

Suggesting a QA Ticket (RTT)

The second workflow focuses on QA handoff. Normally, I’d spend 30-45 minutes drafting a QA ticket with context, testing environment, areas impacted, and testing steps. With Cline, I can:

  1. Use the current task context (or provide the task ID if not known)
  2. Enter the testing environment configuration
  3. Add any specific areas or steps that differ for this ticket

From there, Cline generates a Markdown draft for the RTT, prefilled with the right structure and placeholders. I review it, make small edits, and paste it into YouTrack. I’m intentionally not sharing the internal template verbatim here; the key point is that the workflow ensures I never forget required sections and keeps formatting consistent for QA.

Reflections

A few early observations:

  • Consistency matters. Automating branch naming and QA ticket scaffolding reduces back-and-forth with teammates.
  • Human-in-the-loop is essential. Workflows remove boilerplate, but judgment calls still belong to humans.
  • Simple is effective. Even Markdown-level automation saves time when repeated across dozens of tasks per sprint.
What’s Next?

Planned extensions:

  • A release notes generator based on merged branches and tickets
  • A static analysis gate that summarizes lint/test issues in a consistent format
  • Deeper hooks into CI/CD for deployment health checks
  • Improving workflows with MCP (Model Context Protocol): leveraging MCP will let the agent fetch richer context from multiple sources (tickets, repos, logs) without custom glue code. This should make workflows more dynamic—e.g., auto-filling RTT fields from task data, or surfacing related commits automatically during branch creation.

By combining lightweight automation with natural-language prompts, Cline workflows are helping me streamline the unglamorous parts of development—so I can spend more time on the interesting problems.

https://waiyanyoon.com/experimenting-with-cline-workflows-for-git-branching-and-qa-tickets/
Fixing HTML5 Validation in Rails Forms with Simple Form
html5railsrails-form
Show full content

While migrating a page from AngularJS to Rails templates, I stumbled on a strange issue: my form skipped HTML5 validation entirely.

At first, I considered handling it manually using the reportValidity() API. But while digging into low-level validation APIs, I discovered the noValidate attribute.

It turns out that Rails forms—when using the simple_form gem—have novalidate enabled by default. This disables browser-based HTML5 validation.

Since the pages are still under active migration, disabling novalidate globally wasn’t an option. Instead, I disabled it only on the form I was working on—and that solved the issue.

= simple_form_for [@customer, @ad], html: { novalidate: false } do |f|
...
https://waiyanyoon.com/fixing-html5-validation-in-rails-forms-with-simple-form/
Analysing SQL Queries
mysqlpostgresqlsql
Show full content

Make use of EXPLAIN clause in your database engine to run a query analyse:

EXPLAIN
SELECT
  user_id,
  COUNT(DISTINCT (user_id))
FROM
  users.post
GROUP BY
  user_id
HAVING
  COUNT(DISTINCT (user_id)) > 1;

It will show you how the query is being executed:

| QUERY PLAN                                                                    |
| ----------------------------------------------------------------------------- |
| GroupAggregate  (cost=790088.08..848298.55 rows=929342 width=12)              |
|   Group Key: user_id                                                    |
|   Filter: (count(DISTINCT user_id) > 1)                                 |
|   ->  Sort  (cost=790088.08..797874.79 rows=3114687 width=4)                  |
|         Sort Key: user_id                                               |
|         ->  Seq Scan on post  (cost=0.00..368989.87 rows=3114687 width=4)  |
| JIT:                                                                          |
|   Functions: 8                                                                |
|   Options: Inlining true, Optimization true, Expressions true, Deforming true |

This shows you how the query is being executed, leaving you a feedback for optimization.

https://waiyanyoon.com/analysing-sql-queries/
How to check running host and port on Phoenix
elixirphoenix
Show full content

If you can't figure out why the web server is running but ingress returns 503 for every single request, try run a bash session in your problematic pod and run this command to get the running configuration for your web endpoint:

Application.get_env(:my_app, MyAppWeb.Endpoint)

You may get some surprising info which exposes that the host and the port isn't matching what's being expected.

https://waiyanyoon.com/how-to-check-running-host-and-port-on-phoenix/
Node gyp ERR - invalid mode: 'rU' while trying to load binding.gyp
yarn-install
Show full content

Had this error while doing yarn install:

Traceback (most recent call last):
  File "/Users/user/Documents/app/node_modules/node-gyp/gyp/gyp_main.py", line 50, in <module>
    sys.exit(gyp.script_main())
             ^^^^^^^^^^^^^^^^^
  File "/Users/user/Documents/app/node_modules/node-gyp/gyp/pylib/gyp/__init__.py", line 554, in script_main
    return main(sys.argv[1:])
           ^^^^^^^^^^^^^^^^^^
  File "/Users/user/Documents/app/node_modules/node-gyp/gyp/pylib/gyp/__init__.py", line 547, in main
    return gyp_main(args)
           ^^^^^^^^^^^^^^
  File "/Users/user/Documents/app/node_modules/node-gyp/gyp/pylib/gyp/__init__.py", line 520, in gyp_main
    [generator, flat_list, targets, data] = Load(
                                            ^^^^^
  File "/Users/user/Documents/app/node_modules/node-gyp/gyp/pylib/gyp/__init__.py", line 136, in Load
    result = gyp.input.Load(build_files, default_variables, includes[:],
             ^^^^^^^^^^^^^^^^^^^^^^^^^^^^^^^^^^^^^^^^^^^^^^^^^^^^^^^^^^^
  File "/Users/user/Documents/app/node_modules/node-gyp/gyp/pylib/gyp/input.py", line 2782, in Load
    LoadTargetBuildFile(build_file, data, aux_data,
  File "/Users/user/Documents/app/node_modules/node-gyp/gyp/pylib/gyp/input.py", line 391, in LoadTargetBuildFile
    build_file_data = LoadOneBuildFile(build_file_path, data, aux_data,
                      ^^^^^^^^^^^^^^^^^^^^^^^^^^^^^^^^^^^^^^^^^^^^^^^^^
  File "/Users/user/Documents/app/node_modules/node-gyp/gyp/pylib/gyp/input.py", line 234, in LoadOneBuildFile
    build_file_contents = open(build_file_path, 'rU').read()
                          ^^^^^^^^^^^^^^^^^^^^^^^^^^^
ValueError: invalid mode: 'rU' while trying to load binding.gyp
gyp ERR! configure error 
gyp ERR! stack Error: `gyp` failed with exit code: 1
gyp ERR! stack     at ChildProcess.onCpExit (/Users/user/Documents/app/node_modules/node-gyp/lib/configure.js:351:16)
gyp ERR! stack     at ChildProcess.emit (events.js:400:28)
gyp ERR! stack     at Process.ChildProcess._handle.onexit (internal/child_process.js:285:12)
gyp ERR! System Darwin 22.6.0
gyp ERR! command "/Users/user/.asdf/installs/nodejs/14.21.3/bin/node" "/Users/user/Documents/app/node_modules/node-gyp/bin/node-gyp.js" "rebuild" "--verbose" "--libsass_ext=" "--libsass_cflags=" "--libsass_ldflags=" "--libsass_library="
gyp ERR! cwd /Users/user/Documents/app/node_modules/node-sass
gyp ERR! node -v v14.21.3
Solution

Set python version in the running npm/yarn:

$ yarn config set python $(which python)
https://waiyanyoon.com/node-gyp-err-invalid-mode-ru-while-trying-to-load-bindinggyp/
Installing libv8 on MacOS Ventura
rubygems-installation-errors
Show full content

This error happened in MacOS Ventura 13.5.

The command with error:

» gem install libv8 -v '3.16.14.19'                                                                          1 ↵
Building native extensions. This could take a while...
ERROR:  Error installing libv8:
        ERROR: Failed to build gem native extension.

    current directory: /Users/user/.asdf/installs/ruby/2.5.8/lib/ruby/gems/2.5.0/gems/libv8-3.16.14.19/ext/libv8
/Users/user/.asdf/installs/ruby/2.5.8/bin/ruby -r ./siteconf20231122-54101-1ainoj5.rb extconf.rb
creating Makefile
Applying /Users/user/.asdf/installs/ruby/2.5.8/lib/ruby/gems/2.5.0/gems/libv8-3.16.14.19/patches/disable-building-tests.patch
Applying /Users/user/.asdf/installs/ruby/2.5.8/lib/ruby/gems/2.5.0/gems/libv8-3.16.14.19/patches/disable-werror-on-osx.patch
Applying /Users/user/.asdf/installs/ruby/2.5.8/lib/ruby/gems/2.5.0/gems/libv8-3.16.14.19/patches/disable-xcode-debugging.patch
Applying /Users/user/.asdf/installs/ruby/2.5.8/lib/ruby/gems/2.5.0/gems/libv8-3.16.14.19/patches/do-not-imply-vfp3-and-armv7.patch
Applying /Users/user/.asdf/installs/ruby/2.5.8/lib/ruby/gems/2.5.0/gems/libv8-3.16.14.19/patches/do-not-use-MAP_NORESERVE-on-freebsd.patch
Applying /Users/user/.asdf/installs/ruby/2.5.8/lib/ruby/gems/2.5.0/gems/libv8-3.16.14.19/patches/do-not-use-vfp2.patch
Applying /Users/user/.asdf/installs/ruby/2.5.8/lib/ruby/gems/2.5.0/gems/libv8-3.16.14.19/patches/fPIC-for-static.patch
Compiling v8 for x64
Using python 2.7.18
Using compiler: c++ (clang version 14.0.3)
Unable to find a compiler officially supported by v8.
It is recommended to use GCC v4.4 or higher
Beginning compilation. This will take some time.
Building v8 with env CXX=c++ LINK=c++  /usr/bin/make x64.release ARFLAGS.target=crs werror=no
GYP_GENERATORS=make \
        build/gyp/gyp --generator-output="out" build/all.gyp \
                      -Ibuild/standalone.gypi --depth=. \
                      -Dv8_target_arch=x64 \
                      -S.x64  -Dv8_enable_backtrace=1 -Dv8_can_use_vfp2_instructions=true -Darm_fpu=vfpv2 -Dv8_can_use_vfp3_instructions=true -Darm_fpu=vfpv3 -Dwerror=''
  CXX(target) /Users/user/.asdf/installs/ruby/2.5.8/lib/ruby/gems/2.5.0/gems/libv8-3.16.14.19/vendor/v8/out/x64.release/obj.target/preparser_lib/src/allocation.o
clang: warning: include path for libstdc++ headers not found; pass '-stdlib=libc++' on the command line to use the libc++ standard library instead [-Wstdlibcxx-not-found]
In file included from ../src/allocation.cc:33:
../src/utils.h:33:10: fatal error: 'climits' file not found
#include <climits>
         ^~~~~~~~~
1 error generated.
Solution

The best solution is to investigate whether therubyracer and libv8 can be removed in the first place. These libraries are based on v8 engine which is possibly replaced by modern JS build tools, or it's not even needed in the first place.

Alternative
# Install libv8 with system v8
gem install libv8 -v '3.16.14.19' -- --with-system-v8

# Find out the directory of your installed v8 binary, in this case, through homebrew:
$ gem install therubyracer -v 0.12.3 -- --with-v8-dir=/opt/homebrew/Cellar/v8/11.7.439.16

Source: https://github.com/rubyjs/libv8/issues/282

https://waiyanyoon.com/installing-libv8-on-macos-ventura/
Installing dmarkow-raspell gem on MacOS
rubygems-installation-errors
Show full content

When you see this error while installing the gem:

2:20:33/user/libraries/avvo_common (master⚡) » gem install dmarkow-raspell -v '1.2.2' -- --with-opt-dir=/opt/homebrew/bin/aspell
Building native extensions with: '--with-opt-dir=/opt/homebrew/bin/aspell'
This could take a while...
ERROR:  Error installing dmarkow-raspell:
        ERROR: Failed to build gem native extension.

    current directory: /Users/user/.asdf/installs/ruby/2.6.6/lib/ruby/gems/2.6.0/gems/dmarkow-raspell-1.2.2/ext
/Users/user/.asdf/installs/ruby/2.6.6/bin/ruby -I /Users/user/.asdf/installs/ruby/2.6.6/lib/ruby/site_ruby/2.6.0 -r ./siteconf20231115-96329-nkq65n.rb extconf.rb --with-opt-dir\=/opt/homebrew/bin/aspell
checking for ruby.h... yes
checking for aspell.h... no
checking for -laspell... no
creating Makefile

current directory: /Users/user/.asdf/installs/ruby/2.6.6/lib/ruby/gems/2.6.0/gems/dmarkow-raspell-1.2.2/ext
make "DESTDIR=" clean

current directory: /Users/user/.asdf/installs/ruby/2.6.6/lib/ruby/gems/2.6.0/gems/dmarkow-raspell-1.2.2/ext
make "DESTDIR="
compiling raspell.c
In file included from raspell.c:2:
./raspell.h:6:10: fatal error: 'aspell.h' file not found
#include <aspell.h>
         ^~~~~~~~~~
1 error generated.
make: *** [raspell.o] Error 1

make failed, exit code 2
Solution

Install aspell in mac using brew

brew install aspell

You will need to specify where is your aspell being installed. For brew users, it's inside the homebrew Cellar:

gem install dmarkow-raspell -v '1.2.2' -- --with-opt-dir=/opt/homebrew/Cellar/aspell/0.60.8
https://waiyanyoon.com/installing-dmarkow-raspell-gem-on-macos/
Introduction to JS Promise
javascriptjavascript-promise
Show full content

So you've clicked the title to read this post. I know you're a JavaScript developer by then. You've probably seen "promise" and "async / await" flying everywhere in Medium and blog posts written by developers with at least a slight of knowledge about it. There's a big chance that you've been using Promise all this while with the mind of "it just works" without knowing the reason behind the .then chain. In this post, we'll discover a little bit of history behind Promise, by implementing a couple of API calls to Github to retrieve a user's profile and repositories. If you're a seasoned developer for years, you've probably attempted this at some point in your career:

function getUser(username) {
  request("https://api.github.com/users/" + username, function(
    userError,
    userReponse,
    user
  ) {
    console.log("user", user);

    request("https://api.github.com/users/" + username + "/repos", function(
      reposError,
      reposResponse,
      repos
    ) {
      console.log("repos", repos);

      return { user: user, repos: repos };
    });
  });

  return { user: null, repos: [] };
};

Getting value from a function that calls API asynchronously is not an easy task. This is the value returned by calling the function above:

var userInfo = getInfo("gaearon");
console.log(userInfo); // returns { user: null, repos: [] }

Due to the asynchronous nature of JavaScript language, the API calls are not handled by getUser function. At this point, maybe you'll try to a callback to assign a variable within the callback function:

function getUserWithCallback(username, callback) {
  request("https://api.github.com/users/" + username, function(
    userError,
    userReponse,
    user
  ) {
    console.log("user", user);

    request("https://api.github.com/users/" + username + "/repos", function(
      reposError,
      reposResponse,
      repos
    ) {
      console.log("repos", repos);
      
      var result = { user: user, repos: repos };
      callback(result);
      
      return result;
    });
  });

  return { user: null, repos: [] };
};
let callbackUserInfo;
callbackGetUser("yoonwaiyan", userInfo => {
  callbackUserInfo = userInfo;
});
console.log("callbackUserInfo", callbackUserInfo); // undefined

Now, the callbackGetUser process is way out of space and there's no way to catch it back and console.log merely tells you it went missing. You might think that callback works, but declaring a function with a callback argument won't make it asynchronous. See here for more info

If you're in a hurry to get this call working, you'll probably remove the function altogether and resort in the main call instead:

let userInfo, userRepos;
request("https://api.github.com/users/" + username, function(
  userError,
  userReponse,
  user
) {
  userInfo = user;
  console.log("userInfo", userInfo);

  request("https://api.github.com/users/" + username + "/repos", function(
    reposError,
    reposResponse,
    repos
  ) {
    userRepos = repos;
    console.log("main repos", userRepos.length);

    // future calculations or DOM manipulation
  });
});

Welcome to callback hell.

If you've ever code something similar to this, you feel the pain of not finding a way to reduce the nested blocks. If you're like me, feeling icky to find a solution to end this monstrous bite to stop me from the Path towards Clean Code, you've probably used Promise to chain the callbacks by using .then.

Use Promise Chain for Consecutive Asynchronous Calls

Since few years ago, Promise has been the standard used in APIs provided by major library developers to an extend that it's even harder to find libraries without returning a Promise by default. Requesting user data from Github is much easier with the use of octokit rest client.

octokit.users
  .getByUsername({
    username
  })
  .then(({ data }) => {
    console.log("data", data);
    setUser(data);
  })
  .then(() => {
    return octokit.repos.listForUser({
      username
    });
  })
  .then(({ data }) => {
    setRepos(data);
    setLoading(false);
  })
  .catch(error => {
    console.log("error", error);
  });

Similar result can be obtained by using axios too, if using API client is not favorable due to certain reasons:

let user, repos;
axios
  .get(url)
  .then(data => {
    user = data.data;
  })
  .then(() => {
    return axios.get(`${url}/repos`);
  })
  .then(data => {
    repos = data.data;
  });
Create a Promise Function

From the snippet above, axios.get is a function that returns a Promise object. A Promise object consists of a property named then, with a callback constructor that returns resolve and reject.

let foo = new Promise(function(resolve, reject) {
  resolve('Success!');
});

As a rule of thumb, every Promise defined should have both resolve and reject being called. Typically resolve works like a function, while reject tells caller that something is wrong within the function.

Let's try re-implement the getUser function. This function does the same thing as getUser function we've seen earlier, with Promise implemented:

const getUser = username => {
  return new Promise(async (resolve, reject) => {
    const url = `https://api.github.com/users/${username}`;
    let user, repos;
    axios
      .get(url)
      .then(data => {
        user = data.data;
      })
      .then(() => {
        return axios.get(`${url}/repos`);
      })
      .then(data => {
        repos = data.data;
        resolve({ user, repos });
      })
      .catch(error => {
        reject(error);
      });
  });
};

Now we can call getUser function like how we use then previously:

getUser(username).then(data => {
  console.log("getUser", data);
});

// output: getUser Object {user: Object, repos: Array[30]}
Promise.all

Now we're able to call getUser function to get both user profile and user repos. Experienced developers might noticed that Promise chain runs linearly. The API call to obtain user repositories only triggered after the first API call to get user profile, but the API to get user's repositories doesn't rely on what's being returned from user profile! We can now improve the performance by calling both APIs asynchronously. That means we're going to separate both calls to different Promise calls.

const loadUser = octokit.users
  .getByUsername({
    username
  })
  .then(() => {
    setUser(loadUser);
  });

const loadRepos = octokit.repos
  .listForUser({
    username
  })
  .then(() => {
    setRepos(loadRepos);
  });

It looked syntactically correct, but now both calls are asynchronous without being controlled, which would easily obstruct the program flow in overall. You'll need a manager to consolidate both calls to return data first before proceed. Let us hire Promise.all to do that.

const dataPromises = [
  octokit.users.getByUsername({
    username
  }),
  octokit.repos.listForUser({
    username
  })
];

Promise.all(dataPromises).then(allPromises => {
  const [userCall, repoCall] = allPromises;
  setUser(userCall.data);
  setRepos(repoCall.data);
  setLoading(false);
});

Promise.all will make sure every async call is finished before resolving all promises into one single array consists of the resolved data of each async call following the order in dataPromises array.

Conclusion

There's a deep knowledge of asynchronous programming in JavaScript which is available to read online for free, and this blog post merely scratching the surface by introducing the practical application of Promise in our projects using Node.js or any modern JavaScript tools including frontend frameworks and libraries. Based on my personal experience, it is important to make sure every Promise is being handled, as a program might remain running indefinitely if the async calls are not being handled properly, and this is especially hard to debug if you have many async calls scattered across files within a project.

By going through the improvements from a callback hell to using Promise.all to run two API calls asynchronously, hope this makes things clearer for you to understand how to utilize JavaScript Promise.

External Read and Resources
  1. https://medium.freecodecamp.org/how-to-make-a-promise-out-of-a-callback-function-in-javascript-d8ec35d1f981
  2. https://developer.mozilla.org/en-US/docs/Web/JavaScript/Reference/Global_Objects/Promise/then
  3. https://eloquentjavascript.net/11_async.html
https://waiyanyoon.com/introduction-to-js-promise/
How to Receive Emails in Your Rails Application
rails
Show full content

There are times when a Rails app needs to receive emails to process the content, or grab the file from the attachment and process data within the file. In this case griddler gem would be the best bet to parse the incoming emails with its built-in controller action, but it seems tricky to follow through the documentations and I have to adapt an apparent syntax change which caused an issue if I follow the instructions blindly. Here is my version of the guide, hope you find it helpful.

The first step is that you'll need to find an email deliver service provider to help receive and send your emails. Mailgun and SendGrid would be a good choice as they are free to use for small personal projects. After that, follow through the instructions as given by the service so that they could properly receive and send emails.

After that, you'll need to setup the service to receive emails and "forward" it to your app. To test this out, you'll need to expose your local development web server to the public through services such as localtunnel or ngrok. By default griddler gem handles the incoming emails in /email_processor route, so your setup should include a setting to route your emails through HTTP request to your local web server, such as https://test-localtunnel-11.localtunnel.me/email_processor.

Now finally it's time to dive in the code. The code snippets below are based on Mailgun service that I configured personally, feel free to substitute with other adapters available to griddler.

Add these gems to your Gemfile:

gem 'griddler'
gem 'griddler-mailgun'

And configure your griddler to use the adapter of your choice:

Griddler.configure do |config|
  config.email_service = :mailgun
end

Add mount_griddler for the simplest configuration provided by Griddler gem by default. This handles /email_processor route that is handled by Griddler::EmailsController controller provided by the gem.

Rails.application.routes.draw do
  # ...
  mount_griddler
end

Add new file named app/models/email_processor.rb with the following code as a template. Note that this section is different from other guides as there seems to be a new syntax being introduced in the gem, as now an instance of EmailProcessor class will be created before process instance method is called (used to be a class method).

class EmailProcessor
  def initialize(email)
    @email = email
  end

  def process
    puts "received email from #{@email.from}:"
    p @email.body
  end
end

Now you can try send an email to your configured domain and observe your local webserver to make sure everything works fine. Advanced configurations (such as handling the route manually or customize your email processor class) is available at the gem README.

Hope this clarifies out the way to receive emails from your Rails app.

External Readings:

  1. Receiving Email in Your Rails App With Griddler
  2. Griddler is Better Than Ever!
  3. griddler gem Type your TIL here.
https://waiyanyoon.com/how-to-receive-emails-in-your-rails-application/