GeistHaus
log in · sign up

Francois Guillaume Ribreau

Part of feedburner.com

Full Stack CTO, Startup Advisor, Consultant, Hacker, Maker

stories
Releasing cargo-clean-targets — I had no idea Cargo was sitting on 773 GiB of my disk: A tiny Rust CLI to find out
clidevtoolsdisk-cleanupopen-sourcerust
Show full content
773 GiB FREED 0 GIB 2 TB — THE WHOLE DRIVE 38% of the disk WAS CARGO CACHE i had no idea.

It's the morning of April 29, 2026. I've been chasing disk hogs with dumap for a while wondering where the hell my disk space keeps disappearing. Docker volumes? node_modules? Old Xcode runtimes? 

But every time I checked back a few weeks later, I was short again. Something was leaking, and I had a hunch I knew where.

The problem

Cargo's target/ directories.

Years of SaaS work, projects, prototypes, CLI tools, every random cargo new I'd ever run. Each one with its own multi-gigabyte cache (deps/, build/, incremental/, .fingerprint/), never cleaned up. Spread across ~/www and ~/labs — too scattered for any single cargo clean to catch.

~/www ~/labs

The naive fix is to delete every target/ whole. But then I'd lose yesterday's release/ build that I might still want to run (like some MCP that I wrote and use locally). I wanted the cache gone, not the binaries.

target/ deps/ build/ incremental/ .fingerprint/ release/myapp

What about cargo clean? It's too aggressive, cargo clean wipes a project entirely.

That was a hard No for me. So I sat down and wrote it.

The solution

A Cargo subcommand that walks any directory, finds every target/ it can prove is one (CACHEDIR.TAG or .rustc_info.json, the markers Cargo itself drops), and removes only the cache subtrees. The compiled binaries (release/myapp, debug/myapp, examples, dylibs, rlibs, wasm) stay put.

First run on my laptop:

done: 127 target dir(s), 4199 path(s) removed, 773.17 GiB freed

773 GiB. I re-read that line three times. Almost a full terabyte across 127 target dirs, accumulated without me ever noticing. That's a LOT for a 2 To drive!!

If I had this much sitting on my disk, I can't be the only one. So I open-sourced it the same morning.

How it works

A single src/main.rs. No dependencies beyond std. ~600 lines.

The detection rule is the only thing that really matters: a directory is treated as a Cargo target only if it contains CACHEDIR.TAG or .rustc_info.json. A folder named target/ that isn't actually one (some random project's data dir, whatever) is left alone.

target/ CACHEDIR.TAG target/

Inside each profile (debug/, release/, custom):

KeptRemoved Top-level executables (no ext, .exe) deps/, build/, incremental/, .fingerprint/ Dynamic libs (.so, .dylib, .dll) Top-level .d, .rmeta, .pdb, .o, .obj Static libs (.a, .lib, .rlib) doc/, package/, tmp/ WebAssembly (.wasm) sqlx-tmp/, cargo-timings/ examples/ final binaries examples/{deps,build,incremental,.fingerprint}/

Target-triple wrappers (x86_64-apple-darwin/, aarch64-unknown-linux-gnu/, …) get descended into and each profile inside is cleaned the same way.

Try it
cargo install cargo-clean-targets

# preview first
cargo clean-targets --dry ~/code

# do it
cargo clean-targets ~/code

Or via Homebrew:

brew tap FGRibreau/tap
brew install cargo-clean-targets

Or cargo binstall for a prebuilt binary (no compile):

cargo binstall cargo-clean-targets

The dry-run output tells you exactly what it's about to do:

target: /Users/me/code/myproj/target
  would rm dir  /Users/me/code/myproj/target/release/.fingerprint  (12.04 MiB)
  would rm dir  /Users/me/code/myproj/target/release/incremental   (48.21 MiB)
  would rm dir  /Users/me/code/myproj/target/release/deps          (612.80 MiB)
  would rm dir  /Users/me/code/myproj/target/release/build         (4.10 MiB)

done: 1 target dir(s), 5 path(s) removed, 677.82 MiB freed (dry)
What's next
  • An age filter (only clean targets untouched for >N days), to preserve hot projects
  • A --keep-doc flag for folks who actually use cargo doc output
  • A reporting mode that shows per-project savings before touching anything

Open to other ideas. The whole tool is one file. Easy to hack on.

Run it tonight

Seriously. Run it on your dev machine with --dry and tell me what number comes back. I'm curious whether 773 GiB is an outlier or whether half of us are walking around with terabytes of dead Rust caches.

Star it if you find it useful. Report bugs. Send PRs.

github.com/FGRibreau/cargo-clean-targets

tag:blogger.com,1999:blog-8128983.post-6042871573242183260
Extensions
Le SI est la colonne vertébrale de l’entreprise. On ne sous-traite pas sa colonne vertébrale.
france-nuage
Show full content

Henri Verdier est intervenu auprès d'une commission d'enquête et il porte un message que j'aimerais entendre plus souvent.

Les chefs d'entreprise commencent tout juste à prendre conscience que leur supply-chain n'est pas seulement physique, elle est aussi numérique et qu'il faut la sécuriser.

Cela passera autant que possible par le choix de solutions open-source (ouvertes, adaptables, facilement interopérables, sans lock-in de prestataires intermédiaires 💸💸) et l'internalisation progressive de leurs infrastructures (ce que nous appelons le post-cloud chez France nuage) derrière du zero-trust network notamment pour se protéger autant que possible des IA offensives dont nous ne subissons actuellement que les prémices du tsunami à venir.

L'IA tue progressivement le coût du logiciel pur (ERP, CRM, e-commerce…) ; restent donc, comme valeur patrimoniale et avantage concurrentiel pour l'entreprise, ses données et son infrastructure, si elles sont internalisées.

Contrôler ses données et son infrastructure, c'est reprendre en main son destin et ses capacités de décision et de direction stratégique.

Le système d’information est la colonne vertébrale de l’entreprise.
On ne sous-traite pas sa colonne vertébrale.

L'intervention vidéo en question via LinkedIn.

tag:blogger.com,1999:blog-8128983.post-4427418609781952610
Extensions
Releasing 3D LiDAR Scans of Machu Picchu, Sacsayhuaman, and Other Ancient Sites
3D scan
Show full content

November 2024. I'm standing at 2,430 meters on a ridge above the Urubamba Valley, staring at Machu Picchu. Like millions before me, I'm blown away. Unlike most of them, I have an iPhone with a LiDAR sensor in my backpack.

I'd been annoyed for a while by how hard it is to find downloadable 3D data of major archaeological sites. You get blurry photogrammetry on Sketchfab, paywalled academic datasets, or just nothing. Try finding a 3D model of the Sacsayhuaman walls. Go ahead, I'll wait. There isn't one.

So I made one.

3D LiDAR scan of Machu Picchu walls
Machu Picchu, scan #1. iPhone LiDAR, November 2024.
What I did

During a trip across Peru, I scanned 13 archaeological sites with the LiDAR sensors on an iPhone. Machu Picchu alone got 15 separate scans: walls, terraces, the astronomical observatory, individual stone joints where you can see exactly how blocks interlock without mortar. I captured the polygonal walls of Sacsayhuaman (blocks up to 200 tonnes, and no, I still don't understand how they moved them), the concentric terraces of Moray, what's left of Qorikancha's walls after the Spanish stripped the gold off, the still-functioning aqueducts at Tipon. I also scanned the Sitamarhi Caves in Bihar, India.

47 scans. 14 sites. 2 countries. 17 GB of raw 3D data.

3D LiDAR scan of Sacsayhuaman megalithic walls
Sacsayhuaman. Blocks up to 200 tonnes, fitted without mortar.

Every scan is interactive. You rotate and zoom in your browser, no app needed.

The sites

Peru, 13 sites. Machu Picchu has 15 scans covering walls, terraces, and the Intihuatana solar clock. Sacsayhuaman has its megalithic zigzag walls stretching 600 meters. Ollantaytambo got 8 scans across the fortress, the Temple of the Sun monoliths, and the water channels. Qorikancha is the Temple of the Sun in Cusco. Chinchero is the royal estate of Tupac Inca Yupanqui, sitting at 3,762 meters. Moray has those eerie circular terraces with 15°C temperature swings between levels. Tipon is pure hydraulic engineering, aqueducts that still carry water today. Q'enqo has zigzag channels and subterranean chambers carved into raw limestone. Puka Pukara, the Red Fortress, was a checkpoint on the road to Antisuyo. Amaru Punku is the Gate of the Serpent near Ollantaytambo. The Bath of the Ñusta is a ceremonial fountain where water channels are cut into a single rock face. I also captured some street-level Inca walls in Cusco itself, and the Intihuatana observatory stone at Machu Picchu as a separate scan.

3D LiDAR scan of Ollantaytambo fortress
Ollantaytambo, scan #3. Temple of the Sun monoliths.
3D LiDAR scan of Moray circular terraces
Moray. Concentric terraces with 15°C temperature differentials between levels.
3D LiDAR scan of Q'enqo carved limestone
Q'enqo. Zigzag channels carved into raw limestone.

India, 1 site: the Sitamarhi Caves in Bihar, rock-cut caves tied to the Ramayana.

3D LiDAR scan of Sitamarhi Caves, Bihar
Sitamarhi Caves, Bihar, India.
Why an iPhone?

Professional terrestrial LiDAR scanners cost $50K+ and take hours to set up per scan. The iPhone sensor does it in minutes. The resolution is lower, obviously. But I could scan a wall section between tour groups, in rain, while hiking between sites. Speed and portability won over precision.

3D LiDAR scan of Qorikancha Temple of the Sun
Qorikancha, Temple of the Sun. The Inca stonework underneath the Spanish convent.
3D LiDAR scan of Tipon aqueducts
Tipon. Aqueducts built 600 years ago, still carrying water.
The tech stack

Each scan is exported as GLB for browser viewing and USDZ for AR on iOS. Source files are available in STL, XYZ point clouds, PLY, DXF, DAE, FBX, and OBJ. 204 files total.

The viewer is a custom Three.js fullscreen viewer I built. No iframe, no third-party embed. DRACO-compressed GLB files load straight in the browser. The 17 GB of assets sit on Cloudflare R2 behind a CDN. The site runs on Netlify. Everything is static. No backend, no login. Click a scan, it loads.

Download everything

All files are free. Every scan card has download buttons for GLB, USDZ, STL, XYZ, PLY and more.

Licensed under Creative Commons BY-NC-SA 4.0. Credit me, don't sell them, share derivatives under the same terms.

What's next

Easter Island, Bolivia and Turkey are on the list. We'll see when that happens.

fgribreau.com/research/3d-scans.html

tag:blogger.com,1999:blog-8128983.post-8742356814076707417
Extensions
Releasing mcp-matomo - from frustration to Open Source: Building MCP Matomo in 30 Minutes
Show full content

It’s Friday, December 19th. The coffee roasted spelt is still hot, and Hook0 team just pushed the "deploy" button.

We just shipped a massive update: a brand new design and completely overhauled documentation for Hook0, the open-source webhook sending infrastructure I co-founded. It feels good. But as the dust settled, I realized we needed to implement analytics on the new documentation pages.

Naturally, we reached for Matomo. It’s privacy-focused, ethical, and solid. But as I was setting it up, a thought struck me:

"Why am I still navigating dashboards, setting date ranges, and clicking through menus in 2025? Why can't I just talk to my data?"

I immediately started looking for a way to connect Matomo to Claude via the Model Context Protocol (MCP). I found exactly one solution.

The problem? It required routing my data through a third-party API and I had to ask them politely through a contact form to get access.

That was a hard No for me.

It goes against my core engineering values. I need future-proof solutions, not a solution that depends on an external black box for simple logic. I want autonomy. I want self-hosted reliability (or at least the ability to do so when needed, that's what we belive at Hook0 and Cloud-IAM). I want my data to stay mine.

So, I checked the clock. I opened my IDE along with some IA agents. And I decided to fix it myself.

I chose Rust for performance and reliability. Exactly 30 minutes later, I had a fully functional MCP server running locally. No external APIs, no subscriptions, just raw, direct access to the Matomo instance.

I’m open-sourcing it today because I believe analytics should be accessible and private.

Get the code on GitHub: FGRibreau/mcp-matomo (don't forget to star it!)

What Can You Do With It?

Instead of clicking through the UI, you can now simply ask Claude questions like:

"Show me the top 10 pages by visits this week, broken down by device type."

mcp-matomo connects to your instance, introspects the API, executes the necessary calls, and presents the answer. It covers almost everything Matomo tracks:

  • Traffic: Visits, unique visitors, bounce rates.
  • Acquisition: Referrers, search engines, campaigns.
  • Behavior: Entry pages, downloads, outlinks.
  • Tech & Geo: Devices, screens, countries.
What's Next?

Now that the tool is live, my next step is to deploy this across the ecosystem of companies I've created or co-founded. We need to democratize access to data for our teams without forcing them to become analytics experts.

I'll be rolling this out at:

  • Cloud-IAM: To track adoption of our managed Keycloak solution (ISO 27001 certified).
  • Netir: To better understand how freelancers, companies and mentors interact on our marketplace.
  • Natalia: To analyze how users engage with our unified AI ecosystem across Voice, WhatsApp, and Transcripts.

If you share the value of autonomy and want to talk to your data without a middleman, give it a try.

Feedback and PRs are welcome on GitHub!

tag:blogger.com,1999:blog-8128983.post-7644547006731177667
Extensions
Releasing n8n-nodes-signal-cli - How I automatically transcribe Signal voice messages with my own n8n node extension
n8nsignal
Show full content

I was fed up with receiving 5-minute voice messages on Signal just to find out someone was asking if I'm free next Tuesday. No automatic transcription, no way to quickly scan the content. You have to listen to the whole thing, often at the worst possible moment.

So I built n8n-nodes-signal-cli - an n8n extension that integrates with Signal CLI to automatically transcribe voice messages and send back a concise summary directly in the conversation.

The problem

Voice messages suck when:

  • People take 5 minutes to say what could be written in 3 lines
  • You're in a meeting and can't listen
  • You need to find specific information buried in a long monologue
  • Signal doesn't offer automatic transcription
The solution

My n8n extension adds two nodes:

  • Signal CLI Trigger: fires when receiving new Signal messages
  • Signal CLI: sends messages back to Signal

My workflow:

Signal message received 
    → Filter voice messages only
    → Download audio file
    → Transcribe with local Whisper (or equivalent)
    → Summarize with LLM
    → Send transcript back to Signal conversation
    

Result: That 3-minute rambling voice message becomes:

📝 Transcript: "Are you available next Tuesday at 2 PM for a meeting?"

My self-hosted n8n runs on my NAS locked behind a Zero Trust Network thanks to France nuage

Installation

Prerequisites:

  • n8n installed and running
  • signal-cli configured with your phone number

Install the extension:

npm install n8n-nodes-signal-cli

Setup:

  1. Add Signal CLI credentials in n8n
  2. Create new workflow
  3. Add "Signal CLI Trigger" node
  4. Build your processing logic
  5. Use "Signal CLI" node to send messages back
Beyond transcription

This opens up tons of automation possibilities:

  • Reminder bot - schedule reminders via Signal
  • Auto-archiving - save important messages automatically
  • Instant translation - translate messages on the fly
  • Smart notifications - filter and route messages by content
  • Service integration - connect Signal to Slack, Discord, etc.
Results

Since using this:

  • I never miss important info hidden in long voice messages
  • I can "read" voice messages anywhere, anytime
  • People actually appreciate seeing their rambling transcribed concisely
  • Saved tons of time not listening to minutes of audio

Check it out on GitHub. Star it if you find it useful. Report bugs. Send PRs. The usual drill.

tag:blogger.com,1999:blog-8128983.post-5146882843061020974
Extensions
Filtrer les messages de sensibilisation à la cybersécurité et aux phishing de avantdecliquer.com
avantdecliquerphishingsecurity
Show full content

Si tu travailles pour de grands groupes, tu as peut-être déjà entendu parler de https://avantdecliquer.com/

Cette plateforme aide les entreprises à sensibiliser leurs salariés aux dangers du phishing en leur envoyant des faux e-mails de phishing. 

Alors, comment gérer ce flux d'emails sans se noyer, surtout si, comme moi, tu reçois déjà entre 150 et 200 e-mails chaque jour ?

Pas de panique ! Si tu sais déjà repérer ces faux-emails et souhaite organiser ta boîte de réception plus efficacement, suis le guide ci-dessous. 

J'ai préparé une démo pour te montrer comment créer un filtre sur Outlook afin d'archiver automatiquement les messages provenant de avantdecliquer.com.

Une solution en 3 actes. @avantdecliquer pic.twitter.com/QwD9J2tcZM

— Francois-Guillaume Ribreau (@FGRibreau) August 4, 2023
tag:blogger.com,1999:blog-8128983.post-7153035096400946938
Extensions
How to add a label to previously created annotation in MakeSense.ai when you forgot to select a default one
create-mlmachine learningmakesense
Show full content

Yes. Like the title said.


function selectOption(f){
  const a = document.querySelector('.DropdownOption');
    if(a===null){
        return setTimeout(selectOption.bind(null, f), 1);
    }

    a.click();

    setTimeout(f, 1);    
}

function selectLabel(label, f){
    label.click();
    selectOption(f);
}

function selectLabels(labels, f){
  function _do(){
    if(labels.length === 0){
        return f();
    }

    const l = labels.shift();
    selectLabel(l, _do);
  }

  _do();   
}

function selectAll(f){
  selectLabels(Array.from(document.querySelectorAll('.DropdownLabel')), f);
}

function loop(){
  if(document.querySelector('[draggable="false"][alt="next"]') !== null){
    console.log('Done!');
    return;
  }
  
  selectAll(() => {
      document.querySelector('[alt="next"]').click();
      setTimeout(loop, 100);
  })
}

loop();
tag:blogger.com,1999:blog-8128983.post-6957082690149648951
Extensions
IntelliJ IDEA - Import PostgreSQL connection string with Data Source from URL feature
intellij ideaintellij ultimatepostgresqlproductibity
Show full content

IntelliJ IDEA does not support out of the box "Data Source from URL" import with standard PostgreSQL connection string like

postgresql://username:password@host:port/database

It sucks. Here is how to fix it:

  • File > New > Driver
  • Find "PostgreSQL" existing driver
  • Click "+" in the URL templates section to add a new url template
  • Type: "postgresql://{user}:{password}@{host}:{port}/{database}"
  • Click "OK"

Now next time you want to import a PostgreSQL connection string:

  • Open "Database" tab (or use the "find tool" window with your usual shortcut)
  • Click "+" > "Data Source from URL"
  • Past your PostgreSQL connection string, the selected driver will automatically change to "PostgreSQL"
  • Click "OK"
  • From there you may say: WAT. I don't see my username, password, port and host. That's right and it's IntelliJ IDEA default behavior... But, if you click on "URL only" next to "connection type" and switch back to "default" there you will find every connection field pre-completed
  • In "URL:" section, prefix "postgresql://" with "jbdc:"
  • In "URL:" section, remove the ":@" the "username:password" part.
  • Your good to go. Yes, it's slow and could be even faster but that's current IntelliJ limitation....
tag:blogger.com,1999:blog-8128983.post-5096563195180587921
Extensions
Lettre à l'ARCEP concernant l'annulation par le Conseil d'État des fréquences utilisées par Starlink
arcepstarlink
Show full content

A l'attention de l'Arcep,

Je suis client Starlink depuis le 9 février 2021. Ma femme et moi avons besoin d'un accès internet pour notre travail (elle possède son propre site e-commerce et de mon côté je crée et maintient des Software as a Service (SaaS) en ligne 1 2 3 4 ainsi qu'une activité de CTO as a Service). Nous habitons dans un lieu-dit à 3km de la ville la plus proche (Les Essarts en Bocage).

À ce lieu dit, il est très peu probable que nous ayons un jour la fibre, nous captons très mal la 4G et notre seule option est le wimax avec un débit maximum théorique et non garanti de 30 Mbps.

Voici les alternatives que j'ai d'abord considérées :

  • échange avec une entreprise télécom locale pour faire venir la fibre jusqu'à notre maison, coût BTP estimé de ~80 000€ et coût de l'abonnement fibre: 450€/mois.
  • échange avec une entreprise locale pour la mise en place de Wimax : ils m'ont annoncé que nous aurons difficilement 30 Mbps en descendant.
  • échange avec une entreprise d'internet par satellite : limitation à 100Mbps pour 59€90/mois via Nordnet

Aucune de ces options n'était viables au vu de notre travail (upload de vidéos de formation, téléchargement et upload de backups journalier). Nous sommes dans une zone blanche sans fibre ni adsl digne de ce nom, sans accès internet haut débit il nous aurait été impossible de nous installer et d'exercer nos activités.

Starlink a été la seule option à nous proposer un accès illimité, à un coût raisonnable et à un débit en version bêta allant jusqu'à 263Mbps en DL et 24Mbps en UP (chiffres du 30 octobre).

Supprimer l'accès internet Starlink, c'est nous empêcher de vivre à la campagne, dans notre ferme, tout en gardant nos activités professionnelles.

tag:blogger.com,1999:blog-8128983.post-7231275223176745083
Extensions
How to migrate from AWS Route 53 to Scaleway DNS
amazon aws route 53migrationscaleway dns
Show full content

I've spent the last 2 days talking with Scaleway DNS (domain) team reporting bugs I found while preparing Cloud-IAM DNS migration from Amazon AWS Route53 to Scaleway DNS and was amazed by how fast they fixed these bugs. It's so unusual for a cloud provider to be this responsive, I had to start this blog post saying it! What an amazing team! If you also use Scaleway for hosting, join their Slack.

Because Cloud-IAM DNS zone file is quite large and because we wanted to automate this migration as much as possible, I wrote a script to seamlessly migrate cloud-iam.com zone from AWS to SCW through a gitlab-ci job that we can manually start at will and also run at scheduled interval

Route53 does not have an "export to bind format" feature but I found cli53 that does that for me. On the other hand scaleway cli had the dns zone import command but it was not working out of the box thus the 2 days of exchange with their team to fix some edge cases.

First thing you will need to find and set the environment variables below:

AWS_ACCESS_KEY_ID
AWS_SECRET_ACCESS_KEY
SCW_ACCESS_KEY
SCW_SECRET_KEY
SCW_DEFAULT_ORGANIZATION_ID
SCW_DEFAULT_PROJECT_ID

Then use the .gitlab-ci.yml below to automate the import, don't forget to rename DOMAIN.TLD to the zone you want to migrate.

stages:
  - run

sync:
  stage: run
  image: node:16
  script:
    - curl -L "https://github.com/barnybug/cli53/releases/download/0.8.18/cli53-linux-amd64" > /usr/local/bin/cli53
    - chmod +x /usr/local/bin/cli53
    - cli53 export --full --debug DOMAIN.TLD > DOMAIN.TLD.zone
    - curl -o /usr/local/bin/scw -L "https://github.com/scaleway/scaleway-cli/releases/download/v2.4.0/scw-2.4.0-linux-x86_64"
    - chmod +x /usr/local/bin/scw
    - scw dns zone import -D DOMAIN.TLD bind-source.content="$(cat ./DOMAIN.TLD.zone)"
  tags:
    - build
  artifacts:
      when: always
      untracked: true
      expire_in: 1 day
      name: 'build'
      paths:
        - DOMAIN.TLD.zone

One last thing, don't forget to take a look at what we do at Cloud-IAM if you are looking for a fully managed Keycloak as a service.

tag:blogger.com,1999:blog-8128983.post-5885334502414951956
Extensions
[Bug] Google Cloud Run decodes url search part before reaching your app
bugcloud-rungoogle cloud platformgoogle cloud run
Show full content

Today I discovered a (insane 🤯) bug in Google Cloud Run.

I was trying to understand WHY 😵‍💫 Image-Charts works on Google Kubernetes Engine (GKE) but the same container does not work on Cloud-Run.

To be precise, why the signed URL (HMAC) below works on GKE and not on Cloud-Run

https://image-charts.com/chart?chbr=8&chd=t%3A10%2C15%2C25%2C30%2C40%2C80&chf=b0%2Clg%2C90%2C05B142%2C1%2C0CE858%2C0.2&chl=%7C%7C%7C%7C%2033%25%20%21%7Cx2%20&chma=0%2C0%2C10%2C10&chs=700x450&cht=bvs&chtt=Revenue%20per%20month&chxl=0%3A%7CJan%7CFev%7CMar%7CAvr%7CMay&chxs=1N%2AcUSD0sz%2A%2C000000%2C14&chxt=x%2Cy&icac=fgribreau&ichm=d92a75886c0657013da32eda4d82b8db3af39d355b3419caebd5952bc827990d

Note that HMAC signature (ichm query parameter) is computed like this:

ichm=sign(url.search, shared_secret)

My main intuition was that cloud-run had some internal reverse proxies that changes part of the URL on the fly.

If that's trye, let's find what encoded characters Cloud-Run would automatically decode in the URL query part before reaching your app:

new Array(155).join('-').split('-').map((x, i) => '%'+i.toString(16).toUpperCase()).join('-_-')

// output:
// %0-_-%1-_-%2-_-%3-_-%4-_-%5-_-%6-_-%7-_-%8-_-%9-_-%A-_-%B-_-%C-_-%D-_-%E-_-%F-_-%10-_-%11-_-%12-_-%13-_-%14-_-%15-_-%16-_-%17-_-%18-_-%19-_-%1A-_-%1B-_-%1C-_-%1D-_-%1E-_-%1F-_-%20-_-%21-_-%22-_-%23-_-%24-_-%25-_-%26-_-%27-_-%28-_-%29-_-%2A-_-%2B-_-%2C-_-%2D-_-%2E-_-%2F-_-%30-_-%31-_-%32-_-%33-_-%34-_-%35-_-%36-_-%37-_-%38-_-%39-_-%3A-_-%3B-_-%3C-_-%3D-_-%3E-_-%3F-_-%40-_-%41-_-%42-_-%43-_-%44-_-%45-_-%46-_-%47-_-%48-_-%49-_-%4A-_-%4B-_-%4C-_-%4D-_-%4E-_-%4F-_-%50-_-%51-_-%52-_-%53-_-%54-_-%55-_-%56-_-%57-_-%58-_-%59-_-%5A-_-%5B-_-%5C-_-%5D-_-%5E-_-%5F-_-%60-_-%61-_-%62-_-%63-_-%64-_-%65-_-%66-_-%67-_-%68-_-%69-_-%6A-_-%6B-_-%6C-_-%6D-_-%6E-_-%6F-_-%70-_-%71-_-%72-_-%73-_-%74-_-%75-_-%76-_-%77-_-%78-_-%79-_-%7A-_-%7B-_-%7C-_-%7D-_-%7E-_-%7F-_-%80-_-%81-_-%82-_-%83-_-%84-_-%85-_-%86-_-%87-_-%88-_-%89-_-%8A-_-%8B-_-%8C-_-%8D-_-%8E-_-%8F-_-%90-_-%91-_-%92-_-%93-_-%94-_-%95-_-%96-_-%97-_-%98-_-%99-_-%9A

To run this experiment I've set a special route on Image-Charts that outputs what Image-Charts http server got as part of url.search.

On Google Kubernetes Engine (GKE), Image Charts API got an unmodified query string:

%0-_-%1-_-%2-_-%3-_-%4-_-%5-_-%6-_-%7-_-%8-_-%9-_-%A-_-%B-_-%C-_-%D-_-%E-_-%F-_-%10-_-%11-_-%12-_-
%13-_-%14-_-%15-_-%16-_-%17-_-%18-_-%19-_-%1A-_-%1B-_-%1C-_-%1D-_-%1E-_-%1F-_-%20-_-%21-_-%22-_-
%23-_-%24-_-%25-_-%26-_-%27-_-%28-_-%29-_-%2A-_-%2B-_-%2C-_-%2D-_-%2E-_-%2F-_-%30-_-%31-_-%32-_-
%33-_-%34-_-%35-_-%36-_-%37-_-%38-_-%39-_-%3A-_-%3B-_-%3C-_-%3D-_-%3E-_-%3F-_-%40-_-%41-_-%42-_-
%43-_-%44-_-%45-_-%46-_-%47-_-%48-_-%49-_-%4A-_-%4B-_-%4C-_-%4D-_-%4E-_-%4F-_-%50-_-%51-_-%52-_-
%53-_-%54-_-%55-_-%56-_-%57-_-%58-_-%59-_-%5A-_-%5B-_-%5C-_-%5D-_-%5E-_-%5F-_-%60-_-%61-_-%62-_-
%63-_-%64-_-%65-_-%66-_-%67-_-%68-_-%69-_-%6A-_-%6B-_-%6C-_-%6D-_-%6E-_-%6F-_-%70-_-%71-_-%72-_-
%73-_-%74-_-%75-_-%76-_-%77-_-%78-_-%79-_-%7A-_-%7B-_-%7C-_-%7D-_-%7E-_-%7F-_-%80-_-%81-_-%82-_-
%83-_-%84-_-%85-_-%86-_-%87-_-%88-_-%89-_-%8A-_-%8B-_-%8C-_-%8D-_-%8E-_-%8F-_-%90-_-%91-_-%92-_-
%93-_-%94-_-%95-_-%96-_-%97-_-%98-_-%99-_-%9A

On Google Cloud Run however, things are different:

%0-_-%1-_-%2-_-%3-_-%4-_-%5-_-%6-_-%7-_-%8-_-%9-_-%A-_-%B-_-%C-_-%D-_-%E-_-%F-_-%10-_-%11-_-%12-_-
%13-_-%14-_-%15-_-%16-_-%17-_-%18-_-%19-_-%1A-_-%1B-_-%1C-_-%1D-_-%1E-_-%1F-_-%20-_-!-_-%22-_-
%23-_-%24-_-%25-_-%26-_-%27-_-(-_-)-_-*-_-%2B-_-%2C-_---_-.-_-%2F-_-0-_-1-_-2-_-
3-_-4-_-5-_-6-_-7-_-8-_-9-_-%3A-_-%3B-_-%3C-_-%3D-_-%3E-_-%3F-_-%40-_-A-_-B-_-
C-_-D-_-E-_-F-_-G-_-H-_-I-_-J-_-K-_-L-_-M-_-N-_-O-_-P-_-Q-_-R-_-
S-_-T-_-U-_-V-_-W-_-X-_-Y-_-Z-_-%5B-_-%5C-_-%5D-_-%5E-_-_-_-%60-_-a-_-b-_-
c-_-d-_-e-_-f-_-g-_-h-_-i-_-j-_-k-_-l-_-m-_-n-_-o-_-p-_-q-_-r-_-
s-_-t-_-u-_-v-_-w-_-x-_-y-_-z-_-%7B-_-%7C-_-%7D-_-~-_-%7F-_-%80-_-%81-_-%82-_-
%83-_-%84-_-%85-_-%86-_-%87-_-%88-_-%89-_-%8A-_-%8B-_-%8C-_-%8D-_-%8E-_-%8F-_-%90-_-%91-_-%92-_-
%93-_-%94-_-%95-_-%96-_-%97-_-%98-_-%99-_-%9A

Yep. Characters like ")", "(", "a", "~" were converted on the fly by some Cloud Run internal proxy.

Now lets filter this for better readability:

const search_raw = new Array(155).join('-').split('-').map((x, i) => '%'+i.toString(16).toUpperCase());
const search_processed_by_cloud_run = `%0-_-%1-_-%2-_-%3-_-%4-_-%5-_-%6-_-%7-_-%8-_-%9-_-%A-_-%B-_-%C-_-%D-_-%E-_-%F-_-%10-_-%11-_-%12-_-%13-_-%14-_-%15-_-%16-_-%17-_-%18-_-%19-_-%1A-_-%1B-_-%1C-_-%1D-_-%1E-_-%1F-_-%20-_-!-_-%22-_-%23-_-%24-_-%25-_-%26-_-%27-_-(-_-)-_-*-_-%2B-_-%2C-_---_-.-_-%2F-_-0-_-1-_-2-_-3-_-4-_-5-_-6-_-7-_-8-_-9-_-%3A-_-%3B-_-%3C-_-%3D-_-%3E-_-%3F-_-%40-_-A-_-B-_-C-_-D-_-E-_-F-_-G-_-H-_-I-_-J-_-K-_-L-_-M-_-N-_-O-_-P-_-Q-_-R-_-S-_-T-_-U-_-V-_-W-_-X-_-Y-_-Z-_-%5B-_-%5C-_-%5D-_-%5E-_-_-_-%60-_-a-_-b-_-c-_-d-_-e-_-f-_-g-_-h-_-i-_-j-_-k-_-l-_-m-_-n-_-o-_-p-_-q-_-r-_-s-_-t-_-u-_-v-_-w-_-x-_-y-_-z-_-%7B-_-%7C-_-%7D-_-~-_-%7F-_-%80-_-%81-_-%82-_-%83-_-%84-_-%85-_-%86-_-%87-_-%88-_-%89-_-%8A-_-%8B-_-%8C-_-%8D-_-%8E-_-%8F-_-%90-_-%91-_-%92-_-%93-_-%94-_-%95-_-%96-_-%97-_-%98-_-%99-_-%9A`.split('-_-');

search_raw.reduce((m, encoded, i) => encoded === search_processed_by_cloud_run[i] ? m : m.concat([encoded, search_processed_by_cloud_run[i]].join(' => ')), []).join('\n')
    
// output
%21 => !
%28 => (
%29 => )
%2A => *
%2D => -
%2E => .
%30 => 0
%31 => 1
%32 => 2
%33 => 3
%34 => 4
%35 => 5
%36 => 6
%37 => 7
%38 => 8
%39 => 9
%41 => A
%42 => B
%43 => C
%44 => D
%45 => E
%46 => F
%47 => G
%48 => H
%49 => I
%4A => J
%4B => K
%4C => L
%4D => M
%4E => N
%4F => O
%50 => P
%51 => Q
%52 => R
%53 => S
%54 => T
%55 => U
%56 => V
%57 => W
%58 => X
%59 => Y
%5A => Z
%5F => _
%61 => a
%62 => b
%63 => c
%64 => d
%65 => e
%66 => f
%67 => g
%68 => h
%69 => i
%6A => j
%6B => k
%6C => l
%6D => m
%6E => n
%6F => o
%70 => p
%71 => q
%72 => r
%73 => s
%74 => t
%75 => u
%76 => v
%77 => w
%78 => x
%79 => y
%7A => z
%7E => ~

I reported this bug to Steren (Product Manager at Google Cloud Run) and hopefully it will be fixed soon :)

tag:blogger.com,1999:blog-8128983.post-1814837337558957639
Extensions
[fr] oxmoto.fr — stratégie e-commerce 1 an plus tard
cto as a servicee-commerceoxmotostrategy
Show full content
Cela fait maintenant 1 an (2020) que j'ai rejoins en tant qu'associé Oxmoto afin d'y développer la partie e-commerce de Oxmoto.fr grâce à un suivi hebdomadaire. 
Fin 2021 nous avons maintenant franchit une étape importante car le CA réalisé chaque semaine correspond au CA annuel de 2020. 
C'est le résultat d'efforts continus de la part de toute l'équipe, d'une approche aggressive #lean et d'une excellence d'exécution à tous les niveaux. 
2022 s'annonce exceptionnel !
tag:blogger.com,1999:blog-8128983.post-8933750073414314232
Extensions
[Fr] Une sombre histoire de vaccin, d'erreur 500 de FSM et de routing
Finite State MachineFSMNoBullshit CTONoBullshit Tech-LeadProduct DesignProduct ManagementStateCharts
Show full content

L’infirmière a une erreur 500 sur AmeliPro lorsqu’elle souhaitait valider ma première dose de vaccin 🥲

Bien entendu — comme tout utilisateur — elle fait donc un retour arrière mais l’application ne respectant pas les principes du web : pas d’état porté par l’url -> 🔥💥☠️🥲

Qu’a-t-elle donc fait ?
Recommencer le cheminement à 0 🥲

Chez Cloud-IAM, Hook0 et feu Redsmin et Bringr nous respect(i)ons le principe de « les interfaces graphiques en tant que machines d'états finis » qui map chaque état sur un routing associé.

Pour faire simple un état (~ un écran) = une route côté front.

La *majorité* des états sont donc accessibles via une URL associée, permettant de nombreux usages internes et externes (partage de lien, bookmarks, retour arrière, debugging, compréhension globale des parcours utilisateurs, documentation à jour, automatisation etc…)

Envie d'en savoir plus ? J’en parle en détail dans mon livre !

tag:blogger.com,1999:blog-8128983.post-1273765020102301170
Extensions
How to setup your own tmate server with docker
dockertmate
Show full content

tmate is an awesome tool I use to do work/debug session on someone else terminal. Learn more about tmate here. Sadly their default server is not available anymore, at the time of writing this article you have to setup your own tmate server, I could not find a lot of documentation on internet so here we are!

# ssh into your server (e.g. 51.158.172.10)
# install docker
mkdir tmate && cd tmate

# this command will download the create_keys script and create a "keys" folder in the directory
curl -s -q https://raw.githubusercontent.com/tmate-io/tmate-ssh-server/master/create_keys.sh | bash

# don't forget to setup tmate client on the machine you want and configure ~/.tmate.conf with the information outputed by the previous command

# now let's start the server (don't forget to change "sub.my-domain-name.com") with the domain name pointing to your server
# I choose 2223 but any other port will do

docker run -d --name="tmate-server" \
  --cap-add SYS_ADMIN \
  -v  $(pwd)/keys:/keys \
  -e SSH_KEYS_PATH=/keys \
  -p 2223:2223 \
  -e SSH_PORT_LISTEN=2223 \
  -e SSH_HOSTNAME=sub.my-domain-name.com \
  -e USE_PROXY_PROTOCOL=0 \
  tmate/tmate-ssh-server:prod

Now back on your client machines (e.g. personal laptops, or your friend laptop):

# install tmate client (check https://tmate.io/ for instructions)
nano ~/.tmate.conf

# paste what was printed from create_keys.sh

set -g tmate-server-host "IP_OR_DOMAIN_OF_YOUR_SERVER"
set -g tmate-server-port 2223
set -g tmate-server-rsa-fingerprint SHA256:xxxxxxxxxxxxxxxxxx
set -g tmate-server-ed25519-fingerprint SHA256:xxxxxxxxxxxxxxxxxxxxxx

You now are good to go!

tag:blogger.com,1999:blog-8128983.post-2754607971831100461
Extensions
[Fr] La signature numérique de Sylae ? Bonjour Sisyphe, bienvenue en enfer
service-publicsylaewtf
Show full content

L'histoire suivante se passe sur le site Sylae, un site du service-public.

Quelques "MINUTES" pour afficher un formulaire de signature numérique ?!.

C'est forcément parce que vous êtes en train de me générer une clé avec une complexité de tarée right ? RIGHT ?

Moi dans ces cas là, j'ai juste pas la patience (après 10 secondes d'attente), je check le code-source.

Et comme c'est un service publique, il y a 80% de chance que ça soit un grand moment (Atos, CapGemini, Sopra, ... FTW).

(issTimeout=300)

"Allez, on va dire qu'au bout de 5 minutes, si le formulaire n'est pas chargé, c'est qu'il y a un problème".

NON MAIS LES GARS si vous n'étiez pas les services publics, la moitié du web aurait quitté cette page après 5 secondes !

Le script JS génère du mixed content, les mecs doutent de rien. OKLM.

Mais savez pourquoi ils affichent après 5 MINUTES le message: "Nous vous invitons à vérifier la configuration de votre poste de travail avec les pré-requis" ????????

En fait vous DEVIEZ savoir préalablement qu'il fallait lire un PDF pour ajouter des EXCEPTIONS à l'exécution de l'applet Java en HTTP (sisisisisi). 

Les mixed content en fait c'était pas un bug, mais une feature. 

Cher utilisateur, corrige le problème CHEZ TOI (pov' naz).

Fun fact: il n'y a pas de lien depuis le message pour vous guider vers "la configuration" optimale du "poste de travail" en question (ça serait trop vous aider bande de fainéant)

Une recherche google m'emmène le site d'une communauté de commune qui héberge le PDF DE Sylae.

En conclusion : 

  • on te fait dé-facto poireauter 5 minutes
  • on t'affiche un message pour te dire que t'es qu'une merde (je grossis à peine le trait) 
  • ... qu'il te faut vérifier la "configuration" de "ton poste de travail"
  • ... qui consiste à mettre en place un bypass sécurité

Quand on connait les deux grosses sociétés qui sont derrière le développement et l'hébergement de la majorité des applications des services publiques en France... 
... et le niveau des développements là bas 
... et leurs coût

Merci. Changez rien.

[Bonus] Si vous demandez l'impression manuscrite avec signature, on vous affiche ce message. Les mecs n'ont peur de rien.

[Bonus 2] Je vous explique la blague ou bien ?

[Bonus 3] "deployJava.js" quand même Oracle s'y met. La factorisation ? Pour quoi faire ?

Après 1h30 de bataille. 

  • Brave (good point) ne permettant même pas de désactiver le mixed-content. Contrairement à Chrome/Firefox.
  • Chrome/Firefox/Brave ne supportant plus Java. 
Je me décide à faire l'impensable :

... sauf que c'était trop demander à Microsoft:<+p>

C'est partiiiiiiiiiiiiiiiii... 

[3h plus tard. 3. Heures.] Et 1 VM et le vieux windows de ma femme. Toujours pas.

MAIS NOOOOOOON ! Redirection http => https => homepage

Les plus assidus remarquerons que la redirection depuis https va vers une adresse en ... http
A votre avis, le système Sylaé a: 

  1. enregistré mon mot de passe auto-généré MAIS en enlevant des caractères spéciaux SANS RIEN DIRE
  2. truncate mon mot de passe auto-généré de 22 caractères SANS RIEN DIRE

Et c'étaiiiiiiit ....... 🥁🥁🥁🥁 un truncate du mot de passe silencieux à 20 caractères

Maintenant retour à la case départ  😭

On notera le ©2014 en footer.  Mais QUI voudrait vous copier ??

+ 3 heures et 6 minutes

[Bonus je-sais-plus-combien] Le code d'erreur qui intègre l'adresse IP (privée) du serveur qui a traité la requête..

Début d'une 4ème tentative (+3h31). Si IE9+Win7 est trop récent, peut-être que WinXP fera l'affaire

La réponse est non

Fin.

tag:blogger.com,1999:blog-8128983.post-4399493685225030694
Extensions
How to upload Shopify PDF invoices to Google Drive with Zapier
google drivenocodeshopifyzapier
Show full content

Yesterday I discovered that my fiancée was manually downloading every invoice (generated with Order Printer Pro app) from Shopify so then she could upload them to her Google Drive "invoices" folder. It's more than a hundred manual operations per month and that number is growing. FAST.

Let's automate that with Zapier 😇.

Step 1: Trigger Zap on new Shopify paid order

First thing first, create a new zap with a Shopify trigger "New Paid Order".

Step 2: Add some glue code

Sadly the Shopify connector does not expose metadata from apps like Order Printer Pro. We won't get the pdf invoice link for free. Hopefully we can download the receipt page html source code and extract the "Download Invoice" link from there.

Add a "Code by Zapier" step along in order to run JavaScript code. Setup the 3 inputs variables below:

Copy/paste the -good-enough- code below:

const order_name_as_file_name = inputData.order_name.replace('#', '-');

fetch(inputData.order_url)
.then((res) => res.text())
.then((body) => {
  const url_regexp = /href="(.*?)"/ig;
  let match;
  while(match = url_regexp.exec(body)){
    if(match[1].includes('.pdf')){
      return callback(null, {
        order_name: order_name_as_file_name, 
        invoice_url: match[1].replace('/.pdf', `/${inputData.order_number}.pdf`)
      });
    }
  }
  
  // we could not find the PDF invoice, fail loudly
 callback(`Could not find pdf URL in: ${body}`);
})
.catch((err) => callback(err));
Step 3: Upload PDF Invoice to Google Drive

One last thing, add a "Upload File in Google Drive" action, select your drive and folder. Select the "Invoice URL" we got from our previous step as the file parameter, customize the filename as needed and you are good to go!

Job done, you now get full tracability and alerting capabilities from Zapier, enjoy!

tag:blogger.com,1999:blog-8128983.post-9006280460077752202
Extensions
How to fix "there is no timer running, must be called from the context of Tokio runtime"
errorrusttokio
Show full content
Some context

You just tried to compile your Rust project and got the there is no timer running, must be called from the context of Tokio runtime error?

You are desesperatly trying to understand what is going on?

So did I!

For future reference, my project relied on tokio v0.3. I added a dependency (bollard) that was relying on tokio v0.2.

Even when my code was in the execution context of a tokio runtime (v0.3) calling bollard code triggered at runtime the there is no timer running, must be called from the context of Tokio runtime error.

How do I fix this? Option 1: start a new runtime in tokio v0.2

Your first option would be to start another runtime in the same tokio version that your dependency requires, something like:

use tokio::runtime::Runtime;

// Create the runtime
let rt = Runtime::new().unwrap();

// Spawn a future onto the runtime
rt.block_on(async {
    // call your dependency
});

That would result in two threadpools so it might be an issue in some case. I did not go down this path

Option 2: use the same version that your dependency

It's the easiest option. Downgrade your tokio project dependency to v0.2 so it can be the same as your dependency. But yep, it sucks.

Option 3: send a patch to the dependency

Last option (and the best one) is to create and send a patch to your dependency project to upgrade its tokio version.

tag:blogger.com,1999:blog-8128983.post-666926182009229975
Extensions
How PostgreSQL triggers works when called with a PostgREST PATCH HTTP request
apipostgresqlpostgrestresttrigger
Show full content

Wonder what values are set or not inside your new.column_name and old.column_name when you are calling PostgREST with a PATCH request? This article is for you!

Create a private schema for our sample app, we will expose the public schema for our PostgREST API:

create schema private;

A city table:

create table private.city (
    city__id integer not null primary key ,
    name text not null,
    countrycode character(3) not null,
    district text not null,
    population integer not null
);

with some data:

copy private.city (city__id, name, countrycode, district, population) FROM stdin;
1	Kabul	AFG	Kabol	1780000
2	Qandahar	AFG	Qandahar	237500
3	Herat	AFG	Herat	186800
\.

Now let's expose this city private table through PostgREST as a public API (public schema) so we stay clean regarding the Separation of Concerns principle:

create view public.cities as 
	select city__id as id, name, countrycode, district, population 
    from private.city;

Let's add support for the PATCH HTTP verb on our newly created /cities REST endpoint.

create or replace function private.update_city() returns trigger as
$$
begin
    raise exception 'new.name = %, old.name=%, new.countrycode = %, old.countrycode = %', new.name, old.name, new.countrycode, old.countrycode;

    return new;
end;
$$ security definer language plpgsql;


create trigger city_update
    instead of update
    on public.cities
    for each row
execute procedure private.update_city();

Now our function private.update_city() will be called for each rows submitted through PATCH /cities HTTP request. As you can see from update_city function body we print the before/after values of name and countrycode columns in PATCH requests.

What's the value of new.countrycode if I don't specify countrycode property in PATCH request body?
# PATCH /cities?id=eq.1 '{"name": "new_value"}'
curl -H "content-type: application/json" \
	--request PATCH \
    --data '{"name": "new_value"}' http://localhost:3000/cities?id=eq.1 | jq '.message'
new.name = new_value, old.name=Kabul,
new.countrycode = AFG, old.countrycode = AFG
As you can see, the property (column in fact) countrycode was not specified in the PATCH request body but it still defined with its current value in new.countrycode and old.countrycode just like we expected it to be. What's the value of new.name if I set name as a null value in PATCH request body?
# PATCH /cities?id=eq.1 '{"name": null}'

curl -H "content-type: application/json" \
	--request PATCH \
	--data '{"name": null}' http://localhost:3000/cities?id=eq.1 | jq '.message'
new.name = <NULL>, old.name=Kabul,
new.countrycode = AFG, old.countrycode = AFG

Perfect! Just like we expected. We set name property to null in our PATCH request body thus new.name is set to NULL in our trigger function.

Clone this github repository to try all of this locally. Wonder what SQL conventions you should use? Check out these SQL conventions.

tag:blogger.com,1999:blog-8128983.post-1418947669490610626
Extensions
🤝 14 étapes pour vendre son SaaS en 3 mois (et pas 2 ans)
CTOIndieHackerPassive-incomeSaaS
Show full content

J'ai fait l'erreur il y a 2 ans de penser que la vente de mon SaaS, Redsmin.com (je parle de son histoire ici), serait naturelle. Malgré les demandes reçues au fil du temps, rien ne me convenait. Il y a 3 mois, j'ai décidé de me prendre en main ce qui a eu pour résultat une vente de Redsmin jeudi dernier (20 août 2020). Cet article retrace les étapes que j'ai suivies.

1 - Attendre un miracle

Cela faisait 2 ans (juillet 2018) que je laissais Redsmin en roue libre. Pas de mise à jour fonctionnelle, juste un peu de support à raison d'un email par semaine environ. Le MRR variant de mois en mois entre 1 700$ et 2 800$, cela me convenait et j'espérais recevoir des propositions intéressantes.

La bonne nouvelle est que j'ai bien reçu des propositions, la mauvaise nouvelle est qu'elles ne m'intéressaient pas. Offre de partenariats, prise de participation, AcquiHire...

Je n'étais pas proactif quant à la communication et la gestion de la mise en vente de Redsmin et le projet stagnait.

Bref, j'attendais un miracle, tout comme on peut attendre d'obtenir un travail en restant chez soi. Les chances de succès sont très limitées.

2 - Se prendre en main, publier l'annonce sur des marketplaces

Le 11 mai 2020, je décide de rechercher les techniques pour vendre son SaaS. Je réalise qu'il existe des marketplaces spécialisées pour cela.

Je crée une fiche profil pour Redsmin.com sur indiemaker.co, la fiche est validée le jour même par le site.

Deux semaines plus tard, le 22 mai, je découvre microacquire.com. Rebelote, création d'une fiche profil qui sera validée 4 jours plus tard par le site.

3 - Attendre les propositions

12 jours plus tard, j'ai pu recevoir la première demande de mise en contact via Indiemaker. Concernant MicroAcquire il a suffi de 5 jours d'attente.

Au total, c'est 28 prises de contact qui ont eu lieu (19 via MicroAcquire, 9 via IndieMaker). Ces contacts ont découvert la fiche du SaaS majoritairement grâce à la newsletter dédiée de ces deux sites ainsi qu'une mise en avant par les webmestres.

4 - Constituer un dossier de vente

Les potentiels acheteurs vont avoir besoin de plus que vos beaux yeux pour prendre la décision d'aller plus loin.

Il est donc nécessaire de créer et de partager un dossier qui contiendra un ensemble d'informations communicable à l'extérieur.

Je suis parti sur un dossier par mois. Chaque dossier contenant des exports de données relatives au mois ou aux 6 derniers mois, suivant la métrique.

Plutôt que de m'embêter à réaliser des exports partiels de la base de données et de Stripe. J'ai préféré utiliser les offres gratuites de ProfitWell et ChartMogul pour agréger et réaliser des exports.

J'obtenais ainsi très facilement les informations suivantes pour chaque mois :

  • MRR over the past 6 months
  • MRR per plans
  • MRR per countries
  • MRR movements
  • MRR breakdown (new business, expansion, contraction, churn, reactivation) over the past 6 months
  • ARR
  • Subscribers count over the past 6 months
  • Churn/retention cohorts
  • Cash-flow
  • Freemium: free/paid ratio
  • Customer Lifetime Value

À ceci il faut ajouter un export de votre comptabilité interne (profit & loss).

Ce dossier étant dans dropbox il ne me restait plus qu'à partager le lien, suite aux mises en relation.

Rétrospectivement, j'aurais dû d'abord constituer un dossier avant de soumettre les fiches. Même s'il ne faut pas plus de quelques heures pour créer une première version.

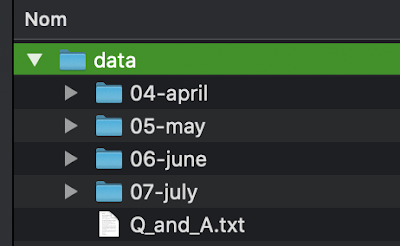
5 - Maintenir un document de Q&A

Les questions des potentiels acheteurs sont souvent les mêmes. Je ne sais pas vous, mais je n'aime pas trop me répéter. J'ai donc ajouté un fichier Q_and_A.txt qui répertorie l'intégralité des questions que j'avais pu recevoir ainsi que leurs réponses associées donc voici un extrait :

  • How much effort do you need to maintain this product?
  • What are the unique values of your SaaS product, compared to your competitors, like XXX ?
  • If you have time to make some dev effort, what functions will you add?
  • What does the overall tech stack of the prod look like?
  • It seems the maintenance cost is low, why do you still sell it?
  • What is included in the sell and more importantly what is not included?

Sur les 28 mise en relations, j'ai pu ainsi partager l'accès au dossier de vente à 10 d'entre eux.

6 - Filtrer les propositions

Suite au partage du dossier de vente, j'ai pu recevoir 5 propositions (conversion : 17%). 

Je considérais une proposition comme intéressante si elle respectait les critères suivants :

  • un maintien du service pour les clients et utilisateurs existants
  • une vente intégralement en cash
  • le montant correspondait à mes attentes

Pour ces raisons, j'ai donc rejeté les propositions suivantes :

  • acquihire (acquisition + recrutement pour continuer à maintenir Redsmin)
  • apport + entrée au capital de Redsmin
  • un peu de cash + une commission sur les nouvelles ventes
  • un peu de cash + un second versement en fonction des résultats après 1 an

Sur ces 5 propositions, en suivant mes critères, deux ce sont avérées intéressantes. Vu que le premier y allait presque au chantage, j'ai donc continué avec le second acheteur nous avons à ce moment là échangé sur le facteur multiplicateur.

7 - Méthode EBITDA et facteur multiplicateur

Pour estimer la valeur d'un SaaS plusieurs méthodes existent mais la plus connue et sans doute l'EBITDA (Earnings Before Interest, Taxes, Depreciation and Amortization). En France nous parlons d'EBE (Excédent Brut d'Exploitation). 

EBITDA = Chiffre d'affaires - Charges d'exploitation

Redsmin est un SaaS et son business model est un modèle de souscription majoritairement mensuel. Pour évaluer le chiffre d'affaires dans ces cas là, on se base sur un MRR médian (par exemple sur les 6 derniers mois) reporté sur 1 an.

Ensuite l'EBITDA est multiplié par le fameux facteur multiplicateur afin d'obtenir le montant final de la vente.

L'intérêt de la méthode EBITDA et facteur multiplicateur est qu'elle donne un repère à l'acheteur ainsi qu'au vendeur. En résumé : on ne peut pas fake son EBE/EBITDA (cette affirmation est à prendre avec des pincettes, je ne suis loin d'être un expert). 

Il ne reste plus alors qu'à jouer sur le facteur multiplicateur pour trouver un terrain d'entente.

Bref, connaissant le modeste MRR de Redsmin, je savais pertinemment que cette vente ne me rendrait pas millionnaire 😅.

8 - LOI - Letter Of Intent

La lettre d'intention d'achat (ou Letter Of Intent en anglais) a principalement deux intérêts :

  • une première définition du prix d'achat du SaaS
  • la définition d'une période (e.g. 14 jours) d'exclusivité où le vendeur s'engagent à ne pas accepter d'autres propositions

Néanmoins la LOI n'engage habituellement pas l'acheteur, il faut donc encore montrer patte blanche !

9 - Due Diligence

Pour résumer, l'objectif de cette étape (appelée Due Diligence) est de vérifier que le vendeur (moi) ne bullshit pas sur les chiffres. Dans notre cas la Due Diligence s'est déroulée via un échange Google Meet (l'acheteur était anglais et d'un autre pays) et un partage d'écran, en 1 heure c'était plié.

Au programme :

  • Parcours du code et explication macro via GitLab et GitHub. 
    • Objectif : démontrer que le code n'est pas dégueux, qu'il y a des tests, une intégration continue (CI) et parfois même du déploiement continu (CD), bref, que l'application est toujours maintenable.
  • Parcours des revenus via Stripe. 
    • Objectif : prouver que je ne bullshit pas sur les exports et sur les chiffres.
  • Parcours des données de visites via Google Analytics.
10 - Asset Purchase Agreement, Asset Transfer, Non Compete Agreement, NonDisclosure Agreement

À cette étape il faut définir un inventaire des assets à transférer (comptes Stripe, Analytics, Google Apps, GitLab, GitHub, npm, Tumblr, Netlify, OVH, Clever Cloud, MongoDB Atlas, RedisLabs, Uservoice, …), sous quelle modalité, avec quel pré-requis...

L'échange se concentre en parallèle sur le contrat d'Asset Purchase Agreement. Dans mon cas nous avons itéré 7 fois afin de bien spécifier les clauses légales.

En parallèle nous avons chacun ouvert un compte sur Escrow.com (oui, la compréhension VF du nom ne rassure pas !). Escrow est une plateforme agissant en tant que tiers de confiance pour assurer la transaction.

11 - Négocier l'accompagnement 

Nous sommes partis sur un accompagnement de 30 jours intégré au contrat de vente. Puis une facturation à l'heure pour du conseil après ces 30 jours. 

Rétrospectivement, j'aurais peut-être dû négocier l'accompagnement sur une durée de 15 jours. La bonne nouvelle cependant est que pour cet accompagnement à la transition il n'y a qu'un engagement de moyen (en mode best-effort) et pas de résultat. No stress.

12 - Signature

Après plus de 60 échanges emails qui ont eu lieu avec l'acheteur sur 2 mois pour répondre aux questions et de nous aligner sur le contenu du contrat de vente, nous étions fin prêt à signer.

Parce que dans notre cas les documents de travails étaient tous des PDF, j'ai dû faire un suivi des changements... à l'ancienne :

13 - Réaliser le transfert des assets

Le transfert de tous les assets, la migration des applications et des accès ont été réalisé en quelques heures, sans downtime pour les utilisateurs.

14 - Attendre l'argent (rends l'argent !) et payer ses impôts

Pas la peine de faire un dessin sur cette dernière partie :).

Ainsi se termine ces 3 mois. "Qui ose gagne. Là où se trouve une volonté, il existe un chemin." disait Churchil.

Si tu lis jusqu'ici c'est sans doute que les SaaS, l'indiehacking, ou simplement le développement en général te passionne. J'ai une bonne nouvelle pour toi, il y a un slack pour ça, rejoins-nous ! Il est temps de mon côté de te laisser, les autres chapitres du livre NoBullshit Tech-Lead ne sortirons pas tout seul 😅 !
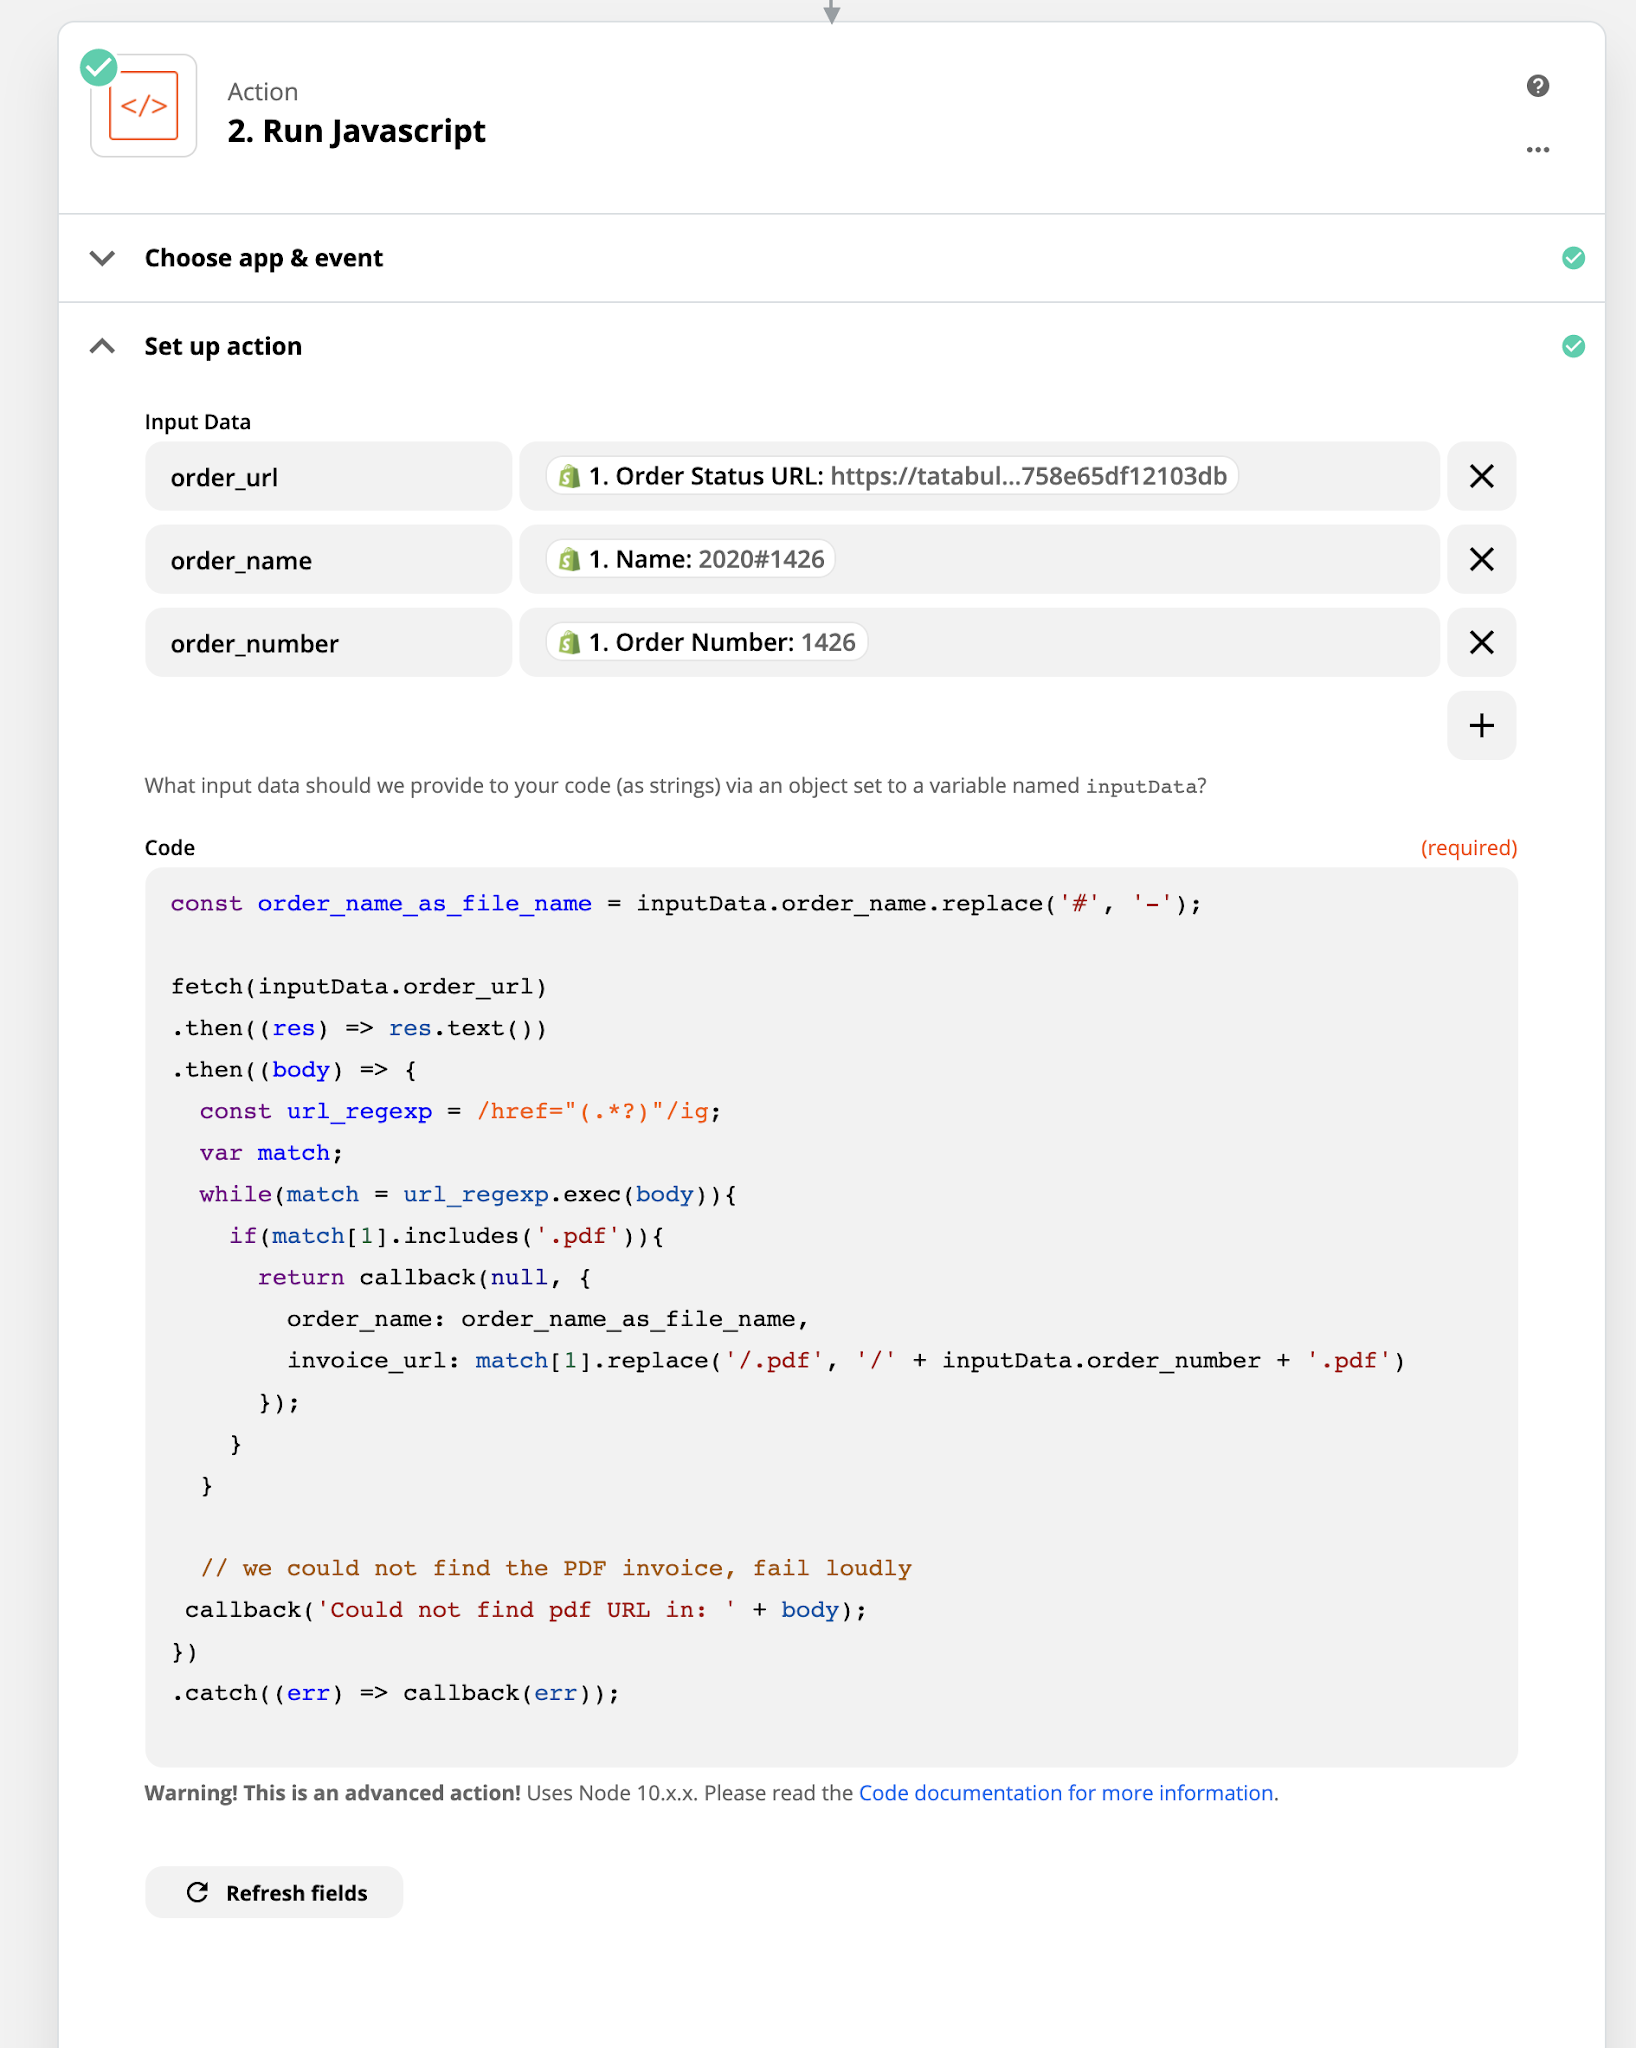
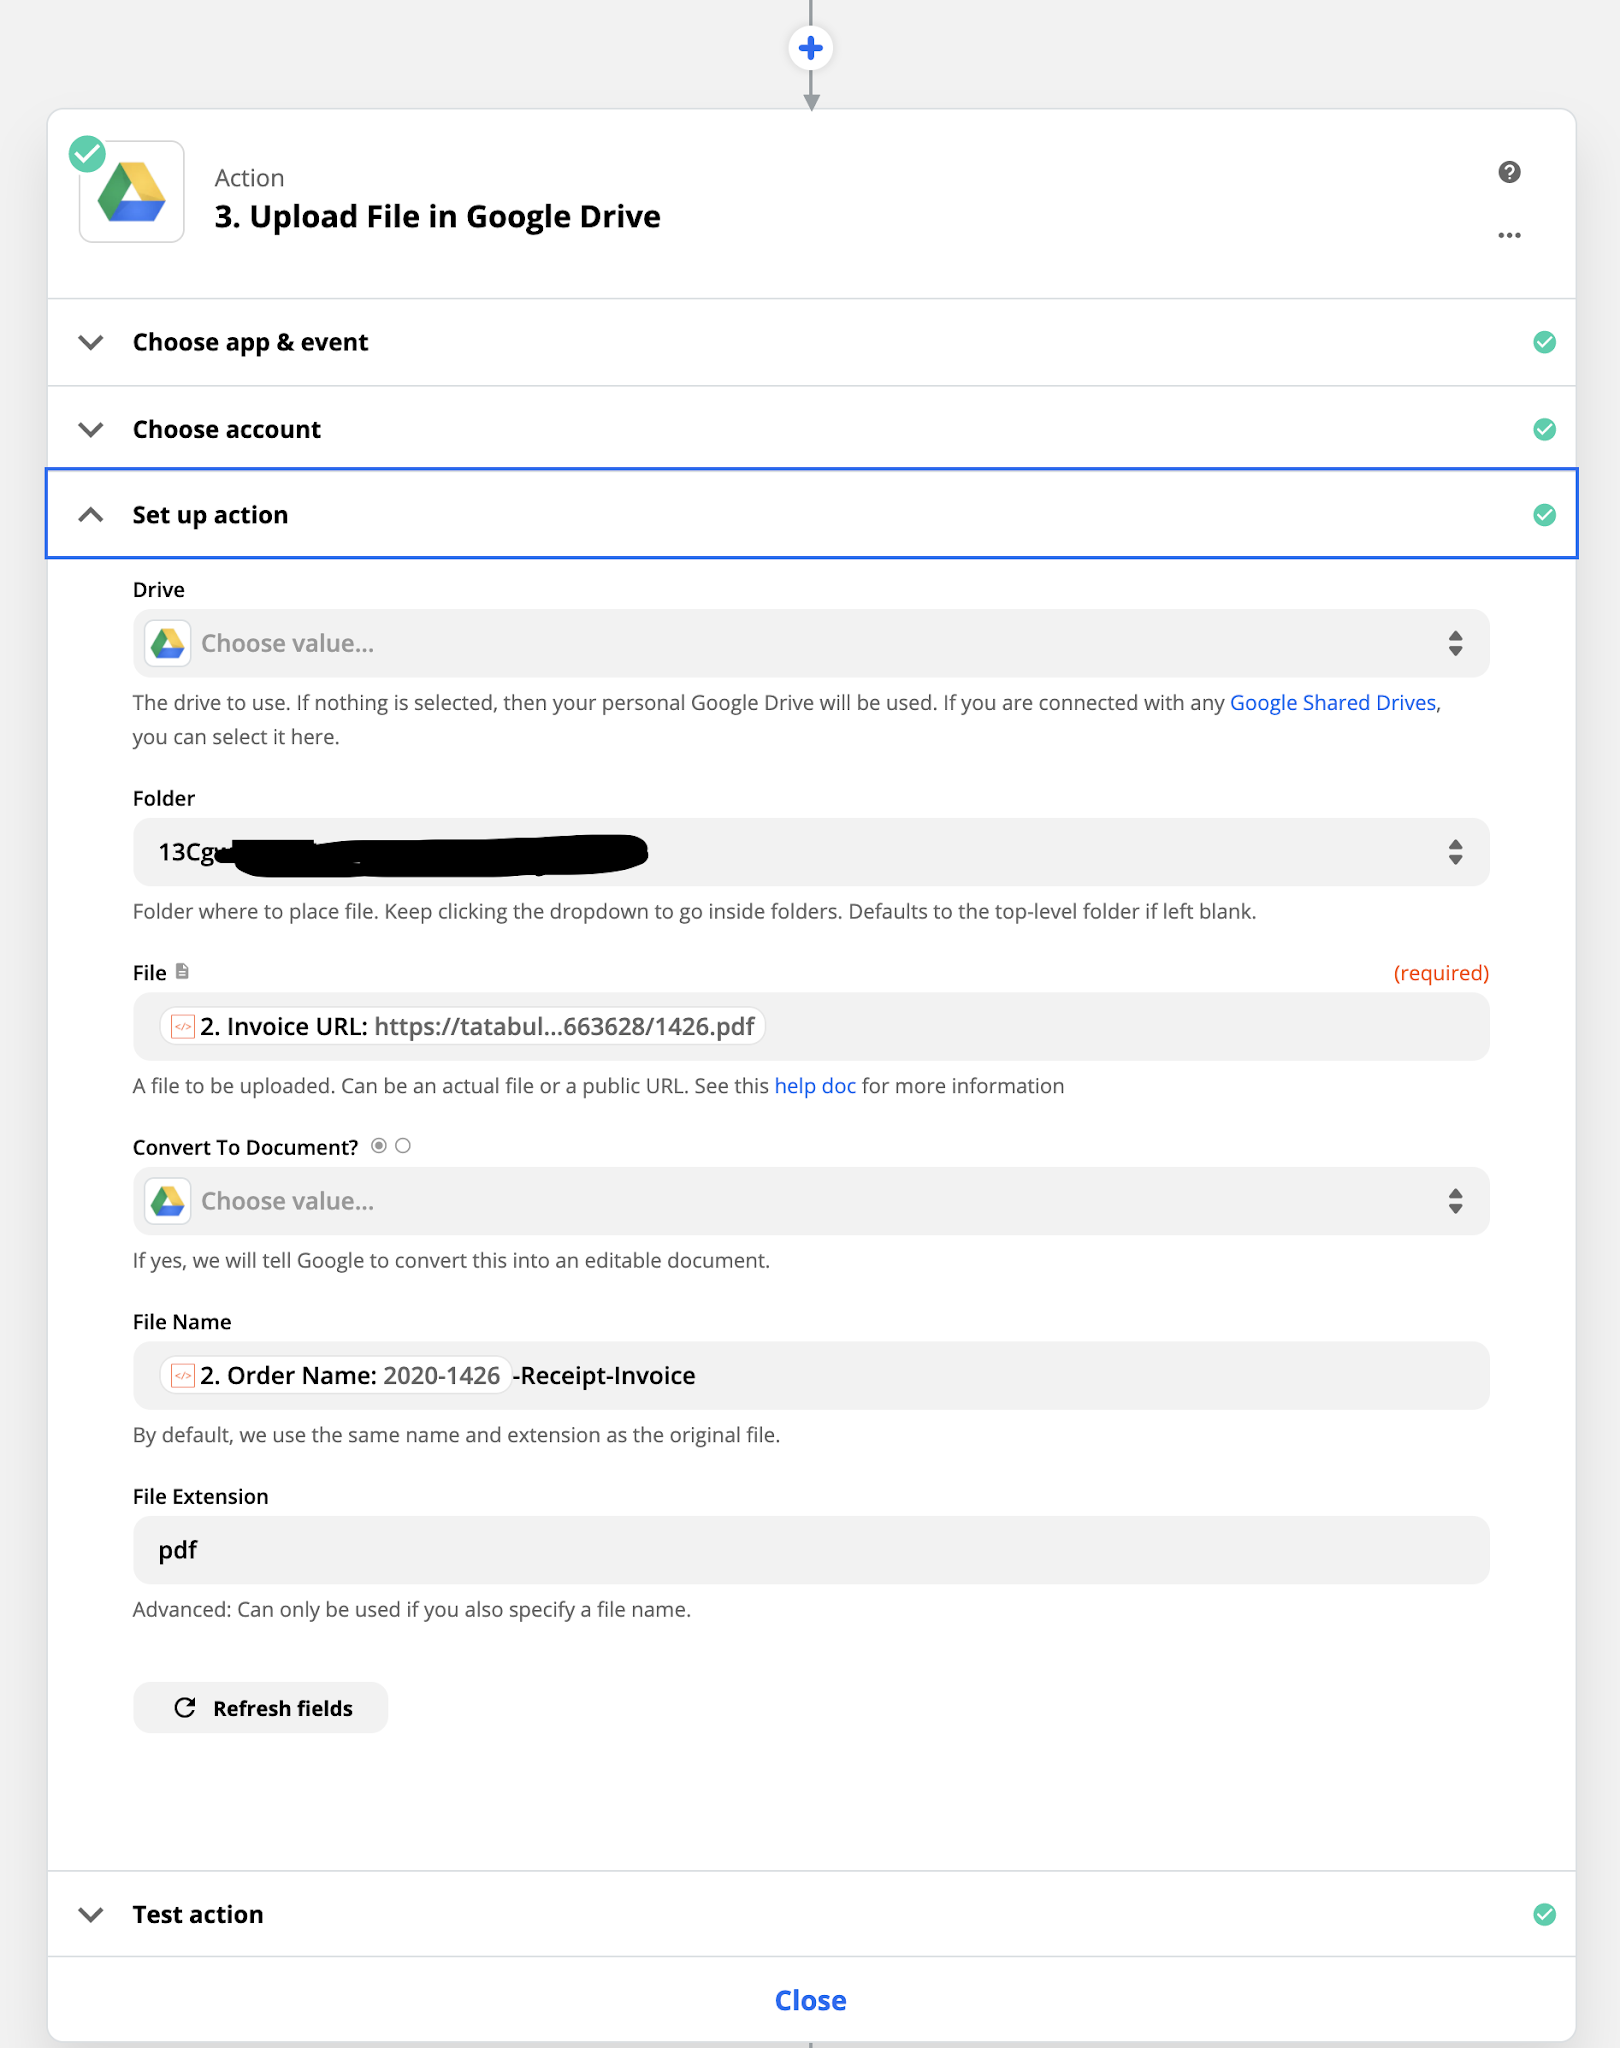
tag:blogger.com,1999:blog-8128983.post-4661453201460813251
Extensions
FinOps - Reducing Google Cloud Storage costs
FinOpsgoogle cloud platformgoogle cloud storageimage-charts
Show full content

🤯 Inter-region network transfer can be a real PITA.

My latest Google-Cloud Invoice for my Image-Charts Saas was ~40% related with inter-region transfer. 💸💸

 - Why ? 🧐

 - I'm glad you asked 😍!

GCP billing report confirms that 40% came from Google Cloud Storage.

Drilling down I saw that the main costs were related with GCP "Storage egress between NA and EU" and "GCP Storage egress between EU and APAC".

Storage/sent bytes per location graph confirms it, I've sent more than 3TB of data from EU to Asia (APAC) & USA (NA) clusters.

WHYYYY 😭?

Because docker images 🐳 are stored on GCP EU (eu.gcr.io). And are downloaded nearly at every Kubernetes node auto-scaling-up steps. And Image-Charts scales. Like a lot.

I've updated @imagecharts continuous delivery pipeline yesterday to push images to the 3 locations (EU+Asia+USA) instead of one (EU) and I already see improvements 👍🔥

Conclusion: 20x Google Cloud Storage cost reduction!

tag:blogger.com,1999:blog-8128983.post-4339838754381646077
Extensions
How to automatically activate PostgreSQL Row Level Security on tables with at least one policy attached
postgresqlpostgrestrow-level-security
Show full content

Row level security is an awesome feature that let you control how your database (PostgreSQL in my case) manage access to each row of a table based on some policies declared upfront. It's also really useful when you expose your database through a REST API with a gateway like PostgREST. I already talked enough about that :).

I often forgot to add the ALTER TABLE schema.table ENABLE ROW LEVEL SECURITY; statement when I declare row level security policies. Do you?

Let's use our database awesome introspection feature to list tables for which we attached access policies and then automatically activate row level security. The SQL request below list tables and display whether or not row level security is activated.

select pg_class.oid,
       pg_namespace.nspname || '.' || pg_class.relname as schema_table,
       pg_policy.polname as policy_name,
       pg_class.relrowsecurity as has_row_level_security_enabled
from pg_catalog.pg_policy
       inner join pg_catalog.pg_class on pg_class.oid = pg_policy.polrelid
       inner join pg_catalog.pg_namespace on pg_class.relnamespace = pg_namespace.oid;
oid schema_table policy_name has_row_level_security_enabled 369657 fsm.machine fsm_machines_access_policy true 369745 iam.user user_access_policy true 369803 actor.company company_access_policy true 369803 actor.company company_access_policy_for_update true 369842 contract_manager.contract contract_access_policy false

From the query output we observe that contract_manager.contract table does have an associated access policy called contract_access_policy but without row level security enabled on the table.

Let's now enable row level security for each table where at least one policy was defined:

update pg_catalog.pg_class
set relrowsecurity = true
where pg_class.oid in (select pg_class.oid
      from pg_catalog.pg_policy
      inner join pg_catalog.pg_class on pg_class.oid = pg_policy.polrelid
      where pg_class.relrowsecurity = false);

This is it! We've activated row level security (not in FORCE mode) to every table with attached policies. No more mistakes. No more boilerplate \o/

tag:blogger.com,1999:blog-8128983.post-4259537864211720261
Extensions
PostgREST "response.headers guc must be a JSON array composed of objects with a single key and a string value" error
apipostgresqlpostgrestsql
Show full content

Yep. You are wondering why it's working locally and not in production right? Or maybe why PostgREST login feature is not working at all?

The response.headers guc must be a JSON array composed of objects with a single key and a string value is often related to the fact that some call were made to set a header field but the value to be set was empty. Take a look at your settings.secrets table. If it's empty, that's the problem.

At least on the PostgREST-starter-kit, the settings.secrets table should contains at least 2 rows:

jwt_secretyour_secret_here jwt_lifetime 3600

Looking for some guidance on PostgREST? How to setup a CI/CD with it? What test strategy to use? As a CTO I've built multiple SaaS with it underneath and now help tech teams build fast, reliable and safer API with PostgREST and PostgreSQL. Hire me on CodeMentor or Malt!

tag:blogger.com,1999:blog-8128983.post-6049664808580821918
Extensions
How to expose all public stored function in PostgREST/SubZero
postgresqlpostgrestsubzero
Show full content
DO $$
    DECLARE
        schema_name INFORMATION_SCHEMA.routines.routine_schema%TYPE = 'api';
        fns CURSOR FOR
            select routine_name from INFORMATION_SCHEMA.routines WHERE routine_schema = schema_name;
    BEGIN
        FOR fn_record IN fns LOOP
                EXECUTE 'grant execute on function ' || schema_name || '.' || fn_record.routine_name || ' to anonymous;';
            END LOOP;
    END$$;

Will expose all store functions from the api public schema in the generated swagger/openapi specification from PostgREST/SubZero. Of course, ensure that all underneath private tables have row-level-security enabled to stay secure.

tag:blogger.com,1999:blog-8128983.post-9074250463042710144
Extensions
How to expose all public views in PostgREST/SubZero
postgresqlpostgrestsubzero
Show full content
DO $$
    DECLARE
        schema_name INFORMATION_SCHEMA.views.table_schema%TYPE = 'api';
        views CURSOR FOR select table_name from INFORMATION_SCHEMA.views WHERE table_schema = schema_name;
    BEGIN
        FOR view_record IN views LOOP
                EXECUTE 'grant select, insert, update, delete on ' || schema_name || '.' || view_record.table_name || ' to anonymous;';
            END LOOP;
    END$$;

Will expose all views from the api public schema in the generated swagger/openapi specification from PostgREST/SubZero. Of course, ensure that all underneath private tables have row-level-security enabled.

tag:blogger.com,1999:blog-8128983.post-4463190654947865280
Extensions
Validate an openapi or swagger API definition from a Gitlab-CI test step
cigitlab-cinodejsopenapiswagger
Show full content

Lets say you've built $BUILD_IMAGE container image at the build step. I did it on a NodeJS based project but it will work with other technology as well.

check-openapi-contract:
  stage: test
  retry: 1
  timeout: 15m
  script:
    - docker run --name=my-container -d -i -p 8080:8080 --rm $BUILD_IMAGE npm start
    - bash -c 'while [[ "$(curl -s -o /dev/null -w ''%{http_code}'' localhost:8080/swagger.json)" != "200" ]]; do sleep 5; done'
    - docker exec -i my-container curl http://localhost:8080/swagger.json -o ./swagger.json
    - docker exec -i my-container npx swagger-cli validate ./swagger.json

So what do we do? We start the server, then retrieve the swagger.json or openapi.json and leverage swagger-cli validate command to ensure our definition is valid and be notified if it is not. Nothing. More.

tag:blogger.com,1999:blog-8128983.post-8392711228591327795
Extensions