GeistHaus
log in · sign up

Nathan Friend

Part of Nathan Friend

Remote Software Engineer at Stripe and cellist based out of Ontario. Previously at GitLab. Fascinated with building usable, delightful software.

stories primary
Useful things I’ve 3D printed
3D printers are ridiculously cool. There’s something about seeing a digital object slowly manifest in the real world that is pure magic.
Show full content

3D printers are ridiculously cool. There’s something about seeing a digital object slowly manifest in the real world that is pure magic.

But they’re also useful. Being able to custom manufacture replacement parts can save otherwise perfectly-working equipment from the landfill.

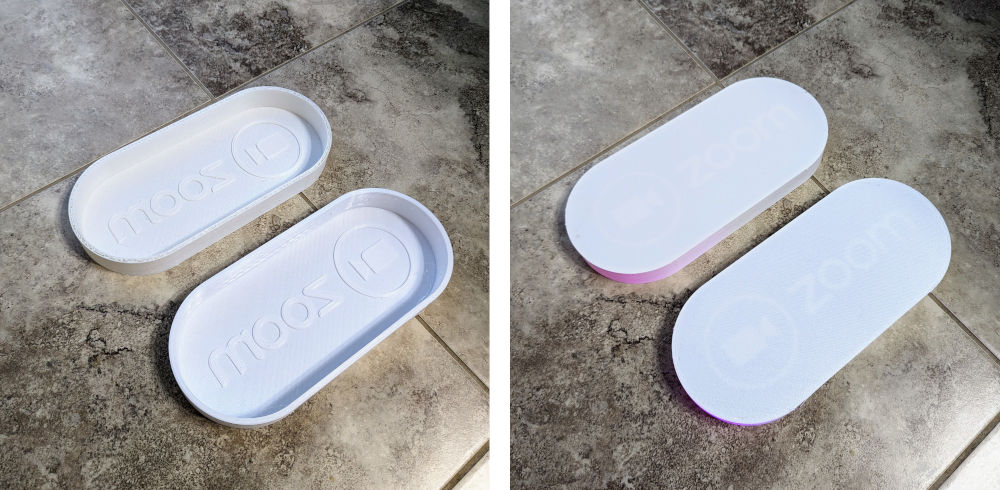
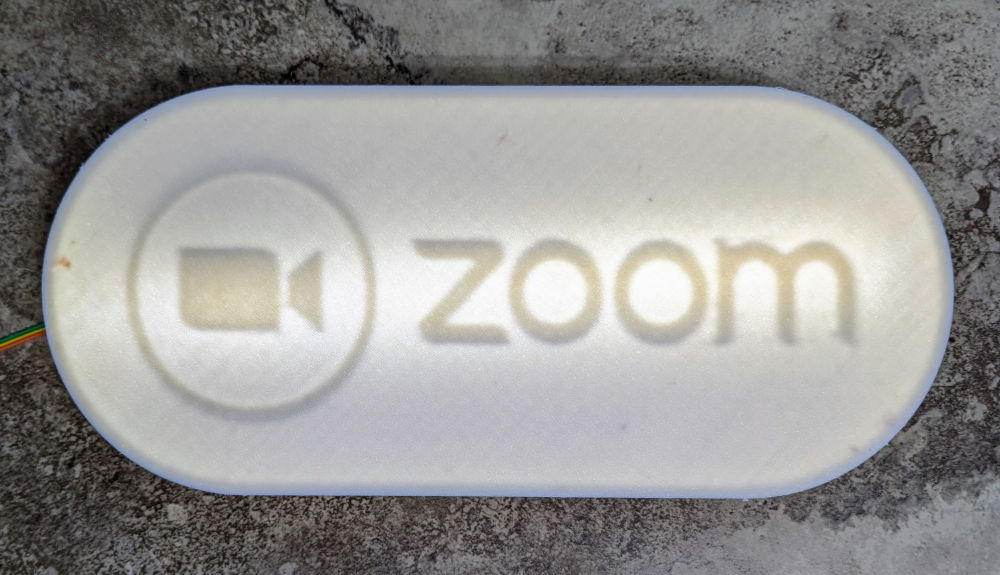
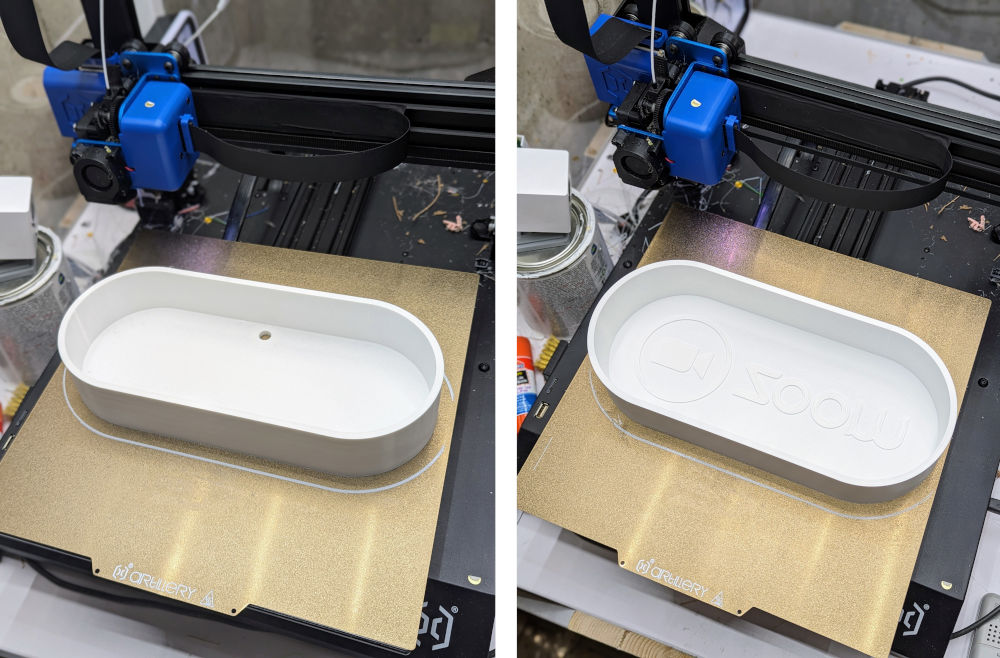
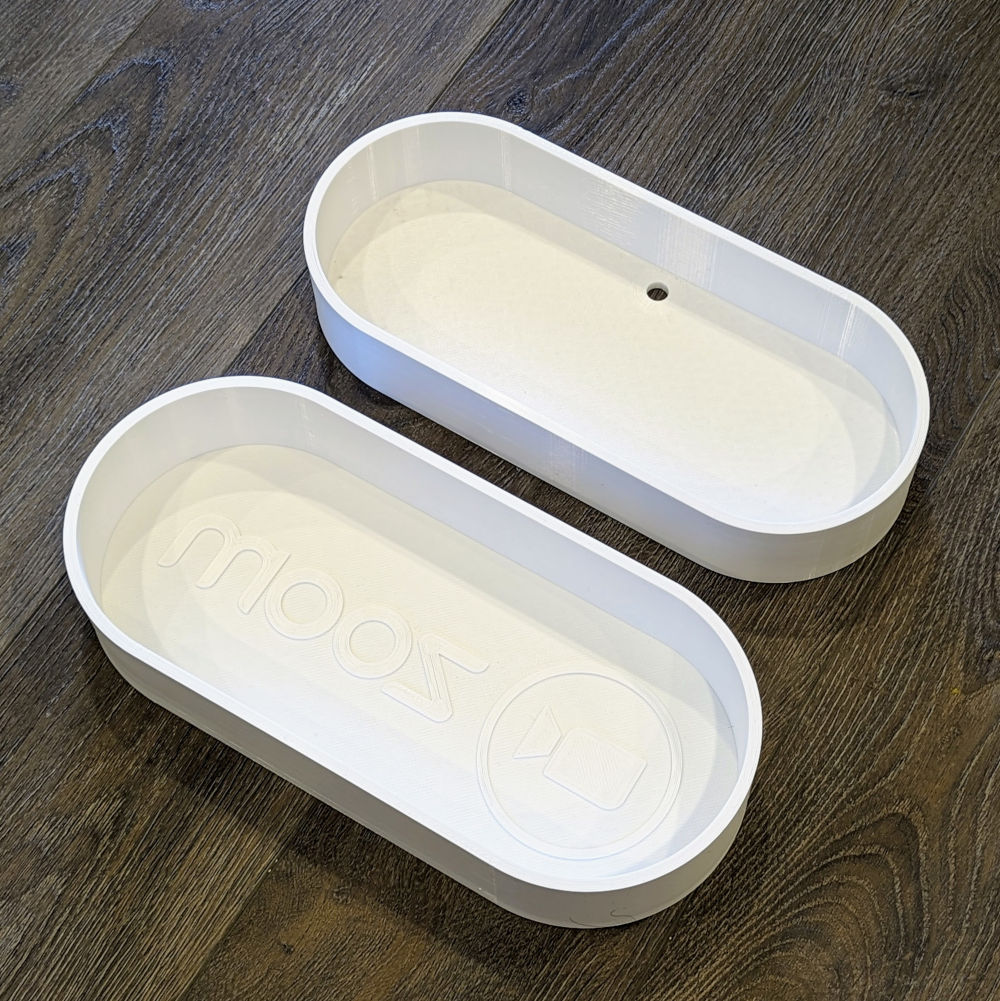
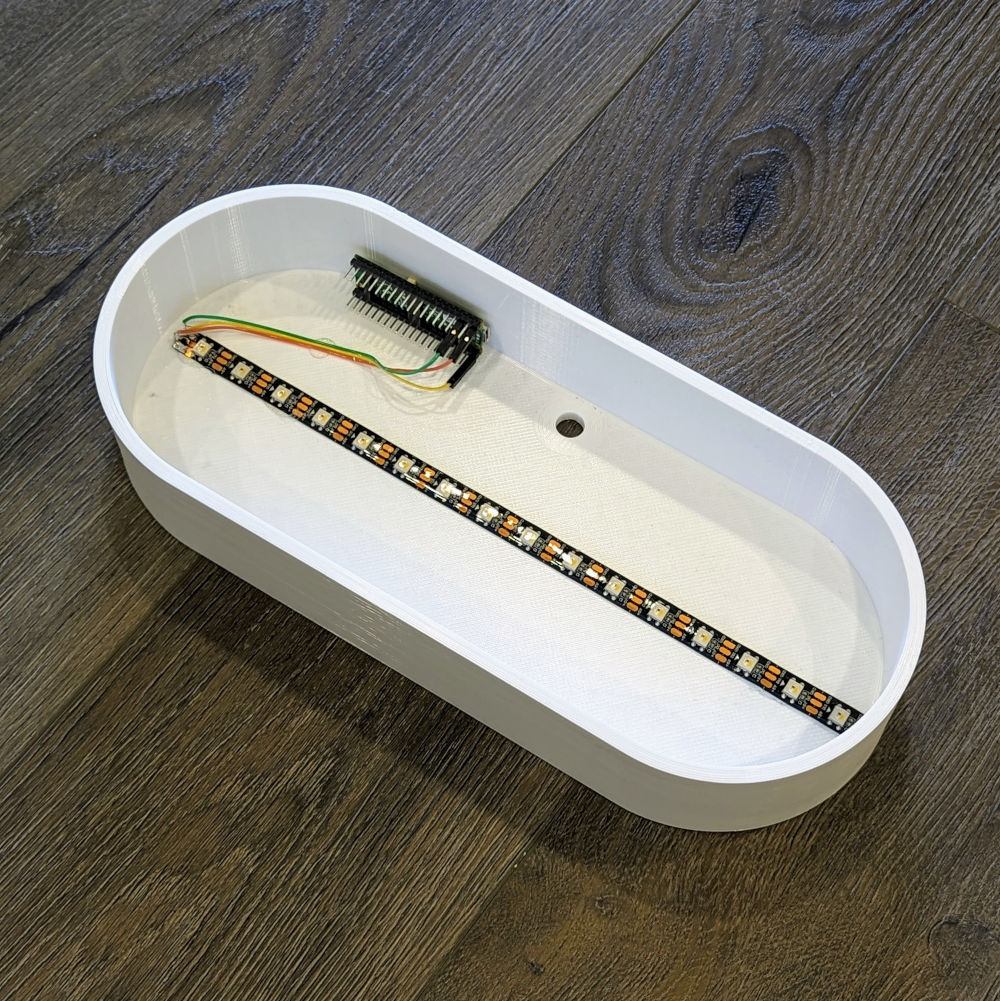
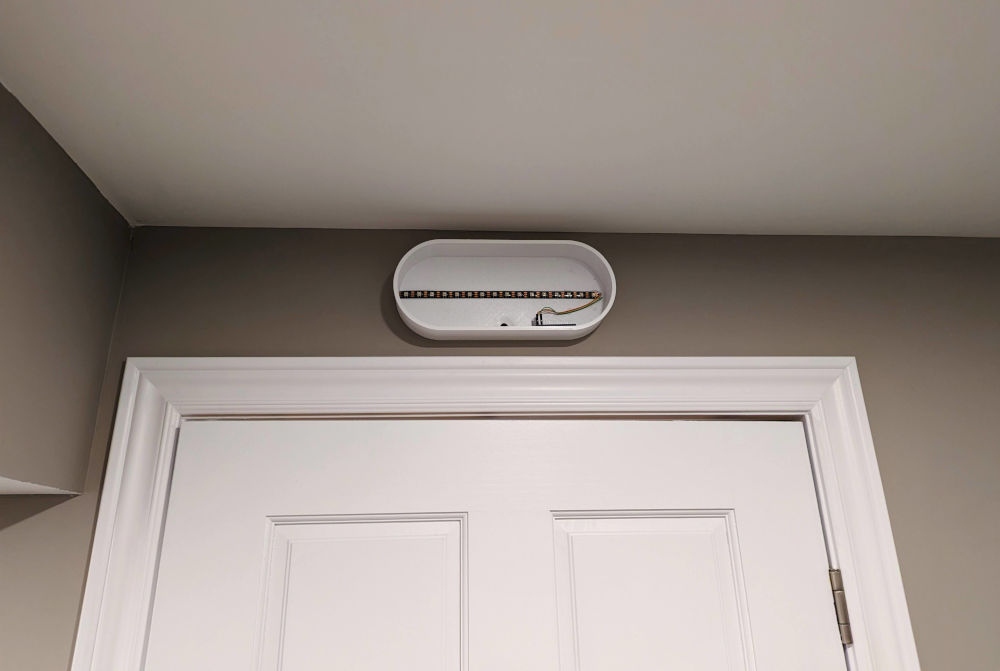
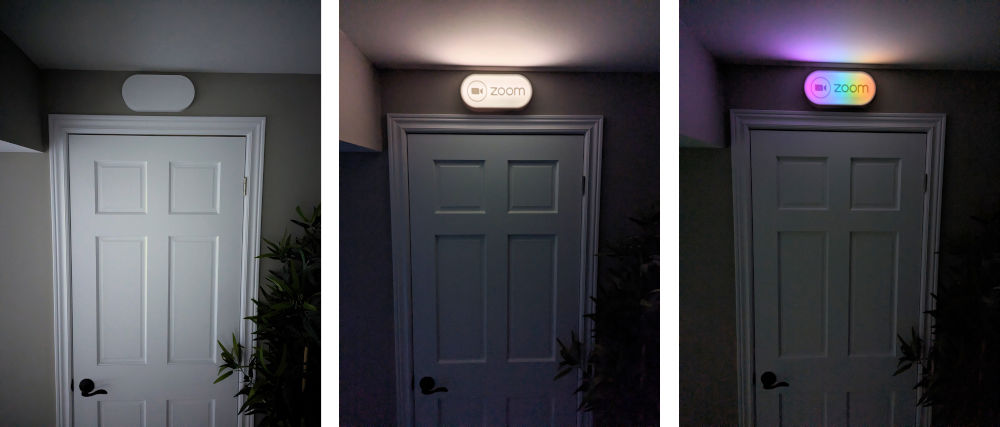
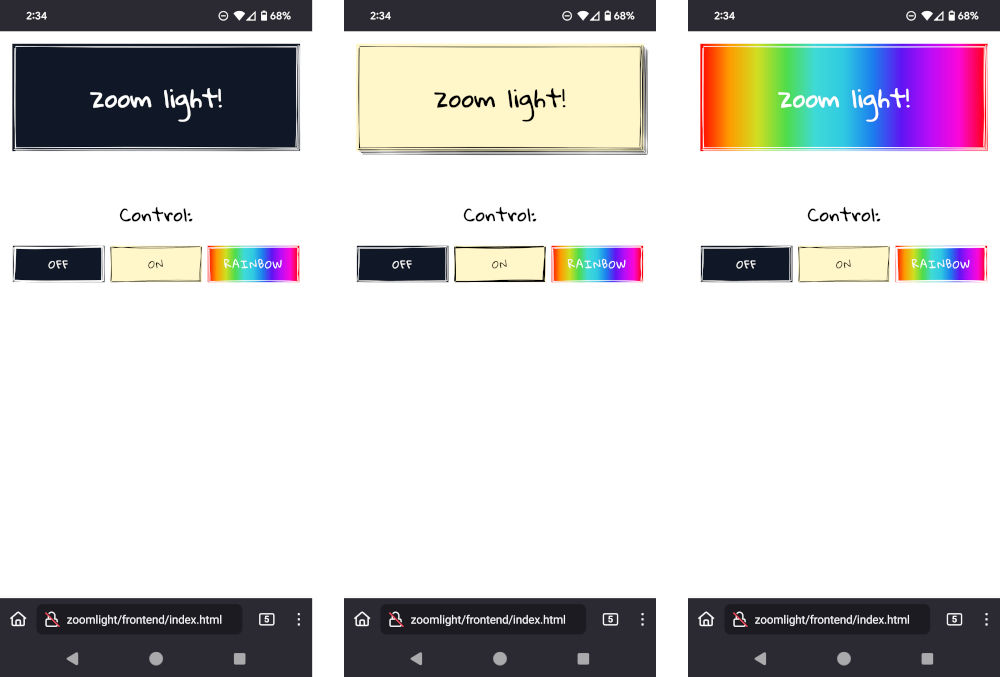
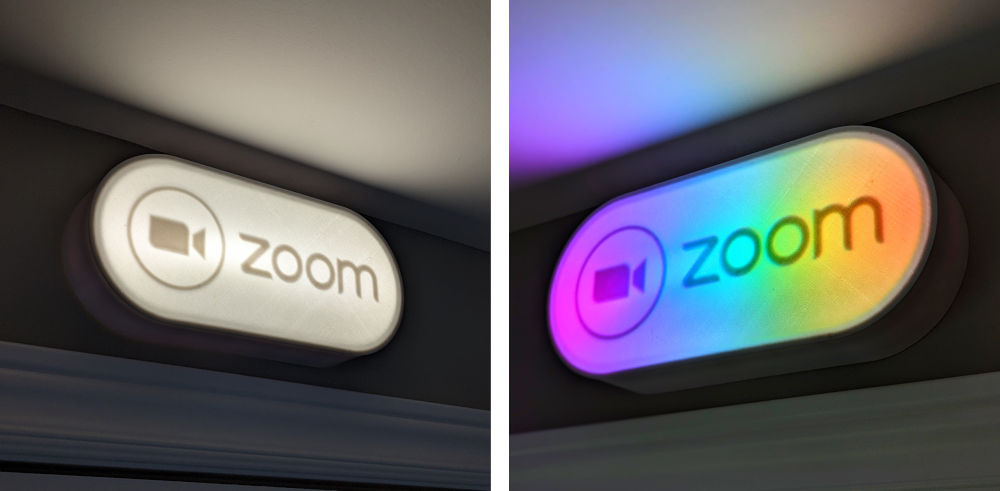
I’ve written before about some of the things I’ve 3D printed, including my Zoom light and my weird keyboard; here are some other useful things I’ve printed:
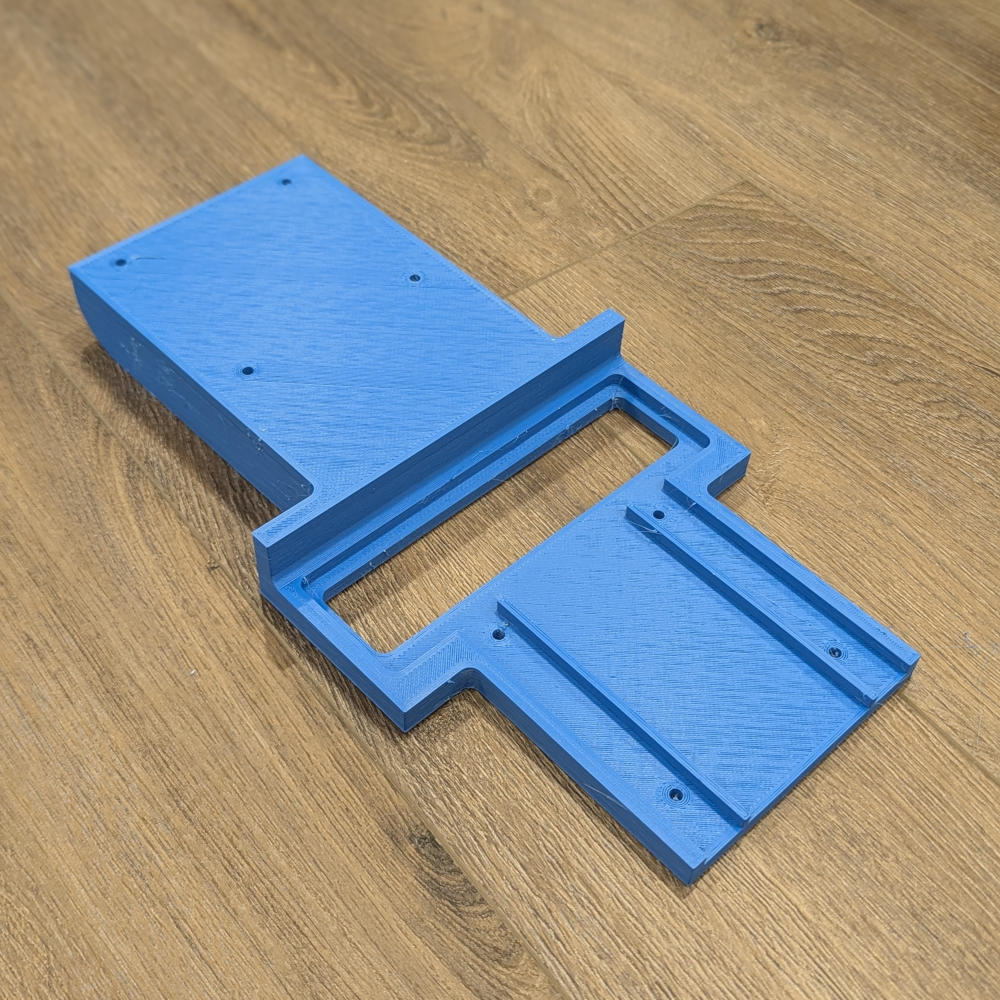
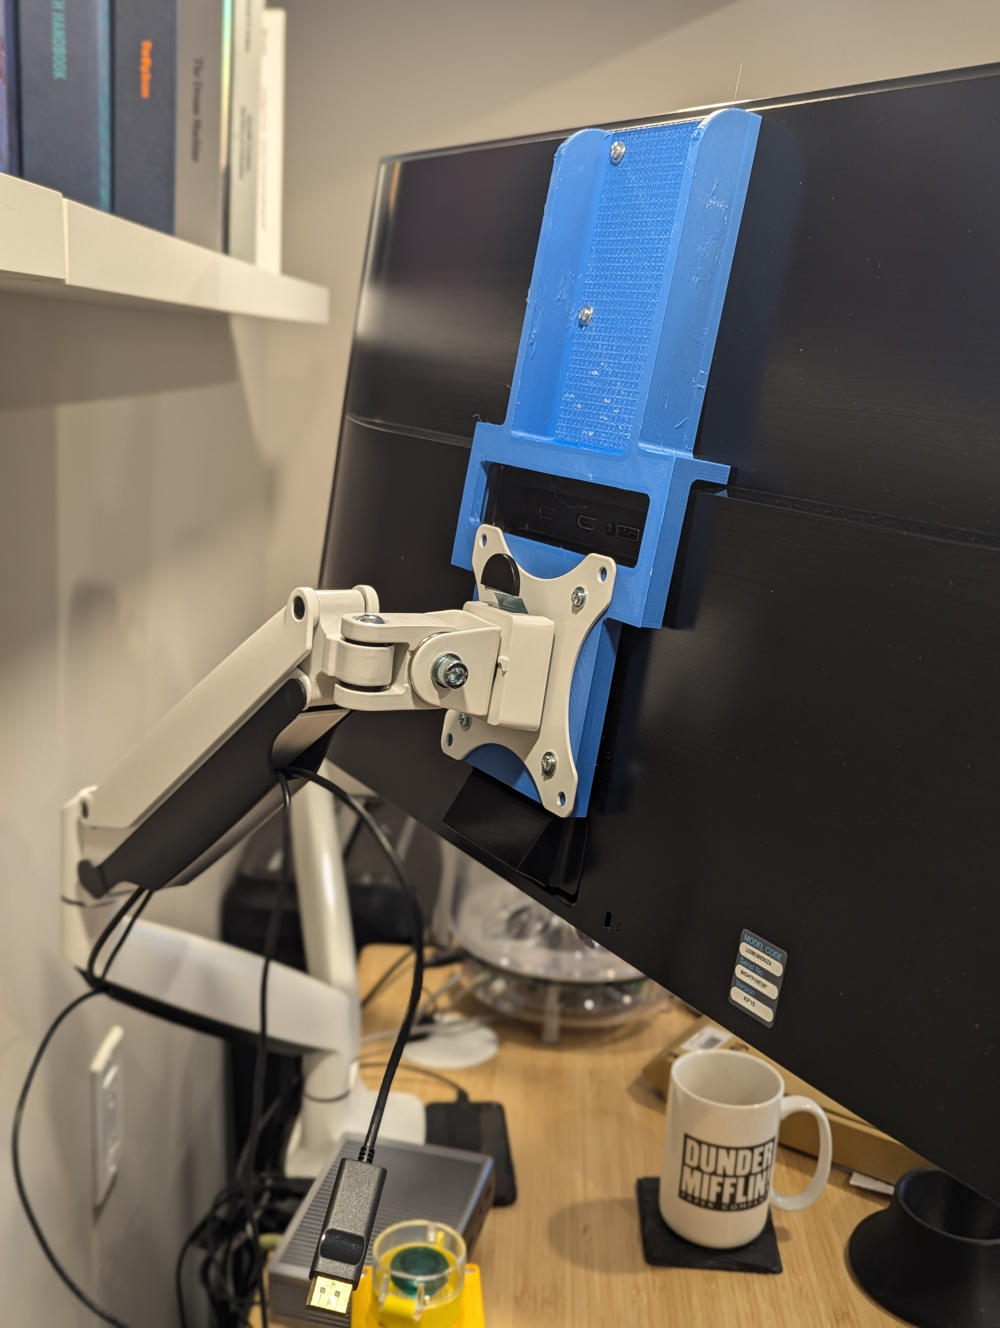
Monitor arm adapter

My main monitor - a Samsung U28E590D - has a terrible design flaw. Its VESA mount is at the very top of the monitor! This means that when connected to my monitor arms, it sits much too low, even with the arm at its maximum height.

While searching for solutions, I ran across this adapter, which effectively moves the VESA connection near the bottom of the monitor. Sadly, I couldn’t find a way to purchase it in Canada. So I decided to design and print my own!

I originally printed the adapter in PETG, as PETG is strong and flexible and usually a better choice for functional prints. However, it was a little too flexible - it caused my monitor to bounce around in a sickening way whenever I bumped my desk. I printed another in PLA (unfortunately the only color I had in enough quantity was a bright blue), which is much stiffer and has mostly eliminated the wobble.

The adapter, printed in blue PLA
The adapter, attached to my monitor
Attached to the monitor and arm
An image of my monitor without my 3D printed adapter
My workspace post-adapter. The monitor now sits comfortably at eye-level.

Thingiverse link: https://www.thingiverse.com/thing:6845708

SodaStream bottle stabilizer

I drink way too much carbonated water, usually straight from the SodaStream bottle. The bottles look cool, but their tiny bases resulted in many a messy spill.

A SodaStream bottle
The very stylish and tippable SodaStream bottle

I modeled a base using the exact curvature of the bottle’s bottom, resulting in a nearly untippable receptacle.

The 3D-printed SodaStream bottle holder
The curvature exactly matches the shape of the SodaStream bottle
The SodaStream bottle in the holder
100% less tippage

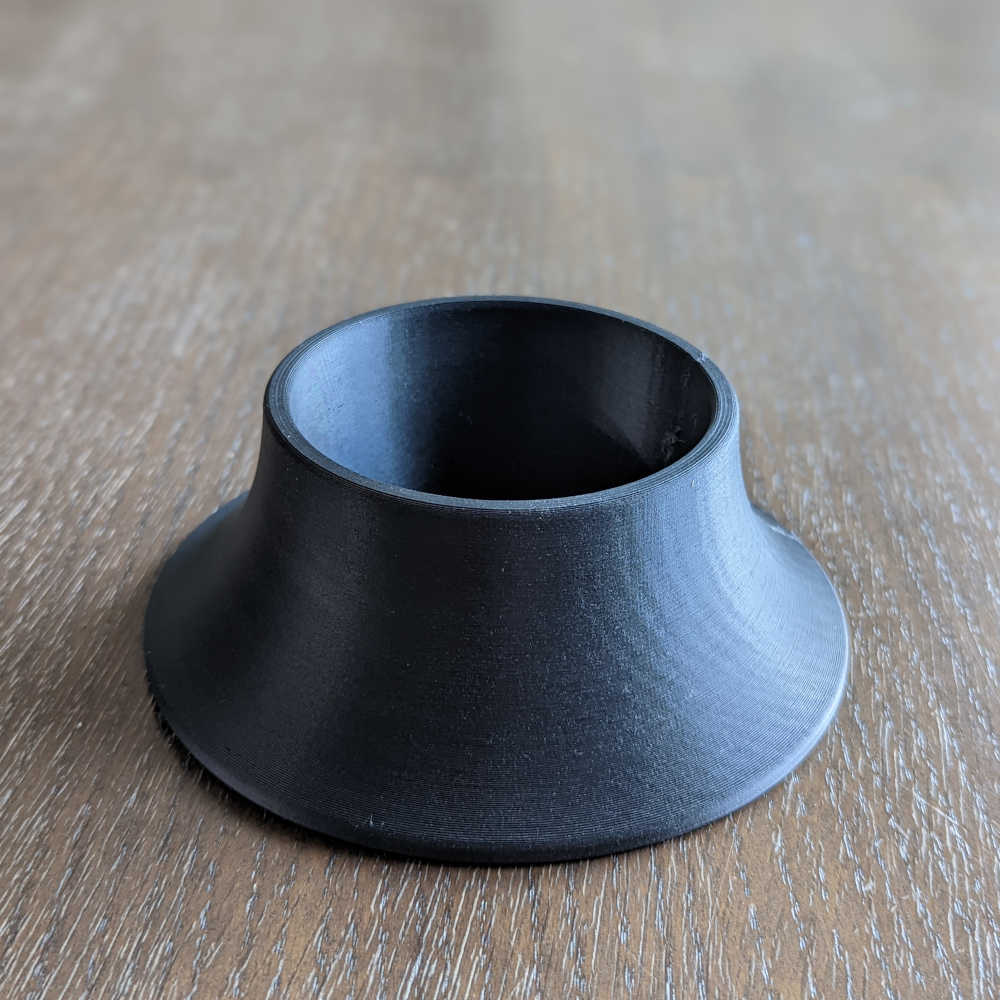
As silly as it sounds, this simple print might be the most-used 3D printed object in my house.

Thingiverse link: https://www.thingiverse.com/thing:5422282
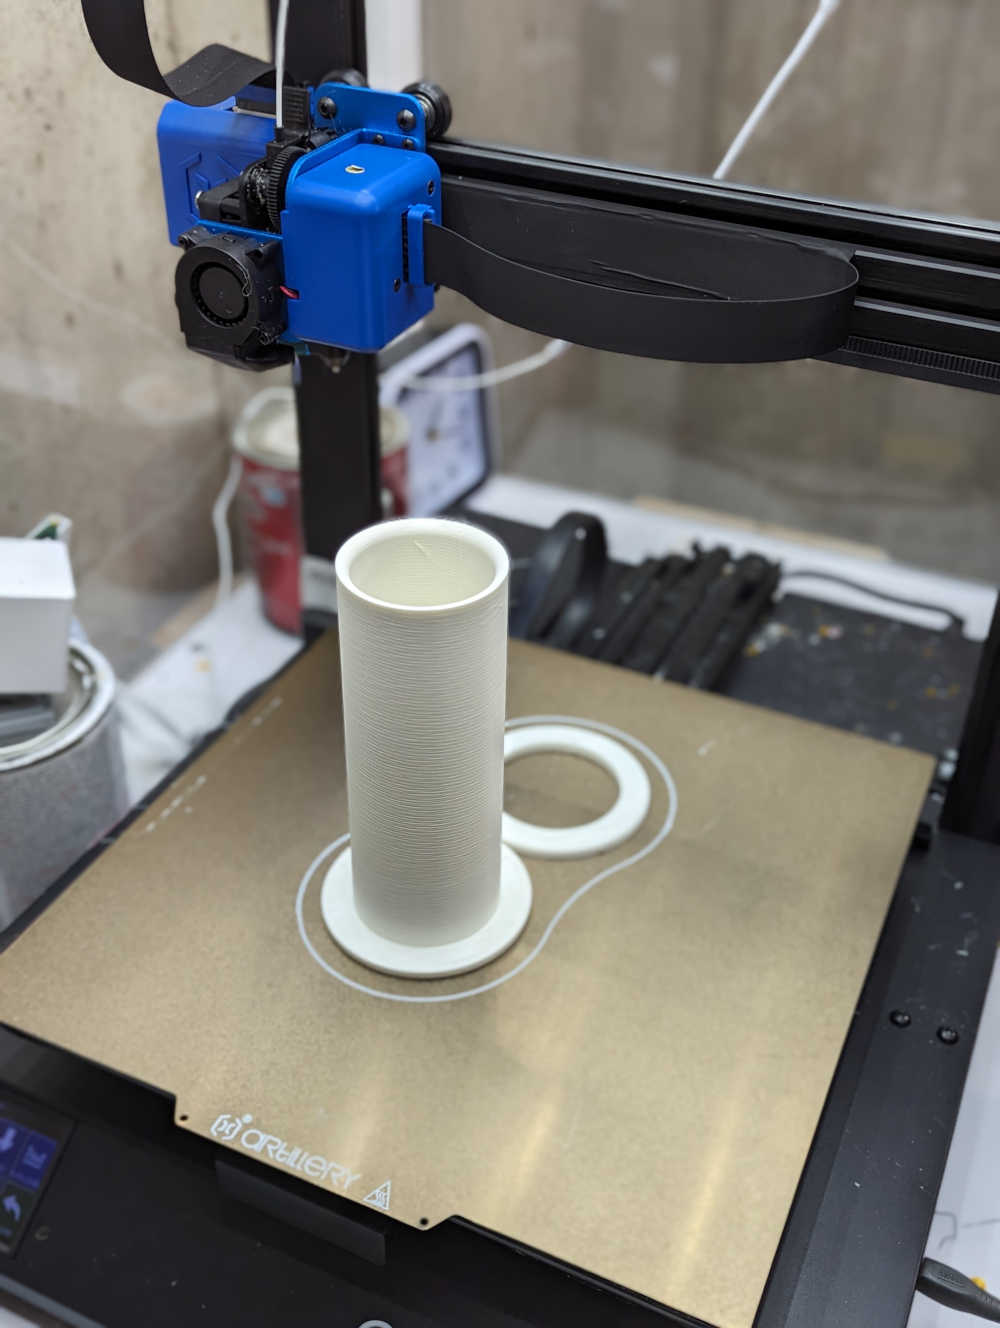
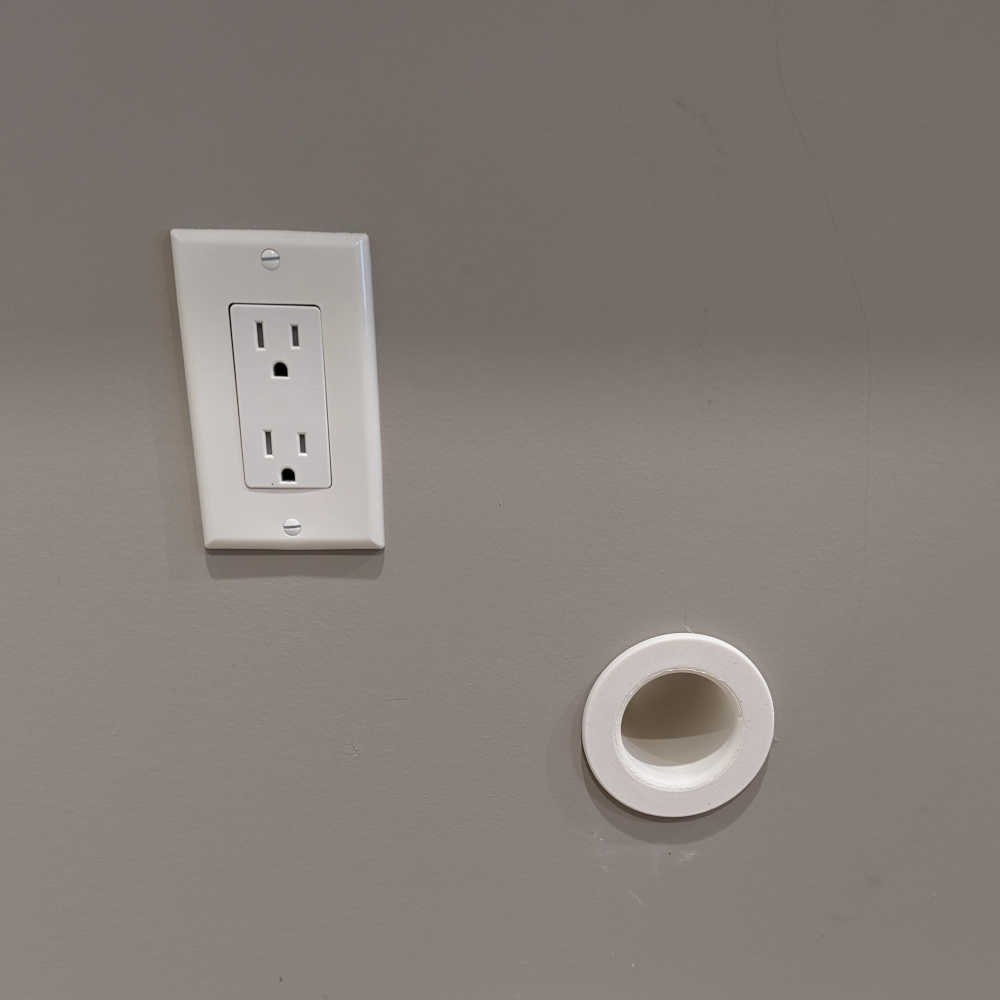
Conduit cover

When we finished our basement, I installed a conduit in the wall with the idea that maybe someday I’d set up a ceiling-mounted projector and need a clean way to route the cables.

The conduit in the wall, before drywall was installed

This left some unseemly holes in our wall once the drywall was in place:

A hole in the drywall where the conduit opens
The opening of the conduit in the ceiling

I modeled and printed covers for each end of the conduit:

The conduit cover in place
The cover in place
The second conduit cover in place
The floor version

They weren’t the cleanest prints, but it’s a huge improvement over the previous look!

Thingiverse link: https://www.thingiverse.com/thing:6847090
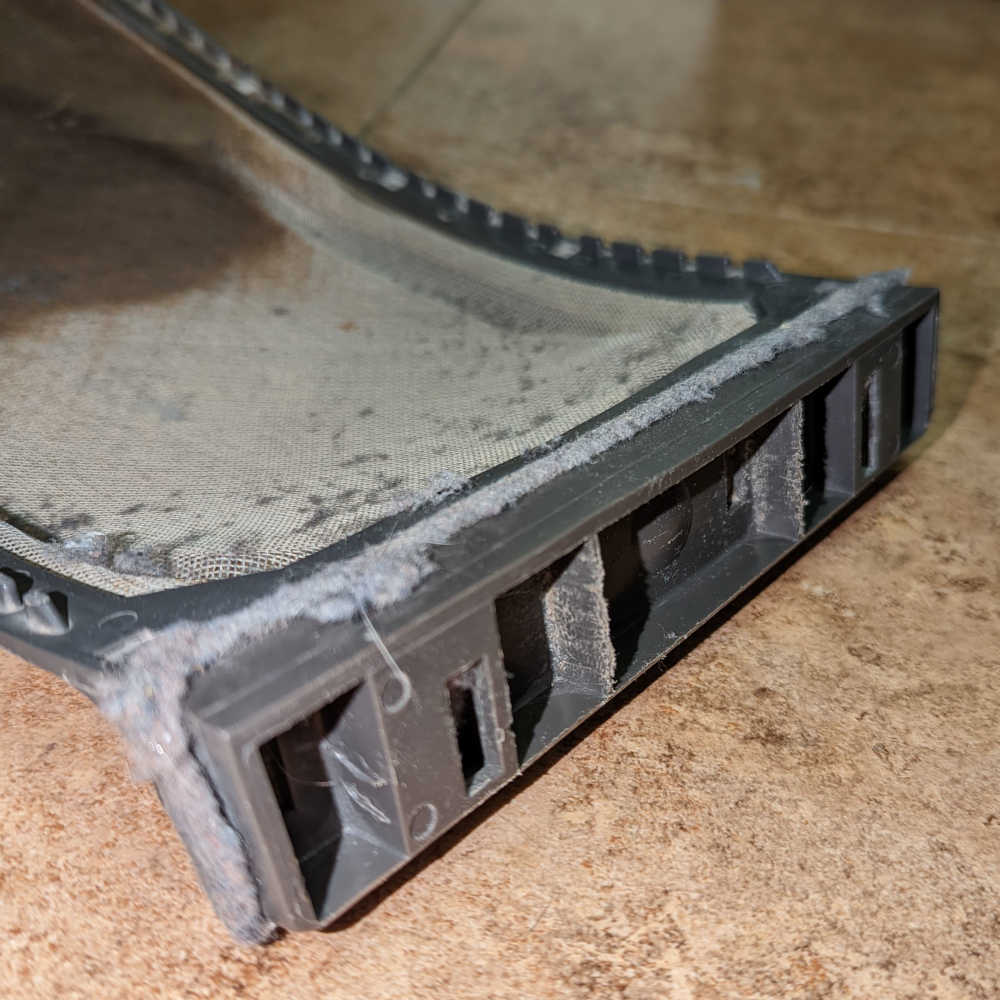
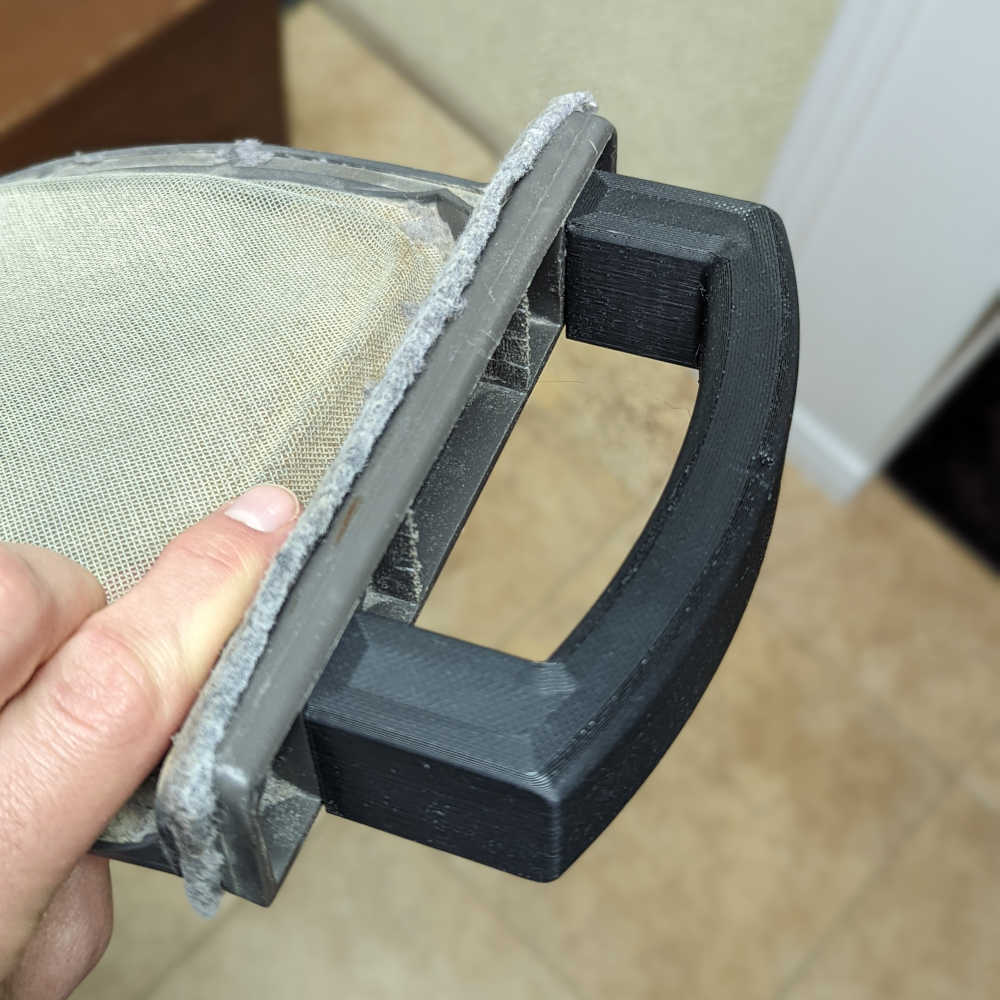
Dryer lint filter handle

One of my earliest functional prints was a new lint filter handle for my in-laws’ ancient dryer. The original handle had snapped off years ago and they had been using pliers to pull it out since then!

The lint filter without a handle
The broken lint filter
The lint filter with a handle
All fixed!

Thingiverse link: https://www.thingiverse.com/thing:6847164
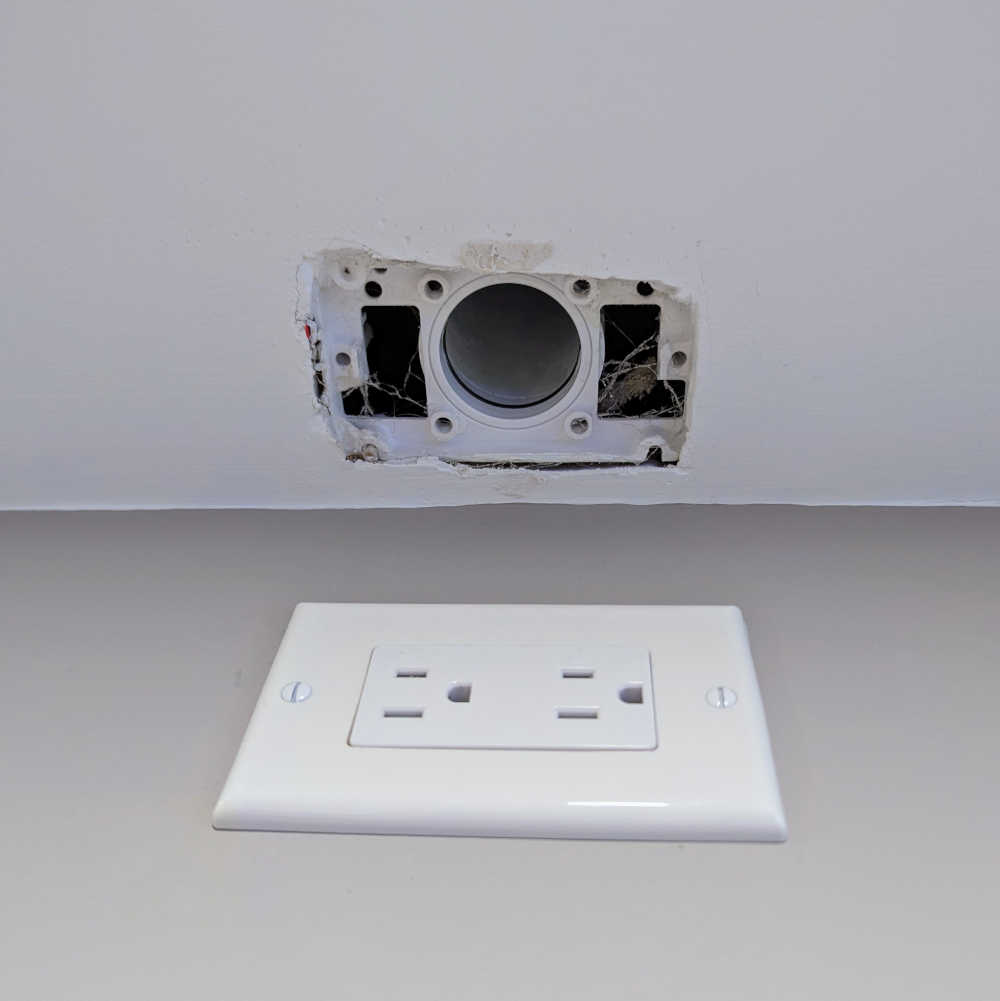
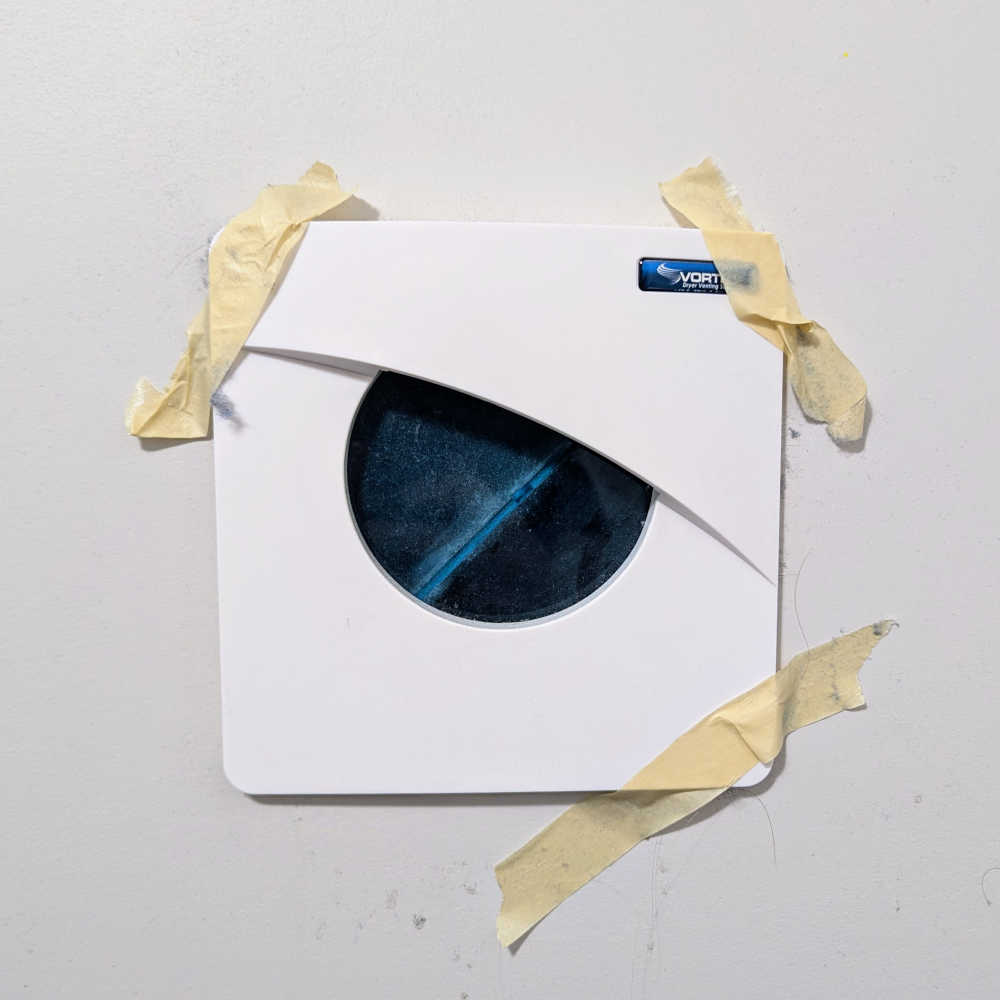
Dryer lint trap seal

We had our laundry room drywalled, and as part of this work, the contractor installed this terrible in-wall lint trap. Why is it so terrible? It has no latch, so every time the dryer starts, the filter pushes out of the wall, filling the room (and the entire house) with dryer lint dust!

I tried gluing some magnets to both the wall and the filter, hoping this would keep it in place, but the magnets were too finicky and didn’t hold it flush against the wall. In the end, we just taped it to the wall, which only kind of worked.

The original, terrible lint trap
The original lint trap, or as I like to call it, the Dust-o-Matic 3000™

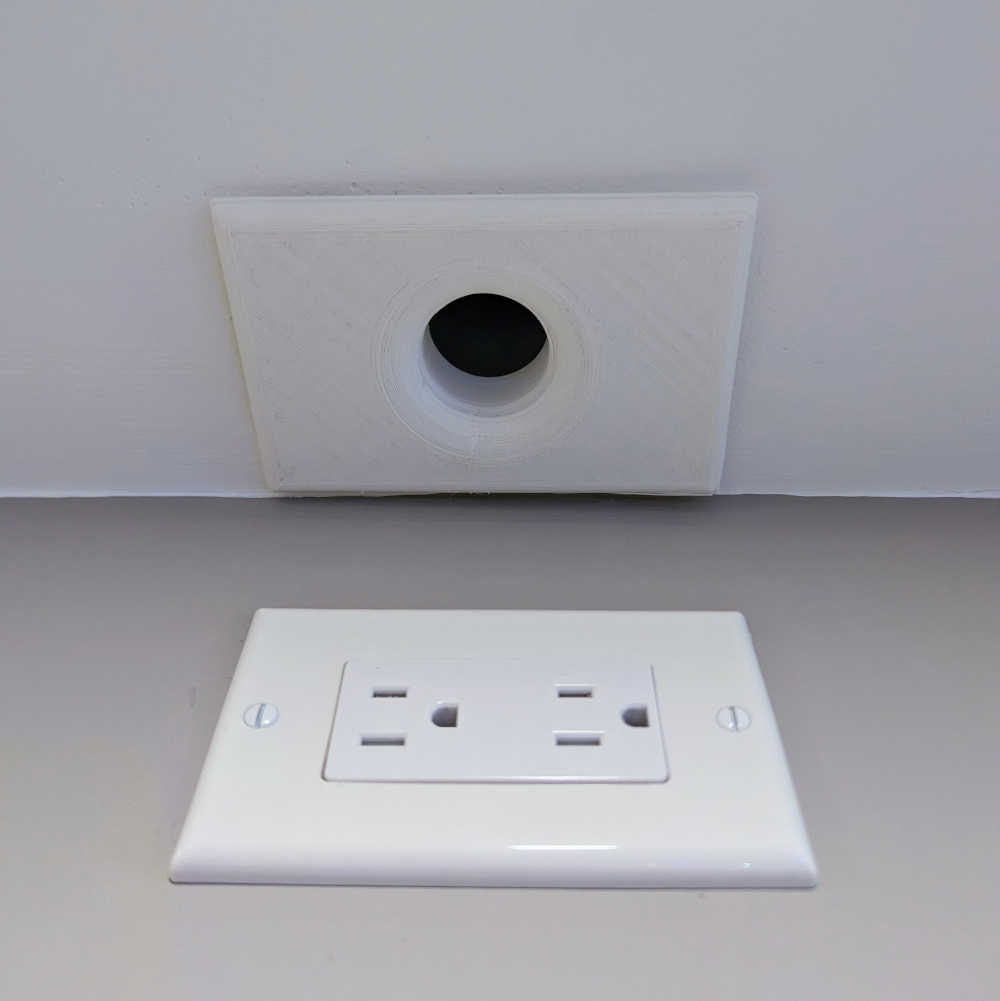
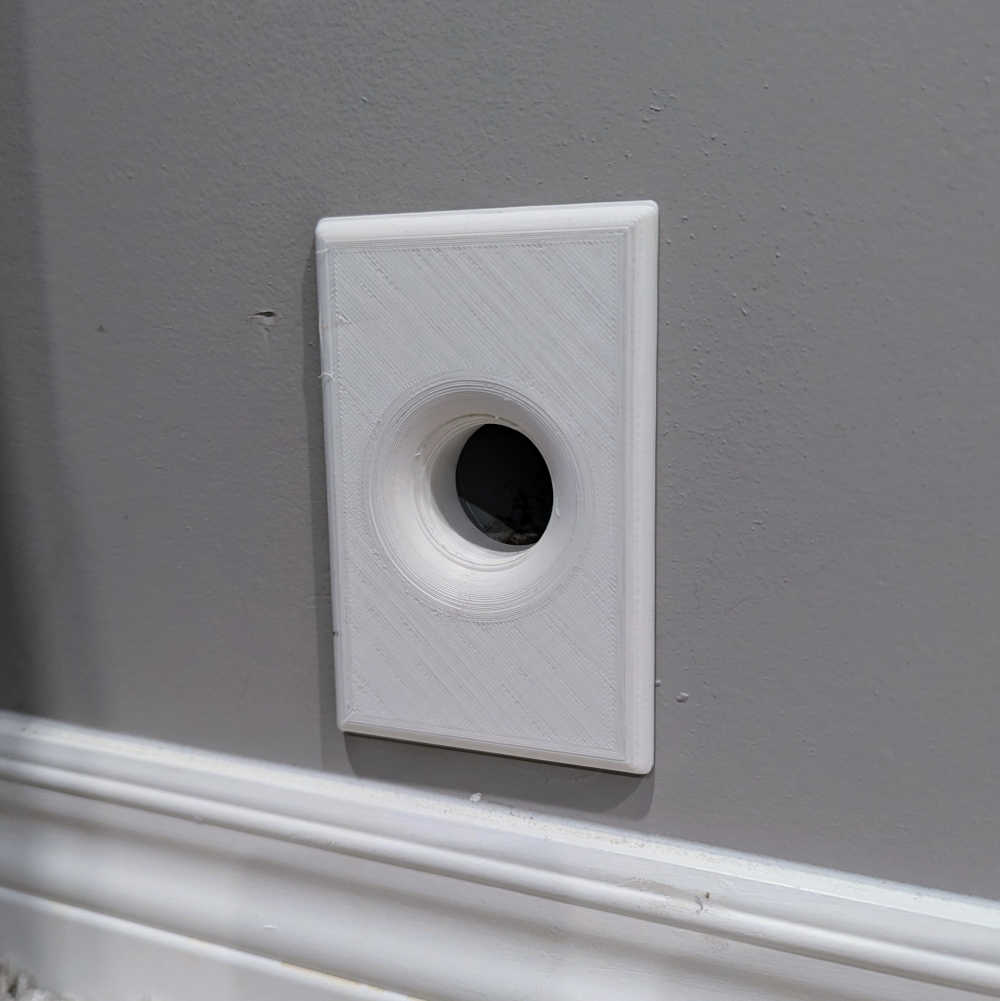
After replacing the tape for the nth time, I resigned myself to a more long-term solution. I designed a mount which I printed in PETG and attached to the wall around the existing filter.

The lint trap with the 3D-printed mount installed
The mount installed around the lint trap

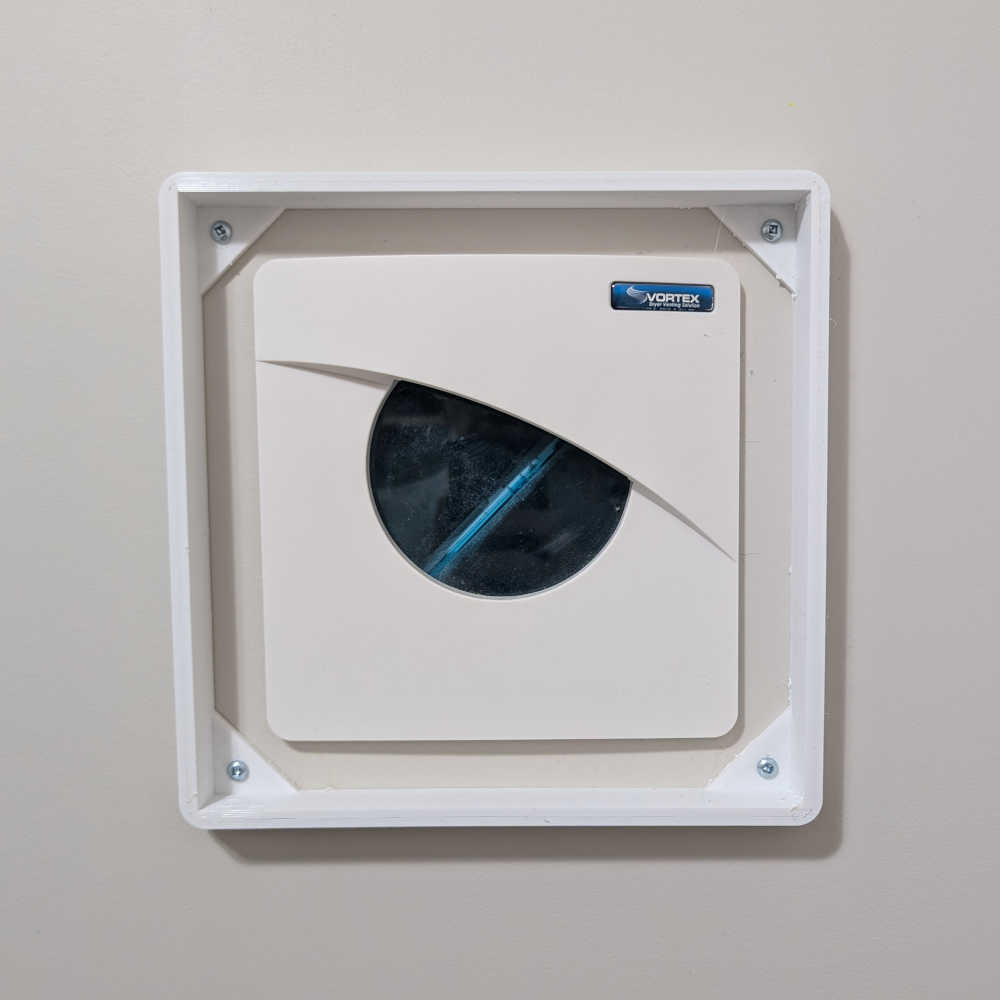
I printed a cover that press-fit over this mount in TPU, a flexible, almost rubbery plastic:

The lint trap with the 3D-printed mount and coverr installed
The cover attached to the mount

Thingiverse link: https://www.thingiverse.com/thing:6876991
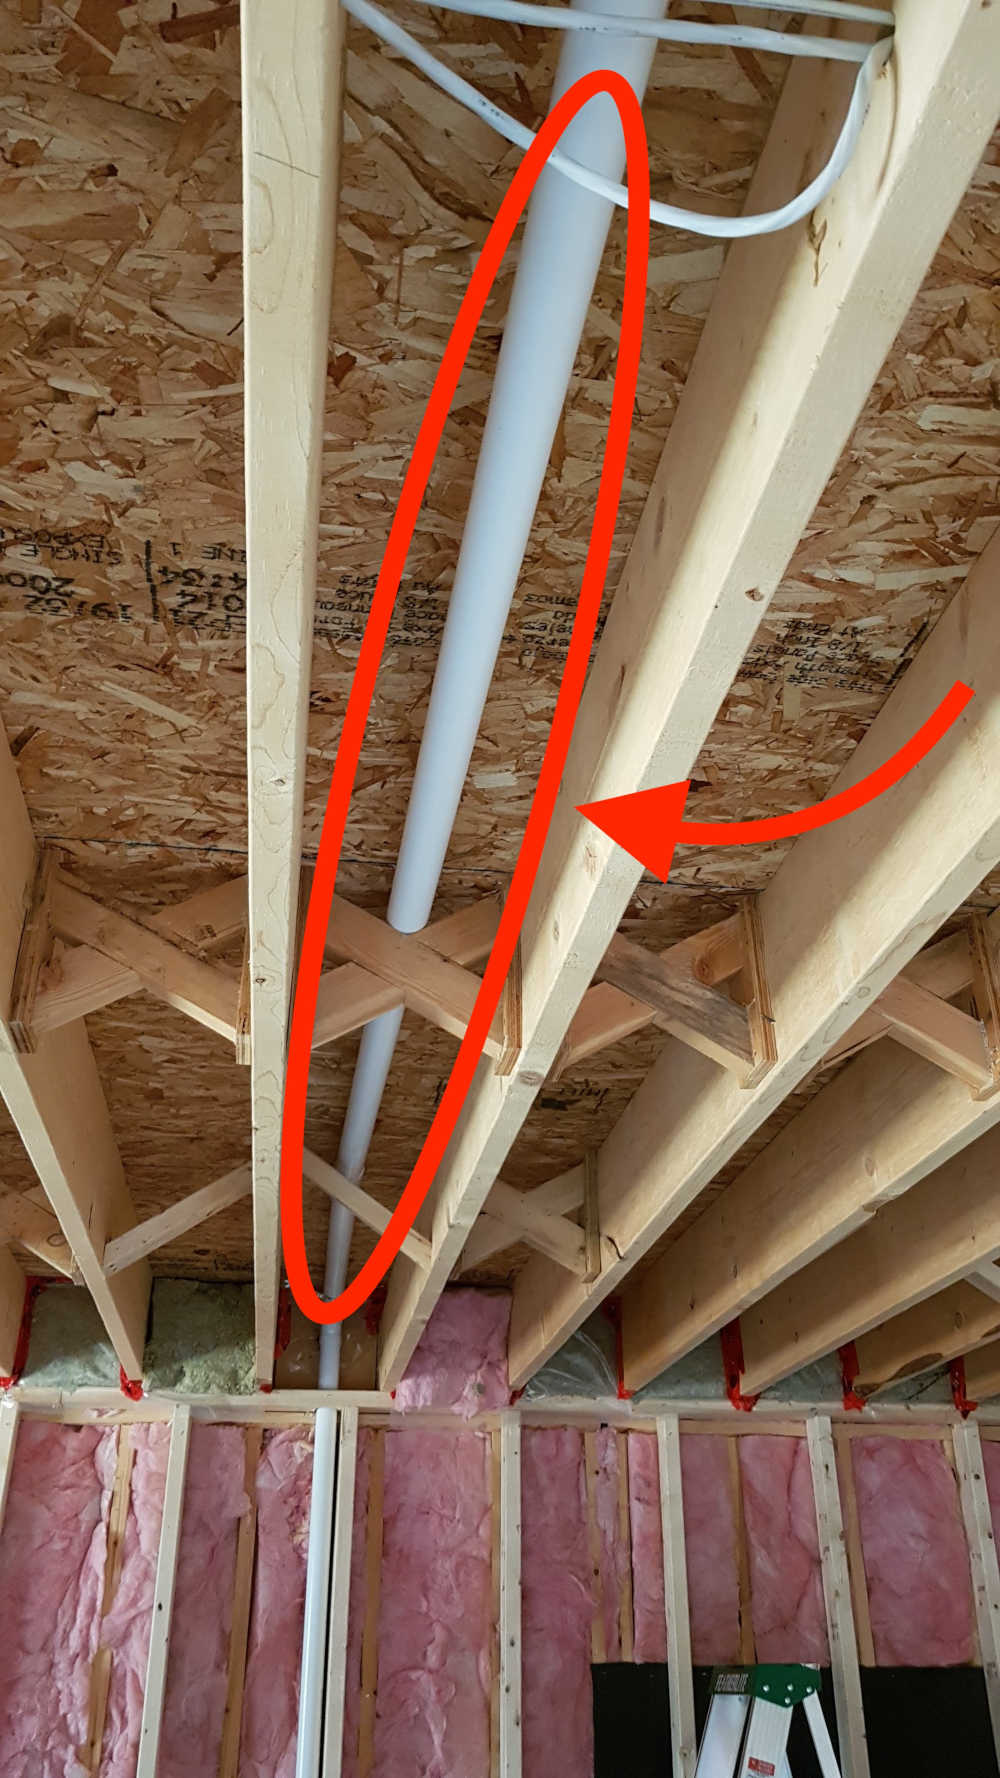
TV wall mount conduit

When I wall-mounted our TV, I wanted a clean look without any visible cables. This involved cutting two holes through the wall behind the TV so that the cables could be run into the storage room behind the wall and then back to the cabinet underneath the TV:

Two holes in the wall, ready for the conduit insert
I let my son help me drill the holes the drywall; I think it was the highlight of his year

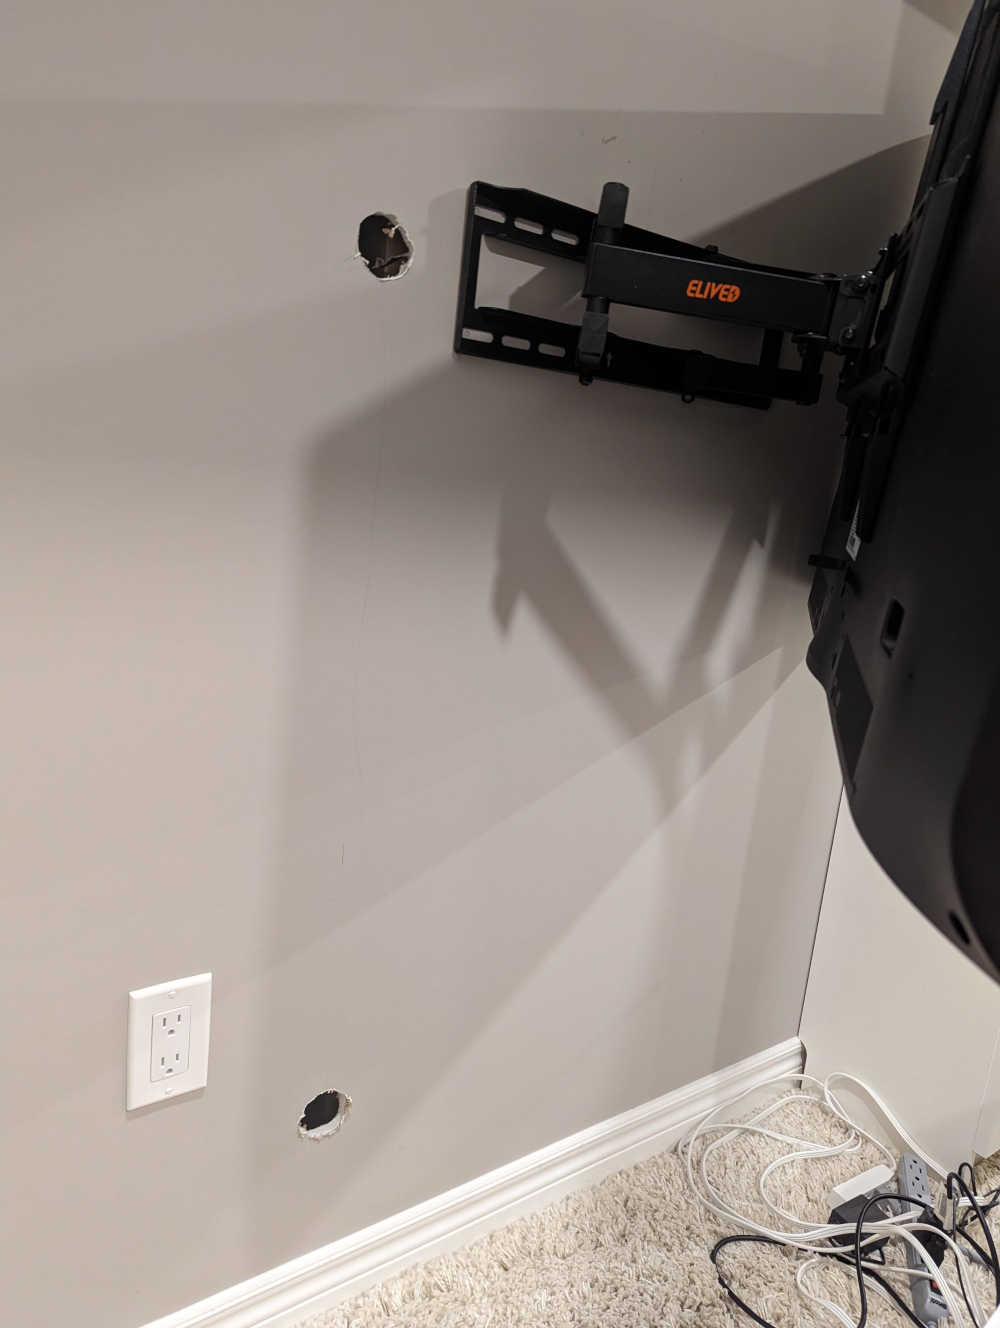
To make this tidier, I printed two conduits that exactly matched the depth of the wall.

The conduit on the 3D printer bed
A conduit and end cap

This made running the cables much easier and cleaner.

The conduit on the 3D printer bed
The conduit installed in the wall

The end result is a floating TV that seemingly requires no power source or video cables!

The TV mounted on the wall, showing a Mario game being played
The end result

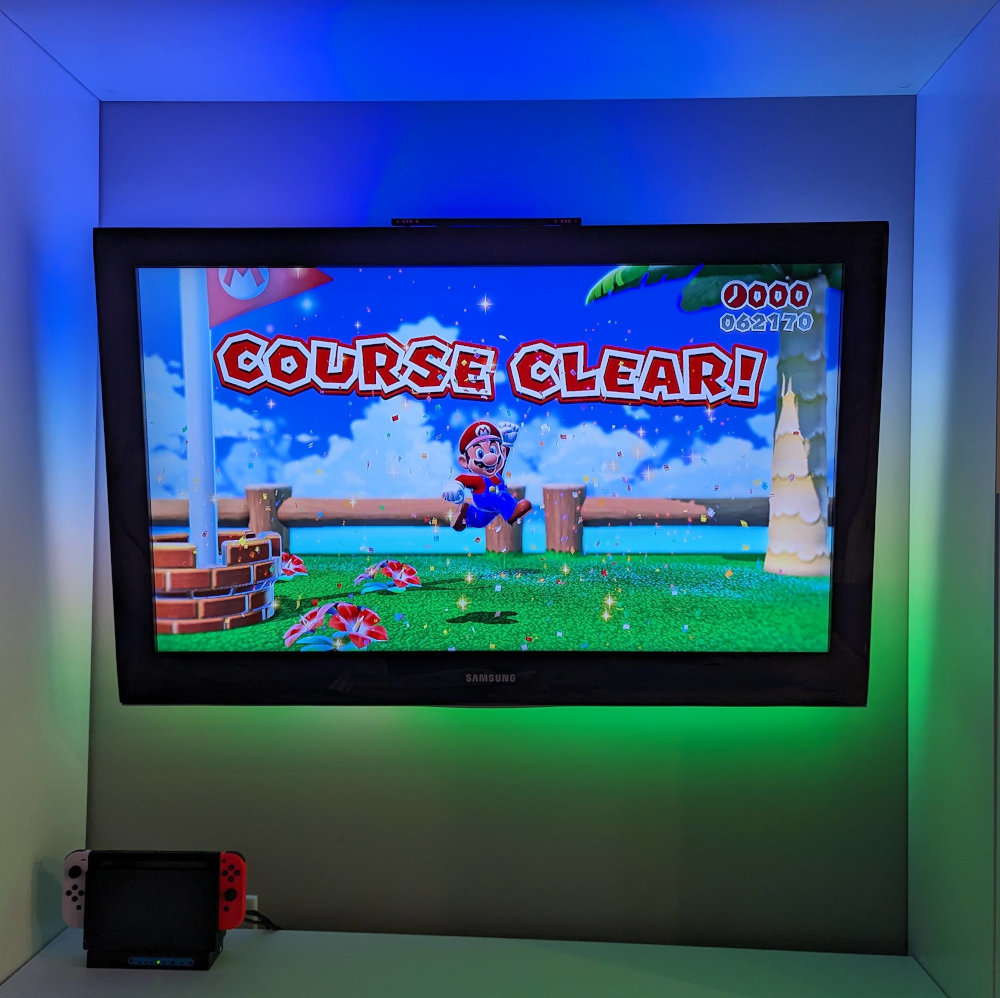
(You might also notice the LED backlighting; this is an ambient lighting setup I installed that is powered by Hyperion, which could be the subject of a blog post of its own!)

3D printer enclosure

I built my own 3D printer enclosure to help stabilize the ambient temperature during prints (especially for plastic prone to warping, like PETG).

A 3D printer enclosure
My printer enclosure

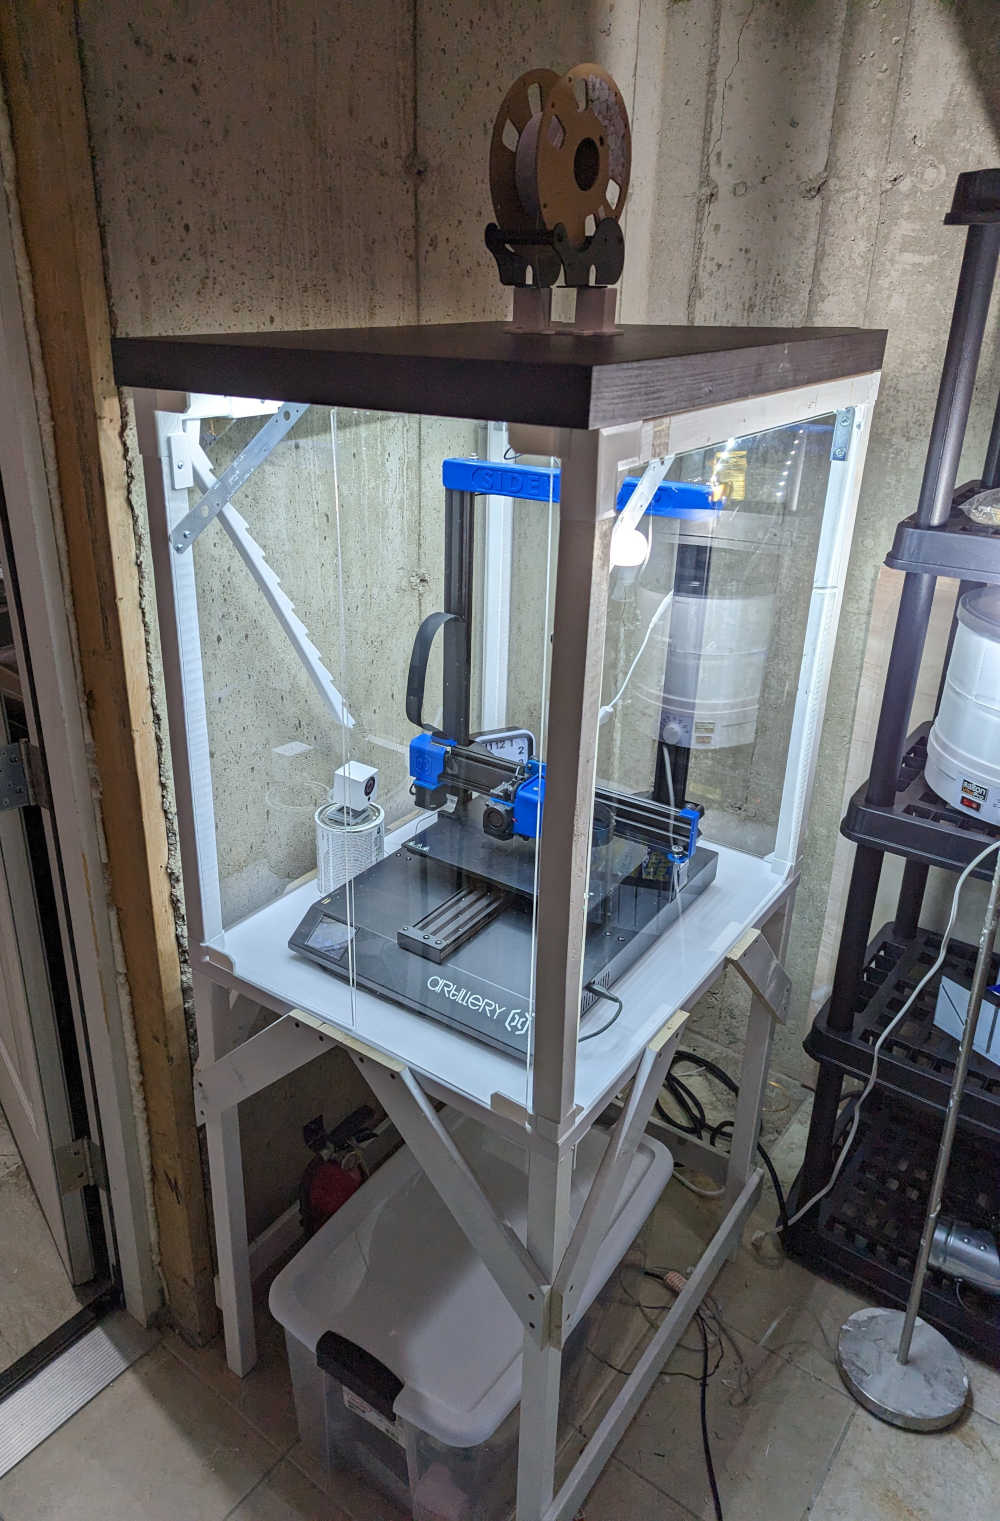
While the structure itself was mainly built from wood scraps, most of the joints, hinges, and other interesting pieces were 3D printed in white PETG.

A 3D-printed hinge
A "print-in-place" hinge (which I did not design)
A variety of 3D-printed parts for the enclosure
Some other various pieces (which I did design)

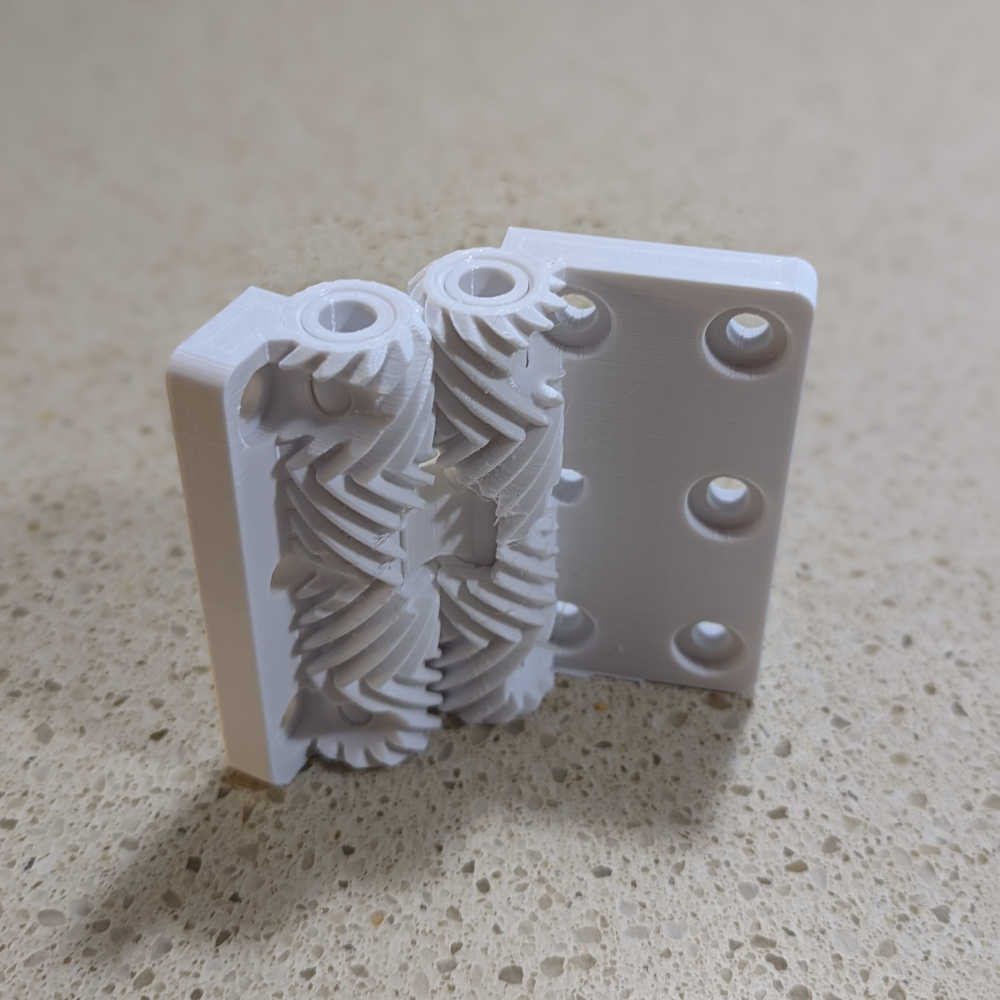
Printables link for the hinge: https://www.printables.com/model/120766-print-in-place-geared-hinge
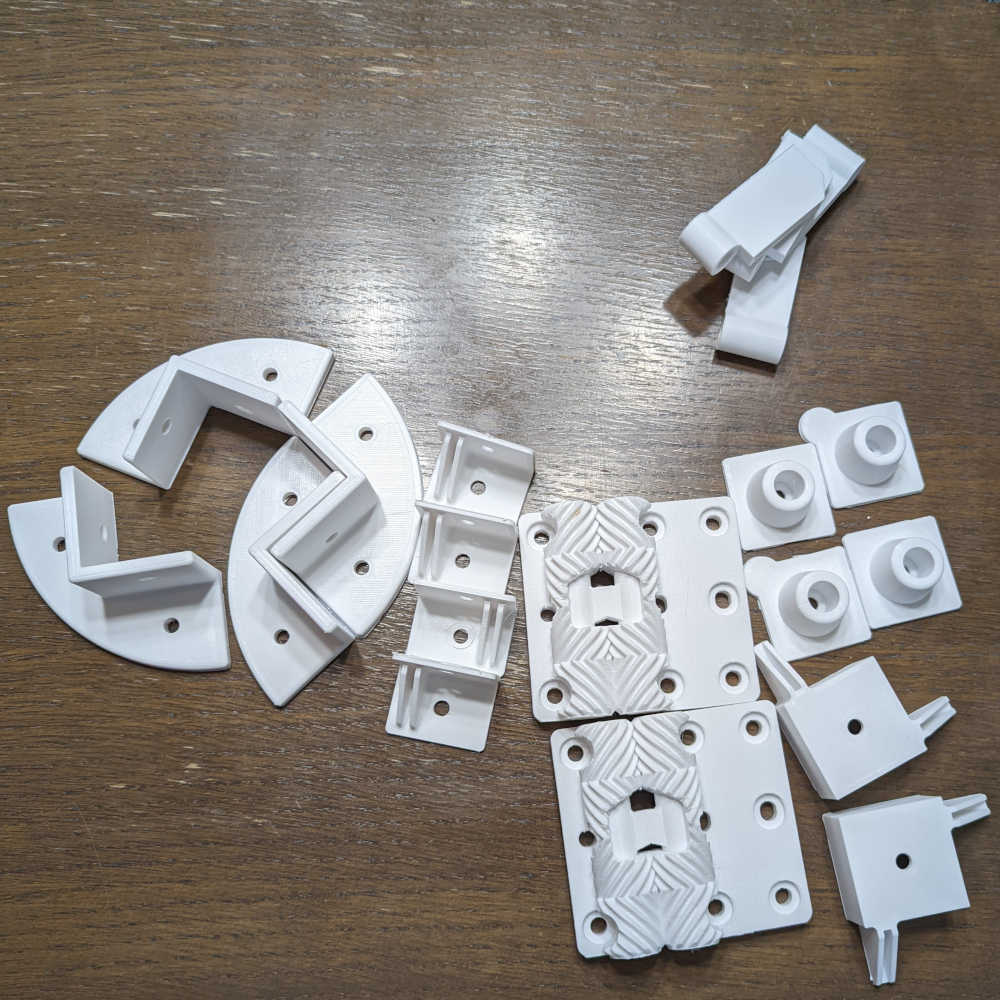
Laptop stand

A friend needed a laptop stand, so I printed him one!

A laptop stand
The stand
A laptop stand with a laptop
The stand, in action

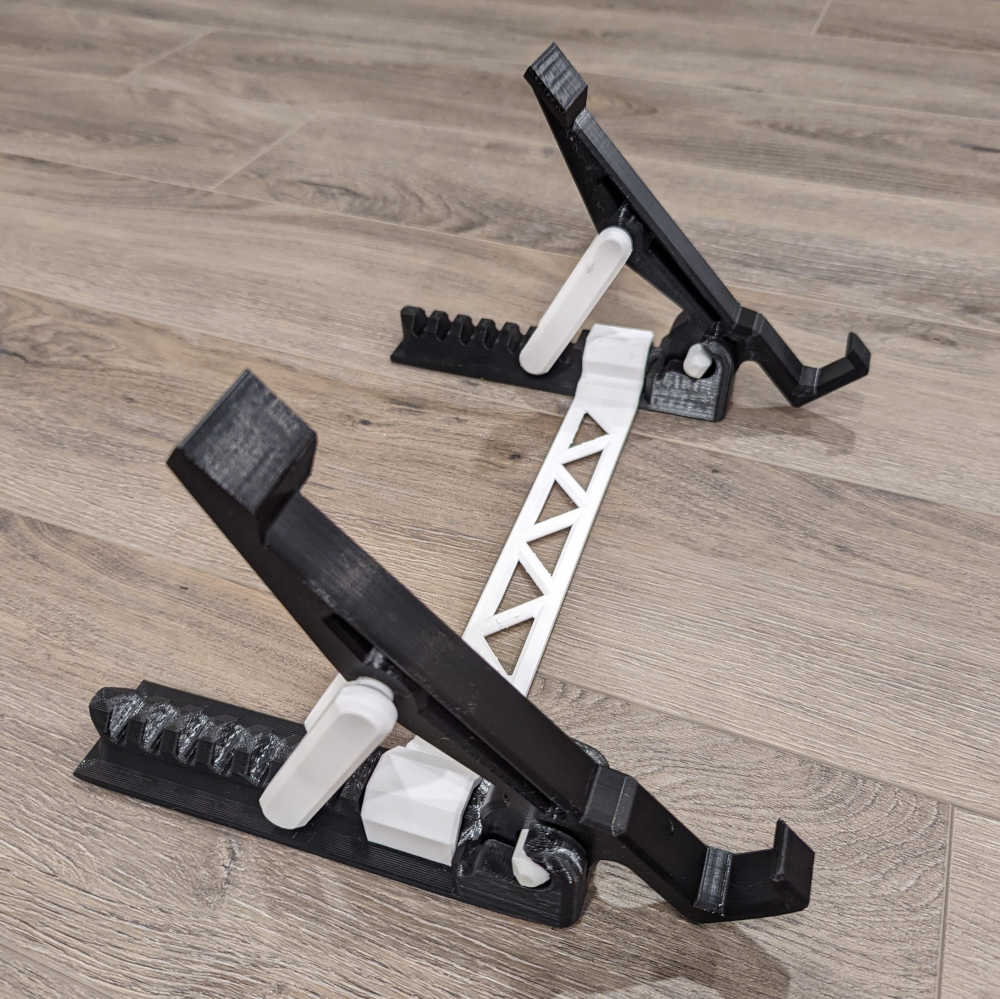
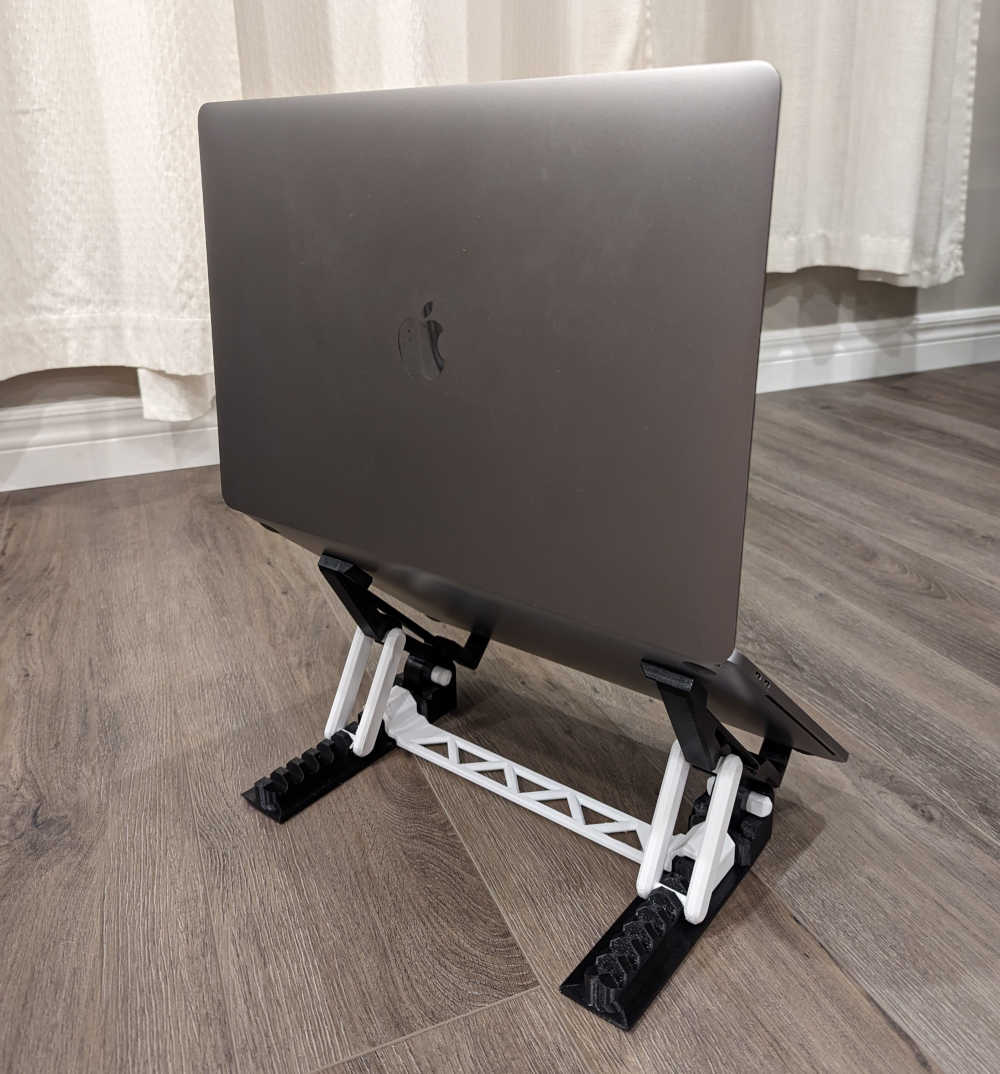
Unlike most of these other models, I didn’t design this one myself; I found it here.

Thingiverse link: https://www.thingiverse.com/thing:3708825
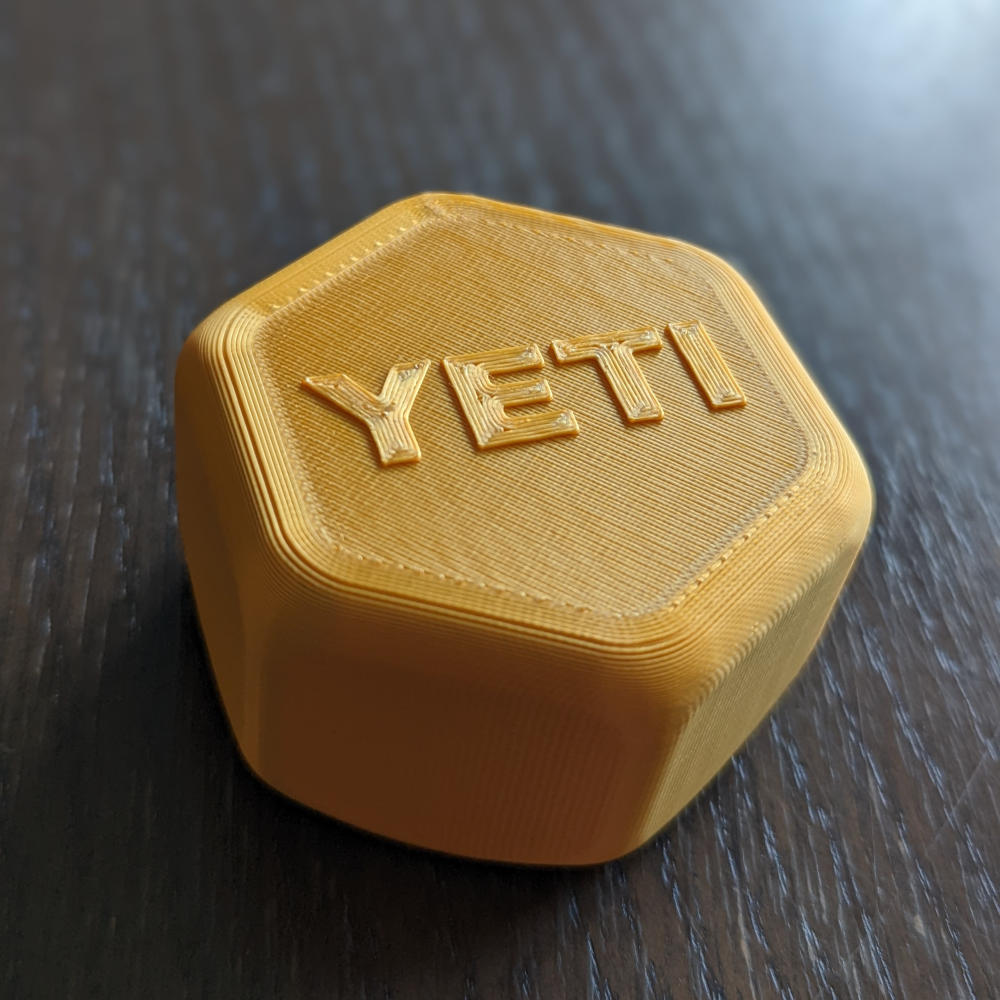
Yeti adapter

Another friend had a Yeti can insulator that was designed for 16 oz cans and was therefore too long for standard 12 oz cans. I printed a spacer so that the insulator could work with either.

A hexagonal spacer with the words 'YETI' on it
Appropriately branded, of course
Clamping mitre box

I wanted a large mitre box to help me make straight wood cuts:

A large mitre box with a saw in it
Mitre box

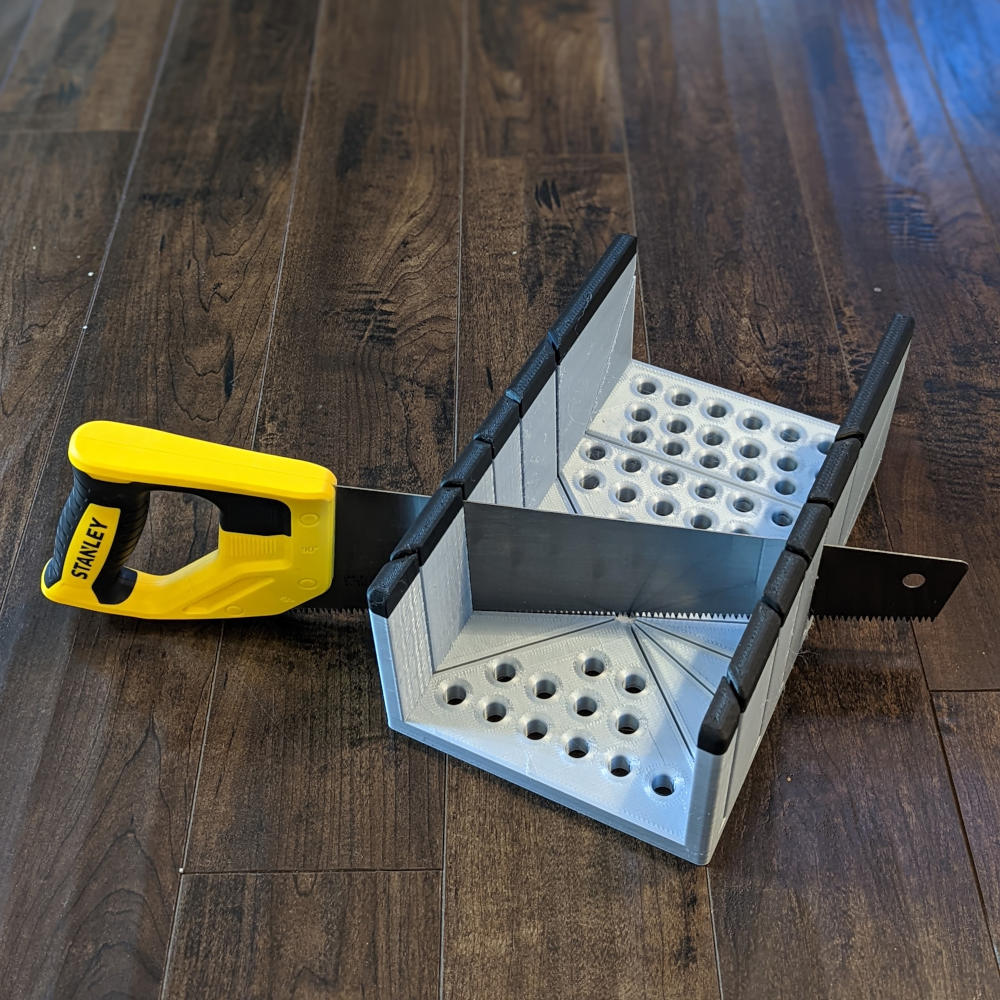
While it was fun to model and print, it was ultimately a failure as it broke within the first five minutes of usage.

Thingiverse link: https://www.thingiverse.com/thing:5380012

Desiccant containers

3D printer filament needs to be kept dry; it naturally absorbs humidity from the air which can negatively impact print quality. I printed some desiccant containers that I keep alongside my filament spools in a sealed plastic tub.

A cylindrical desiccant container
Container for desiccant beads

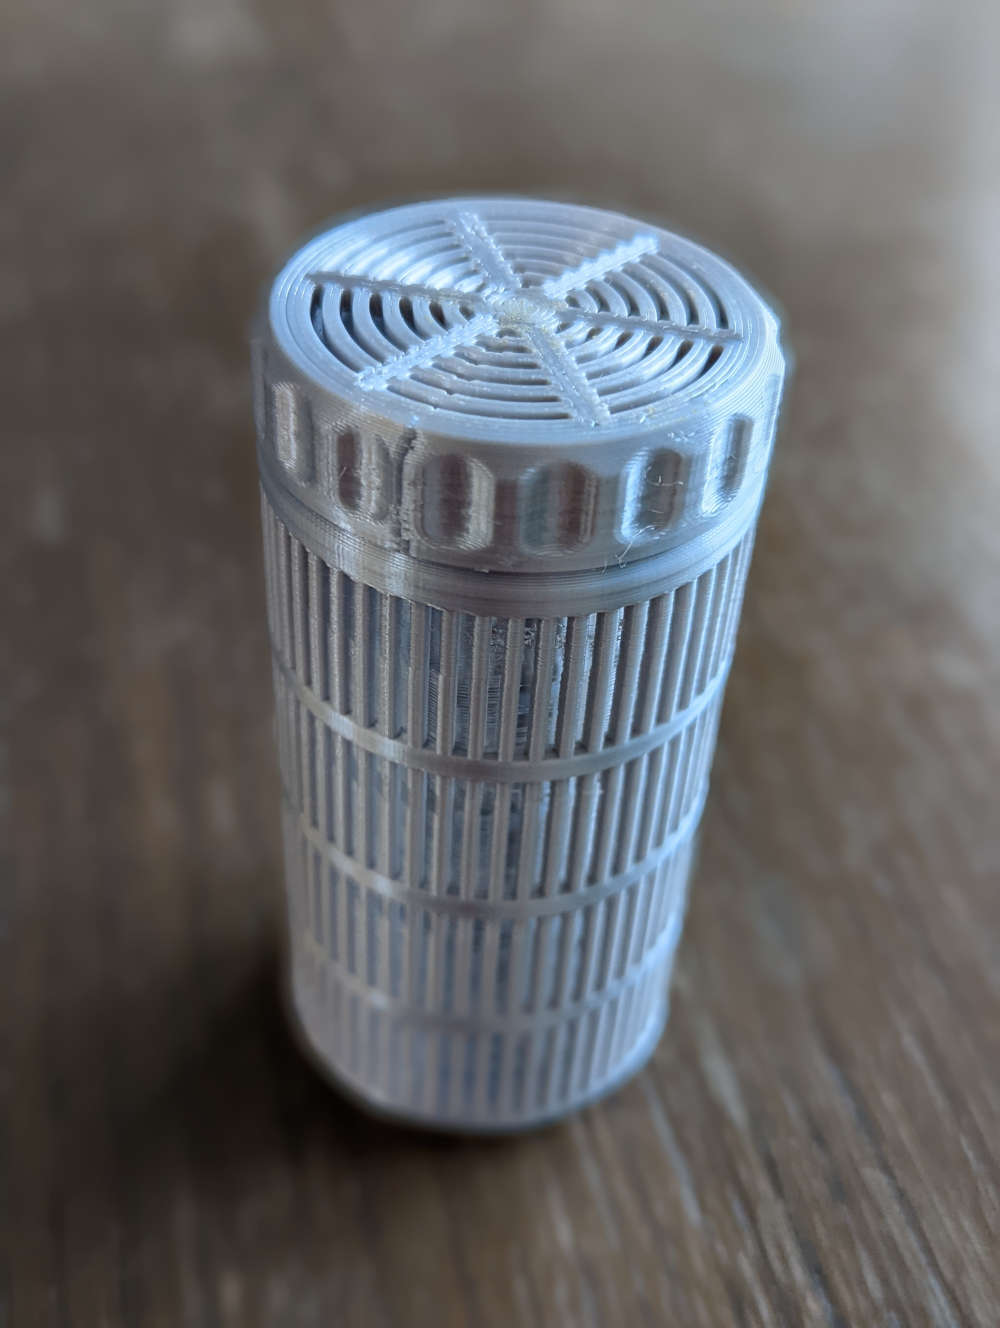
Although, to be honest, I don’t think they are doing much good; the desiccant beads are supposed to be recharged in the oven or microwave every few months, and ain’t nobody got time for that.

Instead, I now dry individual filament spools using a food dehydrator like this.

Poster frame

I got this funky poster as part of a swag package from Stripe. I modeled some matching low-poly poster holders that clamp together with magnets to display in my home office.

A poster hanging in a frame on a wall
To be honest, I'm not really sure what it's portraying? But it looks cool.

Thingiverse link: https://www.thingiverse.com/thing:6848192
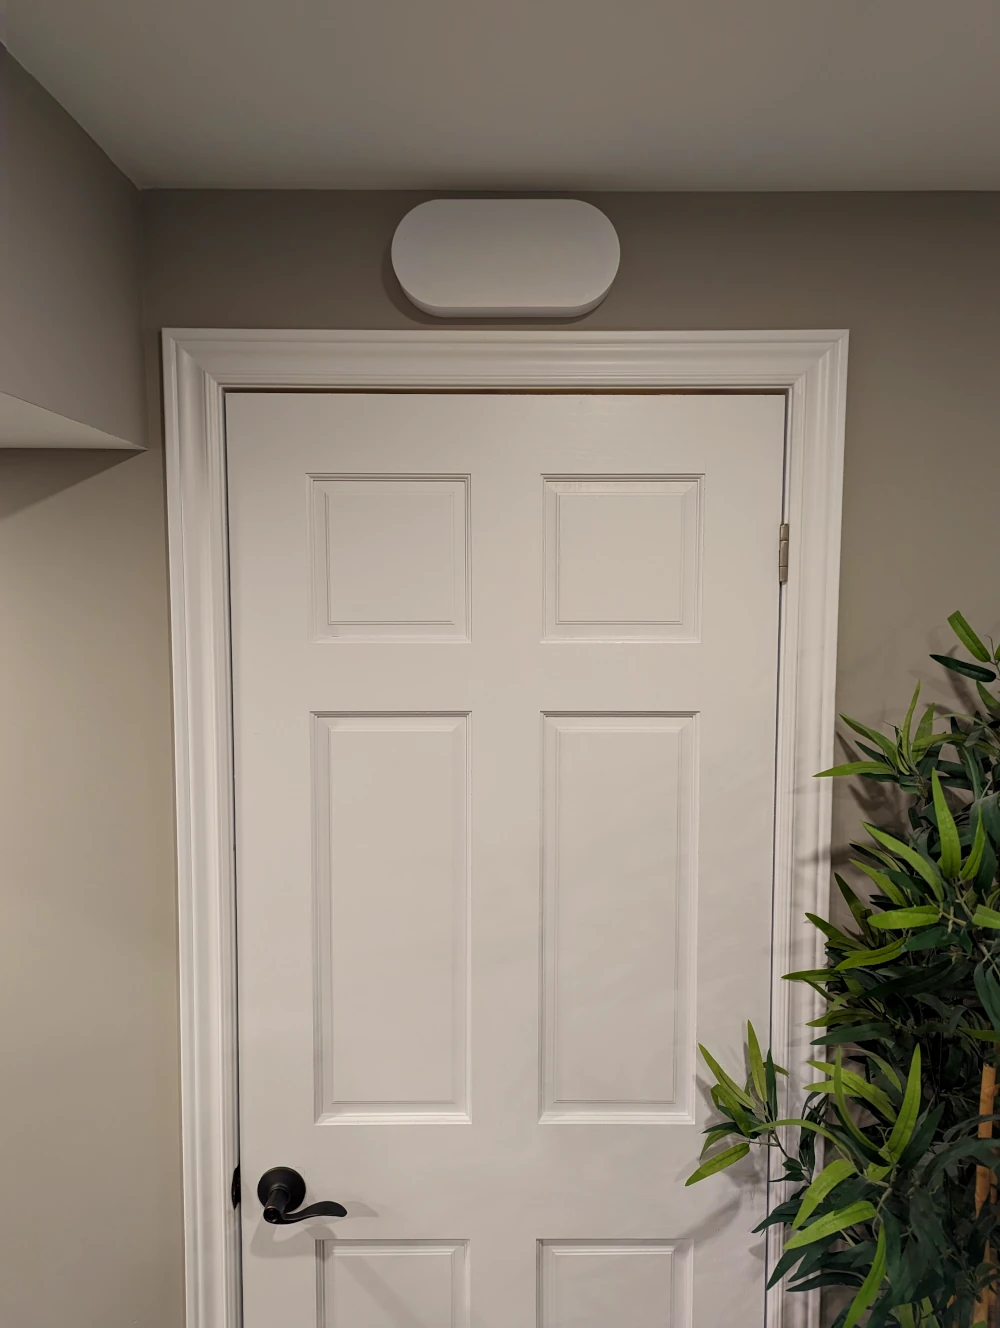
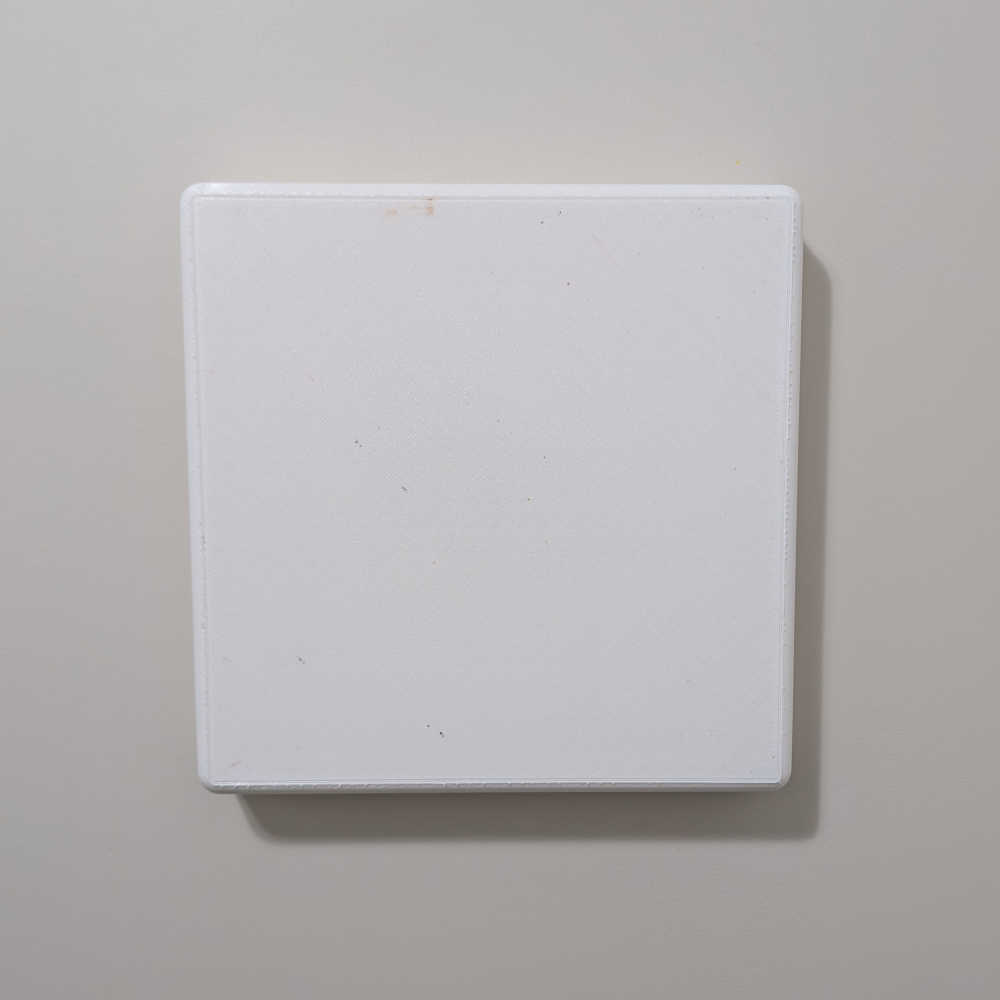
Smoke alarm cover

Our smoke and carbon monoxide detectors expired, so I replaced the individual units with a single, combined detector. This left an empty hole in the ceiling of each room, so I printed a simple cover that snapped into the existing bracket.

A circular cover for a smoke detector
The cover
A circular cover for a smoke detector, installed in the existing bracket
When installed in the old detector's bracket

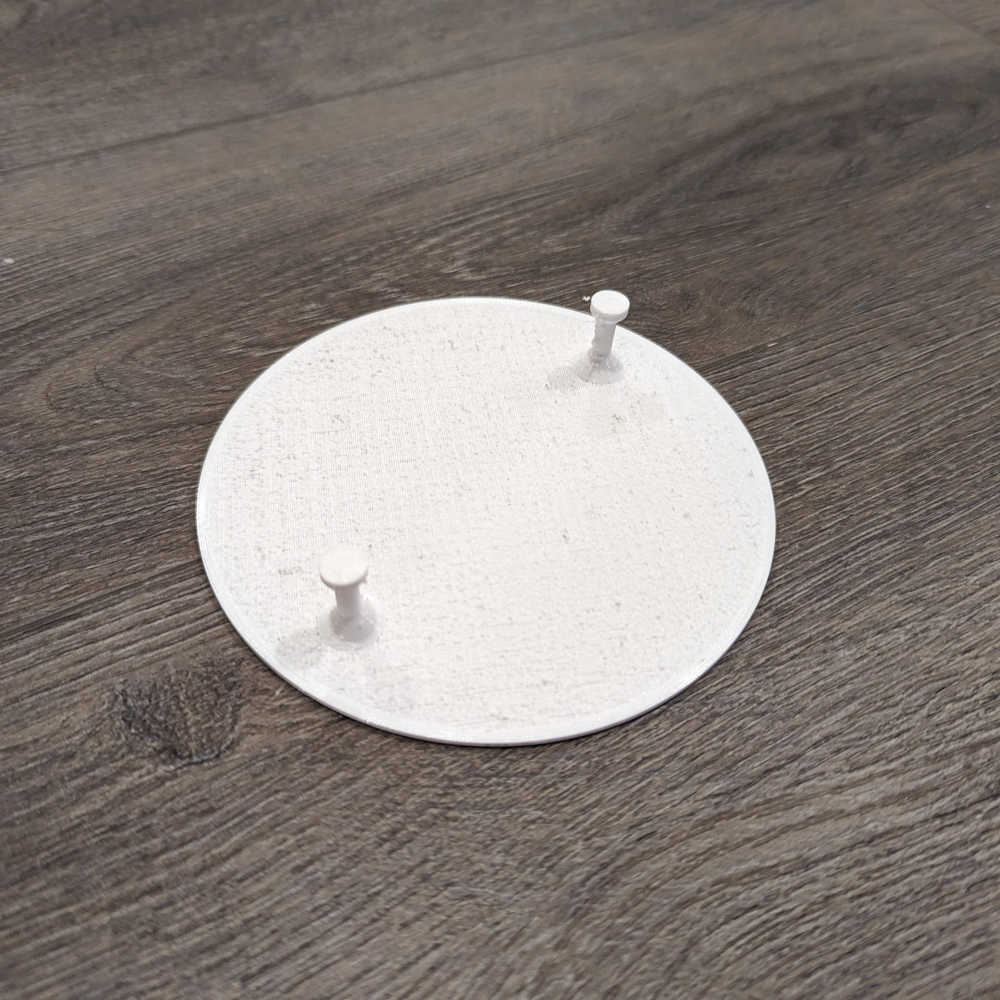
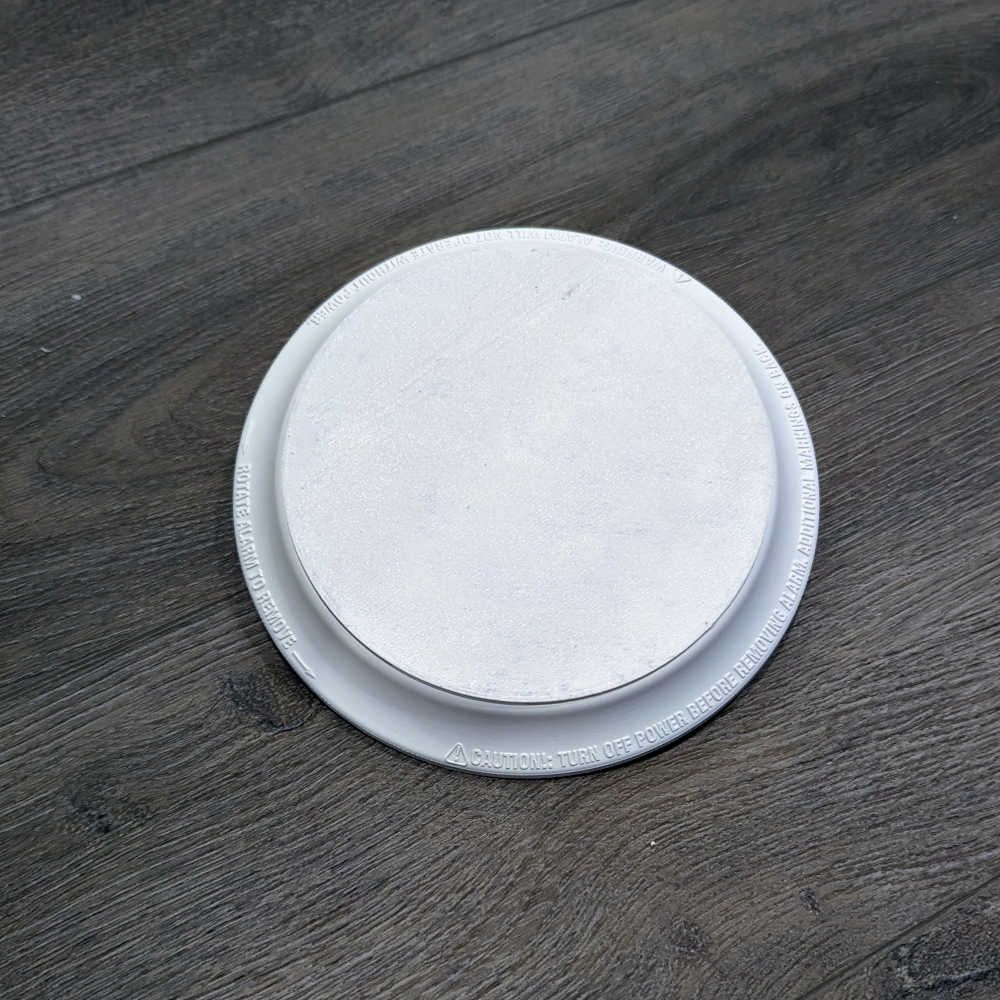
Thingiverse link: https://www.thingiverse.com/thing:6449765

Cabinet legs

We bought an IKEA BESTÅ TV cabinet, but discovered the doors got caught in our shag area rug. I printed some simple legs to elevate the cabinet just enough to allow the doors to operate unobstructed.

A TV cabinet with legs highlighted by red circle annotations
TV cabinet with legs

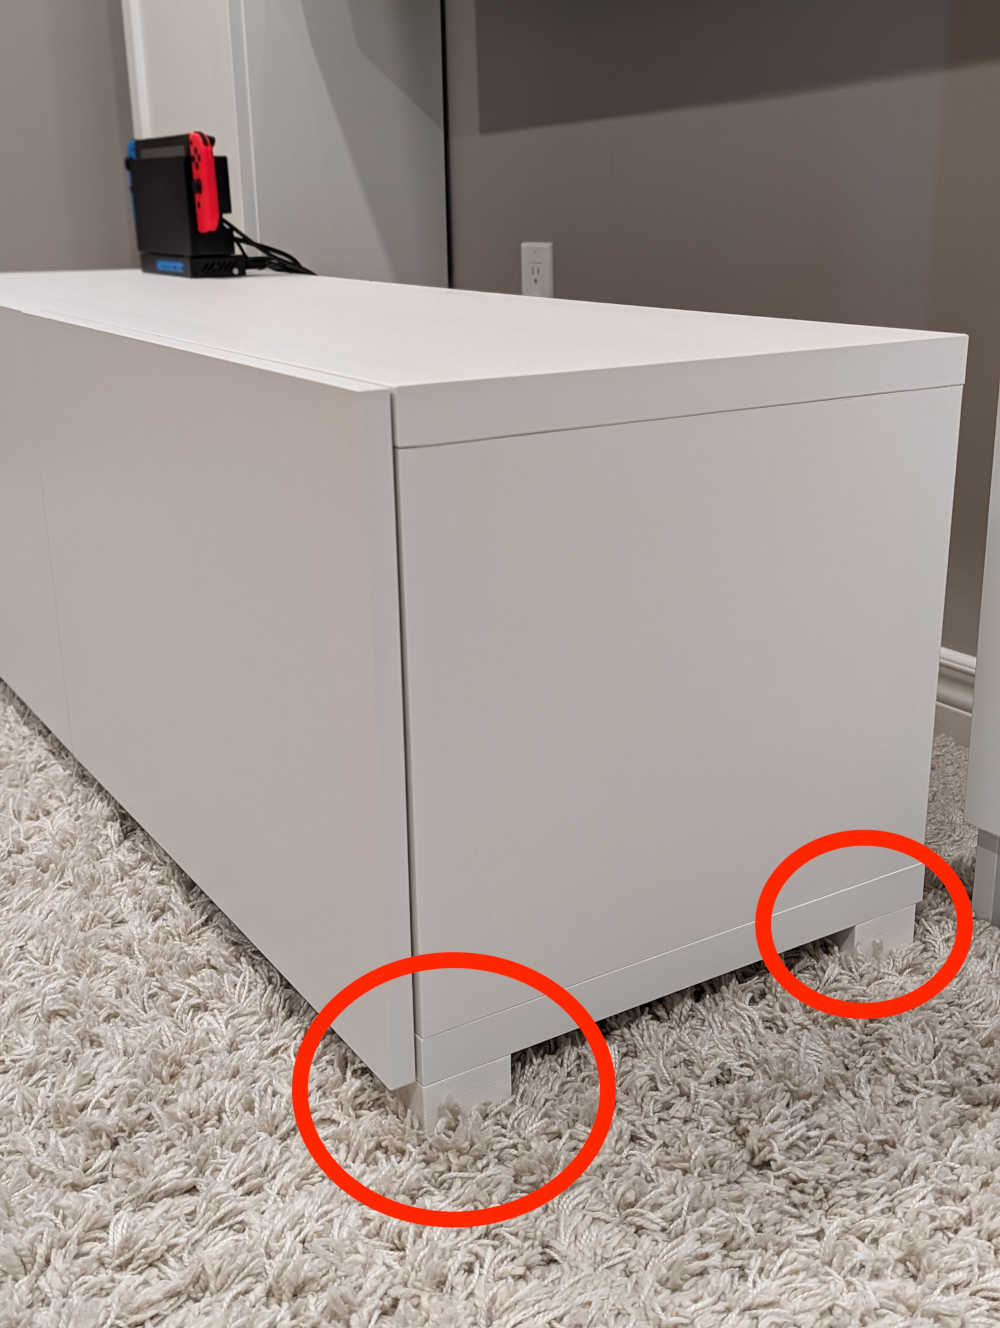
Thingiverse link: https://www.thingiverse.com/thing:6848214
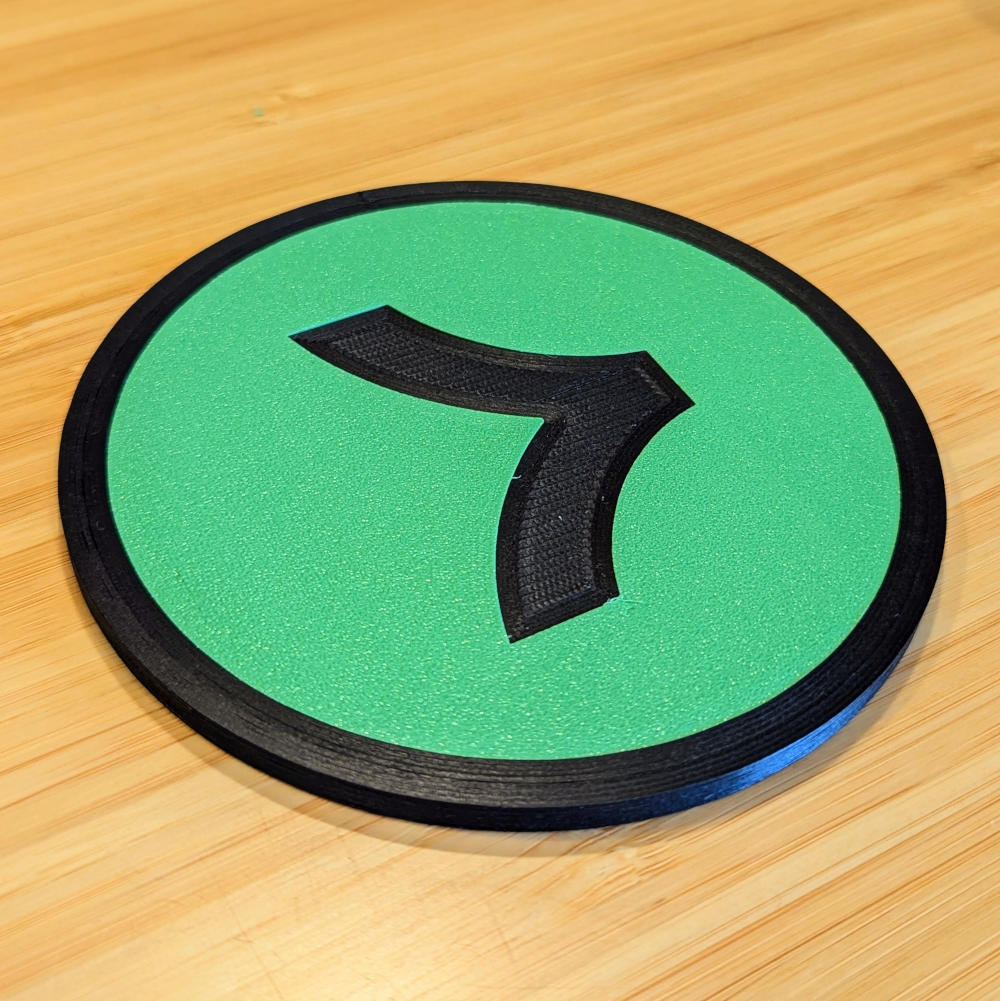
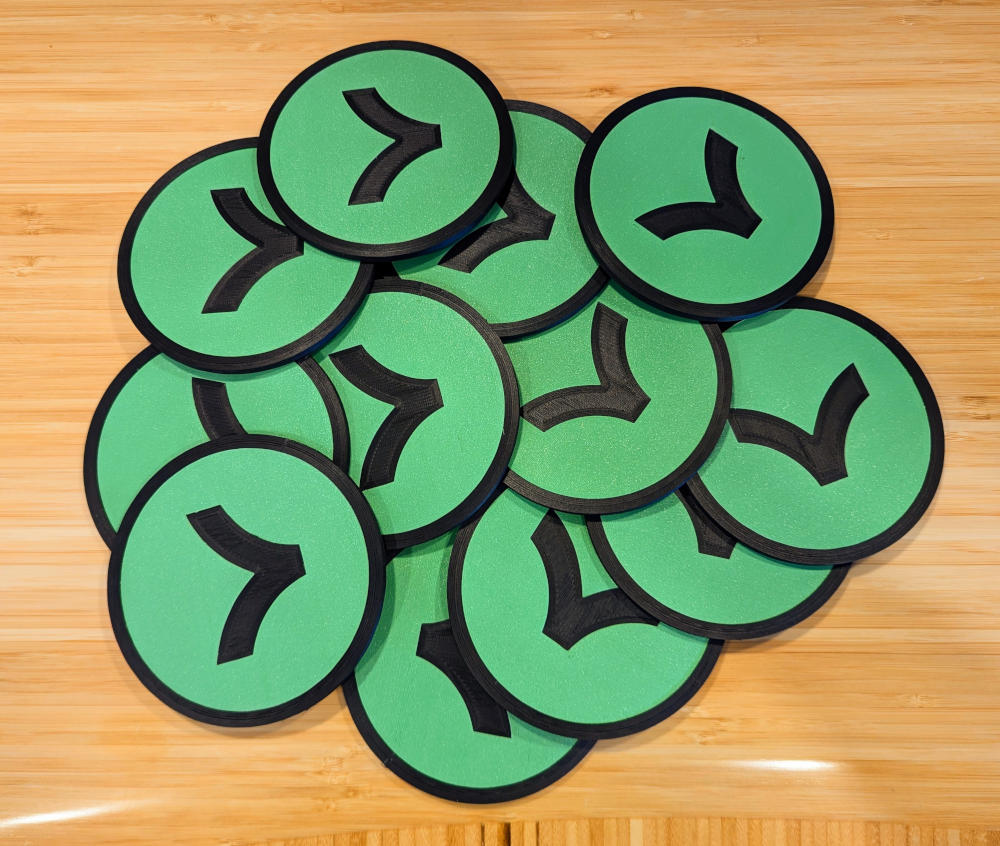
Coaster

While not strictly functional, I printed some Link-themed drink coasters for myself and my team at Stripe.

A drink coaster with the Stripe Link logo embedded in it
A Linkoaster™
Lots of drink coasters with the Stripe Link logo embedded in it
A flock of 12 Linkoaster™s
Google WiFi wall mount

I designed a wall mount for a Google WiFi access point. The fit wasn’t quite right due to my not noticing the top of the puck is slightly smaller than the bottom, but a well-placed wad of sticky tack did the trick.

A wall-mounted Google WiFi puck
Wall-mounted and sticky tack'd

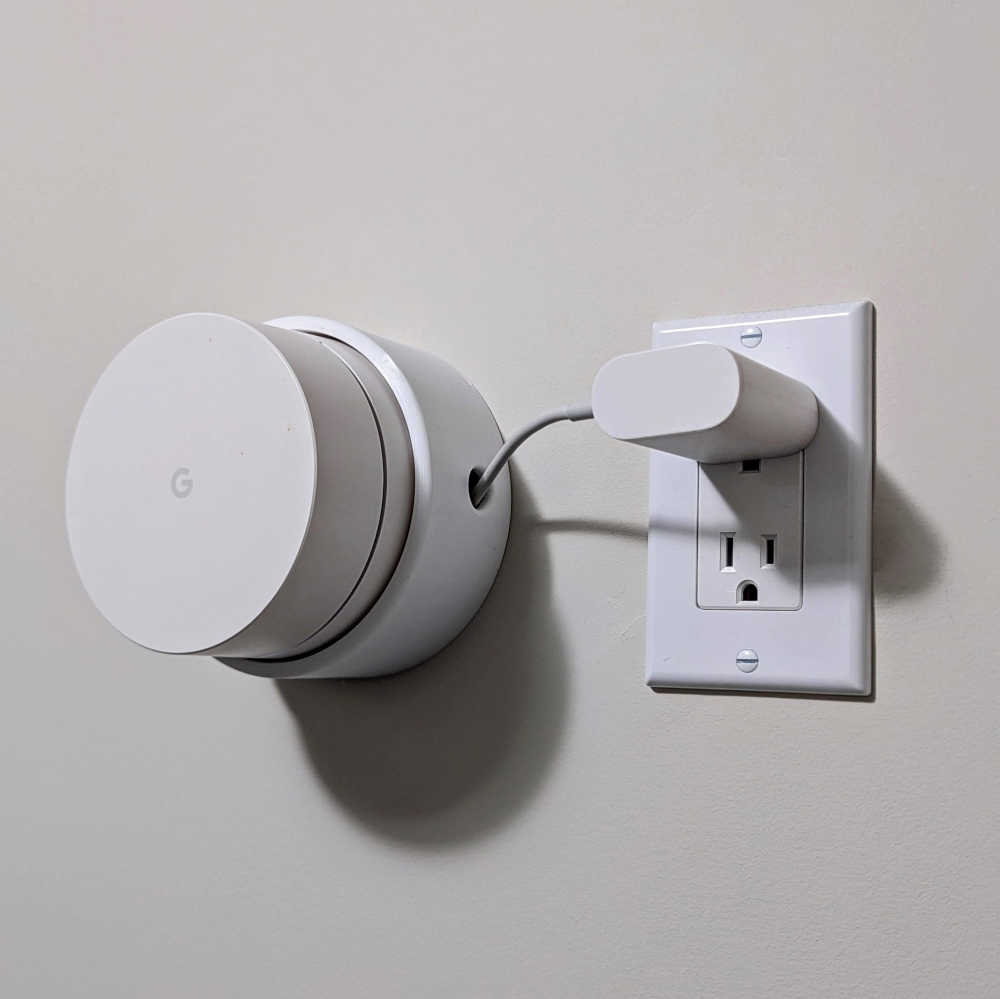
Thingiverse link: https://www.thingiverse.com/thing:6903032

And more to come!

I plan on treating this post as an evergreen log of the functional things I’ve printed. Be sure to revisit!

https://nathanfriend.com/2024/11/25/useful-things-ive-3d-printed
Extensions
GitLab Pages with multiple domains
I recently migrated the website you are on now from AWS to GitLab Pages.
Show full content

I recently migrated the website you are on now from AWS to GitLab Pages.

An abstract, AI-generated graphic of a bunch of arrows all circling each other
Obligatory AI-generated image. This is Meta AI's vision of what a bunch of HTTP redirects look like, which will be relevant in a bit.

While part of my motivation was to simplify my bespoke Docker build, the primary reason was because Amazon ended their Alexa Developer Rewards Program which had been funding my website hosting for over half a decade. (I don’t blame them, only a tiny fraction of the free credits went towards hosting my one semi-popular and now defunct Alexa Skill.) As a result, I began owing AWS about $30 USD/month, which is a bit much for this barebones website and a smattering of side projects.

Since the vast majority of my content is static, I decided to go all in on GitLab Pages, my favorite (free!) static hosting service.

(Disclaimer: I’m a bit biased since I used to work for GitLab and even implemented some improvements to GitLab Pages while I was there.)

It was all going swimmingly until I began repointing my DNS records from the AWS EC2 instance to GitLab Pages. I have three domains that all point to this website:

At the time, the first two redirected to the third (I’ve since decided to instead centralize on .com since .io domains are getting expensive lately and I’d like to retire it someday.)

This should be easy to do with GitLab pages, since GitLab supports domain-level redirects via a Netlify-style _redirects file. But a quick test configuration like this didn’t seem to work:

https://nathanfriend.io/*  https://nathanfriend.com/:splat 301
https://nathanfriend.dev/* https://nathanfriend.com/:splat 301
The problem

GitLab Pages only checks the rules in _redirects if no file matches the request path. From their docs:

Files take priority over redirects. If a file exists on disk, GitLab Pages serves the file instead of your redirect. For example, if the files hello.html and world.html exist, and the _redirects file contains the following line, the redirect is ignored because hello.html exists:

/project-slug/hello.html /project-slug/world.html 302

GitLab does not support Netlify force option to change this behavior.

Unfortunately, this makes it impossible to fully redirect one domain to another using a _redirects rule. Using my example, if a request is made to https://nathanfriend.dev, GitLab Pages will consider this a file match to index.html and immediately serve the page with an HTTP 200 instead of processing the 301 redirect as specified in the _redirects file.

At this point, I was considering dumping GitLab Pages altogether and switching to something like Netlify. Not being able to redirect my domains is a dealbreaker; not only is having multiple live domains annoying, but it’s considered bad SEO practice. From a Google blog:

  • Don’t create multiple pages, subdomains, or domains with substantially duplicate content.

Fortunately, I came up with a hacky-yet-satisfying solution.

The solution

Since GitLab Pages redirects only work when no matching file is found, the solution is to create a separate Pages site with no content at all. Then, point any domain or subdomain that should redirect at this second Pages site, and include a _redirects file with all the corresponding configuration.

This is exactly what I’ve done in gitlab.com/nfriend/nathanfriend.com-redirector, which is an empty project that deploy a single _redirects file that looks like this:

https://nathanfriend.io/*      https://nathanfriend.com/:splat 301
https://www.nathanfriend.io/*  https://nathanfriend.com/:splat 301
https://nathanfriend.dev/*     https://nathanfriend.com/:splat 301
https://www.nathanfriend.dev/* https://nathanfriend.com/:splat 301
https://www.nathanfriend.com/* https://nathanfriend.com/:splat 301

Now, any request that comes in to one of these non-canonical domains will be forwarded to this Pages site and subsequently redirected to the canonical domain.

I’m reasonably happy with this solution, although I’d much prefer for GitLab to simply add support Netlify’s force option and avoid the extra complexity altogether. Please upvote my feature request issue!

https://nathanfriend.com/2024/10/14/gitab-pages-with-multiple-domains
Extensions
Zoom light
I built a light that glows when I’m on a Zoom call.
Show full content

I built a light that glows when I’m on a Zoom call.

An animation of the Zoom light in action


I recently had a blast building my own keyboard. As part of that project, I connected individually-addressable LED strips to the two microcontrollers inside each half. It was way easier than I expected and the end result was fantastic!

This new project was the perfect excuse to play around with these LED strips again. I wanted to engineer a way to allow my family to know I was on a Zoom call without having to open my office door. I had a vision of a nondescript, unobtrusive object that would only reveal its purpose when turned on.

I decided to build a light with a partially-transparent shade; the shade would be thick enough to obscure any pattern on its inside when dark, but would clearly reveal its inner pattern when lit.

How it works

On a technical level, here’s how it works:

  • A script on my MacBook listens for Zoom calls to begin
  • When it detects a Zoom call has started, the script makes a network request to http://zoomlight/api/led/on
  • A web server running on a wireless Raspberry Pi Pico inside the light receives the request and turns on the LED strip
Build log Step 1: Hello world

This was my first time working with a Raspberry Pi Pico, so my first task was to just get some code running. Before too long I was able to toggle the on-board LED on and off:

A side-by-side showing the on-board LED both on and off


Step 2: Pico web server

Now that I had code compiling and running, I wanted to prove out the idea of running a web server on the wireless Pico.

At first, I hand-coded my own web server, which looked something like this and actually worked okay. But I then discovered microdot and threw away my fragile, bespoke implementation for this much more fully-featured library.

I could now toggle the on-board LED remotely!

Step 3: The SK6812s

I soldered some jumper cables to an SK6812 LED strip and connected it to the Pico. With some help from the neopixel library, I had a remotely-controllable LED strip!

A side-by-side showing the LED strip off, white, and rainbow


Step 4: The prints

With the digital problems solved, I pivoted to the analog half of this project. I designed a case and shade in FreeCAD and 3D printed some prototypes using both PLA and PETG.

Two prototypes of the shade, one in PETG and one in PLA


These first attempts were okay, but neither were perfect. Both had some printing deformities that were noticeable when backlit. In addition, the shade wasn’t quite deep enough to allow the light from the LED strip to diffuse, causing the center of the light to be noticeably brighter than the top and bottom edges.

One of the prototypes backlit, showing not enough light diffusion


I increased the depth a bit and printed a new version of both the casing and the shade in PETG. I got lucky; both were some of the cleanest prints I’ve ever managed!

The casing and the shade on the printer bed


I usually struggle with PETG, but the 3D printing gods smiled on me that day. (Well, days. Each one took ~18 hours to print.)

The casing and the shade on floor


Step 5: Piecing it together

The end was in sight. I fixed the LED strip and Pico to the inside of the casing using some hot glue.

The casing with the LED strip and Pico installed


Step 6: Drilling holes

It was time to mount it. After some obsessive measuring, I drilled a hole all the way through the wall above my office door (for the power cord) and mounted the casing using command strips.

The casing mounted above my office door


I popped on the shade and had a working light that I could manually trigger with curl!

The finished light, off, on, and rainbow


Step 7: Making it automatic

The final step was to automate the light so that it automatically turned on when I entered a Zoom call and turned off when I exited.

I experimented with a few different approaches and ultimately ended up using a rather unsatisfying method of polling every 5 seconds for the number of open Zoom ports:

#!/usr/bin/env bash

# How often to poll for Zoom status, in seconds
INTERVAL=5

# Function to execute the command and process its output
monitor_zoom() {
    current_state='unknown'

    while true; do
        # output will be an integer representing the number of open Zoom ports
        output=$(lsof -i 4UDP | grep zoom | awk 'END{print NR}')

        if [[ $output -gt 2 && $current_state != "on" ]]; then
            # In practice, when on a Zoom call, $output seems to always be 6

            current_state="on"
            echo "Turning light on"
            curl -X POST http://zoomlight/api/led/on
        elif [[ $output -le 2 && $current_state != "off" ]]; then
            # In practice, when not on a Zoom call, $output seems to always be 1

            current_state="off"
            echo "Turning light off"
            curl -X POST http://zoomlight/api/led/off
        fi

        sleep $INTERVAL
    done
}

echo "Watching for Zoom meetings in the background with PID: $$"

# Start the monitoring
monitor_zoom

(Does anyone know of a more elegant solution? I’d love to hear it!)

I set up this script to run every time my machine starts (like this).

Step 8: Adding a frontend

Since the Pico was already running a web server, I added a simple frontend that could be accessed through a web browser.

The website shows the current status of the light (via the color of the header block) and provides a way to manually control the color of the light.

Screenshots of the frontend application served by the Pico


It uses my favorite component library, Wired Elements.

Final thoughts

Overall, I’m very happy with how this turned out. The light looks great and turns on and off exactly when it is supposed to!

The finished, mounted light, both white and rainbow


Links/resources
https://nathanfriend.com/2024/05/31/zoom-light
Extensions
I built a weird keyboard
I spent most of my free time over the last 10 months building this bizarre keyboard from scratch. It’s a Dactyl Manuform - a split keyboard with a highly sculpted design that is somehow simulataneously the ugliest and most eye-catching object I’ve ever seen.
Show full content
A picture of half a Dactyl Manuform keyboard


I spent most of my free time over the last 10 months building this bizarre keyboard from scratch. It’s a Dactyl Manuform - a split keyboard with a highly sculpted design that is somehow simulataneously the ugliest and most eye-catching object I’ve ever seen.

The goal of this keyboard design is to place keys exactly along each finger’s natural axis of motion. The consequences of this approach are downward-sloping (A.K.A “tented”) rows to match the natural angle of the wrists, a deeper middle finger column to compensate for this finger’s relative length, an offset pinky column to minimize stretching, and a thumb cluster with multiple keys to take advantage of its opposable nature.

There’s a reason most keyboards don’t look like this. It’s difficult to mass-produce curved keyboards since they can’t use the stiff, flat PCBs that most keyboards use to wire the keys to the microcontroller. Every Dactyl Manuform is a unique piece of art, painstakingly hand-wired by a human being. Here’s how I built mine:

Build log

The first step was to design and 3D print the case. There are a number of Dactyl Manuform model generators out there; I ended up using this one since it had a few extra features I wanted (e.g. wide pinky keys). Some things I was looking for in my design:

  • A key layout similar to the ErgoDox EZ keyboards I already own
  • An aggressive tent angle (I went with π/8 = 22.5°)
  • Hot-swap sockets

I gave up on the hot-swap sockets after failing to coax the generator script to produce valid hot-swap socket holders. I’m glad I did - in the end I don’t think they would have worked anyway.

Once I had a model that looked good on the screen, I printed a draft version to see it in real life.

A draft print of the right half
Printed with a .8mm nozzle, .32mm layer height, and lightning infill


Overall, I was really happy with this first draft. I only made a few tweaks to the model before printing the real thing:

  1. I enabled the “external microcontroller” option, which let me kick the can on deciding which microcontroller and connection types to use
  2. I added my own screw holes; the holes generated by the script were awkwardly placed

To mount the base plates to the body of the keyboard, I used these heat set inserts. It’s a neat system; the threaded inserts are melted into the 3D print using a soldering gun, producing threaded screw holes much stronger and smaller than anything that would be possible using only 3D printing.

To determine the ideal hole size for these inserts, I made a test print.

A photo of a print for determining the correct insert tolerance
A test print with insert holes ranging from 3.8mm to 4.2mm in diameter


I’m glad I tested this; all of the hole options were too small! A second print with bigger holes was more successful.

A photo of another insert hole test print; this one includes installed screws
A second test print with insert holes ranging from 4.2mm to 4.6mm in diameter. I decided to go with 4.5mm


With this last detail resolved, I began printing the real halves. I used my favorite material - wood PLA - which looks (and even smells!) quite similar to real wood, once properly post-processed.

A screenshot of the final STL being sliced in Cura
The final STL file being sliced in Cura. 24 hours per half!


A picture of the left half of the keyboard on the 3D printer bed
The left half, fresh off the printer


A picture of both halves of the keyboard
Both halves printed and slightly cleaned up


I melted the inserts into the holes, which was nerve-wracking; one bad insert would have likely ruined the whole print. It was awkward to try and hold the keyboard and the insert in place while pressing the insert into the plastic with the soldering gun. Somehow I managed to install all ten without issue!

A picture of an installed heat-set insert
An installed heat-set insert


I ordered the transparent acrylic base plates from ponoko.com and was quite happy with the result.

The bottom plate of the keyboard, made from acrylic
Acrylic base plate from ponoko.com


Next up was post-processing. I sanded each half with 80-grit sandpaper, which was a ton of work - there are a lot of nooks and crannies that make this a tedious job.

A picture of both keyboard halves, sanded
Both halves, sanded


In order to sand the inside of the key holes, I printed a little attachment that I could wrap with sandpaper and fit on my screwdriver.

A screwdriver with a 3D-printed accessory installed
My custom SuperSander™ (patent pending)


Normally this would be an unnecessary step - no one sees the inside of the key holes - but the fit was a bit too tight; most of the holes required some sanding before the switch would fit properly. (This is why I’m glad I didn’t bother with hot-swap sockets - the fit is so tight, I’d never be able to get the switches out anyway.)

Another picture of both keyboard halves, sanded
Another shot, because sanding these took too much time not to show off


The next step was to stain and clear coat the prints. I used this gel stain and glossy polyurethane to give the prints a rich, polished wood color.

A picture of a keyboard half, finished with stain and polyurethane
The finished product


Another picture of a keyboard half from a different angle, finished with stain and polyurethane
Some nice faux woodgrain


This was a time consuming step, as each half required three coats of stain (minimum 24 hours to dry per coat) and at least 3 coats of polyurethane (a few hours to dry per coat). I did this in the dead of winter which made drying these in the outdoors challenging (a space heater may have been involved).

The hard work paid off, though - I’m really happy with how these look! The layer lines even give the illusion of a wood grain.

The next decision was which key switches to use. I’m a clicky switch guy; the noisier the better. I bought a Kailh switch tester so I could make an informed decision and decided on Kailh Box Whites.

Two keyboard switch testers
Regular and low-profile Kailh switch testers. Not pictured: Gateron and Boba testers


Compared to other clicky switches (e.g. Cherry MX Blues), Box Whites are extra clicky (they click twice per key press). Perfect for working remotely! If I ever make a silent/office-friendly version of this board, I’ll go with Boba U4 Silents.

At this point, I was able to set the switches and keycaps in place and get a feel for what it would be like to type on this monstrosity. I’ll admit it felt about as weird as it looks.

A picture of the keyboard; half has just the switches installed, and the other half has both switches and key caps installed
Switches and keycaps (temporarily) installed


There was one last detail to work out before I could begin wiring up the halves. I wanted to install a rotary encoder (“volume knob”) on each half, but these don’t click into a standard keyboard hole out of the box. I had to 3D print a special adapter for each.

3D-printed adapters for rotary encoders
The end result, with chunks of glass attached to the bottoms


I printed these with PETG and learned the hard way to always use glue stick when printing with PETG. The adapters adhesed to the bed so strongly they took chunks out of my glass bed when I finally pried them off. I was able to salvage the adapters with some sanding, but the printer bed was unfortunately beyond repair.

A picture of the 3D printer bed with chips in it from the overly-adhesive PETG print
😭


Despite their rather violent effects on my printer, the adapters did their job quite nicely!

Two pictures of rotary encoders; one without a cap and one with a cap
Rotary encoder with and without the cap


Finally, it was time to start wiring it up! First, I wrapped diodes around one pin on each switch.

A keyboard half with diodes bent around one pin of the switch
Diodes wrapped


I soldered the diodes into place and snipped the extra leg.

A keyboard half with diodes soldered to one pin of the switch
Diodes soldered and snipped


I soldered the remaining diode legs together to form the rows of the key matrix.

A keyboard half with diodes soldered together to form rows of the keyboard matrix
Diode legs soldered together into rows


I used small, individual pieces of insulated wire to form the columns.

A keyboard half with wires soldered to the switches to form columns of the keyboard matrix
Don't look too closely; I'm really bad at soldering


I installed DuPont connectors so I didn’t have to solder directly to the microcontroller. This saved me a lot of headache since it took quite a bit of trial and error to get all pins in the right spot.

A keyboard half with DuPont connectors installed to each row and column of the keyboard matrix
DuPont connectors installed


I flashed a basic QMK firmware to the microcontroller and had the incredibly satisfying experience of seeing a letter appear on the screen when I pressed a key. I also got the LED strip working!

A keyboard half with a LED strip lit in rainbow colors
IT LIVES!!


I was getting really close at this point. I designed a custom holder for the microcontroller since the one that was supposed to be compatible with my case didn’t fit for some reason.

A 3D printed holder for the microcontroller
Custom-designed microcontroller holder


I spliced some wires together since a few of the microcontroller pins had to be shared by more than one connection.

A mess of wires soldered together
I'm frankly shocked this thing works


After assembling all the pieces, a bit of software configuration, and a lot of trial and error… I had a working keyboard!

A picture of the finished keyboard on a desk
Finally. Done.


A picture of the finished keyboard, with one half showing the bottom and one half showing the side
This was way too much work.


Another picture of the finished keyboard, with pink underglow
Never again. Probably.


ALERT


How does it feel?

Weird, but good! I’ve only been typing on it for a few work days, so my muscle memory hasn’t fully adjusted. I keep reaching for keys in the wrong places; in particular, my fingers naturally stretch too far when reaching for the bottom row. I also made a few modifications to my QMK layout to take advantage of the more accessible thumb clusters compared to my ErgoDox EZ. I think I’ll really like it once I’m used to it.

Was it worth it?

Umm… I think so? The end result was fantastic, but it was an insane amount of work. I don’t recommend this project to anyone who isn’t interested in the process itself. If you’re just looking for a great ergonomic keyboard, I’d recommend buying an ErgoDox EZ, a Moonlander, a Kinesis Advantage360 or a prebuilt Dactyl Manuform, all of which will cost about the same as this project (see below).

Cost breakdown

Cost of all items, including tax and shipping.

Description Cost (CAD) Link Wood PLA filament for 3D printed case $40.44 amazon.ca Kailh switch tester $21.46 aliexpress.com Kailh low-profile switch tester $9.68 aliexpress.com Pro Micro controller (x2) $44.98 amazon.ca Kailh BOX White switches (x90) $51.26 aliexpress.com M3 heat-seated inserts (x100) $12.42 amazon.ca M3 screws (x100) $12.02 amazon.ca EC11 rotary encoder (x4) $15.80 amazon.ca LED strip (1m) $16.37 aliexpress.com 1N4148 Diode (x100) $8.80 digikey.ca Reset button (x3) $10.82 digikey.ca 22AWG Wire (25’) $7.24 digikey.ca TRRS jack, female (x3) $12.65 digikey.ca Jumper wire (x60) $11.74 digikey.ca Soldering iron $59.87 homedepot.ca Solder $28.23 homedepot.ca Wire stripper $11.29 canadiantire.ca Acrylic base plate (x4) $54.88 ponoko.com Gel wood stain $19.93 homedepot.ca Glossy polyurethane $27.11 amazon.ca Keycap set (x2) $57.32 amazon.ca Electrical tape $5.37 amazon.ca Rubber feet $13.55 amazon.ca Only keyboard materials $450.93 ≈ $340 USD All items (including tools, testers, etc.) $553.23 ≈ $417 USD

As you can see, building your own keyboard is not a good way to save money 💸

Links/resources
https://nathanfriend.com/2023/06/26/i-built-a-weird-keyboard
Extensions
Wordle Bot
Like everyone else, I’ve been obsessed with Wordle lately.
Show full content

Like everyone else, I’ve been obsessed with Wordle lately.

I was really bad at it when I began. My original strategy was to use the first 3 or 4 guesses to uncover as many letters as possible, and then use the last few guesses to unscramble the solution. This turned out to be a terrible approach, and I failed most of the challenges.

This got me thinking: what is the optimal Wordle strategy?

And that immediately led to a second thought: can I automate it?

The answer is a resounding of course! I present to you: Wordle Bot!

The Wordle Bot logo


How it works

The general strategy is to repeatedly pick the word that is most likely to reveal new letters. To do this, I use the frequency of each letter in the set of possible solutions to assign a score to each potential guess, and choose the option with the highest score.

The set of all possible solutions is conveniently hardcoded in Wordle’s source code, so my first step is to simply hardcode this list into my own script.

Next, I loop through each potential solution and count how many times each letter occurs. This results in a mapping like this:

{
  "e": 1233,
  "a": 979,
  "r": 899,
  "o": 754,
  "t": 729,
  "l": 719,
  "i": 671,
  "s": 669,
  "n": 575,
  "c": 477,
  "u": 467,
  "y": 425,
  "d": 393,
  "h": 389,
  "p": 367,
  "m": 316,
  "g": 311,
  "b": 281,
  "f": 230,
  "k": 210,
  "w": 195,
  "v": 153,
  "z": 40,
  "x": 37,
  "q": 29,
  "j": 27
}

So, for example, a word like “HELLO” would score 3,814 (389 + 1,233 + 719 + 719 + 754).

Using this method, the bot would always start with the word “EERIE”, due to its high score of 5,269 (1,233 + 1,233 + 899 + 671 + 1,233).

However, this actually isn’t a very useful guess! It only gives us information about 3 letters. A more strategic method is to pick the highest scoring word that contains no repeating letters. Using this approach, the best first play is “LATER”, which still scores quite high (4,559 = 719 + 979 + 729 + 1,233 + 899) and provides information about 5 different letters.

(Side note: Even though I know I should start with “LATER” when playing on my own, I can’t help but start with “ADIEU” - too many vowels to pass up!)

Each subsequent guess is generated using the same algorithm, except that the list of possible solutions is shrunk by eliminating all options that contradict the results of previous guesses. A side effect of this elimination method is that it effectively plays the game on Hard Mode. (Hard Mode = “Any revealed hints must be used in subsequent guesses”).

In later guesses, it’s possible there won’t be a valid option that includes no repeating letters, so in this case the bot falls back to the highest-scoring word regardless of letter repetition.

Demo

Here’s an example of the script working in bookmarklet form:

A demo of Wordle being solved by the script in bookmarklet form

(Instruction for setting up this script as a bookmarklet can be found here.)

How good is it?

The short answer is: quite good! (Much better than me.) But not perfect!

At the time of writing, Wordle Bot has solved 220 puzzles. Its guess distribution looks like this:

A chart showing Wordle Bot's guess distribution

80% of the time, Wordle Bot can solve the daily puzzle in 4 tries or less. Not bad!

But why isn’t it perfect? I was intrigued by the two puzzles it failed to solve. In both cases, Wordle Bot failed in a similar fashion. By guess 3, it had nailed down letters 2 - 5. It spent the remaining guesses cycling through different starting letters, and failed to find the correct one before it ran out of guesses.

Here is its attempt at puzzle 113:

A screenshot of Wordle Bot's solution to puzzle 113
Wordle 113

Even though the correct solution (“HATCH”) scores higher than all the options it tried (“PATCH”, “MATCH”, “BATCH”, and “WATCH”), it chose not to guess “HATCH” since it includes a repeated letter (“H”). As mentioned earlier, the algorithm always prefers guesses without repetition if they exist.

A similar thing happened on day 123:

A screenshot of Wordle Bot's solution to puzzle 123
Wordle 123

In this case, the solution “JAUNT” scored lower than all the options it tried (“DAUNT”, “HAUNT”, “GAUNT”, and “VAUNT”), so it simply ran out of time.

Bringing the bot to life

Turning the script into a Twitter bot was just a matter of automation.

First, I built a Puppeteer script to launch Wordle in an instance of headless Chrome, inject my bookmarklet script, and solve the puzzle. Once it’s finished, the script takes a screenshot, uploads it to Imgur, and tweets the results:

Wordle 220 3/6

⬜🟨⬜⬜🟩
🟩⬜⬜🟩🟩
🟩🟩🟩🟩🟩

Full solution [#SPOILER!]: https://t.co/kXojDt5u3i

— Wordle Bot (@bot_wordle) January 25, 2022

Then, I configured a scheduled GitLab pipeline to run the project’s pipeline every day at 3:00 AM ET.

Even though the end result is fairly simple, I ran into a number of speed bumps along the way:

  • Wordle shares its results by copying them to the clipboard, but I couldn’t figure out a way to access the clipboard’s contents inside Puppeteer (it always returned my system clipboard contents instead). To get around this, I had to build the “share” text myself.
  • The Imgur JavaScript library I use required Node 14+, but the Puppeteer Docker image I was using inside my GitLab pipeline was stuck on Node 12. Switching to buildkite/puppeteer fixed this.
  • The pipeline would randomly fail while trying to connect to the Wordle website: Error: net::ERR_NETWORK_CHANGED at https://www.powerlanguage.co.uk/wordle/. I “solved” this by adding a timeout and retry to my GitLab job.
Absurdal

Oh, did I mention the bot is also surprisingly good at solving the Absurdal variant?

A demo of Absurdal being solved by the script in bookmarklet form


Links
https://nathanfriend.com/2022/01/25/wordle
Extensions
Herding Gits
Juggling multiple Git identities can be tricky.
Show full content

Juggling multiple Git identities can be tricky.

A screenshot of the Git logo

For example, at Stripe, we encourage developers to create a separate GitHub account for Stripe-related open source activity. For me, this means I now own both a nfriend and a nfriend-stripe GitHub profile.

While setting up my dev environment, I had a few goals:

  • Use both Git identities on the same machine
  • Sign commits with separate GPG keys
  • Connect to remotes using different SSH keys
  • Have all of this 👆 happen automatically without me having to think about it

Good news! This is possible with a little .gitconfig magic ✨

The setup

Note: The instructions below rely on Git’s conditional includes, which are only available in Git 2.13 and beyond.

1. Set up separate SSH and GPG keys for each identity

I won’t go into details since this is already covered in great detail by other tutorials. GitHub’s tutorials are particularly well-presented:

2. Create separate directories for each identity

For example, a ~/github-personal and a ~/github-work directory.

3. Create a .gitconfig_include file in each

Inside each of these new directories, create a new file named .gitconfig_include with the following content:

[user]
  name = Your Name
  email = your-name@example.com
  signingkey = 0123456789ABCDEF

[core]
  sshCommand = ssh -i ~/.ssh/id_rsa_example -F /dev/null

Update each file with the name, email, and signing key for the corresponding Git identity.

Additionally, update the command in the sshCommand option to reference the appropriate key file.

4. Reference these files from the global .gitconfig

In your global .gitconfig (i.e. ~/.gitconfig), configure Git to conditionally include the correct .gitconfig_include file based on the current directory:

[includeIf "gitdir:~/github-personal/"]
  path = ~/github-personal/.gitconfig_include

[includeIf "gitdir:~/github-work/"]
  path = ~/github-work/.gitconfig_include
5. Test it!

Create a test project with both identities. Ensure you can:

  1. Clone the repository from the remote
  2. Make a commit
  3. Push the commit to the remote

If you’re using a web UI like GitLab or GitHub, check to see that your commits are being signed correctly and are labeled as “Verified”:

A screenshot of GitLab showing a 'Verified' label next to a commit


Helpful links

Some things I found helpful while setting this up:

Feedback

Thoughts? Let me know in this GitLab issue!

https://nathanfriend.com/2021/08/26/herding-gits
Extensions
It’s finally here! 🎉
It’s been almost seven years since Inspiral Web was released.
Show full content

It’s been almost seven years since Inspiral Web was released.

For most of those seven years, the site included a “Get the app” button that popped open a message that read “Inspiral Web isn’t mobile friendly… yet” and included a link to join the mailing list.

Over 25,000 people joined that mailing list. The sheer number of interested people, combined with just a bit of pandemic cabin fever, spurred me to finally begin work in earnest on the mobile app.

After five months of feverish, bleary-eyed, nights-and-weekends coding, I’m thrilled to announce that Inspiral is now available for iOS and Android!

A screenshot of the Inspiral app

Give it a try on your platform of choice:

Get it on Google Play Download on the App Store

Or, check out the app’s website, which includes links to the app’s social media presence.

The app’s source code is public. If you find issues or have a feature request, please open an issue!

https://nathanfriend.com/2021/05/07/its-finally-here
Extensions
Capturing Alexa Errors with Sentry and GitLab
Diagnosing issues with a live Alexa skill can be tricky.
Show full content

Diagnosing issues with a live Alexa skill can be tricky.

The Amazon Echo logo with a speech bubble saying "Uh oh"

Most users who run into issues will simply uninstall your skill. A few unusually inspired users may even leave helpful reviews like this:

An Amazon review that says &qout;This skill is broken&qout;

How do you go about figuring out what’s wrong?

By plugging a few open source tools together, you can get great visibility into what’s going wrong.

1. Implement an ErrorHandler in your skill code

First, you’ll need a way to globally catch errors in your Alexa skill. The ASK SDK provides an ErrorHandler interface that does just this. Create a new file for your ErrorHandler implementation:

// lambda/src/handlers/ErrorHandler.ts

import * as Alexa from 'ask-sdk-core';

export class ErrorHandler implements Alexa.ErrorHandler {
  canHandle() {
    // Handle _all_ exceptions
    return true;
  }
  handle(handlerInput: Alexa.HandlerInput, error: Error) {
    console.log(`~~~~ Error handled: ${error.stack}`);

    const speech = 'Sorry, something went wrong! Can you please try again?';

    return handlerInput.responseBuilder
      .speak(speech)
      .reprompt(speech)
      .getResponse();
  }
}

(I’m using TypeScript in this example, but a vanilla JS implementation shouldn’t be much different.)

Next, register this error handler in your skill’s entrypoint:

// lambda/src/index.ts

import * as Alexa from 'ask-sdk-core';
import { ErrorHandler } from './handlers/ErrorHandler';

export const handler = Alexa.SkillBuilders.custom()
  .addRequestHandlers(/* ...your request handlers here...  */)
  .addErrorHandlers(new ErrorHandler()) // ← add this
  .lambda();

This already gets you pretty close! If anything goes wrong, you’ll have a nice stack trace in your CloudWatch logs, and the user will get a polite message informing them something went wrong.

2. Ship error details to Sentry

Sentry is an open source monitoring platform that does a great job of tracking and organizing software errors.

After creating a free account at https://sentry.io, create a new Sentry project with the “Node.js” platform option. Install the dependencies it recommends:

yarn add @sentry/node @sentry/tracing

Next, set up @sentry/node with the tracking info it needs. You can do this at the beginning of every Alexa request by creating a new request interceptor:

// lambda/src/interceptors/SentryInterceptor.ts

import * as Alexa from 'ask-sdk-core';
import * as Sentry from '@sentry/node';

export class SentryInterceptor implements Alexa.RequestInterceptor {
  async process() {
    Sentry.init({
      dsn: '<your DSN here>',
      tracesSampleRate: 1.0,
    });
  }
}

(Your Sentry DSN will be provided to you when setting up your Sentry project.)

Don’t forget to register this interceptor, similar to how you registered your ErrorHandler above:

// lambda/src/index.ts

import * as Alexa from 'ask-sdk-core';
import { ErrorHandler } from './handlers/ErrorHandler';

export const handler = Alexa.SkillBuilders.custom()
  .addRequestHandlers(/* ...your request handlers here...  */)
  .addRequestInterceptors(new SentryInterceptor()) // ← add this
  .addErrorHandlers(new ErrorHandler())
  .lambda();

Finally, in the error handler you created earlier, send the error to Sentry:

// lambda/src/handlers/ErrorHandler.ts

import * as Alexa from 'ask-sdk-core';
import * as Sentry from '@sentry/node'; // ← add this

export class ErrorHandler implements Alexa.ErrorHandler {
  canHandle() {
    // Handle _all_ exceptions
    return true;
  }
  handle(handlerInput: Alexa.HandlerInput, error: Error) {
    console.log(`~~~~ Error handled: ${error.stack}`);

    Sentry.captureException(error); // ← also add this

    const speech = 'Sorry, something went wrong! Can you please try again?';

    return handlerInput.responseBuilder
      .speak(speech)
      .reprompt(speech)
      .getResponse();
  }
}

That’s it! Now all that’s left is to…

3. Test it!

In your LaunchRequest handler, do something silly like this:

const anObject: any = {};
anObject.aMethodThatDoesntExist();

(I’m explicitly specifying any here, otherwise TypeScript won’t let me get away with this!)

Deploy your skill and give it a spin!

❯ ask dialog
User  > Open <your skill name here>
Alexa > Sorry, something went wrong! Can you please try again?

Jump back into your Sentry project - you should now be the proud owner of a new issue:

A screenshot of the Sentry dashboard with a new issue


4. Integrate Sentry with GitLab (optional)

If you host you skill’s code on GitLab you can take advantage of GitLab’s first-class Sentry integration to see error details directly in your GitLab project:

  1. From your GitLab project, navigate to Settings > Operations
  2. Expand the Error tracking section
  3. Check the Active checkbox
  4. Assuming you are using Sentry’s hosted solution, enter https://sentry.io/ in the Sentry API URL field
  5. Paste your Sentry auth token into the Auth Token field. To generate an auth token in Sentry:
    1. Navigate to your Sentry dashboard
    2. Click the ▼ next to your name and select API keys
    3. Click Create New Token
    4. Leave the default scopes as they are and click Create Token
    5. Copy the big string of gibberish
  6. Jump back to GitLab and click Connect and select your Sentry project
  7. Click Save changes

That’s it! Navigate to Operations > Error Tracking. You should see the same set of Sentry errors nicely displayed inside your GitLab project.

A screenshot of GitLab's Error Tracking page showing an issue's details


Source

See this code in action at https://gitlab.com/nfriend/days-until, or give my Days Until skill a try for yourself. Here’s a quick link to the skill!

https://nathanfriend.com/2020/11/18/capturing-alexa-errors-with-sentry-and-gitlab
Extensions
Ridiculous Refs
How many different special characters can you jam into a Git ref name (i.e. the full name of a tag or a branch) before Git will complain?
Show full content

How many different special characters can you jam into a Git ref name (i.e. the full name of a tag or a branch) before Git will complain?

The git logo with a exploding head inside
As if Git isn't complicated enough without testing its limits.

The answer is… a lot.

Here’s a list of ref names that Git considers valid, ranging from pedestrian to ludicrous:

  1. a/b
  2. A/B
  3. a/b/c/d
  4. a/b.c
  5. 0/1/2
  6. !/"#%&'{}+,-.<>;=@]_`{|}
  7. 🙂🚀😂🇺🇸💩🇨🇦💯👍❤️/🤦
  8. (╯°□°)/╯︵┻━┻
  9. ¯|_(ツ)_/¯

The opposite is a little less flashy, but equally useful. All of these are invalid ref names:

  1. a: At least one / is required
  2. a/.b: Slash-separated components can’t begin with a .
  3. a/b.: No ending with a .
  4. a/.lock: No ending with .lock
  5. a/b..c: Consecutive dots (..) are not allowed
  6. a/~^:?*[\: None of the characters after a/ are allowed
  7. a/b/: No ending with a slash
  8. /a/b: No beginning with a slash
  9. a/b//c: No consecutive slashes
  10. a/@{: The @{ sequence is not allowed

There’s some nuance to this second list - some of these rules can be relaxed in special situations. For the complete specification, check out the documentation for the check-ref-format command.

Wait, I’ve created lots of branches and tags that don’t contain a /!

Right! When you create a branch named my-feature, Git actually creates a ref named refs/heads/my-feature.

This is a bit of a tangent, but what Git is actually doing under the hood is creating a new file named my-feature inside your repo’s .git directory at .git/refs/heads/my-feature. You can see this for yourself by opening up .git/refs/heads in a file explorer. Understanding this makes it more obvious why the / character is required.

Why should I care about this?

If all you do with Git is pull, commit, push, and maybe the occasional rebase, you can ignore these edge cases. Just keep using nice, simple, boring names like my-feature-branch or v1.2.

However, if you’re building a tool that interacts with Git refs, you might want to throw a few of the crazier names listed above into your test cases.

In fact, this was my motivation for compiling these lists. I built a new GitLab Issue search feature that involved Git tag names, and I needed to make sure it handled any tag name the user threw at it. I was hoping to find something like the Big List of Naughty Strings for Git refs, but I couldn’t find anything beyond Git’s technical documentation.

Your list is wrong!

I wouldn’t be surprised! Please let me know by opening an issue!

References/Attributions

The “exploding head” icon was created by Anniken & Andreas from the Noun Project.

https://nathanfriend.com/2019/10/19/ridiculous-refs
Extensions
PDF Gotchas with Headless Chrome
Generating PDF reports is one of those features that every enterprise developer will implement at some point in their career. I had my turn on a project with my previous employer. After exploring the available options, I settled on using Chrome’s headless mode to render HTML and save the result as a PDF.
Show full content

Generating PDF reports is one of those features that every enterprise developer will implement at some point in their career. I had my turn on a project with my previous employer. After exploring the available options, I settled on using Chrome’s headless mode to render HTML and save the result as a PDF.

A headless minifigure and a Chrome logo
"Headless Chrome" just sounds so.... gruesome.

This approach seems kind of weird and a bit overkill at first, but it has a number of pretty huge advantages:

  • You can build your PDFs using the most popular layout system in the world (HTML/CSS)
  • Anything that can be rendered in a webpage can be used in a PDF, including:
    • images
    • custom fonts
    • links
    • 3rd party JavaScript libraries (think visualization libraries like D3.js or graphing libraries like Google Charts)
    • etc…
  • If you’re building a web application, you can reuse components from your application in your PDF
  • Printing to a PDF is a supported use case of Chrome’s headless mode
  • Google’s own Puppeteer library gives you full control over the headless instance of Chrome
  • You can develop your PDF layout in Chrome - with full access to Chrome’s dev tools - instead of continually regenerating the PDF to see changes

It’s not all unicorns and rainbows, though. Below are a few of the gotchas I discovered while building a real PDF using headless Chrome.

Headers and footers can’t use external resources

This is the big one. If you try and place an <img> tag in your header or footer (a pretty common use case for a header or footer):

<img src="/assets/logo.jpg" />

…your image won’t show up. This is because Chrome won’t make any requests for external resources that appear in the header or footer templates.

One workaround is to encode the image into the template as a base64’d string:

<img src="data:image/png;base64, iVBORw0KGg..." />

I’ve found this site handy for converting an image into an <img>-compatible base64 string.

Headers and footers don’t inherit styles from the rest of the page

Headers and footers are specified at PDF render time by passing HTML strings to the page.pdf() method:

page.pdf({
  headerTemplate: '<h1>This is the header!</h1>',
  footerTemplate: '<h1>This is the footer!</h1>',
});

These templates are rendered in a separate context than the content of the webpage. Because of this, the CSS styles that apply to the content won’t apply to the header and the footer. Any styles that apply to the content of your PDF that you would like to also apply to your header and footer must be repeated in each of your header and footer templates. And unfortunately, you can’t just reference a common stylesheet using a <link> element - see point #1 above.

Headers and footers require explicit margins to be visible

This one took me a while to figure out. Chrome won’t automatically resize your content to make space for the header and footer templates. You’ll need to make space for your header and footer by specifying a fixed margin at the top and bottom of your page:

page.pdf({
  headerTemplate: '<h1>This is the header!</h1>',
  footerTemplate: '<h1>This is the footer!</h1>',
  margin: {
    top: '100px',
    bottom: '50px',
  },
});

Without these margins, the content will be rendered on top of your header and footer, leaving you wondering why your header and footer templates aren’t showing up.

Page breaks can be a pain

CSS provides some rules that determine where a page break should be placed when printing, for example:

@media print {
  .page {
    page-break-after: always;
  }
}

These rules work - but they can be finicky. You may run into problem when trying to page break inside of[1]:

  • tables
  • floating elements
  • inline-block elements
  • block elements with borders

I also had issues using page-break-after inside of a flexbox layout.

Some advanced layouts simply aren’t possible

There are a few edge cases - mostly dealing with headers/footers and page wrapping - that you simply can’t control. For example, want to place a special footer only on pages 2, 4, and 7? Not possible. (If it is, let me know how!)

The page needs to finish loading

If the page being screenshotted requires time to load, (for example, if the page has JavaScript that makes an AJAX request for some data), you’ll need to wait for this initialization to complete before triggering the screenshot. If you simply screenshot the page right after the initial load, your PDF will be filled with loading bars and missing data.

I worked around this by setting a global flag in the webpage once all initialization work is finished:

// in the web page
async init() {
    const data = await this.dataService.getData();
    const user = await this.userService.getUserProfile();

    // ...etc...

    window.isReadyForPDF = true;
}

Then, using Puppeteer’s page.waitForFunction() method, we can wait for this global variable to bet set:

// on the server
await page.waitForFunction('window.isReadyForPDF');
// now we know the page is ready for a screenshot
The page might require authentication

If the page you’re screenshotting is part of a web application, it’s likely there’s an authentication step that’s required to view the page. This can be a bit of a pain to work around, but fortunately, Puppeteer provides enough control to programmatically log in to the application:

await page.waitForSelector('#username');
await page.waitForSelector('#password');

await page.evaluate(() => {
  document.querySelector('#username').value = 'my-username';
  document.querySelector('#password').value = 'my-password';
  document.querySelector('#log-in-button').click();
});

There are some downsides to this approach, though:

  • You now need to maintain a system account for logging in to the application for PDF screenshots
  • The extra login step adds quite a bit of time to the PDF generation process
  • Your PDF generation is now dependent on your authentication/authorization system
  • It just feels kind of wrong

Disclaimer: my PDF generator was written in .NET Core, so I actually used a library called Puppeteer Sharp which aims to replicate the API of the official Puppeteer library (which runs on Node). Some of the code examples above might be slightly off since I translated them from C♯ into JavaScript.


References/Attributions

[1]: https://stackoverflow.com/a/26265549/1063392

Minifigure/Chrome image from https://hackernoon.com/so-many-testing-frameworks-so-little-time-b03c707b8f90

https://nathanfriend.com/2019/04/15/pdf-gotchas-with-headless-chrome
Extensions