GeistHaus
log in · sign up

Working on Pharo Smalltalk

Part of blogger.com

stories
Deprecations as They Should Be
Show full content

With BPatterns, you don’t need a special syntax to search or rewrite code. Any block or any AST node can become a matching pattern.

This opens up interesting opportunities to simplify existing users of the rewrite engine. One particularly good candidate is the deprecation mechanism in Pharo.

Let’s look at a real example.

Deprecations in Pharo Today

Consider this recently introduced deprecation in Object:

Object>>confirm: queryString        self                 deprecated: 'Use the ConfirmationRequest instead.'                 transformWith: '`@rcv confirm: `@arg' -> 'ConfirmationRequest signal: `@arg'.        ^ConfirmationRequest signal: queryString

This method will be removed in an upcoming Pharo version. Users are expected to migrate from #confirm: to raising a ConfirmationRequest.

The interesting part is the transformation rule: any sender of #confirm: is automatically rewritten on the fly using the provided rewrite pattern.

Run your test suite with good coverage, and your codebase is upgraded automatically. No manual work required. That’s powerful.

But Let’s Look Closer

Even in this relatively simple example, a lot is duplicated:

  • The deprecated message is duplicated twice in the transformation rule and the actual method name:
    • '`@rcv confirm: `@arg'
  • The replacement API appears three times:
    • in deprecation description: 
      • 'Use the ConfirmationRequest instead'
    • in the transformation rule: 
      • 'ConfirmationRequest signal: `@arg'
    • at the end of the method to do the real API call: 
      • ^ConfirmationRequest signal: queryString
  • The transformation rule duplicates symbolic pattern variables: 
    • `@arg 
If you are already familiar with Pharo’s deprecation API, this is manageable. But think about the first time you deprecated a method. How easy was it to write this from scratch?

Personally, I always start by searching for an existing example to copy. I never try to write it cold.

There is a “Deprecate Method” refactoring in Pharo, but today it is very basic and does not help with transformations. It could be improved—but that’s where we currently are.

Now let’s look at the same idea through the lens of BPatterns.

The Same Rewrite with BPatterns

The core transformation rule can be written as a plain block:

[[ anyRcv confirm: anyArg ] -> [ ConfirmationRequest signal: anyArg ]] brewrite.

No strings. No backticks. No special syntax.

Now imagine embedding this rewrite directly into the deprecated method:

Object>>confirm: queryString        | brewrite anyRcv anyArg newAST |        brewrite := [[ anyRcv confirm: anyArg ] -> [ ConfirmationRequest signal: anyArg ]] brewrite.
        "some code to actually rewrite the sender"        newAST := brewrite rewriteMethod: thisContext sender home method.        thisContext sender home receiver class compile: newAST formattedCode.
        "And call new API at the end"        ^ConfirmationRequest signal: queryString

This already removes the string-based rewrite syntax, but we can do better.

In BPatterns, variables starting with any are wildcards by default—but you can explicitly configure any variable, including self and method arguments.

That means we can reuse the actual method variables directly in the rewrite rule:

Object>>confirm: queryString        | brewrite newAST |        brewrite := [[ self confirm: queryString ] -> [ ConfirmationRequest signal: queryString ]]                                         brewrite with: [ self. queryString ].
        "some code to actually rewrite the sender"        newAST := brewrite rewriteMethod: thisContext sender home method.        thisContext sender home receiver class compile: newAST formattedCode.
        "And call new API at the end"        ^ConfirmationRequest signal: queryString

Now the transformation rule and the method body speak the same language. And we can easily refactor it like any other method to avoid the duplication of the new API call:

Object>>confirm: queryString        | brewrite newAST |        newAPI := [ ConfirmationRequest signal: queryString ].        brewrite := [[ self confirm: queryString ] -> newAPI ] brewrite with: [ self. queryString ].
        "some code to actually rewrite the sender"        newAST := brewrite rewriteMethod: thisContext sender home method.        thisContext sender home receiver class compile: newAST formattedCode.
        ^ newAPI value

At this point, most of the code above is mechanical. BPatterns only needs an AST of the deprecated API call for the matching pattern. 

Normally it comes from a block - [ self confirm: queryString ] - but here it can be easily derived from thisContext method ast since it is equivalent to the deprecated method header. 

That means the whole deprecation can collapse into this: 

Object>>confirm: queryString        ^ self deprecatedBy:  [ ConfirmationRequest signal: queryString ]

That’s it.

No duplicated selectors.
No duplicated replacement calls.
No rewrite strings.
No boilerplate.

This is the deprecation without stress.

Variations Are Easy

Once the transformation is automatic, it’s natural to allow variations:

Disable auto-transformation:

Object>>confirm: queryString        ^self                 deprecatedBy: [ ConfirmationRequest signal: queryString ]                 autoTransform: false

Add a custom deprecation message:

Object>>confirm: queryString        ^ self                 deprecated: 'self confirm: is a bad style , use ConfirmationRequest'                by:  [ ConfirmationRequest signal: queryString ] 

The basic version generates a default title automatically.

Summary

With the new API, the deprecation becomes a seamless, fluent process. You no longer need to think about transformation rules at all—they are simply part of the system, enabled by default. Deprecation is expressed in the same language as the code itself, not in a separate, string-based mini-language.

Once this foundation is in place, building higher-level tooling becomes straightforward. Wrapping deprecations into proper refactoring commands is trivial, and integrating them into existing refactorings—such as Rename Method or Add/Remove Argument—becomes a natural next step.

That’s all for now.

You can load BPatterns from GitHub and try new deprecations yourself:

👉 https://github.com/dionisiydk/BPatterns

tag:blogger.com,1999:blog-621833069645593200.post-1481914257817296884
Extensions
BPatterns: Rewrite Engine with Smalltalk style
Show full content

The rewrite engine is an absolutely brilliant invention by John Brant and Don Roberts, introduced with the Refactoring Browser (see “A Refactoring Tool for Smalltalk”, 1997). It gives us AST-level matching and rewriting with astonishing power.

But let’s be honest: how many people actually remember its syntax?

Even the simplest rewrite rule—say, replacing a deprecated message with a new one—usually sends me hunting for examples. During this project I spent a lot of time deep inside the rewrite engine, and even now I cannot reliably recall the exact syntax.

Is it something like this?

``@receiver isNil ifTrue: ``@nilBlock -> ``@receiver ifNil: ``@nilBlock

Or maybe with single backticks?

`@receiver isNil ifTrue: `@nilBlock -> `@receiver ifNil: `@nilBlock

In fact, both versions work—but they apply different filters to the target node. Try to remember which one.

And that’s only the beginning. 

Do you know you can wildcard parts of selectors?

`@receiver `anyKeywordPart: `@arg1 staticPart: `@arg2

You can rename keywords using it:

`@receiver newKeywordPart: `@arg1 staticPart: `@arg2

Or even swap them:

`@receiver staticPart: `@arg2 `anyKeywordPart: `@arg1

It’s incredibly powerful. But how do you remember all of this?

With normal Smalltalk code, I would explore the system using senders, implementors, inspectors— gradually rebuilding my understanding. Here, that breaks down. The matching syntax lives inside strings, invisible to standard navigation tools. No code completion. No refactorings. No help from the environment.

So how do we keep the power without the syntax tax?

That is where BPatterns come in:

[ any isNil ifTrue: anyBlock ] bpattern

BPatterns

BPatterns provide a fluent, Smalltalk-native API on top of the rewrite engine, using ordinary Smalltalk blocks as patterns.

You create a BPattern instance by sending the #bpattern message to a block. The variables and selectors inside the block define the pattern to be matched against target AST nodes. By convention anything started with any word acts as a wildcard. Everything else must match structurally.

Under the hood, BPattern builds a pattern AST using the same pattern node classes as the rewrite engine. All the original matching and rewriting machinery is still there — just wrapped in a more approachable, scriptable interface.

You can think of BPatterns as a Smalltalk DSL for the rewrite engine.

Pharo already provides dedicated tools for the rewrite engine, such as StRewriterMatchToolPresenter:


Glamorous Toolkit adds its own powerful helpers.

With BPatterns, none of that is required. A pattern is just a block. Add one more message and simple DoIt will do the job.

To find all matching methods:
[ anyRcv isNil ifTrue: anyBlock ] bpattern browseUsers

To rewrite them:

[[ anyRcv isNil ifTrue: anyBlock ] ->  [ anyRcv ifNil: anyBlock ]] brewrite preview


Refining Patterns Explicitly


You can narrow patterns explicitly using #with: message:

[ anyVar isNil ifTrue: anyBlock ] bpattern with: [ anyVar ] -> [:pattern | pattern beVariable ]

Because this is regular Smalltalk code, all standard development tools work out of the box: syntax highlighting, code completion, navigation, and refactorings:


Browse the implementors of #beVariable message and you will find other filters under BPatternVariableNode class, such as #beInstVar or #beLocalVar. If you miss something, just add a method. No new syntax required.

You can also use an arbitrary block as a filter: 

[ anyVar isNil ifTrue: anyBlock ] bpattern 

         with: [ anyVar ] -> [:pattern | 

                           pattern beInstVar where: [:var | var name beginsWith: 'somePrefix' ]]

Notice the block [anyVar] is used to reference variables where the configuration block should be applied. This avoids raw strings for variable names and keeps these configs friendly to development tools:


Message Patterns Revisited


Now let’s revisit the selector wildcard examples from the beginning using BPatterns.


Renaming a keyword:

[

         [ anyRcv anyKeywordPart: anyArg1 staticPart: anyArg2 ] 

                  -> [ anyRcv newKeywordPart: anyArg1 staticPart: anyArg2 ]

] brewrite.

Swapping keywords:

[

         [ anyRcv anyKeywordPart: anyArg1 staticPart: anyArg2 ] 

                  -> [ anyRcv staticPart: anyArg2 anyKeywordPart: anyArg1 ]

] brewrite.

Message patterns can also be refined using #with: message:

[ any anyMessage: any2 ] bpattern 

with: #anyMessage: -> [:pattern | pattern beBinary ];

browseUsers.

This finds all methods containing binary messages:


Add another filter to keep only binaries between literals:

[ any anyMessage: any2 ] bpattern 

with: #anyMessage: -> [:pattern | pattern beBinary ];

with: [ any. any2 ] -> [ :pattern | pattern beLiteral ]; 

browseUsers


The old syntax also supports literal patterns but good luck finding an example.

Message patterns can also be configured with arbitrary conditions:

[ any anyMessage ] bpattern 

with: #anyMessage -> [:pattern | pattern where: [:node | node selector beginsWith: 'prim' ]];

browseUsers


Status and What’s Next

BPatterns don’t expose every feature of the rewrite engine yet, but many are already supported, including full method patterns via #bmethod.

For full details, see the GitHub repository:

And check the next blog post about a simplified deprecation API built on top of BPatterns:

tag:blogger.com,1999:blog-621833069645593200.post-8484165835469583967
Extensions
Calypso in progress 0.8.7
Show full content
It is important release which prepares Calypso for new TelePharo version and removes the main Nautilus dependency.

Now all Nautilus method icons are done in Calypso way with extra features:
  • override/overridden method icons (up/down arrows).
Up/down buttons open method browser scoped to superclasses or subclasses. Method context menu "Inheritance" with shortcut cmd+h.
  • icon for methods marked with #flag: message 
In addition new method group "flags" is implemented. 

  • icon for ffi methods 
In addition new method group "ffi calls" is implemented. 

  • test icon for methods covered by tests 


The implementation brings additional feature to run inherited tests when they are visible in the browser.


And you can run tests when abstract test case is selected. In that case tests are executed for all concrete subclasses.
  • extra "expected failures" method group for tests

  • when browser shows class side the title is bold


  • open dependency browser command for packages
  • commit package command uses Iceberg. cmd+s to open Iceberg Sync tool. 
  • decoration button for "seeClassSide" protocol and method. Button switches browser to the class side.


tag:blogger.com,1999:blog-621833069645593200.post-914478507482706364
Extensions
New Calypso version 0.8 is out
Show full content
Finally I finish major Calypso changes. It is a big refactoring on navigation model and browser pluggability.

For the model part the biggest change is composition of queries and scopes.  For example string lookup in class comments and method sources looks like:

(ClyClassComments withSubstring: 'test') , (ClyMethodSources withSubstring: 'test')
Query of all variables accessible from the class can be done with:
ClyAllVariables fromAll: {ClyClassScope. ClySuperclassScope} of: Morph in: environment
In the browser these compositions are created from some concrete scope using conversion methods. For example inherited scope can be constructed with:

classScope , (classScope asScope: ClySuperclassScope)

And full hierarchy scope looks like:
classScope
     , (classScope asScope: ClySuperclassScope)
     , (classScope asScope: ClySubclassScope)

The next important feature is async queries. Now it is possible to evaluate any query in background. Just convert given query using #async message:

asyncQuery := aQuery async

Browser provides nice visualisation for execution process. It is very simple rotating icon. But real progress indication can be implemented later. Try following script to see it in action:
ClyQueryBrowser openOn: (
    (ClyClassComments withString: 'test'), (ClyMethodSources withString: 'example')) async.

Composition and async queries were required to support advanced search functions like "method source with it". Also critic plugin is now based on them instead of complicated internal implementation for background analysis.  Nice detail about async queries: they are not bound to global progress bar. The animation is shown in the browser and the query not blocks UI.
With help of new composed design I was able to redo all method groups using queries. Normally if you want new method group you do not need new subclass of group. You only implement new query and group provider instantiates a group on it. For example breakpoints provider is implemented with following methods:
ClyBreakMethodGroupProvider>>createMethodQueryFrom: aClassScope ^ClyActiveBreakpoints from: aClassScope

ClyBreakMethodGroupProvider>>createMethodGroupFor: aMethodQuery from: aClassScope ^ClyMethodGroup named: 'breakpoints' priority: 8.4 on: aMethodQuery 

Interesting that in case when provider returns async query it will be automatically represented by group item with progress animation. It is how critic method group is now implemented. 
Another big change is the result of query. If you will execute query it will return the instance of ClyQueryResult subclass. Previously it was always cursor object which is now opened by demand from given result.  Purpose of different kinds of result is to format items in different forms. There is ClySortedQueryResult with sort function as parameter (that's why I worked on SortFunction). And there are many kinds of result which return hierarchical browser items. You can get any query with required result:

newQuery := classQuery withResult: (ClySortedQueryResult using: #name ascending)
newQuery := classQuery withResult: ClySubclassHierarchy new asQueryResult 

By default any query is created with ClyRawQueryResult which represents retrieved items without any formatting. So by default any query returns raw methods, classes and packages. It allows in future to replace current SystemNavigation with Calypso query model.
On the browser part there are many renames. As you noticed ClyQueryBrowser replaced method browser with ability to show mixed query result. In example it shows class comments and methods together in single list. It also able to show classes. Interesting that hierarchical view and sorted view modes are working in all these cases. The ClySystemBrowser is renamed to ClyFullBrowser.
There are a lot of other internal changes and bug fixes. Here is short list of them:
  • better class hierarchies implementation
    • merged hierarchies
      • mixed traits and subclasses/superclasses relation
    • inverse relation hierarchy
      • pluggable order for variables view
      • pluggable order for class visibility view
  • class annotations for browser pluggability
    • table decorators are annotated by browser context where they are applied
    • browser tools are annotated by browser context where they are activated as tabs
  • new Commander based on class annotations
  • repackaged code
  • many classes are renamed
  • traits are in separate plugin
  • browser tabs subscribe on system changes by themselves. It fixes sync bug when tabs are not updated after system changes
  • search packages like in Nautilus with default persistent filter
  • a lot of new system queries
Now I start document new design and I will post more details soon 
tag:blogger.com,1999:blog-621833069645593200.post-1028934554157607627
Extensions
Class annotations
Show full content
In Pharo language we can annotate methods with meta information using special syntax:
MyClass>>someMethod
  <mySpecialPragmaWith: firstArg and: secondArg>
  "method logic"
The meta information is represented by pragma instances. It can be retrieved from methods:
(MyClass>>#someMethod) pragmas
And it can be queried globally from the system:
Pragma allNamed: #mySpecialPragmaWith:and: in: MyClass
You can read details about pragmas here: Pragmas: Literal Messages as Powerful Method Annotations.

Interesting that method pragmas can be used to implement class annotations without introducing special language constructs for them. Many libraries do it without explicit mention of annotations.

Usually the trick is class side method which is annotated with special conventional pragma which arguments are used as class meta information. So you query the system for this pragma and from methods you get classes and from pragma you get metadata.

The problem here is that pragma is quite simple and therefore it is quite restrictive:
  • It is always an instance of class Pragma. So you can not add specific behaviour to it.
  • Pragma arguments are literal objects. So you can not use anything complex in pragmas. And again you can not get metadata with specific behaviour
To address this problems you can return special object from "class annotating" methods. It will allow you to add any behaviour to it and instantiate it together with any other object without restrictions. In that case to query annotations you will evaluate found pragma methods and collect result. In addition you will probably need cache results if annotations are part of some frequent processing logic. And for cache you will need some invalidation logic because "class annotating" methods can be removed or added.

So many libraries implement described mechanizms in one or another way. And they all duplicate implementation of class annotations in one or another way.

For example in Commander users annotate command classes with activators which represent the way how access and execute commands (shortcut, context menu, etc..). Activators are attached as class side methods with pragma #commandActivator. Each method returns activator instance.

Calypso browser has similar mechanism to declare what tools should be in the browser as tabs. Each tool defines class side methods which return the context of browser where it should be shown.

Generally class annotations are very known and useful concept. In Java and C# they are used everywhere: serialization, ORM, web services, whatever.

So I decided introduce class annotations as reusable mechanizm in Pharo. You can look at first version on github https://github.com/dionisiydk/ClassAnnotation. Interesting that it is just one class with two method extensions. Main logic is based on existing PragmaCollector. That's why it is so small library.

So in my implementation every annotation is subclass of ClassAnnotation. To attach it to classes you should create new class side method which will return an instance of the annotation. This method should be marked with pragma #classAnnotation:
MyClass class>>specialAnnotation
  <classAnnotation>
  ^MySpecialAnnotation new
Then you can query annotations using one of the following methods:
You can ask concrete annotation class for all registered instances:
MySpecialAnnotation registeredInstances
And you can ask given class for all attached annotations:
MyClass classAnnotations
All annotations are cached. So it is cheap to query them.

Now I start adopt Calypso and Commander to use this new mechanizm. And I think there are many places where class annotations will simplify the system.

Interesting that it really took time to realize that the things which Commander and Calypso implement are actually annotation logic. Thank's Marcus Denker who helps me with this.

tag:blogger.com,1999:blog-621833069645593200.post-4391108841316232185
Extensions
Full Calypso in pictures
Show full content
At Esug2017 I made presentation about Calypso. It shows full set of features in pictures.
Have fun to look at it:

tag:blogger.com,1999:blog-621833069645593200.post-106356070922466980
Extensions
PharoThings. A live programming IoT platform based on Pharo
Show full content
I am glad to announce the project PharoThings which brings the live programming environment into IoT domain. 
It includes:
  • development tools to lively program, explore and debug remote boards (based on TelePharo)
  • board modeling library which simplifies board configuration
    • Raspberry driven by WiringPi library
    • Arduino driven by Firmata, soon
    • Beaglebone, soon
Follow github page and videos to get a feeling of this project: Now PharoThings is in beta stage together with documentation and videos. I would like any feedback on how to improve them
tag:blogger.com,1999:blog-621833069645593200.post-9111809459564517785
Extensions
PharmIDE is renamed to TelePharo and moved to github
Show full content
This time to talk about PharmIDE migration.

In the team we finally agreed on the end name for project. It is now TelePharo.
Prefix "tele" means some action on or by distance. And this is what the project is about: to work remotely with Pharo images.

With new name project was moved to github repository https://github.com/dionisiydk/TelePharo with all dependencies:


According to the new name classes were renamed with the new prefix "Tlp".

TelePharo brings tiny bug fixes and new tools comparing to previous project.

Import remote code changes
Now you are able to import remote code changes (thank's Norbert for the script):
remotePharo applyChangesToClient
Underhood it loads all Epicea events from remote image and applies them into the local image. Then you just need commit the code into source repository.
Remote process browser
The new remote tool is added. You can browse processes which are running on remote image:
remotePharo openProcessBrowser

It is very initial version of ProcessBrowser based on Calypso. It will be improved in future. Now it allows explore and terminate processes on remote Pharo image.

Other improvements
  • Playground/inspector scripts are safe for disconnection from remote side

On remote side script can use remote variables (from remote playground). And now if communication is broken (bad connection) it will use cached values and will not break. It means that you are able to run processes on remote side using playground variables. And these processes will continue work when you disconnect.

  • Command line option "startServerOnPort" is safe when image was saved with running server

In past this option broke startup of image which included running server.
Also at the end of startup TelePharo prints actual server port into console

  • Better remote image save

Now expression "remotePharo saveImage" waits until remote side will be saved and connection will be recovered.

  • Some optimisations on remote communication

That's all. Feel free to fork TelePharo and report bugs. 
P.S. For those who skipped previous project here is the link. Notice that valid instructions are now at TelePharo project page and classes are now renamed
tag:blogger.com,1999:blog-621833069645593200.post-1571306505293813776
Extensions
Calypso update: many improvements and migration to GitHub
Show full content
New version 0.7.9 is done. Calypso is now hosted on https://github.com/dionisiydk/Calypso.
To load it use following script:
Metacello new
  baseline: 'Calypso';
  repository: 'github://dionisiydk/Calypso';
  load
Feel free to fork it and pull requests to dev branch.

Main improvement is navigation history:


It remembers table selections, browser modes and active tabs. You can switch browser to class hierarchy and go back using shortcut or button.
Another cool feature is across window navigation. When you spawn new browser "go back" command will close this window and focus initial one. "Go forward" in that case will open closed window again. Video below shows it in live:


You can notice that now method editor allows edit protocol and package just in place:


You don't need anymore create protocol in advance and select it. Just type it directly in method editor or choose extending package if you want.
These editors are placed in status bar which can be filled by tools and browser plugins. For example critic plugin shows analysis indication in status bar (look at the bottom of first image).

SUnit plugin is also improved. It extends toolbar of method browser with two buttons. One button runs all tests from method list. Another button runs all failures:


Full browser adds special "failed tests" group which appears when failure exists:


With selected group you can open all tests in method browser by context menu command.

Extra tab with #setUp method is shown when test class is selected. It is suitable tool which provide fast access to setup logic of test case. And you can see test and setup at once:


Now other method groups in pictures:

  • Abstract methods
  • Overridden methods
  • Overrides methods

  • Methods which should be implemented. They are defined as abstract in superclasses


  • Breakpoints


  • Deprecated methods
  • Critiques. It is most interesting group which collects all problem methods by evaluating critic analysis in background 


The next main feature will be scoped refactoring. Idea is to extend current change browser

with scope selection tool in the way similar to method browser:

New change browser is also needed to remove dependency from Nautilus.  Soon we will integrate Calypso in Pharo 7 and removing Nautilus code will be another important task.

tag:blogger.com,1999:blog-621833069645593200.post-7168029105616850418
Extensions
PharoDays2017. Calypso presentation
Show full content
Another Pharo year is gone. I made presentation about Calypso browser at PharoDays2017.
You can look at slides here:


And try it lively by:
Metacello new
  baseline: 'Calypso';
  repository: 'github://dionisiydk/Calypso';
  load.

#ClySystemBrowser asClass open

tag:blogger.com,1999:blog-621833069645593200.post-6544237907388295533
Extensions
Commander: command pattern library
Show full content
Commander is a new Pharo library which models application actions as first class objects. Every action is implemented as separate command class (subclass of CmdCommand) with #execute method and all state required for execution. Commands are reusable objects and applications provide various ways to access them: shortcuts, context menu, buttons, etc.. This information is attached to command classes as activator objects. Currently there are three types of activators:
  • CmdShortcutCommandActivator
  • CmdContextMenuCommandActivator
  • CmdDragAndDropCommandActivator
Activators are declared in command class side methods marked with pragma #commandActivator. For example following method will allow RenamePackageCommand to be executed by shortcut in possible system browser:  
RenamePackageCommand class>>packageBrowserShortcutActivator
  <commandActivator>
  ^CmdShortcutCommandActivator by: $r meta for: PackageBrowserContext
And for context menu:  
RenamePackageCommand class>>packageBrowserMenuActivator
  <commandActivator>
  ^CmdContextMenuCommandActivator byRootGroupItemFor: PackageBrowserContext
Activators are always declared with application context where they can be applied (PackageBrowserContext in example). Application should provide such contexts as subclasses of CmdToolContext with information about application state. Every widget can bring own context to interact with application as separate tool. For example system browser shows multiple panes which provide package context, class context and method context. And depending on context browser shows different menu and provides different shortcuts. To support activators command should implement several methods:  
  • canBeExecutedInContext: aToolContext
By default it returns true. But usually commands query context for specific information. For example RenamePackageCommand requires package and it defines this method as:  
RenamePackageCommand>>canBeExecutedInContext: aToolContext
   ^aToolContext isPackageSelected
  • prepareFullExecutionInContext: aToolContext
In this method command should retrieve all state required for execution. It can also ask user for extra data. For example RenamePackageCommand retrieves package from context and asks user for new name:  
RenamePackageCommand>>prepareFullExecutionInContext: aToolContext
    package := aToolContext selectedPackage.
    newName := UIManager default
        request: 'New name of the package'
        initialAnswer: package name
        title: 'Rename a package'.
    newName isEmptyOrNil | (newName = package name) ifTrue: [ ^ CmdCommandAborted signal ]
To break execution command can raise CmdCommandAborted signal.  
  • applyResultInContext: aToolContext
Purpose of this method is to be able interact with application when command completes. For example if user creates new package from browser then at the end of command browser should open created package:  
CreatePackageCommand>>applyResultInContext: aToolContext
    aToolContext showPackage: resultPackage
Commands are supposed to be reusable for different contexts and these methods should be implemented with that in mind. They should not discover internal structure of contexts. Specific context can override activation methods and send own set of messages to command. For example:  
SpecialContextA>>allowsExecutionOf: aCommand
     ^aCommand canBeExecutedInSpecialContextA: self

SpecialContextA>>prepareFullExecutionOf: aCommand
  aCommand prepareFullExecutionInSpecialContextA: self

SpecialContextA>>applyResultOf: aCommand
  aCommand applyResultInSpecialContextA: self
By default CmdCommand can implement them with standard context methods. And only particular commands will override them specifically:  
CmdCommand>>prepareFullExecutionInSpecialContextA: aSpecialContextA
  self prepareFullExecutionInContext: aSpecialContextA

SomeCommand>>prepareFullExecutionInSpecialContextA: aSpecialContextA
  "special logic to prepare command for execution"
Different kind of activators extend commands with new protocol to support them. For example context menu activator add building method to command:  
command fillContextMenu: aMenu using: anActivator
By default it just creates item morph and allow subclasses to define default label and icon:
  • defaultMenuItemName
  • setUpIconForMenuItem: aMenuItemMorph
But subclasses can override build method to represent themselves differently. For example they can create item morph with check box. The way how concrete type of activator hooks into application is responsibility of application. For example to support shortcuts based on commands application should define specific kmDispatcher for target morphs:  
YourAppMorph>>kmDispatcher
  ^ CmdKMDispatcher attachedTo: self
with supporting method:  
YourAppMorph>>createCommandContext
  ^YourAppContext for: self
If application wants context menu based on commands then it needs to hook into context menu part of application and ask activator to build menu:  
menu := CmdContextMenuCommandActivator buildMenuFor: anAppMorph inContext: aToolContext
In future Commander will provide deep integration with UI. And many things will work automatically. To load code use following script:  
Metacello new
  baseline: 'Commander';
  repository: 'github://dionisiydk/Commander';
  load.
Detailed documentation can be found here
tag:blogger.com,1999:blog-621833069645593200.post-571815300769602006
Extensions
Calypso navigation model
Show full content
This time I am going describe Calypso navigation model.

In Calypso users query environment for specific set of objects.
First you need environment instance. There is global one for current image:
env := ClyNavigationEnvironment currentImage
It is navigation environment which is created over some system environment. In this case it is current image:
ClySystemEnvironment currentImage
System environment models the image. It includes package manager, globals and system announcer. And navigation environment provides interface to query information from it. It organizes cache of all queries.  If you will browse senders of message #do: same result will be returned for second call. Cache optimizes performance and memory usage during navigation.
You can use your own navigation instance instead of global one:
env := ClyNavigationEnvironment over: ClySystemEnvironment currentImage
External libraries can provide own system environment and Calypso will be able browse it. For example new version of Ring allows browse code repository with all Calypso features.

For next steps you need a scope where you will look at environment objects.
It can be scope of full system:
systemScope := env systemScope
Or it can be scope of concrete objects:
packageScope := env selectScope: ClyPackageScope of: {Point package}. 
classScope := env selectScope: ClyClassScope of: {Point. Collection}
With scope you can evaluate queries:
packageScope query: ClySortedClasses 
classScope query: ClySortedMethods
packageScope query: (ClyMessageSenders of: #(do: x))
classScope query: (ClyMessageImplementors of: #(select: y:)) 
Any query returns instance of cursor which provides stream access to result (details below).
Result is represented by requested ClyEnvironmentContent subclass. In first example it is instance of ClySortedClasses which is sent as argument. Query method accepts query instance (subclasses of ClyEnvironmentQuery) or compatible object which implements #asEnvironmentQuery message. And class of result itself plays role of most trivial query ClyAllItemsQuery. This query is responsible to return all objects accessible from given scope in requested form. For example you can query all classes in hierarchical form:
packageScope query: ClyHierarchicallySortedClasses
Any query is created with requested content or defines default one.  In example senders and implementors use sorted methods by default. But they can use different:
classScope query: (ClyMessageSenders of: #(do:) as: ClyHierarchicallySortedMethods)
As was mentioned above actual result of #query: is cursor object, the instance of ClyEnvironmentCursor:
cursor := classScope query: ClySortedMethods.
Cursor provides stream access to requested content items:
cursor currentItem.
cursor nextItem.
cursor moveTo: itemPosition. 
cursor retrieveAll.
Returned items are not raw objects like methods or classes. Instead they are instances of ClyEnvironmentItem which wraps actual object. Items extend objects with arbitrary set of properties. For example if class has abstract method it can be marked with "abstract property". If method is overridden in subclasses it can be marked by "overridden property". Then tools use these properties to provide specific representation for items. For example browser can show abstract classes with italic font and it can show special icon nearly overridden method.

Computation of properties is slow. Imaging that you look at all classes in system and for each class you want abstract property. It will require scanning almost all methods in system.
Calypso solves this problem in two ways:
  • All queries are cached. Computation will be performed only once
  • Properties are computed lazily when objects are really used.  For example they computed for objects which are shown to user, for only visible part of them.
Lazy computation is hidden from users by cursor instance. Cursor asks observed environment content to resolve small part of items according to current position. Then cursor uses resolved part as items cache. And new portion of items are resolved by demand.

This logic provides important optimization for remote scenario where observed content is remote object. In this case only used part of items is transferred over network. And when next part is needed it is loaded to client. It makes remote browser very fast because only visible part of packages, classes and methods are sent over network and all required information is available in few requests.

Now let's play with example cursor. It can be opened in table morph:
cursor := packageScope query: ClySortedClasses.
dataSource := ClyCollapsedDataSource on: cursor.
table := FTTableMorph new.
table
extent: 200 @ 400;
dataSource: dataSource;
openInWindow. 

Cursor provides query API to evaluate new queries with modified parameters.
For example you can ask different kind of result for original query:
cursor := cursor query: ClyHierarchicallySortedClasses


Or you can evaluate new query with extra package:
cursor := cursor queryContentInScopeWith: #'AST-Core' asPackage.

Or you can evaluate new query without existing package:
cursor := cursor queryContentInScopeWithout: #Kernel asPackage.

With cursor you can navigate to the children scope of particular items. For example you can query methods of selected classes:
cursor := cursor query: ClySortedMethods from: {Point. Array}.

You can also evaluate original query in different scope. It allows fetch class side methods of selected classes:
cursor := cursor queryContentInNewScope: ClyClassSideScope. 

All these queries never modify cursor state. They always return new cursor instance which points to new result.

On top of this navigation model Calypso implements tree structure. For example you can look at classes and methods in same table morph:
cursor := packageScope query: ClySortedClasses.
dataSource := ClyCollapsedDataSource on: cursor.
dataSource childrenStructure: { ClySortedMethods }.
table := FTTableMorph new.
table
extent: 200 @ 400;
dataSource: dataSource;
openInWindow

Tree structure can include many levels. For example packages -> class groups -> classes:
cursor := env systemScope query: ClySortedPackages.
dataSource := ClyCollapsedDataSource on: cursor.
dataSource childrenStructure: { ClySortedClassGroups. ClyHierarchicallySortedClasses}.
table := FTTableMorph new.
table
extent: 200 @ 400;
dataSource: dataSource;
openInWindow

Also it is possible to show hierarchical items with collapsing buttons:
cursor := packageScope query: ClyHierarchicallySortedClasses.
dataSource := ClyExpandedDataSource on: cursor.
table := FTTableMorph new.
table
extent: 200 @ 400;
dataSource: dataSource;
openInWindow

At the end let's implement new environment content RandomOrderedMethods:
ClyMethodsContent subclass: #ClyRandomOrderedMethods
instanceVariableNames: ''
classVariableNames: ''
package: 'Calypso-Example'
Each kind of environment content implements set of the building methods depending on what scope it supports. For example ClySortedMethods supports extracting methods from classes and method groups. ClySortedClasses supports extracting classes from packages and class groups.
When ClyAllItemsQuery is evaluated by given scope it asks requested content to be built from concrete objects. For package scope it will ask content for #buildFromPackages:. For class scope it will ask content for #buildFromClasses:.
For simplicity ClyRandomOrderedMethods will support only class scope:
buildFromClasses: classes
items := OrderedCollection new.
classes do: [ :eachClass |
eachClass localMethods do: [ :each |
items add: (ClyEnvironmentItem named: each selector with: each)] ].
items shuffle
Now look at methods in new form:
cursor := env systemScope query: ClySortedPackages.
dataSource := ClyCollapsedDataSource on: cursor.
dataSource childrenStructure: { ClySortedClasses. RandomOrderedMethods}.
table := FTTableMorph new.
table
extent: 200 @ 400;
dataSource: dataSource;
openInWindow

"Building" methods are required to be able evaluate "all items queries" with new implemented form. More advanced queries could require another code. Generally queries implement one method:
  • fetchContent: anEnvironmentContent from: anEnvironmentScope
where they dispatch processing to scope and environment content depending on their logic. For example to be able to use new random order for senders or implementors the method #buildFromMethods: should be implemented by content:
buildFromMethods: methods
items := methods shuffled collect: [ :each |
ClyEnvironmentItem named: each selector with: each]
If you open senders browser:
browser := ClyMethodBrowser browseSendersOf: #do:.

you can switch it to new order:
browser switchToResultContent: ClyRandomOrderedMethods

For more details look at code and read class comments.
Next time I will show how extend browser with new functions.
tag:blogger.com,1999:blog-621833069645593200.post-4838851208542003412
Extensions
PharmIDE: Pharo remote IDE to develop farm of Pharo images remotely
Show full content
I am glad announce first version of PharmIDE project which is complete toolset for remote development of Pharo images. It includes:
  • remote debugger
  • remote inspector
  • remote playground
  • remote browser
Old project RemoteDebuggingTools is deprecated. But it could be used for Pharo 5 images. PharmIDE targets Pharo 6 or later and provides everything which was done in original project.

Server part of project should be installed on target image:
Metacello new
        smalltalkhubUser: 'Pharo' project: 'PharmIDE';
        configuration: 'PharmIDE';
        version: #stable;
        load: 'Server'
Then server should be started on port where client image can connect:
PrmRemoteUIManager registerOnPort: 40423
Image can be saved with running server. It will be automatically started when image restarts. Or you can use command line option for this:
./pharo PharoServer.image remotePharo --startServerOnPort=40423
On IDE image client side of project should be installed:
Metacello new
        smalltalkhubUser: 'Pharo' project: 'PharmIDE';
        configuration: 'PharmIDE';
        version: #stable;
        load: 'Client'
And then you can connect Pharo to remote image:
remotePharo := PrmRemoteIDE connectTo: (TCPAddress ip: #[127 0 0 1] port: 40423)
It registers local debugger and browser on remote image:

  • Any error on remote image will open debugger on client image with remote process stack
  • Any browser request on remote image will open browser on client image with remote packages and classes
  • User requests from server are redirected to client. Any confirm or inform requests from remote image will be shown on client. For example author name request will be shown on client image where user can type own name remotely.

With remotePharo instance you can evaluate scripts:
remotePharo evaluateAsync: [ [1/0] fork ].
remotePharo evaluate: [ 1 + 2 ] "==> 3".
remotePharo evaluate: [ 0@0 corner: 2@3 ] "==> aSeamlessProxy on remote rectangle".
Look at original project post for more details about scripting and inspecting. In this version inspector is improved:
  • PrintIt command shows correct #printString of remote object instead of 'aSeamlessProxy~'. 
  • "Workspace" variables are supported in inspector. You can save temp results in it.
  • Implementors/senders shortcuts will open local browser on remote environment. Any subsequent navigation will be bound to remote image.
Remote playground and remote browser support same set of features. All text editors support same commands like in local environment.

To open browser or playground use:
remotePharo openPlayground.
remotePharo openBrowser
Now #debugIt command and refactorings are not working remotely but they will be supported in future.

Now look at PharmIDE in action:


Update. Project was renamed to TelePharo and moved to github. Details are here http://dionisiydk.blogspot.fr/2017/08/pharmide-is-renamed-to-telepharo-and.html


tag:blogger.com,1999:blog-621833069645593200.post-693867192015842137
Extensions
Calypso update: MethodBrowser and better UI
Show full content
I glad release new version of Calypso. It includes method browser which makes Calypso complete toolset for system navigation.
Also new version contains many UI changes:
  • white toolbar (according to theme background color)
  • separators between radio button groups
  • clickable labels instead of buttons


Method browser has many new cool features:
  • Flat and hierarchy view modes. First shows methods as flat list sorted by selectors. And last sorts methods according to class hierarchy 
  • Scopes. You can switch between package, class or system scopes to filter methods. Scopes are inherited from initial tool which opens browser
  • "Child" method browsers are opened in tabs. Click on senders/implementors button do not open new window but instead it shows result in new window tab

To make Calypso default tool evaluate:
ClyBrowser beAllDefault
And little live video:


tag:blogger.com,1999:blog-621833069645593200.post-2057789354598533517
Extensions
Calypso. New system browser for Pharo
Show full content
Calypso is a new system browser for Pharo which I developed as required component for general remote IDE project.  First initial version is done. You can try it by:
Metacello new
  baseline: 'Calypso';
  repository: 'github://dionisiydk/Calypso';
  load.
#ClySystemBrowser asClass open.
I release Calypso in the state where I finish most design decisions which I think important for project evolution.  Of course there are a lot of things to do and improve. But browser is fully working. And most Nautilus features are supported.  Now it is important to community to participate in project and make browser great again :). We need escape from Nautilus pasta code.
Please report any ideas/bugs on github page https://github.com/dionisiydk/Calypso/issues. I already fill it with my wishes.

Next step I will work on documentation/class comments and I will publish couple of posts about Calypso internals

Browser features in many pictures
  • all navigation panes are based on fast table.


  • multiple selection supported everywhere


  • dynamic tabs instead of single source code panel
    • separate tools in tabs to create/edit methods/classes
    • separate tab for class comment
    • extended by plugins


  • dynamic toolbar for hierarchy switches and buttons
    • class refs, senders and implementors again
    • extended by plugins


  • new hierarchies: traits and trait users where available


  • method group view instead of protocols view
    • old "dynamic protocols" as core feature
    • based on method tags as symbols
    • support multiple tags per method (Pharo 7)
    • could provide hierarchy of tags (like in Dolphin)
    • not required star convention for class extension
    • inherited methods group
    • extensions group


  • visibility option for inherited methods


  • methods inherited from traits are not shown by default
    • simple checkbox to show them if exist

  • variable view as special mode for method group view.
    • refactorings directly on shown variables


  • package view is based on class groups
    • "dynamic protocols" for classes
    • based on class tags as symbols
    • support multiple tags per class (Pharo 7)
    • extensions group

  • navigation over hierarchy view automatically selects package of selected class


  • automatic selection of items similar to last selection
    • select method A on class1 then select class2 and method A of class2 will be selected automatically
  • unaccepted edits are not lost when any selection changed
    • tab with modified method stayed "pinned" with special icon
    • same for any other editors (class definition, class comment)
  •  table cells are extendable by plugins
    • ClySUnitBrowserPlugin provides classic icon with test results
    • also icon for package and class tag
  • explicit commands instead of duplicated menu and shortcuts
    • extendable by plugins
There are a lot of things to explain which I will try to do at next steps
tag:blogger.com,1999:blog-621833069645593200.post-1798766545557425915
Extensions
ObjectTravel. A tool to traverse object references
Show full content
ObjectTravel is a tool to deeply traverse "native" references of objects through instance variables and "array contents".
     Metacello new
         baseline: 'ObjectTravel';
         repository: 'github://dionisiydk/ObjectTravel';
         load.
Usage is quite simple: just create traveler instance on your object and send #referencesDo:
      traveler := ObjectTraveler on: (1@2 corner: 3@4).       traveler referencesDo: [:eachRef | eachRef logCr].
It will print on transcript:
      (1@2)       (3@4)       1       2       3       4
There is convenience method to collect all references:
      traveler collectReferences. "==> an OrderedCollection((1@2) (3@4) 1 2 3 4))
Traveler enumerates each reference in breadth-first direction and visit every reference only once:
      point := 1@2.       traveler := ObjectTraveler on: {point . #middle. point}.       traveler collectReferences "==> an OrderedCollection((1@2) #middle (1@2) 1 2)"
"point" is referenced two times. But traveler will go deeply only once. So circles are supported:
      array := Array new: 2.       array at: 1 put: 1@3.       array at: 2 put: array.       traveler := ObjectTraveler on: array.       traveler collectReferences asArray = { 1@3. array. 1. 3 } "==> true"
You could control traveler to skip particular objects:
      rect := 1@2 corner: 3@4.       traveler := ObjectTraveler on: rect.       traveler skip: rect origin.       traveler collectReferences "==> an OrderedCollection((1@2) (3@4) 3 4)"
(it can be done during enumeration too).
Also you could apply predicate for objects which you want traverse:
      rect :=
      traveler := ObjectTraveler on: {1@2 corner: 3@4. 5@6}.        traveler traverseOnly: [:each | each isKindOf: Point].        traveler collectReferences "==> an OrderedCollection((1@2) corner: (3@4) (5@6) 5 6)"
There are another convenient methods:
      traveler countReferences
It will count all references in object graph.
      traveler copyObject
It will make deep copy of original object which is similar to #veryDeepCopy: cyclic references are supported. 
Also traveler could find all paths to given object in object graph:
      root :=  {#one -> #target. {#emptyArray}. {#two -> #target}}.       traveler := ObjectTraveler on: root.       traveler findAllPathsTo: #target "==>            {#one -> #target. root}             {#two -> #target. {#two -> #target}. root} "
During enumeration traveler could replace visited references:
      rect := 1@2 corner: 3@4.       traveler := ObjectTraveler on: rect.       traveler referencesDo: [:each |             each isInteger ifTrue: [traveler replaceCurrentReferenceWith: each + 1]].       rect "==> 2@3 corner: 4@5"
It would be fun project to connect ObjectTraveler to XStreams to make any object "streamable":
      (1@2 corner: 3@4) traveling reading count: [:each | each isInteger].       (1@2 corner: 3@4) traveling reading get; get; read: 2; rest.       (1@2 corner: 3@4) traveling writing write: 100@500

Update: project was moved to github
tag:blogger.com,1999:blog-621833069645593200.post-2572139239303005122
Extensions
Major Seamless update
Show full content
I glad to publish new version of Seamless (0.8.2) together with new doc.
It could be loaded by:

       Metacello new
           baseline: 'Seamless';
           repository: 'github://dionisiydk/Seamless';
           load

It works in Pharo 5 and 6. As usually feedback is welcome.

It is complete redesign of original version with the goal to make it more flexible, reliable and simple. (original version was created by Nikolaos Papoulias).

New version introduces new project Basys as foundation for new design.
Basys implements an abstract layer for networks which require bidirectional communication between clients and servers. (details here).
Seamless implements Basys network to organize transparent communication between distributed objects.

To use Seamless SeamlessNetwork should be created on client and server:

       network := SeamlessNetwork new.

To accept connections server should be started:

       network startServerOn: 40422.

Clients could connect to server and retrieve remote environment:

       remotePeer := network remotePeerAt: (TCPAddress ip: #[127 0 0 1] port: 40422).
       remoteSmalltalk := remotePeer remoteEnvironment.

       "or short version"
       remoteSmalltalk := network environmentAt: (TCPAddress localAt: 40422)

remoteSmalltalk here is proxy which delegates any received message to remote object. Remote messages are executed on server which return result back to client. Result can be returned as another proxy or as copy which contains another proxies.

In example result is reference to remote Smalltalk instance. It can access globals from remote environment:

       remoteTranscript := remoteSmalltalk at: #Transcript.
       remoteTranscript open; show: 'remote message'; cr

It will open transcript on server and print text on it.

Arguments of remote message are transferred to server with same logic as message result transferred to client. On server arguments can include proxies and server can send messages to them:

       remoteTranscript print: #(1 2 3 4 5)

Here array will be passed to server as reference. Then on server transcript will interact with it to print it. And as result client will receive messages from server.

Concrete transfer strategy is depends on transferred object. It is specified in method #seamlessDefaultTransferStrategy:

       Object>>seamlessDefaultTransferStrategy
            ^SeamlessTransferStrategy defaultByReference

       Number>>seamlessDefaultTransferStrategy
            ^SeamlessTransferStrategy defaultByValue

Default strategy could be overridden on network level:

       network transferByValue: (Instance of: Point).
       network transferByReference: (Identical to: #specificSymbol)

It allows to tune network for specific application to optimize communication between distributed objects. There are few other transfer strategies which allow minimize remote communication. Most interesting allows properties caching. It will transfer object reference together with specified properties. Following example will configure network to transfer class reference together with name:

       network transferByReference: (Kind to: Class) withCacheFor: #(name)

And then proxy for remote class will return #name from local cache instead of real remote call.

Previously announced project RemoteDebuggingTools uses all these feature to minimize communication between debugger and remote process. It allows to reduce number of remote messages for opening debugger from 800 to 13.

Now another important feature: block evaluation on remote peers:

       remotePeer evaluate: [1 + 2]. "==>3"

Given block is transferred to remote side and evaluated. Result is returned to client. As in other cases it could be proxy or normal object.

Block could use globals. On remote side they will be local globals of this remote environment. Following example will show notification on remote image:

       remotePeer evaluate: [Object inform: 'message from remote image'].

Temps and workspace variables can be used too. They will be transferred according to own strategies:

       | result |
       result := OrderedCollection new.
       remotePeer evaluate: [100 to: 500 do: [:i | result add: i factorial ]].

Non local return is also supported in regular Smalltalk semantics:

       remotePeer evaluate: [1 to: 10 do: [:i | i>5 ifTrue: [^i] ] ]. "==>6"

Also block could be evaluated asynchronously without waiting any result:

       | result |
       result := OrderedCollection new.
       remotePeer evaluateAsync: [result add: 1000 factorial]. "it will not wait result"

Seamless provides integration with GT tools. Remote proxies could be inspected to explore remote objects state with ability to execute remote scripts (doIt, printIt). It is shown on remote debugging demo.

To analyse remote communication Seamless implements special tool SeamlessLogger. It is explained in doc.  Here is little example for following code:

       remoteRect := remotePeer evaluate: [0@0 corner: 2@3].
       remoteRect area. "==>6".
       localRect := 0@0 corner: 5@2.
       remoteRect evaluate: [remoteRect area + localRect area] "==>16"

Statistics will show number of messages, receivers and bytes which was transferred over network in dimension of receiver class or message selector:


At the end I must say about two important issues which will be covered in next versions:

1) No garbage collection
SeamlessNetwork keeps all objects which was transferred by reference. They will never be cleaned while network is live.  Now It could be done manually by evaluating "network destroy". It will clean all object caches and close all connections. It could be not safe because remote peers could use this objects. Seamless tries to handle it properly with clear errors in such cases.  In future unused distributed objects will be cleaned automatically.
2) No security: no authorization and encryption. Now for security purpose you need external tools like VPN

Update: project was moved to github
tag:blogger.com,1999:blog-621833069645593200.post-1766430380734146977
Extensions
Remote debugging tools is ready
Show full content
I glad to release first version of RemoteDebuggingTools project. It allows explore and debug remote images.
Here is demo with debugging Seaside application:


On server side you need to install Server group of project:

Metacello new
        smalltalkhubUser: 'Pharo' project: 'RemoteDebuggingTools';
        configuration: 'RemoteDebuggingTools';
        version: #stable;
        load: 'Server'.

Then server should be started on port where client image could connect:

RemoteUIManager registerOnPort: 40423.

Also image could be started with running server from command line:

./pharo PharoWithServer.image debuggerServer --port=40423

On client side Client group should be installed

Metacello new
        smalltalkhubUser: 'Pharo' project: 'RemoteDebuggingTools';
        configuration: 'RemoteDebuggingTools';
        version: #stable;
        load: 'Client'.

Then RemoteDebugger could connect to target image:

debugger := RemoteDebugger connectTo: (TCPAddress ip: #[127 0 0 1] port: 40423).

It registers a RemoteDebugger as debugger tool on remote image. Any error there will open debugger on client image with remote process stack.

With connected debugger instance you can execute scripts:

debugger evaluateAsync: [ [1/0] fork ].
debugger evaluate: [ 1 + 2 ] "==> 3".
debugger evaluate: [ 0@0 corner: 2@3 ] "==> aSeamlessProxy on remote rectangle".

Async evaluation not returns any result of block. It just transfer block to remote side and not waits any result.
Normal evaluation will wait until block competes on remote side. And result will be returned. There is nice integration with GTTools to inspect remote objects.

Blocks could reference local objects like temps or workspace variables. You can write scripts like:

result := OrderedCollection new.
debugger evaluateAsync: [100 to: 500 do: [ :i | result add: i factorial] ].

Non local return is also supported. Following expression works same way as local block evaluation:

debugger evaluate: [ 100 to: 500 do: [ :i | i > 200 ifTrue: [^i] ]].

This project (with scripting facilities) are based on new version of Seamless which will be announced soon next time. It misses very important feature now: distributed garbage collection. When you finish your debugging session you need manually disconnect your debugger. It will clean all garbage:

debugger disconnect.

Other restrictions which will be covered in future:
  • debugging expressions from debugger is not working (debugIt from context menu)
  • code browse and navigation are not working. Nautilus and MessagesBrowser should be able to work with remote environment.
  • remote stack items are printed with prefix SeamlessProxy. It should be improved
  • printIt inside debugger/inspector should return remote printString instead of aSeamlessProxy.  
  • no security: no authorization and encryption. Now for security purpose you need external tools like VPN
Update. This project is outdated. Use PharmIDE instead which includes full toolset for development: remote browser, remote playground, remote inspector and remote debugger.
tag:blogger.com,1999:blog-621833069645593200.post-3981173243954601191
Extensions
Magic with Pharo Reflectivity
Show full content
Last days I play with idea of compile time evaluation without special language support.
For example in Dolphin Smalltalk there is special syntax for this:

##(100 factorial)

Factorial will be evaluated at method compilation time and result will be saved as literal. And this precomputed value will be used during method execution.

In Pharo we can do this without special syntax. Thank's to powerful reflection system which called Reflectivity. It allows reflection on the level of AST nodes with different kind of transformations.
With Reflectivity we could substitute particular expression with result when method will be executed first time. It is a bit different than compile time evaluation. But after first method execution it will be same: precomputed value of expression will be stored and used as regular literal.

And now magic:

100 factorial asMethodConst

I was quite impressed when I realize that this approach could work. First I tried to use blocks but it was completely not needed:

Object>>asMethodConst
| constNode link |
constNode := thisContext sender sourceNodeExecuted.
link := MetaLink new
metaObject: self;
control: #instead.
constNode link: link.
^self

#asMethodConst will be executed on result of expression. Trick here is that constNode is "message send" ast-node where receiver is target expression. Metalink with control #instead will substitute it as whole and receiver will not be executed anymore.

Wondering how little code is required. It will be available in Pharo soon (18768).
tag:blogger.com,1999:blog-621833069645593200.post-4009858078305288077
Extensions
ObjectStatistics. Simple objects analysis tool
Show full content
I am glad to announce ObjectStatistics tool to analyse set of objects by computing different kind of metrics and look at them from different angles. It implements simplistic OLAP Cube approach for data analysis but in objects space. Imaging that we have collection of message sends and we want to know number of message sends in dimension of receiver, receiver class and message selector. We have different angles to look at this data: from receiver class to selector and receiver or from selector to receiver class and receiver or any other combination.  We also could analyze different kind of metrics which could be computed on given objects. It could be number of unique receivers, execution time, executed lines of code, etc. This package implements computation of object statistics over declared metrics and dimensions space. For example code profilers could be easily implemented by this tool. Following code will produce statistics for printing SmallInteger 3:
ObjectStatistics>>exampleFlatProfiler
 | stat prev |
  stat := ObjectStatistics new.
  stat countAllAs: 'sends'.
  stat countDifferent: [:context | context receiver ] as: 'receivers'. 

  stat 
    dimension: [ :context | context receiver class ] 
    named: 'classes'; with: [ 
        stat dimension: [ :context | context selector ] 
            named: 'msgs' ];
    dimension: [ :context | context selector ] 
    named: 'msgs'; with: [ 
        stat dimension: [ :context | context receiver class ] 
            named: 'classes' ];
    dimension: [ :context | context receiver class -> context selector ] 
    named: 'leaves'; with: [ 
        stat dimension: [ :context | context sender method ] 
            named: 'sender' ].
 
  prev := nil.
  thisContext sender 
    runSimulated: [3 printString] 
    contextAtEachStep: [:current |
 current ~~ prev & (current sender == prev ) ifTrue: [
  stat accumulate: current].
 prev := current].
   
  ^stat inspect
ObjectStatistics provides GTTools integration which shows computed objects in suitable way:
Usually profilers show execution tree to analyse how many message sends was happen per method call or how many time was spent on each method call. To achieve this ObjectStatistics implements special recursive dimension which produce metrics per children::
ObjectStatistics>>exampleTreeProfiler
| stat prev |
stat := ObjectStatistics new.
stat countAllAs: 'sends'.
stat countDifferent: [:context | context receiver ] as: 'receivers'. 
  
stat 
    dimension: [ :context | context receiver class -> context selector] 
    named: 'calls' recursionUpTo: [:context | context sender].
 
prev := nil.
thisContext sender 
    runSimulated: [3 printString] 
    contextAtEachStep: [:current |
 current ~~ prev & (current sender == prev ) ifTrue: [
  stat accumulate: current].
 prev := current].
   
^stat inspect
And inspector will show regular profiler tree:
(here we also see stack frames which belongs to tool which ran example).  At the end lets look at methods of some package in multidimensional space:
ObjectStatistics>>exampleMethods
| stat |
  stat := ObjectStatistics new.
  stat countAllAs: 'methods'.
  stat countFunction: [:m | m linesOfCode ] as: 'lines of code'. 
 
  stat 
    dimension: [ :m | m methodClass package name ] 
    named: 'pckgs'; with: [ 
 stat dimension: [ :m | m methodClass ] 
     named: 'classes'; with: [
  stat dimension: [ :m | m selector] 
         named: 'methods']];
    dimension: [ :m | 
 m methodClass package mcWorkingCopy versionInfo author ] 
    named: 'authors'; with: [ 
 stat dimension: [ :m | m methodClass ] 
     named: 'pcks'; with: [
  stat dimension: [ :m | m methodClass ] 
      named: 'classes'; with: [
   stat dimension: [ :m | m selector] 
       named: 'methods']]].

  stat accumulateAll: ((RPackage allInstances 
 select: [ :each | each name beginsWith: 'Athens']) gather: #methods).
  ^stat inspect


You can load code by:
Metacello new
  baseline: 'ObjectStatistics';
  repository: 'github://dionisiydk/ObjectStatistics';
  load.

Update: project was moved to github
tag:blogger.com,1999:blog-621833069645593200.post-3302077817051278039
Extensions
Halt next object call
Show full content
ObjectVirus allows very simple implementation of object centric debugging. We can infect given object by virus which will halt any message send.
Let's create new GhostBehaviour for this:

GHGhostBehaviour subclass: #GHObjectCallHalt
      instanceVariableNames: ''
      classVariableNames: ''
      package: 'Ghost-ObjectCallHalt'

GHGhostBehaviour>>send: aMessage to: anObject
       | method breakpoint |
       anObject recoverFromVirus.
       self halt.
       ^aMessage sendTo: anObject

First we disable interception behaviour to not halt any following messages (to get halt once logic). And then we halt message processing. It will open debugger on any message send. And to access target method "step into" button should be pressed few times in the debugger.
To activate such behaviour on objects we can create suitable method:

Object>>haltOnNextCall
       | virus |
       virus := GHObjectVirus behaviour: GHObjectCallHalt new.
       virus infect: self

And now we can play with this:

      point := 2@3.
      point haltOnNextCall.
      0@0 distanceTo: point

It will open debugger:


Of course we don't want to step into target method manually. We want to see target method just in the debugger. To achieve this we can set up breakpoint on target method and run it instead of halt message processing:

GHGhostBehaviour >>send: aMessage to: anObject
       | method breakpoint |
       anObject recoverFromVirus.
       method := anObject class lookupSelector: aMessage selector.

       breakpoint := Breakpoint new
             node: method ast;
             once.
       breakpoint link condition: [ :receiver | receiver == anObject ] arguments: #(#object).
       breakpoint install.

       ^aMessage sendTo: anObject

And with this change we will see what we want:


Debugger shows Point>>x method because #distanceTo: asks #x and #y of given point to compute distance:


Last thing which is not nice is that we see all message interception logic on the debugger stack view. Fortunately Pharo stack model allows context manipulation and we can really remove unneeded stack elements from execution context:

GHGhostBehaviour >>send: aMessage to: anObject
       | method breakpoint |
       anObject recoverFromVirus.
       method := anObject class lookupSelector: aMessage selector.

       breakpoint := Breakpoint new
             node: method ast;
             once.
       breakpoint link condition: [ :receiver | receiver == anObject ] arguments: #(#object).
       breakpoint install.

       self activateTargetMethodOf: aMessage for: anObject

GHGhostBehaviour >>activateTargetMethodOf: aMessage for: anObject
       | targetContext sender objectClass |
       sender := thisContext.
       [ sender selector == #cannotInterpret: ] whileFalse: [ sender := sender sender ].
       thisContext terminateTo: sender sender.
       "We should not use direct message to object because we propaply already install breakpoint to it"
       objectClass := GHMetaMessages extractClassOf: anObject.
       targetContext := thisContext sender
             activateMethod: (objectClass lookupSelector: aMessage selector)
             withArgs: aMessage arguments
             receiver: anObject
             class: objectClass.

       targetContext jump

It covers our tracks of "halt-virus" infection:


At the end we can extend Pharo debugger with new button "Run to next self send" which will resume process execution and halt on next call to current receiver:

ResumeDebugAction subclass: #GHRunToNextSelfCallDebugAction
       instanceVariableNames: ''
       classVariableNames: ''
       package: 'Ghost-ObjectCallHalt'

GHRunToNextSelfCallDebugAction >>defaultLabel

       ^ 'Run to next self call'

GHRunToNextSelfCallDebugAction >>id

       ^ #runToNextObjectCall

GHRunToNextSelfCallDebugAction class >>gtStackDebuggingActionFor: aDebugger
       <gtStackDebuggingAction>

       ^ (self forDebugger: aDebugger)
             icon: GLMUIThemeExtraIcons glamorousPlay

GHRunToNextSelfCallDebugAction >>executeAction

       self currentContext receiver haltOnNextCall.

       ^super executeAction.

And with these debugger will be looked like:


And if you press new button debugger will be opened on #y method of current point:


Code is hosted in Ghost repository. You can use it in your development process:

Metacello new
  baseline: 'Ghost';
  repository: 'github://dionisiydk/Ghost';
  load: 'ObjectCallHalt'
tag:blogger.com,1999:blog-621833069645593200.post-7122852789435498456
Extensions
New version of Mocketry 3.0
Show full content
New version of Mocketry is out. You can load it from https://github.com/dionisiydk/Mocketry by 
Metacello new
  baseline: 'Mocketry';
  repository: 'github://dionisiydk/Mocketry';
  load
In this version I try to provide most simple way to stub any message to any object and to verify any occurred behaviour.
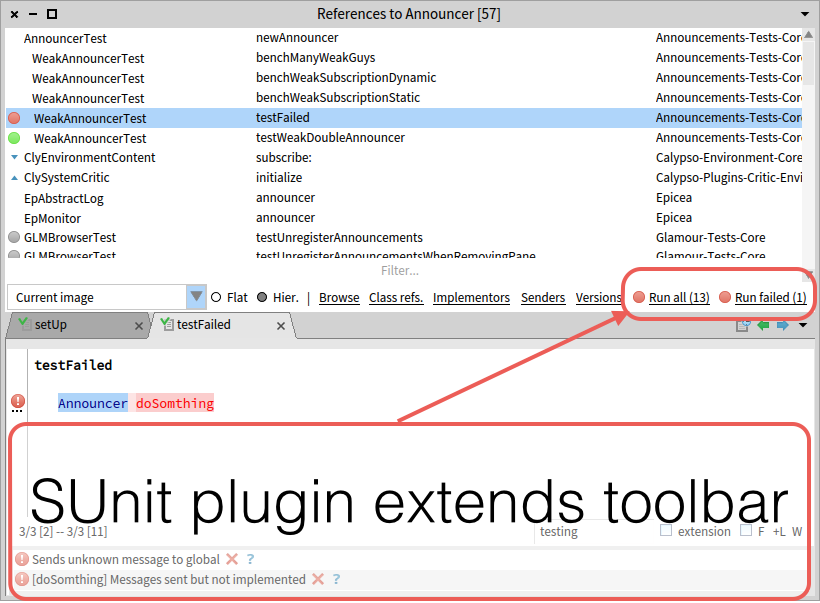
  It was presented at PharoDays2016 conference: Here I show full details about Mocketry Create mocks easily To create mock just use #new
yourMock := Mock new.
Mocketry not requires any special context variables for this. Also Mocketry implements auto naming logic to retrive variable names from test context. Inside test yourMock will be shown as "a Mock(yourMock)" (in debugger). But if you need special name you can specify it:
Mock named: 'yourMock'
You can look at it livelly in MockTests. Also there is way to get multiple mocks at once:
[ :mockA :mockB | "your code here" ] runWithMocks
Stub any message sends To stub message send just send message #stub to object and following message will create expectation:
mock := Mock new.

mock stub someMessage willReturn: 100.

mock someMessage should be: 100.
You can stub any objects. It is not only about mocks:
rect := 0@0 corner: 2@3.

rect stub width willReturn: 1000.

rect area should be: 3000 "are = width * height"
And you can do this with globals too:
DateAndTime stub now willReturn: #constantValue.

DateAndTime now should be: #constantValue.
But you should be carefull with globals. Don't try
Array stub new.
It will crash image. And if you stub global from workspace it is your responsibility to recover it from stub behaviour. Do it by this:
DateAndTime recoverFromGHMutation.
In case when you stub global inside test Mocketry automatically recovers all global stubs when test completes. Also with Mocketry you can define expectations for set of objects. For example you can stub message to ANY object:
Any stub width willReturn: 100.

mock := Mock new.
mock width should be: 100.

rect := 0@0 corner: 2@3.
rect stub. "#stub activates message intercection for real object. Without it following sentence will not work"

rect area should be: 300.
Or you can stub ANY message to particular object:
mock := Mock new.

mock stub anyMessage willreturn:: 100.

mock someMessage should be: 100.
mock someMessage2 should be: 100.
And both variants are supported:
Any stub anyMessage willReturn: 100.

mock := Mock new.
mock someMessage should be: 100.

rect := 0@0 corner: 2@3.
rect stub.

rect area should be: 100.
rect width should be: 100.
Any class is specific object spec which means "any" object. You can uses any kind of specs:
(Kind of: Rectangle) stub width willReturn: 100.

rect := 0@0 corner: 2@3.
rect stub.

rect area should be: 300.

rect2 := 0@0 corner: 4@5.
rect2 stub.

rect2 area should be: 500
Stub message sends with arguments In place of message arguments you can use expected objects itself. Or you can put specifications for expected arguments:
mock stub messageWith: arg1 and: arg2
mock stub messageWith: Any and: arg2
mock stub messageWith: [:arg | true]
mock stub messageWith: (Kind of: String) and: arg2
mock stub messageWith: (Instance of: Float) & (Satisfying for: [:arg | arg > 10]).
Last defined expectation has more priority than previous one. It allows you to define default expectations in setUp method and override it in particular tests. Following example shows it:
mock := Mock new.
(mock stub messageWith: (Instance of: SmallInteger)) willReturn: #anyInt.
(mock stub messageWith: (Kind of: String)) willReturn: #anyString.
(mock stub messageWith: 10) willReturn: #ten.

(mock messageWith: 10) should be: #ten.
(mock messageWith: 20) should be: #anyInt.
(mock messageWith: 'test' should be: #anyString
Expected actions for stubs There are different kind of expected actions:
mock := Mock new.

mock stub someMessage willReturn: #result.
mock someMessage should be: #result.

mock stub someMessage willRaise: ZeroDivide new.
[mock someMessage] should raise: ZeroDivide.

(mock stub someMessageWith: #arg) will: [#result].
(mock someMessageWith: #arg) should be: #result.

(mock stub someMessageWith: #arg1 and: #arg2) will: [:arg1 :arg2 | arg1, arg2].
(mock someMessageWith: #arg1 and: #arg2) should equal: 'arg1arg2'.

mock stub someMessage willReturnValueFrom: #(result1 result2).
mock someMessage should be: #result1.
mock someMessage should be: #result2
Extra conditions on message sends It is possible to verify arbitrary condition when expected message is going to be executed. For example:
mock := Mock new.
mock someMessage
    when: [flag] is: (Kind of: Boolean);
    when: [flag] is: true;
    when: [ flag ] satisfy: [ :object | true or: [ false ] ].

flag := true.
mock someMessage. "not failes"

flag := false.
mock someMessage "will fail immediately on call by last condition: flag should be true"

flag := #flag.
mock someMessage "will fail immediately on call by first condition: flag should be boolean"
Also Mocketry implements process related condition to check that message was synchronously sent (relative to test process):
mock stub someMessage shouldBeSentInThisProcess.
[ mock someMessage ] fork. "will fail immediately on call".

mock stub someMessage shouldBeSentInAnotherProcess.
[ mock someMessage ] fork. "will not fail".
mock someMessage. "will fail immediately on call"
Message sends usage rules It is possible to specify how much times expectation can be used:
mock := Mock new.

mock stub someMesage willReturn: #default.
mock stub someMessage willReturn: 300; use: 3.
mock stub someMessage willReturn: 200; useTwice.
mock stub someMesage willReturn: 100 useOnce.

"last defined expectation is more preferred then previously defined"
mock someMessage should be: 100.

mock someMessage should be: 200.

mock someMessage should be: 300.

mock someMessage should be: #default
Unexpected messages. Automocks Mock returns another special mock for unexpected messages (when no expectation is defined for received message):
mock := Mock new.

automock := mock someMessage.

automock should beInstanceOf: MockForMessageReturn.
And any message to this mock will produce another automock. It means that your tests will not fail if you will not define any expectation for your mocks. It allows you put only required detailes inside your tests which really make sense for tested aspect of functionality. Anything else does not matters. Also to improve this idea automock try to play role of false in boolean expressions.
mock := Mock new.
returnedMock := mock someMessage.

result := returnedMock ifFalse: [ #falseBranch ] ifTrue: [ #trueBranch ].

result should be: #falseBranch.
returnedMock should be: false
And play zero in arithmetic
mock := Mock new.
returnedMock := mock someMessage.

result := 1 + returnedMock.
result should equal: 1.
returnedMock should equal: 0
Stub group of message sends There is way to stub multiple message sends at once:
mock := Mock new.
rect := 0@0 corner: 2@3.
rect stub.

[ mock someMessage willReturn: 10.
rect width willReturn: 1000 ] should expect.

mock someMessage should be: 10.
rect area should be: 3000.
Inside "should expect" block you don't need to send extra #stub message to objects Verify message sends With Mocketry you can check that particular object received particular message. Use "should receive" expression for this:
mock := Mock new.

mock someMessage.

mock should receive someMessage.
mock should not receive anotherMessage
You can verify that message was send to real objects. It is not only about mocks:
rect := 0@0 corner: 2@3.

rect stub "it should be here to enable message interception"
rect area

rect should receive width. "area = width * height"
And you can do this with globals too:
DateAndTime stub.
DateAndTime midnight.

DateAndTime should receive now. "inside midnight #now is called"
But you should be carefull with globals. Look at section about stubs. Also with Mocketry you can verify that message was sent to set of objects. For example you can verify that message was sent to ANY object:
mock := Mock new.
rect := 0@0 corner: 2@3.
rect stub.

mock width.
rect area.

Any should receive width. "it will check that mock and rect received message #width"
Any should receive area "it will fail because mock not received #area message".
Also you can verify that ANY message was sent to particular object:
mock := Mock new.

mock someMessage should be: 100.

mock should receive anyMessage.
And both variants are supported:
mock := Mock new.
rect := 0@0 corner: 2@3.
rect stub.

mock someMessage.

Any should receive anyMessage. "will fail because rect not received any message".

rect width.

Any should receive anyMessage. "will not fail because both objects received at least one message"
Any class is specific object spec which means "any" object. You can uses any kind of specs to verify message send for set of objects:
rect := 0@0 corner: 2@3.
rect stub.

rect area.

rect2 := 0@0 corner: 4@5.
rect2 width.

(Kind of: Rectangle) should receive width. "will not fail because both rect's received message #width"
(Kind of: Rectangle) should receive area "will fail because rect2 not received message #area"

mock := Mock new.
(Kind of: Rectangle) should receive width. "will not fail because mock is not kind of Rectangle"
Verify message sends with arguments In place of message arguments you can use expected objects itself. Or you can put specifications for expected arguments:
mock := Mock new.

(mock messageWith: 10) should be: #ten.
(mock messageWith: 'test' should be: #anyString.

mock should receive messageWith: 10.
mock should receive messageWith: (Instance of: SmallInteger).
mock should receive messageWith: 'test'.
mock should receive messageWith: (Kind of: String).
mock should receive messageWith: [:arg | arg isNumber].
Capture message arguments Mocketry provides suitable tool to capture arguments of messages for subsequent verification:
mock := Mock new.
mock someMessageWith: Arg argName.

mock someMessageWith: #argValue.

Arg argName should be: #argValue.
As argument spec capture plays role of any object. So it not restricts message send expectation. Capture will store all received argument values. To verify concrete argument use message #fromCall:
Arg argName fromFirstCall should be: #value1.
Arg argName fromLastCall should be: #value3.
(Arg argName fromCall: 2) should be: #value2.
Short version:
Arg argName should be: #argValue.
will signal error if there are multiple different captured values. Also "should" expression on capture will verify that owner message send was occurred required number of times. When argument is captured it value is stubbed. It allows you to verify subsequent message sends to captured arguments:
mock stub someMessageWith: Arg rectangle.

rect := 0@0 corner: 2@3.
mock someMessageWith: rect.
rect area.

Arg rectangle should be: rect.
Arg rectangle should receive width.
Verify message sends count Mocketry allows to verify how many times object received particular message:
mock := Mock new.

mock someMessage.
mock should receive someMessage once.

mock someMessage.
mock should receive someMessage twice.

mock someMessage.
mock should receive someMessage exactly: 3.
mock should receive someMessage atLeast: 2.
mock should receive someMessage atMost: 3.
mock should receive someMessage atLeast: 1 atMost: 5.
Same works to verify that set of objects received particular message expected number of times:
mock := Mock new.
mock2 := Mock new.

mock someMessage; someMessage.
mock2 someMessage.

Any should receive someMessage twice. "will fail because mock2 received #someMessage only once"

mock2 someMessage.
Any should receive someMessage twice. "will not fail because both mocks received #someMessage twice"
Verify group of message sends There is way to verify group of message sends at once:
mock := Mock new.
rect := 0@0 corner: 2@3.
rect stub.

mock someMessage.
rect area.

[ rect width.
mock someMessage ] should beDone.

[ mock someMessage.
rect width ] should beDoneInOrder.
#beDone don't care about order of message sends. #beDoneInOrder verifies that messages were set in same order as they defined inside given block Verify all expectations There is way how to verify that all defined expectations were occurred:
mock1 := Mock new.
mock2 := Mock new.

[mock1 someMessage. mock2 someMessage2]
   should lenient satisfy:
[ mock2 someMessage2.
mock1 someMessage willReturn: 'some'].
#lenient means that we don't care about order in which expected messages were happened.
mock1 := Mock new.
mock2 := Mock new.

[mock1 someMessage. mock2 someMessage2]
   should strict satisfy:
[ mock1 someMessage willReturn: 'some'.
mock2 someMessage2].
#strict means that we want expected messages were happened in same order in which they were defined.

Update. Project was moved to github
tag:blogger.com,1999:blog-621833069645593200.post-6052403828624522382
Extensions
Playing with ObjectVirus
Show full content
I want to show ObjectVirus, special kind of ClassGhost.

But first let's look at ClassGhost. It is ghost which can play role of object classes. ClassGhost can substitute class of objects and intercept all their messages. And as ghost it intercepts all direct messages too. So concrete implementation should decide how ghost should behave itself and how normal objects should behave when they are "infected" by ghost. Subclasses of GHClassGhost should implement two kind of behaviour: #ghostBehaviour (as any other ghost) and #instancesBehaviour (to process messages to "infected" objects).

ObjectVirus makes these decisions. It delegates all direct messages to victim class. By looking at virus you will not see any difference from class which it substitutes.
And to process messages to infected objects you should define concrete ghost behaviour:
virus := GHObjectVirus behaviour: aGhostBehaviour.
To substitute class of object you should infect it by virus:
virus infect: anObject
Then you can detect infection by:
infectedObject isInfectedByVirus.
infectedObject virus
And you can recover it:
infectedObject recoverFromVirus
or
virus heal: infectedObject
Virus related methods are defined in Object too. So you can ask any object about it.

Now let's play with virus. I want to infect morphs on screen such way that when infected morph will touch another morph it will paint it by own color. For this we need to implement special behaviour. Let's call it MorphsColoring:
GHGhostBehaviour subclass: #MorphsColoring
instanceVariableNames: ''
classVariableNames: ''
package: 'MyWork'
          MorphsColoring >>send: aMessage to: aMorph
| bounds color |
GHCurrentMetaLevelDepth increaseFor: [
color := aMorph color.
bounds := aMorph bounds.
^[GHVictimMetaMessages executeOriginalMethodOf: aMorph for: aMessage]
ensure: [
(World submorphsSatisfying: [ :each |
each ~~ aMorph and: [ each bounds intersects: bounds] ])
do: [:each | each color: color].
]
]
For any message to infected morph it executes morph original method and performs extra virus side effect. It will scan all morphs on screen to detect "touching" morphs. And it will paint them by own color.
We increase current meta level here to escape possible recursion when we interact with surrounding objects. Without it "aMorph color" will produce recursive call to behaviour to process message #color which will lead to infinite recursion. When message is sent inside meta level it will not intercepted by behaviour. And in case of virus it will be performed by original method of infected object.

Now lets infect some morph by virus and play with it:
virus := GHObjectVirus behaviour: MorphsColoring new.
morph := Morph new.
virus infect: morph.
morph openInWorld.


P.S. ObjectVirus is now renamed to ObjectMutation with all related messages

tag:blogger.com,1999:blog-621833069645593200.post-9070667113512751260
Extensions