Things continue to come together nicely, and we’re now ready to reveal that BioMenace Remastered is coming 18 December this year! There’s still a bit of work ahead of us, but we can see the finish line very clearly. Boss fights We made great progress on the boss fights since last week: The final boss … Continue reading BioMenace Remastered Dev Log #3 →
Show full content
BioMenace Remastered releases 18 December 2025!
Things continue to come together nicely, and we’re now ready to reveal that BioMenace Remastered is coming 18 December this year! There’s still a bit of work ahead of us, but we can see the finish line very clearly.
Boss fights
Goliath, the first episode 3 boss
We made great progress on the boss fights since last week: The final boss is now 100% complete, and the mid-episode boss is also close to being finished. There are still a few additional animation frames to be made and some tweaking to be done, but it’s fully playable and already a very fun fight! The mid-episode boss is far simpler than the final boss, but it’s still more complex than most of the original bosses. Let’s look at a comparison of all bosses in the game, based on number of dedicated sprite animation frames, lines of code (excluding comments and blank lines), and state definitions (for the Keen engine’s state machine system). Not counted are sprites, states, and code for boss-specific projectiles, but Skullman’s hands are.
Boss# Sprite frames# Lines of code# State definitionsSkullman620910Dr. Mangle71578Queen Ant2532Trash Boss61695Enforcer71667Goliath4 (3 in original)1118Master Cain1027717New Boss # 130 (WIP)388 (WIP)24 (WIP)New Boss # 256112840
Even more new music
BioMenace Remastered features some brand-new, fully authentic OPL2 (AdLib) music composed by the talented Myrgharok. Initially, we only had new tracks made for a few levels of episode 4, reusing Bobby Prince’s excellent original tracks for most of the other levels. But we’ve now decided to have add more new tracks. Three are already finished and in the game, and a 4th one is in the works. We think this adds a lot to the experience, and our testers agree! We can’t wait for everyone to hear these new songs, and we might even show off one or two, so you might want to watch our YouTube channel and our social media accounts (Bluesky, Twitter/X).
Beta testing & episode 4 general progress
A work in progress location from episode 4
Our testers are now busy playing the game, and some have already completed episode 4! We got some great feedback and already made some adjustments based on that. We’re happy to say that it’s all fairly minor things, the response has been very positive overall so far. We knew we were happy with how the episode is shaping up, but it’s great to hear that other people who weren’t involved in its development also like it.
Here’s a quote from one of our testers:
Overall, well done team! I really enjoyed my time with this 4th Episode, and it feels like a fitting part of the saga which is important. It’s quite ambitious in a lot of ways considering the source material. I can’t see anyway fans won’t be happy with this.
Another tester said:
[…] the most interesting levels of the base game are pretty much concentrated into Episode 1, cities, construction sites, forests, sewers, tunnels, caves, city wasteland and laboratories. Episode 2 has the Ant Caves and the Trash Dump, as well as the one lab level where the Slime mechanic is introduced, but after that and including Episode 3, every level kinda feels like the same lab again.
Episode 4 is definitely a lot more varied than that.
[…] overall thoughts on the quality of Episode 4 — I think the current state is very polished, I couldn’t really find any major issues throughout the episode.
Now with the 1st boss fight almost complete, and most of the last remaining kinks ironed out, episode 4 is extremely close to being finished! There’s only some small additions we’d like to make, and some final difficulty tweaking once our remaining testers also finish their playthroughs, and then it’s a wrap.
What’s even left at this point?
Another episode 4 level. This screenshot was taken from an in-editor playtest, so the score is not representative of what you might have at this point in a real playthrough.
So now you’re probably thinking, why can’t we play the damn thing already, why do we have to wait another month? As mentioned in the last post, there’s still work to be done on the level editor, some final tweaks to the difficulty balancing for episodes 1 to 3, adding some additional cutscene/story images, and general polishing. We also reserved the two weeks right before release solely for final testing and bug fixing, to make sure the game will be as solid and stable as it can be on day one. So bear with us as we navigate it the last couple of meters over the finish line, and the game will be in your hands in no time!
Wow, is it November already? Work on the game continues and we’re making good progress. Our primary focus is still on finishing episode 4’s new bosses. We’ve also just onboarded a small group of playtesters to help us make the game as solid as it can be. Thanks to everyone who responded to our call … Continue reading BioMenace Remastered Dev Log #2 →
Show full content
Wow, is it November already? Work on the game continues and we’re making good progress. Our primary focus is still on finishing episode 4’s new bosses. We’ve also just onboarded a small group of playtesters to help us make the game as solid as it can be. Thanks to everyone who responded to our call for testers at the end of October! We got a lot of responses and it was not an easy task to choose just a few out of that list. It’s really great to see so much interest in the game, and we can’t wait to share it with the world! We just need to finish it first. So on that note, let’s have a closer look at what we’ve been up to.
One of the new levels in episode 4
New boss fights
We want to keep most of episode 4 as a surprise, so we won’t reveal much about the new bosses. But we think they’ll be pretty epic! So far, focus has been mostly on the final boss, and it’s coming along nicely. It’s probably the most complex boss fight in the whole game, but absolutely in a good way. Just in terms of sprite work, there are 46 distinct frames of animation as of now! For reference, most of the original bosses have around 6. There are 964 lines of code just dedicated to this boss (1,262 when including comments and blank lines) as of now, and its behavior isn’t even complete yet. In comparison, Master Cain has about 277 lines of code (338 when including comments and blank lines).
Not a new boss fight – good old Trash Boss from episode 2.
The other new boss fight, a mid-episode boss, is almost complete in terms of art, but still needs to have most of the coding done. It’ll be the top priority once the final boss is finished, which will be very soon (by the end of this week at the latest).
Level Editor
I created a new custom editor for the game so we could make edits to the existing levels and create new content for episode 4. Due to many new level design features and extensions in the remaster, the original game’s level format was not sufficient for our needs, and thus using existing editors was not an option. Throughout most of development, the editor was geared primarily to our needs and not ready for “public” use. I’ve now taken the first steps towards making it usable for end users, so you’ll be able to create your own levels from day one. The editor is now integrated into the game and can be opened from the menu:
Main menu of BioMenace Remastered, showing a sub-menu with entries “Level Editor” and “User Levels”
Levels created with the editor will be saved as files in a user_levels directory within the game’s install directory. Any files found in that directory are listed in the “User Levels” menu in the game, and can be played from there. The files can be shared with other people, they just need to be placed into the directory and will then be accessible in the game. We still plan to add Steam Workshop support at some point for even easier sharing, but this definitely won’t make it in for the initial release. With the setup as just described, it’s still possible to create your own levels and share them with your friends and/or the community, for example by sharing the files via Discord or other methods.
Unlike our internally used version of the editor, the public editor has some restrictions, as certain game features like bosses – or also specific items you will discover when you get to play episode 4 – are very specific to the levels they are placed in within the full episodes, so it doesn’t make sense to allow them in user levels. Opening the official levels from the 4 episodes will also not be possible in the public editor, as we want people to experience the game normally at first and not be tempted to just look up all the secrets etc. We may release full map snapshots for episode 4 at some point, but for now we want you all to discover things on your own! Finally, the public editor lacks the ability to edit the tileset. We may potentially add support for custom graphics at some point in the future, but for now, we have to keep things simple in order to be able to hit our planned release date.
The tileset merge tool, a feature not included with the public editor
This is only the first steps of course, there’s more work left to do to make the editor more user friendly. We plan to add some inline documentation for controls and how to utilize certain actors, and also some extra features to replace functionality that was previously only available in the tileset editor. And of course, we need to record the tutorial videos we mentioned last time.
Aside from the editor and the bosses, it’s now mostly a matter of bug fixing, polishing, and some small final TODOs, plus finalizing the difficulty balancing across all episodes with the feedback from our new testers. It’s all coming together! Stay tuned for the next update, where we might reveal the exact release date we’re aiming for
It’s been 6 months since we announced BioMenace Remastered, and we’re getting closer to the planned release window (December). We’d like to keep you in the loop as we’re moving towards the finish line, so here’s our first dev log! Overall, we’re currently on track to releasing the game in December this year. There’s still … Continue reading BioMenace Remastered Dev Log #1 →
Show full content
It’s been 6 months since we announced BioMenace Remastered, and we’re getting closer to the planned release window (December). We’d like to keep you in the loop as we’re moving towards the finish line, so here’s our first dev log!
BioMenace Remastered level editor and a portion of source code
Overall, we’re currently on track to releasing the game in December this year. There’s still a lot of work to be done, but things are coming together nicely.
Welcoming new team members
We’re happy to welcome two new contributors to the BioMenace team: John “Dark” Brandon joined in June as a level designer and artist, and D. “Zilem” Christensen came on in July as an artist and creator of a character that will make an appearance in BioMenace Remastered.
We’d love to show you some of their work here but that would reveal too much, so all we can say right now is that they’re doing great things and we’re really happy to have them on board!
Episode 4 progress
One of the levels in episode 4
Just today we reached an important milestone: All 15 main levels of episode 4 are now in place! Not all of them are completely final, but we’re getting there. And yes, you read that right: Episode 4 will feature more levels than the original game’s three episodes, which have 12 levels each. And on top of the 15 main levels, there will be 4 secret levels to discover.
We can’t wait for everyone to see the new levels, but we also want to keep some surprises for you so we won’t reveal much before release. We put quite a lot of work into the new episode, with the goal to create an experience that’s still recognizably BioMenace but also feels really fresh and different at the same time. We created a ton of new artwork, came up with new types of environments, and even implemented new game mechanics. There’ll also be two completely new boss fights, which is the main thing we’re working on now. Once the bosses are done, it’s only some final polish and lots of testing, and then episode 4 will be finished!
General improvements and new features
One of the new bonus levels included with the 2.0 update of the demo, “Rocky Mountain Falls”
We’ve also added many new improvements to the game overall, some of them based on feedback we got after releasing our playable demo and seeing people’s gameplay videos/streams. A few of the biggest ones:
Hit detection is now per-pixel accurate, making some specific enemies and hazards a lot less frustrating to deal with.
To make battling for the top spots on the leaderboards more interesting, we introduced a kill streak system: Kill multiple enemies quickly in a row to get score multipliers, up to 5x. We’re looking forward to seeing the creative ways people come up with to take advantage of the system!
We added a dedicated tutorial level teaching basic gameplay mechanics, for new players and those who’d like a refresher.
We also added two new bonus levels, and a third one is currently in the works.
We’re now fairly confident that we’ll be able to release a beta version of our level editor alongside the full game. We most likely won’t have Steam Workshop support ready by then, but from day one you’ll be able to create your own levels and share them with other players. We also plan to record a series of tutorial videos explaining how to use the editor alongside the game.
BioMenace Remastered level editor, with one of episode 2’s levels open
What’s left?
Besides the aforementioned work to finish episode 4 and make the level editor ready for public use, there’s still a lot of other things to do: Implementing remaining achievements, various bug fixes and small improvements, finishing the difficulty rebalancing of the original episodes, etc. At the same time, the finish line is getting closer and closer! We’ll make sure to keep you updated with additional dev logs until then. And if you haven’t already, why not give the updated 2.0 version of the demo another spin – check out the tutorial and the bonus levels and try to get a new entry on the leaderboards!
I’m excited to reveal my latest project: BioMenace Remastered – an official modern re-release of the DOS classic with enhanced graphics, refined gameplay, and quality of life improvements. Watch our reveal trailer: We’re a small independent team and this is the first time we’re fully self-publishing a title, so we’d highly appreciate it if you … Continue reading BioMenace Remastered →
Show full content
I’m excited to reveal my latest project: BioMenace Remastered – an official modern re-release of the DOS classic with enhanced graphics, refined gameplay, and quality of life improvements. Watch our reveal trailer:
We’re a small independent team and this is the first time we’re fully self-publishing a title, so we’d highly appreciate it if you could wishlist the game on Steam to support us!
In this post, I’ll be sharing some of the backstory of how this project came to be.
Disclaimer: All screenshots and GIFs shown in this article are from a work in progress version of the game – visuals may still change before the final release.
The beginning
BioMenace is a 2D run & gun action platformer originally published as Shareware in 1993 by Apogee. It’s the first full game created by developer James Norwood, who did almost everything himself: Art, programming, story, game design, level design. The only exceptions are the game’s music, composed by Bobby Prince, and the game engine: It’s using a modified version of the Keen Dreams/4/5/6 engine, making it Id Software’s very first foray into engine licensing.
It’s also one of my top favorite Apogee games. From time to time, I’ve thought about doing a reverse engineered engine recreation project similar to RigelEngine for BioMenace too, but doing two projects like that at the same time would be too much. Plus, there was always the possibility that Apogee themselves might publish an official HD Remake, like they had done with Crystal Caves, Secret Agent, and Monster Bash.
As time went on, however, there was nothing in sight. Primoz of Emberheart Games, the mastermind behind the aforementioned HD Remakes, was now busy working on other games. Apogee also started shifting their focus away from retro re-releases towards modern titles using new IPs. So it didn’t seem likely that we’d see an official BioMenace remake anytime soon.
Meanwhile, Duke Nukem 1+2 Remastered for Evercade shipped, and after working on RigelEngine for 7 years, I felt ready for something new. So in early 2024, I started a BioMenace decompilation project, with the intention of creating a fan-made enhanced modern engine for the game called SnakeEngine. When I got to a point where the game was playable, I shared it with my friend Bart, also known as Dosgamert. After a short while, we decided to try and pitch it to Apogee as an official remaster.
Pitching to Apogee
I spent some time adding various enhancements like widescreen support, parallax scrolling, and quick saving, as well as some simple art improvements (initially focusing on more natural skin tones), and then Bart arranged a meeting with Apogee. They liked what we showed them – but decided against taking it on. Instead, they referred us to James Norwood himself, who actually holds all the rights to the game and IP. If we were to get his approval, we could still make the game, but we’d have to fund and publish it ourselves.
Initially, the prospect of marketing and selling the game on my own seemed quite daunting. Sure, I have experience shipping a commercial game now thanks to the Duke Nukem 1+2 remasters, but for those, Blaze handled everything related to marketing, sales, licensing deals, etc. We had also hoped Apogee might provide us with an artist to help with reworking and enhancing the game’s art, but now we’d have to find someone ourselves. Maybe we should just stick to the original plan of an unofficial fan-made thing?
But at the same time, we also strongly felt that an official remaster would provide a much better experience for players compared to an engine-only offering. And as much as we’re doing this mainly as a passion project, getting some money in return for our efforts would also be nice. And it could justify some investments, both in terms of time as well as money – like commissioning some new music for example.
With a “source port”/enhanced engine type of project, users need to provide their own game files, and the engine needs to be compatible with the original file formats. This is more effort for the user, and also quite limiting for us – we wouldn’t really be able to make any level design changes, for example. We’d also need to provide enhanced artwork as a separate download, making setup even more complicated for the user.
In contrast, installing a game via Steam is easy and convenient. We’d be able to add features like achievements, online leaderboards, cloud saves, etc. It would allow us to make far broader changes to the game, extend the level file format with new features, etc.
So with all of that in mind, we decided to give it a try. We got in touch with James Norwood, and after some time, we came to an agreement – we would be making BioMenace Remastered as a commercial game! I’d focus on programming and reverse engineering, plus a little bit of art, while Bart would handle QA/testing and marketing. And we’d also go looking for an artist and at least one level designer, since we were planning to add a new episode to the game.
Picking up Steam
While we were talking to James, two things happened that really helped get the project fully moving: First, Ivan aka Roobar, a talented pixel artist and level designer, joined our team. Second, I got access to a complete code reconstruction of the original DOS game thanks to the efforts of a person known as K1n9_Duk3. As it turns out, he had been working on reconstructing BioMenace’s code for quite a while, but hadn’t published the results yet. I had published my own work-in-progress decompilation on GitHub earlier, and when he learned about this, he decided to spend some time cleaning up and polishing his version in order to release it. I was made aware of this by Yoav aka NY00123, who contacted me to tell me about K1n9_Duk3’s project and also provided me with an early snapshot of the code. He didn’t know about BioMenace Remastered at that time, but has now also joined our team as level designer, tester, and general expert on the original game.
I contacted K1n9_Duk3, told him about the remaster, and we made an agreement regarding the use of his code as the basis for further work on the remaster. This sped up the process quite a bit, allowing me to add support for episodes 2 and 3 fairly quickly.
With that, everything was in place, and it was “just” a matter of finishing the game now. We’ll still be busy with that for quite a while, but we’re at a point now where it feels right to reveal what we’re doing, publicly talk about the game, and give everyone a sneak peek with the announcement trailer. We hope you liked what you’ve seen so far, and we can’t wait to share more in the future!
Duke Nukem II dissectionprogrammingdevelopmentgamedevreverseengineering
Last time, we investigated the routine Duke Nukem 1 uses to create its mirror surface floor effect. In this post, we’ll have a look at one of the effects found in the sequel: Underwater areas. Anything present in the affected area is rendered in a blue tint to make it appear submerged in water. To … Continue reading Graphical effects in Duke Nukem 1 & 2, part 2 →
Show full content
Last time, we investigated the routine Duke Nukem 1 uses to create its mirror surface floor effect. In this post, we’ll have a look at one of the effects found in the sequel: Underwater areas.
Anything present in the affected area is rendered in a blue tint to make it appear submerged in water. To further sell the effect, the water surface is also showing an animated wave/ripple pattern. It looks pretty cool, if you ask me! Across the whole game, this effect is only used in two levels: E1L2 and E3L3. I wouldn’t mind seeing it more often, but then again, pools of water don’t always fit thematically. Anyway, we’re here to understand how this effect was achieved, so let’s dive in.
Beneath the surface: Color manipulation
Like the mirror effect in the first game, this effect is also achieved by manipulating the framebuffer after the game world has been rendered. It’s quite a bit more involved compared to the fairly straightforward pixel-copying of the mirror effect though, since we’re altering the colors of existing pixels here. So how does that work?
Both games use EGA video mode 0xD, which is 320×200 pixels at 16 colors. The RGB values of those 16 colors are defined by a palette. The 1st game is limited to the standard EGA palette, whereas the 2nd game uses VGA-specific hardware registers to set a custom palette:
The colors in this palette are the only colors that can ever be displayed while in-game, so that’s all that the water effect has to work with. It can transform any of those colors into any other one, but it can’t create entirely new colors. Consequently, the effect basically comes down to a color value remapping function. But which colors are mapped to which?
To achieve the underwater look, the developers chose color indices 8 through 11 – a dark green and three shades of blue. If we look at the effect in action, we can see that these 4 colors are in fact the only ones visible inside the “watery” region:
So now the question is, how should we map any arbitrary color to one of those four colors? Ideally, we would want to do it in a way that’s fast, and somewhat preserves the overall impression of the original image. The way the developers did it is surprisingly simple, yet gives pretty good results. Essentially, the palette of 16 colors is treated as four groups of four colors each. Within each group, any of the four possible colors from that group is then mapped to its corresponding color within the “underwater” group of colors. Colors that are already part of the “underwater” group remain unchanged. Black, dark red, and medium green are mapped to dark green. Dark gray, light red, and light green turn into dark blue, etc.:
So how can we implement this mapping in code? We can convert any color index to a group index by doing a modulo by 4, giving us a value between 0 and 3. By adding 8, we then offset this group index to the start of the “underwater” group. Basically, all we need to do is apply the following formula to each affected pixel: color % 4 + 8.
But hang on, we’re dealing with EGA planar memory here – we can’t simply loop over a section of the framebuffer and apply a formula to each pixel. We can only access one bit of each pixel at a time. We would need to first convert the memory into linear form by reading all 4 planes one by one and combining their bit values, then apply our transformation, and then convert back to planar format. If we want to have any chance at running the game at playable speeds, this won’t cut it. So how did the game’s authors get around that?
Diving deeper
The game applies the effect in blocks of 8×8 pixels (the game’s tile size), using a routine written in Assembly. Once again, the code is very optimized, and the conceptual mechanism we just described is practically unrecognizable at first glance. Thanks to clever use of the EGA/VGA hardware, the routine is able to transform an 8×8 pixel block (32 bytes in total) by only writing 16 bytes to video memory, without reading anything – quite impressive! To understand how that’s possible, we need to have a closer look at how the CPU interacts with video memory in EGA mode 0xD.
First, a quick recap of EGA planar memory. Representing a single pixel requires 4 bits of storage, since we have 16 (24) colors to choose from. These values are not stored linearly in video memory, they are distributed across 4 separate “planes”. Each plane stores a specific bit position, for all pixels. So the first plane stores all of the 1st bits of all pixels, the 2nd plane all of the 2nd bits etc. Retrieving the color index stored at a specific pixel location thus requires reading one bit from each of the planes and then combining these 4 bits into a single value. Writing a pixel similarly requires splitting the value into its constituent bits and writing each one to the appropriate plane. The EGA’s video memory is mapped into the computer’s regular memory address space, but only one plane at a time can be accessed. This means each byte represents 8 pixels, but only one bit of each one. Dedicated hardware registers determine which plane will be read from or written to1.
Usually, this complexity causes a lot of headaches, but in this case it turns out to actually provide an advantage: We can address specific bits in each pixel when writing data to the hardware, therefore we can modify the colors using just writes. There’s no need to first read the current pixel value, modify it, and then write it back – we can perform the desired modification in place (at least for the general mechanism, some reading is still needed but more on that later). The only requirement is that our transformation can be expressed as setting or unsetting specific bits in each pixel. In our case, this is easily doable.
Let’s recall our pixel transformation function: color % 4 + 8. Similar to the way multiplication and division by powers of two can be expressed using bit shifts, a modulo by a power of two can be expressed using a logical AND. In this case, modulo 4 is equivalent to AND-ing the value by 3. Since our color indices are 4 bits in size, an AND by 3 is equivalent to setting the two most significant bits to 0 (3 is 0011 in binary). So that leaves the addition of 8. Since we do the modulo first, we know that our value will always be less than 4. Therefore, adding 8 can never overflow our 4-bit value2. Since 8 is also a power of two, we can actually express the addition as a logical OR. This can be achieved by simply setting the most significant bit to 1 (8 in binary is 1000).
So here’s our overall sequence of operations to perform on each pixel:
set bit 2 to 0
set bit 3 to 0
set bit 3 to 1
Since the third operation overwrites the result of the second one, we can combine the two, leaving only the 1st and 3rd one. These operations can be performed on 8 pixels at a time by configuring the EGA for writes to the appropriate plane, and then writing a byte of 0s/1s to video memory. This is exactly what the routine does, so let’s have a look at the code now.
PROC _ApplyWaterEffect FAR @@x:WORD, @@y:WORD
    PUBLIC _ApplyWaterEffect
    enter 0, 0
    push  di
    push  ds

    ; Load destination draw page address (in EGA memory) into ES:DI
    mov   di, [@@y]
    shl   di, 1
    mov   di, [yOffsetTable+di]
    add   di, [@@x]
    mov   ax, [drawPageSegment]
    ASSUME ds:NOTHING
    mov   es, ax

    ; Select EGA plane 2 for writing
    SET_EGA_MAP_MASK <1 SHL 2>
    SET_EGA_READ_MAP 2 ; Unnecessary

    ; Write 0s to plane 2, 8 rows of 8 pixels (one byte per row)
    mov   al, 0

    destoffset = 0
    REPT 8
        mov   [es:di + destoffset], al
        destoffset = destoffset + 40
    ENDM

    ; Select EGA plane 3 for writing
    SET_EGA_MAP_MASK <1 SHL 3>
    SET_EGA_READ_MAP 3 ; Unnecessary

    ; Write 1s to plane 2, 8 rows of 8 pixels (one byte per row)
    mov   al, 0FFh

    destoffset = 0
    REPT 8
        mov   [es:di + destoffset], al
        destoffset = destoffset + 40
    ENDM

    pop   ds
    ASSUME ds:DGROUP
    pop   di
    pop   bp
    ret
ENDP
The beginning and end of the function3 are standard register saving and restoration to comply with C calling conventions, one difference compared to last time is the use of the ENTER instruction instead of manually setting up a stack frame4. Next, we set up a far pointer in registers ES and DI. Only one pointer is needed this time. The calculation is similar to that in the mirror effect routine, except that a lookup table is used to multiply the Y coordinate instead of the shifting and addition based approach found in the first game (see previous post). Unlike Duke 1, which uses pixel coordinates, Y coordinates are specified in units of tiles in this game. To convert a Y coordinate to a memory offset thus requires multiplying by 320 (40*8). It would be possible to break this up into Y*256 + Y*64 and then use shifts and addition again, or to use the scheme of the first game to multiply by 40 and then do an additional shift to multiply the result by 8, but the developers chose a lookup table in this case. One other difference worth mentioning is in determining the segment portion of the pointer (ES register). The Duke 1 version of the equivalent code uses an index to keep track of the currently active back buffer, and thus needs branching to load the correct segment register value. In Duke 2, this has been optimized by directly storing the currently active segment instead of an index (in variable drawPageSegment). Loading the ES register thus requires a simple copy from memory using two MOV instructions, and no branching.
With the pointer in hand, we can now perform the bit manipulation described earlier. We first configure the EGA hardware to route writes to plane 2, which corresponds to the second-most significant bit in each pixel. This requires an OUT instruction to perform port I/O with the graphics card, which is abstracted via an Assembler macro for easier reuse across different routines. The macro’s definition is:
It consists of loading two registers with the correct port address and value to write, and then performing the OUT instruction.
Next, the EGA’s read map register is also configured, even though that’s not necessary since we’re not reading from video memory. SET_EGA_READ_MAP expands to a very similar sequence of instructions as SET_EGA_MAP_MASK, just using a different port address. I believe this is an oversight, as some other variations of this routine do need to read from memory – more on that later. But either way, now the EGA hardware is in the correct state, and we can perform the actual writes. We use register AL to store the value we need to write, i.e. 00000000 (to unset the bit in each pixel).
In total, 8 writes per plane are needed, advancing the address by 40 bytes after each write to target the next row of pixels. Once again, this is done using an unrolled loop, so we use the REPT macro again. We also take advantage of the Assembler’s variable substitution feature: We set a variable destoffset, refer to it when emitting instructions, and modify it after each iteration of the unrolled loop. This variable is purely for convenience and readability of the Assembly code, it doesn’t exist at run-time. The REPT macro expands to the following code:
    mov   [es:di +   0], al
    mov   [es:di +  40], al
    mov   [es:di +  80], al
    mov   [es:di + 120], al
    mov   [es:di + 160], al
    mov   [es:di + 200], al
    mov   [es:di + 240], al
    mov   [es:di + 280], al
We’re not actually advancing our pointer this time, we simply use it as base address and specify increasingly higher offsets with each subsequent MOV instruction. Thus, no separate pointer adjustment instructions are needed. This is basically equivalent to the following C code:
Once we’re done writing the 8 bytes, we do pretty much the same thing again, except that we now configure the hardware for writes to plane 3, and write 1s instead of 0s. And that’s it – everything falls into place thanks to EGA’s planar memory layout. Overall, despite being a more complex effect conceptually, the implementation is somewhat more straightforward than the mirror effect, using fewer registers and primarily consisting of simple MOV instructions.
Before we continue on, let’s refactor the code a little bit as that’ll help set us up for the upcoming code examples. We currently have two very similar blocks of code, the only difference being which value to write and which plane to write it to. We can use the IRP macro along with Assembler conditions (IF/ELSE, evaluated at Assembly time) to eliminate some duplication. Similar to the REPT macro, the code within the macro block will be emitted multiple times, substituting different values for the plane_num variable for each instance. While we’re at it, let’s also replace the magic number 40 with a named constant SCREEN_Y_STRIDE. Here’s our modified version of the code:
    IRP plane_num, <2, 3>
        SET_EGA_MAP_MASK <1 SHL plane_num>
        SET_EGA_READ_MAP plane_num

        ; Write all 0s to plane 2, and all 1s to plane 3
        IF plane_num EQ 2
            mov   al, 0
        ELSE
            mov   al, 0ffh
        ENDIF

        ; Write value 8 times to cover 8 rows of pixels
        destoffset = 0
        REPT 8
            mov   [es:di + destoffset], al
            destoffset = destoffset + SCREEN_Y_STRIDE
        ENDM
    ENDM
With this out of the way, let’s now dig into the ripple effect animation on the water surface and how it was achieved.
The surface ripple animation
The animation consists of 4 distinct frames playing in a loop:
The 2nd and 4th frame are identical (calm surface), the 1st and 3rd show specific patterns. Each of these three variations is implemented by a dedicated drawing routine. The overall structure of these routines is the same as for the simple case we’ve already looked at: There’s a bit of code to compute a far pointer to video memory, then two passes of memory manipulation for the two affected EGA planes. The only part that’s different between these versions is the handling of the first two rows of pixels, the remaining 6 are done exactly the same way as in the simple (uniform color) version. Let’s start by looking at the “calm” animation state (we’ll only show the core logic, since the rest of the code is the same as what we’ve already seen):
The code is practically identical to the version we’ve already looked at above, the only difference is that we’re skipping the first row of pixels. Easy. Ok, let’s check out the first of the two wave patterns:
    IRP plane_num, <2, 3>
        SET_EGA_MAP_MASK <1 SHL plane_num>
        SET_EGA_READ_MAP plane_num

        IF plane_num EQ 2
            ; Unset bits on plane 2, for the desired pixels only

            ; 1st row
            mov   al, [es:di]
            and   al, 10011111b
            mov   [es:di], al

            ; 2nd row
            mov   al, [es:di + SCREEN_Y_STRIDE]
            and   al, 00000110b
            mov   [es:di + SCREEN_Y_STRIDE], al

            ; value for remaining rows
            mov   al, 0
        ELSE
            ; Set bits on plane 3, for the desired pixels only

            ; 1st row
            mov   al, [es:di]
            or    al, 01100000b
            mov   [es:di], al

            ; 2nd row
            mov   al, [es:di + SCREEN_Y_STRIDE]
            or    al, 11111001b
            mov   [es:di + SCREEN_Y_STRIDE], al

            ; value for remaining rows
            mov   al, 0FFh
        ENDIF

        ; For the remaining 6 rows, operate as usual
        destoffset = SCREEN_Y_STRIDE * 2
        REPT 6
            mov   [es:di + destoffset], al
            destoffset = destoffset + SCREEN_Y_STRIDE
        ENDM
    ENDM
Ok, now we’re talking – this is quite a bit more involved than what we’ve seen so far. So what’s happening here?
In order to apply the wave pattern, we can’t simply modify 8 pixels simultaneously, we need to target specific pixels within each group. The way this routine does that is by first reading the current framebuffer value, applying the modification on the CPU, and then writing it back. The general principle of operation is the same as before, we need to unset bit 2 and set bit 3 for the affected pixels – just the way we achieve that is different. Let’s start with unsetting bit 2, i.e. plane 2.
First, we set the EGA hardware registers up for writes and reads to/from plane 25. With the hardware correctly configured, we can load the current memory value into register AL using a MOV instruction. AL now holds the bit values of plane 2 for 8 consecutive pixels, with the most significant bit corresponding to the left-most pixel, etc. We want to place a 0 into the bits corresponding to the pixels that should be modified, and leave all other bits unchanged. To do this, we perform a logical AND with a bit pattern that has a 0 in all the positions that we do want to modify, and a 1 elsewhere (10011111). After that, we write the modified value back to memory, and then repeat the process for the 2nd row of pixels, just using a different bit pattern (00000110). Finally, we can process the remaining 6 rows regularly (i.e., writing to all pixels per row).
Now onto plane 3, where we need to change the affected pixels’ bits to 1. The mechanism is basically the same, except that we now do a logical OR by the inversion of the previous bit patterns – we have a 0 in places where we want to leave the pixels unchanged, and a 1 where we do want to set the bit. Again, the remaining 6 rows are handled normally.
When we place the binary numbers in the two bit patterns on top of each other, we can actually recognize the shape of the pixels seen in the resulting rendered image, which I think is neat:
01100000
11111001
Alright, so this covers the first frame of the animated surface. The 3rd frame works exactly the same way, the only difference is that the bit patterns are flipped horizontally, creating a mirror image of the animation frame. For some reason, the order of the first two rows is also different, starting with the 2nd row and then doing the 1st one – not sure why that is.
        IF plane_num EQ 2
            mov   al, [es:di + SCREEN_Y_STRIDE]
            and   al, 01100000b
            mov   [es:di + SCREEN_Y_STRIDE], al

            mov   al, [es:di]
            and   al, 11111001b
            mov   [es:di], al

            mov   al, 0
        ELSE
            mov   al, [es:di + SCREEN_Y_STRIDE]
            or    al, 10011111b
            mov   [es:di + SCREEN_Y_STRIDE], al

            mov   al, [es:di]
            or    al, 00000110b
            mov   [es:di], al

            mov   al, 0FFh
        ENDIF
We’ve now seen all of the Assembly code involved in making this effect happen. It’s overall relatively simple in terms of what the code is doing, but an impressive feat of programming nonetheless. Clever use of the EGA hardware combined with a purposefully laid out palette makes for very efficient pixel processing, adding an impressive and unique visual flourish without tanking performance on hardware of the time. If you’re curious, check out the full code reconstruction to see all four routines in their entirety. And stay tuned for next time, where we’re going to have a look at the cloak power-up’s translucency effect!
It’s also possible to write the same bit value to multiple planes simultaneously, but that’s not relevant here. ︎
3 + 8 is 11, the maximum (unsigned) number representable with 4 bits is 15. ︎
The first two Duke Nukem games aren’t necessarily known for groundbreaking, industry-changing visuals, but they do have some neat effects, which were somewhat impressive for the time. I already talked in depth about the games’ parallax scrolling, which was rare to see in DOS games of the early 90s. But this time, we’ll focus on … Continue reading Graphical effects in Duke Nukem 1 & 2, part 1 →
Show full content
The first two Duke Nukem games aren’t necessarily known for groundbreaking, industry-changing visuals, but they do have some neat effects, which were somewhat impressive for the time. I already talked in depth about the games’ parallax scrolling, which was rare to see in DOS games of the early 90s. But this time, we’ll focus on other graphical effects: Mirror-surface floors in Duke Nukem 1, and under-water and translucency effects in Duke Nukem 2. Let’s start with the first game.
When I played Duke Nukem 1 for the first time as a kid, I was certainly impressed by the mirror surface floors. It may not look that flashy nowadays, but as far as I’m aware, this was an unusual effect to see in EGA-based action games of the time. It’s certainly not something you’d find in other Apogee titles of the era. So how were these implemented?
Mirror, mirror, on the floor
Mirror surface areas are specified in the level files, via a dedicated actor number. Any tile location which has that actor number will create a mirror surface one tile wide. The levels usually have several mirror actors placed in a row to create wider mirror surfaces. The height is hardcoded, making each individual mirror surface 16×30 pixels in size.
The mirror effect is applied after the game world has been drawn to the current backbuffer, by copying pixels from video memory to video memory. The main loop goes through the list of all mirror actors found in the level, and then calls a low-level routine to perform the pixel copying for all mirrors that are currently visible on screen. The copy skips over every other source row of pixels, vertically compressing the mirror image, and the game also applies a vertical source offset of 1 pixel every other frame to create the animated shimmering effect.
Like all low-level rendering code in the first two Duke games, the pixel copy routine was written in Assembly language. It’s fairly heavily optimized and makes use of EGA latched write mode to minimize the amount of ISA bus traffic (a big bottleneck for PC graphics at the time). In video memory, 240 bytes of data need to be read and written, but the CPU only performs 60 read-write cycles – a 4 times reduction in data size thanks to the latch copy technique. Let’s have a look at a C code version first, as it will be easier to understand the general principle.
Show me the code
// Number of bytes between two rows of pixels in EGA memory
// address space.
// 1 byte represents 8 pixels, and the screen is 320 pixels wide,
// hence 320 / 8 -> 40.
#define VMEM_STRIDE 40

// x and srcOffset are in bytes, y is in pixels.
// srcOffset must be a multiple of VMEM_STRIDE.
void ApplyMirrorEffect(
  unsigned x, unsigned y, unsigned srcOffset)
{
  int i;
  byte far* src;
  byte far* dest;

  // Set up source and destination pointers into the current
  // backbuffer in EGA memory
  src = gfxCurrentDrawPage == 0
    ? MK_FP(0xA000, 0x0000) : MK_FP(0xA200, 0x0000);
  dest = src;

  // Advance pointers so they point to the desired pixel
  // locations within the framebuffer.
  // Set src to one pixel above the specified position,
  // potentially further up depending on srcOffset.
  // Set dest to two pixels below the specified position.
  src += y * VMEM_STRIDE + x - VMEM_STRIDE - srcOffset;
  dest += y * VMEM_STRIDE + x + VMEM_STRIDE*2;

  // Copy 30 rows of 16 pixels
  for (i = 0; i < 30; i++)
  {
    // A byte represents 8 pixels, so we only need to
    // copy 2 bytes per row.
    *dest++ = *src++;
    *dest++ = *src++;

    // Undo increments done above
    dest -= 2;
    src -= 2;

    // Advance destination pointer to next row of pixels
    dest += VMEM_STRIDE;

    // Go up by two rows of pixels (skipping one row) for
    // source pointer
    src -= VMEM_STRIDE*2;
  }
}
As we can see, the code is fairly straightforward in this form. We simply set up two far pointers1 into EGA memory, then do a loop to copy the pixels. The game uses a double-buffering scheme, with the first buffer located at EGA memory address A000:0000 and the 2nd one at A200:0000, so we initialize the pointers accordingly. Due to planar EGA memory layout2, the CPU can only access a quarter (one plane) of the actual data at a time, which makes it so that each byte of memory represents 8 pixels. Thanks to the EGA latch registers, doing a copy of one byte on the CPU side will result in a complete copy of those 8 pixels within the EGA hardware (4 bits per pixel, so 32 bytes in total are copied in parallel via the latches). The EGA card will already be in latched write mode by the time this function is called, since that is set up by the calling code.
So overall this should be pretty fast, but compilers of the time were quite simple and not as capable of advanced optimization as they are nowadays. Actually using the C code as presented above with the original compiler used for this game3 would not produce the most efficient machine code, and this routine needed to be as fast as possible (if you’re curious, this is what the original compiler creates from the C code above.) So some Assembly was required. Let’s have a look at that version now:
PROC _ApplyMirrorEffect FAR @@x:WORD, @@y:WORD, @@src_offset:WORD
    PUBLIC _ApplyMirrorEffect
    push    bp
    mov     bp, sp
    push    ds
    push    di
    push    si

    ; Set up source and destination segments (both in EGA memory)
    mov   dx, EGA_SEGMENT ; A000h
    mov   ax, [gfxCurrentDrawPage]
    cmp   al, 0
    jz    @@drawing_to_first_page
    ; When drawing to the 2nd page, add 200h to the destination segment.
    ; Otherwise, skip as DX already holds the correct segment.
    add   dx, 200h
@@drawing_to_first_page:
    mov     es, dx
    mov     ds, dx
    ASSUME ds:NOTHING

    ; Set AX = y * 40. To avoid a costly MUL instruction, the expression is
    ; rearranged into (y * 4 + y) * 8, which can be implemented via cheap
    ; bit-shifts instead.
    mov     bx, [@@y]
    mov     ax, bx
    shl     ax, 1
    shl     ax, 1
    add     ax, bx
    shl     ax, 1
    shl     ax, 1
    shl     ax, 1

    ; Set DI = y * 40 + x + 80. This is 2 pixel rows below the position given
    ; by x and y. The mirrored rows are written starting from here.
    mov     bx, [@@x]
    add     ax, bx
    add     ax, 80
    mov     di, ax

    ; Set SI = y * 40 + x - 40 - src_offset. This is 1 pixel row plus the
    ; specified src_offset above the position given by x and y. The data for
    ; the mirrored rows is read starting from here, but going upwards after
    ; each row of pixels.
    sub     ax, 120
    sub     ax, [@@src_offset]
    mov     si, ax

    mov     bx, 38
    mov     ax, 82

    REPT 29
        ; Copy 16 pixels (1 byte for 8 pixels). Each MOVSB increments SI and DI
        ; by one.
        ; The actual copying of data happens within the EGA card, thanks to the
        ; latches.
        movsb
        movsb

        ; Add 38 more bytes to DI, to make it point to the next pixel row
        ; further down (since 40 bytes = 1 pixel horizontally)
        add     di, bx

        ; Subtract 82 from SI. This undoes the increments done by the two MOVSB
        ; above, and then moves the pointer up by two rows of pixels, skipping
        ; one row of the source data.
        sub     si, ax
    ENDM

    ; Copy the 30th row's pixels.
    movsb
    movsb

    pop     si
    pop     di
    pop     ds
    ASSUME ds:DGROUP
    pop     bp
    ret
ENDP
We can see a number of optimizations in this version of the code. First off, all variables are stored in CPU registers, whereas the C code is going to store the pointers on the stack. The function begins by pushing some registers onto the stack to be able to restore their original values when exiting the function. We then set up the segment part of the source and destination pointers by loading A000 into the segment registers ES and DS. If the 2nd buffer is currently used as back buffer, the segment address is first adjusted to A200. For the offset part of the pointers, registers SI and DI are used. This brings us to the next optimization.
In the C code version, we need to calculate the expression y * 40 + x two times. A modern compiler would very likely optimize this so the result is reused, but it’s a bit too much to ask of a 1988 compiler. What’s more, multiplication was very expensive on CPUs of the time. So the Assembly version calculates y * 40 only once and stores the result in a register, and it also uses a trick to speed up the multiplication itself. The expression is rearranged into y * 5 * 8, which is further rearranged into (y * 4 + y) * 8. The numbers 4 and 8 are both powers of two, so multiplication can be expressed as bit-shifting. Instead of doing a costly MUL instruction, this code performs a couple of shifts4 and an ADD, which is very fast on a CPU of the era5. The result is stored in register AX, to which we also add the value of the x parameter and the constant 80 (VMEM_STRIDE*2 in the C code version), and then store the result in DI to complete the destination pointer.
To produce the source pointer, another neat shortcut is used. AX still holds the value needed for the destination pointer at this point, which is 80 bytes (2 rows of pixels) after the reference coordinates for this mirror area. We want the source pointer to point to 40 bytes (1 row) before those coordinates. Instead of redoing the calculations we’ve already done to convert the reference coordinates into a memory offset, we simply subtract 120 (80 + 40) from AX – basically, we undo the addition of 80 done previously and then further subtract the desired 40 bytes to end up with the correct value, all with a single subtraction. The specified srcOffset is also subtracted, and now we have our source pointer offset ready to go in the SI register.
As it turns out, the registers DS, ES, SI, and DI were chosen very intentionally: x86 CPUs offer an instruction called MOVSB, which is basically tailor-made to implement C code like *a++ = *b++. The instruction reads a byte from the address in DS:SI, writes it to the address in ES:DI, and then increments both SI and DI by one – all of that with a single CPU instruction! So it’s a perfect choice for implementing our pixel copy loop. Except, there’s not actually a loop, at least not in the final machine code – the loop has been unrolled into a series of 30 individual pairs of MOVSB instructions, which is yet another optimization. Doing a loop involves a little bit of overhead: We need to set up a counter, check its value after each iteration, and then perform a conditional jump back to the beginning of the loop. This overhead is negligible if the loop body performs a significant amount of work, but in this case, the work done in each iteration is minimal. The overhead of a loop would very likely have an impact, so by unrolling it, we avoid this overhead at the cost of slightly larger machine code size. The unrolling is done with the help of an Assembler macro, REPT in this case. This macro is evaluated by the Assembler program when turning the Assembly code into machine code. We could’ve simply copy & pasted the instructions in the loop body 30 times, but by using this macro, we save a bunch of typing and also make it a lot easier to see at a glance how many iterations of the unrolled loop are performed. It’s essentially a “loop” at “compile time”, if you will (technically “assembly time” I guess).
Now there’s just one final piece missing to complete the picture. We’ve learned that MOVSB automatically advances our pointers, but we are not doing a straight linear memory copy here – we need to advance the destination pointer by one full row of pixels after each two bytes copied, and the source pointer needs to move backwards by 2 rows of pixels (see C code version). To do this efficiently, we first set up registers BX and AX with the values 38 and 82 before entering the unrolled loop, and then use these registers to add and subtract those values from our pointer offset registers on each iteration. So why these values, specifically? We want to advance the destination pointer by 40 bytes to reach the next row of pixels, but the two MOVSB instructions have already advanced it by 2, hence we only need to add the remaining 38. For the source pointer, we want to go back by 2 rows of pixels, or 80 bytes. We thus subtract 82 in order to both undo the two increments done by the MOVSB instructions as well as subtract the 80 bytes we need, all in one go. Since it’s unnecessary to perform this pointer adjustment after the final iteration, the unrolled loop only does 29 iterations, and the 30th one consists of just two plain MOVSB.
A glitch in the matrix
The original Duke Nukem 1 has a bug, which results in a visual glitch. Since the effect is implemented by copying data from the currently visible game world, it can easily “run out of” data to copy when a mirror is to be displayed near the top of the screen. Nothing in the code checks for that special case however, so if this happens, it simply copies video memory that it’s not supposed to. This memory could be part of the already rendered HUD, or it could be something else unrelated, which usually shows up as black:
It’s unknown whether the original developers simply forgot to handle this case, or if they decided that the glitch was acceptable. Making the mirror height adapt to the amount of available screen space to copy would complicate the code and possibly also make it slower, since we wouldn’t be able to use an unrolled loop anymore – we’d have to use an actual run-time loop, and do some additional calculations to figure out how much data we are allowed to copy. An alternative would be to stop displaying any mirror area as soon as it gets too close to the top of the screen. But this would make mirrors disappear very suddenly, and I could imagine that this would be a lot more visually jarring compared to the glitch. So this may very well have been a case of “picking the lesser evil”.
In the remastered version of the game for Evercade, I’ve fixed this bug by only copying rows that are on screen. This was easy to do using modern technology, but it was certainly a different story back when the game was originally developed.
Well, this concludes our look at Duke Nukem 1’s mirror surfaces. It’s overall a very simple effect, but to make it happen in 1991 nevertheless required quite a bit of skillfull programming. Next time, we’ll check out Duke Nukem 2’s effects!
Why a series of multiple SHL by 1? The original 8086/8088 CPUs didn’t support specifying a shift amount via immediate operand, only via a separate register. Most likely it was faster in this case to simply do 3 and 2 shifts in a row instead of setting up the count register first. ︎
On a modern CPU, just using a MUL instruction will actually be faster. ︎
So far, we’ve looked at how the game renders its world and the characters and objects inhabiting it. But one key ingredient is still missing in the engine layer: There’s not much gameplay to be had if objects can’t interact with each other and the world. For that, we need collision detection. And just like … Continue reading Duke Nukem 1’s collision detection →
Show full content
So far, we’ve looked at how the game renders its world and the characters and objects inhabiting it. But one key ingredient is still missing in the engine layer: There’s not much gameplay to be had if objects can’t interact with each other and the world. For that, we need collision detection. And just like rendering, it has its fair share of quirks in this game.
Duke gets hit by an enemy
The most straightforward way to implement collision detection in a 2D game is to assign bounding rectangles to objects, and then do a rectangle intersection test to figure out if two objects are touching each other. There are more sophisticated methods, like using different shapes for different objects and even pixel-accurate collision detection, but the rectangle-based approach is easy to implement and works well enough in many cases. Cosmo and Duke 2 use this method, but Duke 1’s approach is a bit weirder.
Before we get into the details, let’s start with an overview of the different types of possible collisions. Perhaps the most important one is “objects/player against world”. Basically, checking “if this object moves into that direction, will it end up inside a wall/floor/ceiling?”. This is what turns the level from a purely visual backdrop into a space that characters can move around in.
Yellow rectangles indicate “solid” tiles which act as the floor, walls, etc. of the world
Next, we have “player vs. object”. This is needed to implement things like taking damage when touching enemies or hazards, being able to pick up items, determining if the player is standing in front of an interactive object like a key lock or card reader, etc.
Finally, we have “object against player shot”: “Did something get hit by one of Duke’s laser blasts?” The game doesn’t have any “object vs. object” interactions aside from this specific one – enemies can’t hurt each other, nor are they affected by environmental hazards. The only way an enemy can take damage is being shot by Duke.
A small robot enemy has just been hit by one of Duke’s shots
In a system based on bounding rectangles, the same type of intersection test might be used for all three types of collisions. But Duke Nukem has dedicated code for each one. There are a few core functions implementing the various checks, and actors are responsible for calling the appropriate function(s) for their collision detection needs.
Object collision testing (high-level)
Let’s start by looking at “object vs. player shot” collisions. The function CheckPlayerShotCollision takes a location in world coordinates, and returns whether one of Duke’s shots is currently touching a 16×16 pixel region starting at the specified location. If a collision occurs, the corresponding player shot is deleted by the function. The return value also indicates which direction the shot was moving in.
Actors that can be shot by the player call this function, and then act accordingly based on the result: Taking damage, destroying themselves, revealing the item inside a box etc. Actors that cannot be destroyed by the player but still block player shots achieve this by calling the function and then ignoring the result. Examples for this are the red bouncy mines, and force fields.
Here’s the relevant (decompiled) code for the small robot enemy:
hitTestResult = CheckPlayerShotCollision(actor->x, actor->y);

if (hitTestResult)
{
  /*
    Push robot back depending on which
    direction the shot came from
  */
  if (hitTestResult == 1)
  {
    actor->x--;
  }
  else if (hitTestResult == 2)
  {
    actor->x++;
  }

  PlaySound(SND_SMALL_DEATH);

  /* Start destruction animation */
  actor->state = 3;
}
For actors which consist of only a single tile, this is pretty straightforward: The actor’s position is also the position that needs to be tested for collision with player shots, and a single collision check is sufficient. This is the case for all of the item boxes, and smaller enemies like the green wall crawler and aforementioned small robots. But what about larger enemies? Some are made out of 4, 6, or even 8 tiles. There can be up to 4 player shots, and each tile that gets tested for collision needs to be checked against all current shots. For a sprite made out of 8 tiles, there could be up to 32 tests needed. Presumably, this was causing some performance issues, and so the game only tests a few strategically chosen spots instead of all tiles. Let’s look at some examples:
The helicopter enemy consists of 8 tiles, but only the 3 highlighted ones are checked for player shot collisionsThe mech-bot enemy consists of 6 tiles when jumping, but only the 2 highlighted ones are tested against player shots
“Player vs. object” collision checking is handled in a very similar manner. A function IsTouchingPlayer takes the world position to test and checks if Duke is touching the 16×16 pixel region at that location. Just like with player shot collisions, each actor that can interact with the player is responsible for calling this function and then responding appropriately. For bonus items, this means giving the player some score, enemies deal damage, etc. And just like with shot collisions, large enemies only test specific spots instead of their entire sprite. Here’s the helicopter example again, but this time the tiles that can damage the player are highlighted:
Player damage hitbox of the helicopter enemy (2 out of 8 tiles)
As a consequence of this design, it’s sometimes possible to visually touch an enemy without taking damage. If the game had been using bounding rectangles instead of the tile-sized spot check approach, this wouldn’t be a problem: Each enemy would only require a single rectangle intersection test, regardless of its size. Why wasn’t it implemented that way? Hard to say – possibly Todd Replogle (the programmer) wasn’t aware of the rectangle technique at the time. I could also imagine that perhaps the game started out having mostly single-tile actors, for which the existing approach was perfectly adequate, and larger enemies where then added later without redoing or extending the collision checking code.
In the specific case of the helicopter, it’s also quite likely that this was done intentionally to avoid making the game too hard. If we look at the image above, there’s a fair bit of “empty” space in the sprite at the top and bottom. If Duke would take damage as soon as he touches the “air” below the helicopter, it might feel unfair and broken. It doesn’t explain why the parts to the left and right of the hitbox are not included, so it’s maybe a combination of performance and gameplay considerations.
World collision testing (high-level)
As you may have guessed by now, world collisions are also handled on a tile-by-tile basis. There are two functions in this case: CheckWorldCollisionHoriz and CheckWorldCollisionVert, which are – as the names imply – used for horizontal and vertical collision checks.
The typical pattern for using these functions is to check for collision before moving the actor’s position. There’s no ejection logic in the game, meaning if an actor is already placed inside of a wall, it won’t be pushed out of it. To get robust results, it’s therefore very important to carefully check for collisions before any change to an actor’s position. As before, this is pretty straightforward for single-tile actors. For example, here’s the relevant code from the small robot again (some bits omitted for brevity):
/*
  The number 128 here represents one full tile
  (16 pixels) vertically.
*/
if (actor->state == 1) /* Facing left */
{
  if (
    CheckWorldCollisionHoriz(actor->x - 1, actor->y) ||
    !CheckWorldCollisionHoriz(actor->x - 1, actor->y + 128))
  {
    /*
      When we hit a wall, or reach the edge of
      the current platform, turn around
    */
    actor->state = 2;
  }
  else
  {
    /* We can move */
    actor->x--;
  }
}
else if (actor->state == 2) /* Facing right */
{
  if (
    CheckWorldCollisionHoriz(actor->x + 2, actor->y) ||
    !CheckWorldCollisionHoriz(actor->x + 2, actor->y + 128))
  {
    /* As above */
    actor->state = 1;
  }
  else
  {
    /* We can move */
    actor->x++;
  }
}
Once again, larger enemies also test for selective spots only:
When the mech-bot is jumping, only 1 tile at the top is checked for collision against the ceiling, and 1 of 3 tiles are checked for collision against a wall
This can lead to collision bugs like the following, where the mech-bot can jump into a wall under the right circumstances:
The mech-bot can jump into walls due to insufficient collision checking
Actors that are affected by gravity also use these functions to implement that. There’s no generalized system there, it’s handled on an actor-by-actor basis like most things in the game. If somethings needs to be affected by gravity, it will have a snippet of code like the following in its update logic:
/*
  The number 128 here represents one full tile
  (16 pixels) vertically.
*/
if (!CheckWorldCollisionVert(actor->x, actor->y + 128))
{
  actor->y += 128;
}
Now let’s look at how these tests are implemented.
Object collision testing (low-level)
Checking for collisions with the player and with player shots are both implemented in a very similar way. In both cases, the logic is split into a horizontal and a vertical test. The horizontal test is identical for both, and quite simple: If the absolute value of the difference between the X coordinates of both objects is less than 2, the objects must be intersecting horizontally. Horizontal movement is limited to an 8-pixel grid, and a delta of 2 indicates a distance of 16 pixels – exactly one tile. Therefore, if the horizontal distance between two tile-sized objects is 2 or more, the objects aren’t intersecting horizontally.
Player shots are exactly one tile in size, but the player sprite is made out of 4 tiles – how does it work when testing for collision with the player? Basically, only the middle part of Duke’s sprite takes part in collision checking. We can observe this easily in the game: Duke’s gun can be touching an enemy or hazard, but Duke won’t take damage yet.
Touching a reactor instantly kills Duke, but it seems fine for his weapon and toes to touch it
This is quite important to make the game feel good to play. If the entire player sprite would be susceptible to collisions, it would be very easy to take damage in situations where Duke is not visually touching anything dangerous, and that would be quite frustrating.
When it comes to the vertical test, things get a bit more interesting. This is because Y coordinates aren’t limited to a grid – objects can move in single pixel increments vertically. To recap, Y coordinates are stored as 1/8ths of a pixel, so a delta of 8 represents one pixel, 64 is half a tile, and 128 a full tile1.
The player shot check is still relatively straightforward: Objects are intersecting vertically if the difference between both Y coordinates is less than 128, and greater than or equal to -128. So just like on the horizontal axis, the intention is to make objects collide as soon as they are less than a full tile apart.
Checking for collision with Duke is a litte trickier to make sense of. A tile-sized region intersects the player if the delta between both Y coordinates is greater than 14 and less than 382 – huh? What’s up with these numbers? 382 is close to 384 which is 3 times 128, or 3 full tiles. 14 is 1.75 pixels. The actual numbers from the original code are in fact 384 and 16. But for some reason, the code also applies a fudge factor of +2 to the delta before comparing it against the thresholds. This is equivalent to reducing both thresholds by 2 each, therefore let’s go with 382 and 14.
The player’s Y coordinate in this calculation refers to the bottom edge of the player sprite, whereas the Y coordinate of the tile-sized region to test refers to the top edge of that region. The code calculates the delta as playerY - testY. Therefore, if the position to test is above the player, the delta will be positive, since the test area will have a smaller Y coordinate than Duke’s sprite. If it’s below the player, the result will be negative. Since the two thresholds (14 and 382) are both positive, we can already see that objects below the player are not treated as colliding.
Now if we move the test area closer to the player from below, it will visually intersect Duke’s sprite as soon as the delta reaches 8 (1 pixel), but we only treat it as a collision once it reaches 14. This means that an object below Duke must overlap the player sprite by more than 1.75 pixels in order to register as a collision. My theory is that this slight reduction of the hit box size at the bottom was meant to make it slightly more forgiving to jump over spikes or enemies, as there can be situations where Duke’s sprite is visually touching the top of a hazard but he doesn’t take damage.
Even though Duke’s feet appear to be touching the spikes here, he does not take damage
As we continue moving the test area further up, the delta keeps growing. By the time it reaches 382, the top edge of the test area is almost 3 full tiles away from the bottom edge of Duke’s sprite. The latter is exactly two tiles high, so that means the test area is almost one full tile above the top edge of the player sprite at this point. To be exact, the bottom of the object is overlapping the player sprite by only a quarter of a pixel.
So there we have it: Duke’s hit box is essentially a rectangle that’s 16 pixels wide, and 30 pixels high (32 – 1.75 – 0.25). It’s placed at an offset of 8 and 0.25 pixels relative to the top left corner of Duke’s sprite, which is 32×32 pixels. It sounds fairly straightforward when we describe it like that, but the code implements it in a strange way – which is partly to blame on the weird coordinate systems, and partly on the strange way the player position is handled. But that’s a topic for another post..
Duke’s hit box visualized
Now let’s move on to checking collisions with the world map. The good news: It’s a lot simpler.
World collision testing (low-level)
All tiles starting at index 192 are considered impassable/solid. All other tiles are not solid, and objects can move through them. The system was beefed up considerably in Cosmo and Duke Nukem II, where attribute flags determine which tiles are blocking and also which directions they block (i.e., is only the top edge solid or all four sides, or some other combination etc.) But here in Duke 1, it’s dead simple. To test if a specified location in world coordinates falls onto an impassable map tile, all we need to do is to convert from world to map coordinates, and then check the index of the map tile at those coordinates.
As mentioned above, there are two collision checking functions. Curiously, the first one (CheckWorldCollisionHoriz) also contains the logic for making player shots destroy shootable wall blocks, but that logic is only active during the code path that updates player shots (this is controlled via a global variable). I don’t know why that’s not handled by a dedicated function.
If we omit this special logic for dealing with shootable walls, the first function’s code becomes quite simple. It looks as follows:
First, we have to convert the given X and Y coordinates to an index into the map data array. The X coordinate is divided by 2 (via a right-shift by 1), since 2 world units represent one map tile horizontally. The Y coordinate is divided by 128 (via a right-shift by 7) to go from subpixels to map coordinates, then multiplied by the width of the map to create an index to the start of the corresponding row. We add that to the X coordinate multiplied by 2 to get the full index into the map data array. Finally, we need to subtract 1 from the result, since world space X coordinates are offset by one tile to take the HUD into account when rendering sprites2.
Now we have a pointer to the correct map tile, and we can test if it’s a solid one. Since the game stores map data as EGA memory offsets, not indices, we test if the value is greater than 0x17FF. Why that number? It’s 192 multiplied by 323 to convert it to a memory offset, and then decremented by one. I’m not sure why the comparison wasn’t written as >= 0x1800 instead, which is 192 times 32.
The other collision checking function is extremely similar, the only difference is that it checks two adjacent locations in case the X coordinate falls between two tiles. It looks as follows:
Just like before, we determine the address of the map tile corresponding to the given world coordinates. But this time, the result is stored in two separate pointer variables. If the X coordinate is odd, the second pointer is advanced by one to point to the next tile. And then both pointers are dereferenced and checked using the same comparison as in the first function. As a result, the function will test two adjacent map tiles for X coordinates that fall in-between two tiles, and test the same map tile twice otherwise.
I’m not sure why an equivalent mechanism isn’t in the horizontal collision checking function. Objects can also vertically be placed in-between two tiles. So there are cases where the adjacent-tile checking would be needed. Some places in the code handle this by calling the function twice for two adjacent tile locations, but most of the time, it seems to not be taken into account.
Summary
So that’s Duke Nukem 1’s collision checking. It’s a somewhat strange and unusual system, using spot-checking of individual tile-sized blocks instead of more common approaches like bounding rectangles. The way it’s implemented also means that a lot of responsibility falls onto actor update logic. There are no generalized systems aside from the low-level collision checking functions, every aspect has to be implemented separately for every single actor. This is quite in line with how other aspects of the game’s engine work, so it’s not too surprising. The system was considerably reworked for Cosmo, and then taken over for Duke Nukem II.
Last time, we looked at how the game renders its world – background and tiles. What really brings the game to life though are the sprites drawn on top. Almost everything interactive in the game is represented using sprites: Duke himself, enemies, pickups, doors, force fields, laser blasts, floating score numbers, explosions, etc. In this … Continue reading Duke Nukem 1’s sprite rendering →
Show full content
Last time, we looked at how the game renders its world – background and tiles. What really brings the game to life though are the sprites drawn on top. Almost everything interactive in the game is represented using sprites: Duke himself, enemies, pickups, doors, force fields, laser blasts, floating score numbers, explosions, etc.
In this post, we’ll have a closer look at how these things are rendered.
Like the map and background, sprites are made up of 16×16 pixel tiles. Unlike the former, sprite tiles have transparency masks – parts of the image can be skipped during drawing, making it possible to have (e.g.) rounded shapes and not just rectangles. Some objects in the game only use a single tile, but many are composited out of several ones. Unlike the backgrounds and map tiles, sprite data is held in system memory and needs to be copied to video memory each time a sprite is to be drawn.
Some examples for different sprite composition sizes (number of tiles making up a sprite)
Overall, the system works very similarly to Cosmo and Duke Nukem II, except that those two use 8×8 pixel tiles. But there is another big difference: The later games have a more structured approach for constructing sprites out of multiple tiles.
Both Cosmo and Duke 2 use a combination of files to store sprite data. A graphics file stores the tiles themselves, basically an unstructured soup of small images. A separate metadata file holds the starting address for each sprite within the graphics file, along with the width and height in tiles. Thanks to this metadata, the unstructured graphics can automatically be arranged into larger sprites1. A numerical ID identifies the combined sprites within the code, so the graphics can then be changed (including their dimensions) without needing to update the code – a data-driven approach.
Duke Nukem 1 is more primitive in this regard. There is no metadata stored in files, only the raw graphical data. It’s essentially just the soup of tiles, and the code is responsible for arranging it into something meaningful. Let’s have a closer look at the raw data.
Sprite data
The data for sprites is organized into a couple of separate groups: One for Duke, one for “objects”, one for “animations”, and one for “numbers” (all groups feature animation, so the naming is somewhat arbitrary). The images for each group are stored in multiple smaller files. During game startup, the content of all files is loaded into memory buffers. There’s one buffer per group, so the individual files making up each group are combined during loading. The data remains resident in memory until the game quits.
Sprite tiles in the “animations” groupGroup# files# tilesMemory neededDuke519230 kB“Objects”315023.4 kB“Animations”628845 kB“Numbers”1446.9 kBTotal15674105.3 kB
Most likely, the separation into individual groups/buffers was done to avoid blocks of memory larger than 64 kB, which are difficult to handle in 16-bit real-mode DOS code. Why each of the groups was further split up into multiple files isn’t clear to me though, as each group is definitely smaller than 64 kB. Most likely this was a limitation of the tools used to create and package the graphics – the tiles used for the map (see previous post) are also split up into multiple files.
Overall, sprite graphics occupy more than 100 kB of memory. This may seem insignificant today, but considering that real-mode DOS applications only have a maximum of 640 kB available to them (usually less in practice)2, it’s not nothing. The load image (code and data + space for global variables) of the executable itself is already 156.5 kB.
Each buffer holds a sequence of masked 16×16 pixel tiles, packed tightly. Each of these tiles occupies 160 bytes of memory: 128 bytes of color data, and 32 bytes of mask data. This means that we can seek to the beginning of any tile within a buffer by multiplying its index by 160.
Tile indices and corresponding addresses/offsets
Since there’s no metadata describing which tiles belong to which sprite, these buffer offsets have to be hardcoded into the executable. We don’t know how the original developers organized this, perhaps there was a header file with a bunch of defines for the various offsets. When adding new graphics or reorganizing existing ones, these defines would then have to be updated.
High-level drawing code
Each actor/game object has dedicated drawing code as part of its update logic. The low-level foundation for sprite drawing is a function written in Assembly: BlitMaskedTile_16x16. It takes a pointer to the sprite tile data and the target position on screen, with the X coordinate given in bytes (1 byte of EGA memory address space represents 8 pixels) and Y given in pixels.
This means that sprite positions are limited to multiples of 8 pixels horizontally, but can be positioned freely on the vertical axis. This is due to the complexity inherent in the EGA’s planar video mode3. Another important consideration is that sprites mustn’t be drawn outside of the visible screen – the low-level drawing function doesn’t perform any clipping, so drawing outside the screen’s bounds would result in overwriting and corrupting unrelated memory.
With all this in mind, let’s have a look at an example: The Energizer Bunny enemy, aka “Rabbitoid”.
Some of the bunny’s animation frames
The sprite for this enemy consists of two tiles, stacked vertically. There are 8 animation frames in total: 3 for walking to the left, 3 for walking to the right, and 2 for “spinning in place”. The latter is also used when the bunny reverses direction. Each frame consists of two tiles. Curiously, not all of the tiles for this sprite are adjacent in memory – the last 6 frames are at a different place than the first 3. Pure speculation, but this could be an indication that the bunny enemy only used 3 animation frames at some point during development, and was later changed to have more frames after more graphics had already been added. Or perhaps the space occupied by the first 3 frames was originally used by another enemy which was later scrapped and replaced with the bunny?
The update function for the bunny actor calls a helper function to draw the sprite, which takes the index of the frame to draw and the base position, which refers to the bottom tile. The helper function then calls BlitMaskedTile_16x16 twice with the correct arguments.
Let’s have a look at the (decompiled) code first, and then go through how it works.
void pascal DrawRabbitoidSprite(int frame, int x, int y)
{
  word offset;

  if (frame <= 2)
  {
    offset = frame * 320 + 18240;
  }
  else
  {
    offset = (frame - 3) * 320 + 36480;
  }

  if (!IsOffScreen(x, y - 128))
  {
    BlitMaskedTile_16x16(
      animSpritesData + offset,
      WORLD_2_SCREEN_X(x),
      WORLD_2_SCREEN_Y(y));
  }

  if (!IsOffScreen(x, y))
  {
    BlitMaskedTile_16x16(
      animSpritesData + offset + 160,
      WORLD_2_SCREEN_X(x),
      WORLD_2_SCREEN_Y(y) + 16);
  }
}
The first step is to determine the starting address within the sprite data buffer (animSpritesData). The two tiles for each animation frame are always right next to each other, so to draw the second tile, we simply need to add 160 bytes to the address of the first one. This means that an offset of 320 bytes (two tiles) gets us to the next animation frame’s address. To get the full address, all we need to do then is to add the hardcoded starting offset of the first bunny sprite tile (18240) to the animation frame multiplied by 320.
Due to the discontinuity in how the bunny sprite tiles are laid out in memory (see above), we need a separate case for animation frames 3 and up. In the else-block, we first subtract 3 from the animation frame to get a 0-based index relative to the 2nd group of tiles, and then operate just as before, using starting offset 36480. Now we have the correct starting address for our sprite data, and we can proceed with drawing the two tiles.
Note how each call to BlitMaskedTile_16x16 is preceded by an on-screen check. This is to make sure that we don’t draw outside the bounds of the screen, as mentioned above (more on why it’s y - 128 for the first check in a moment).
Now all that’s left to do is to convert the actor’s position into screen coordinates, and then call the blit function. We use the data address as is for the first call, and then add 160 for the 2nd one to draw the 2nd tile for the current animation frame.
Sprites can be positioned in a way that makes them appear half-way off the screen. This is handled exactly the same way as for map tiles4: Sprite tiles are drawn over the edges of the HUD, and the HUD border is then redrawn on top. The IsOffScreen function takes this into account, and will consider a position to still be “on screen” if it falls within one of the HUD border regions.
The camera sprite on the left and the football on the right appear half-way on screen. The sprites are actually drawn fully, drawing over parts of the HUD, but this gets covered up afterwards by redrawing the HUD borders on top.
Simple actors often don’t use a helper function and just call BlitMaskedTile_16x16 directly. More complex actors work fundamentally the same way as the bunny, but will have larger and more complex helper functions.
We can also see some interesting examples here of optimizing memory and disk space usage by only storing animation frames for the parts of a sprite that change, like for Dr. Proton:
Dr. Proton’s sprite consists of 4 tiles. Only the bottom two are animated, the top two are shared between both animation frames.
Now let’s have a closer look at coordinate conversion.
Coordinate systems
There are three coordinate systems in the game:
The map tile grid, where each tile occupies 16×16 pixels and has an associated tile value in the current level’s map data
The world object coordinate system, used to place actors/objects on the map
Screen coordinates, which are like world coordinates but relative to the screen, not the world map
For both world and screen coordinates, X positions use an 8-pixel grid while the Y position has no restrictions. Converting an X coordinate between map and world coordinates is easy: Multiply by 2 to go from map to world, or divide by 2 to go the other way. To then go to screen coordinates, we just need to subtract the camera position from the world coordinate. The horizontal camera position is also in world units, since the camera scrolls in 8-pixel increments horizontally. The full conversion logic then becomes:
#define WORLD_2_SCREEN_X(a) ((a) - cameraPosX)
With Y coordinates, things get a bit weird. As we’ve established, the Y coordinate is more fine-grained – objects can be drawn at any pixel location. So it may seem like a logical choice to use world pixel coordinates for vertical object positions. Converting a map coordinate would then require a multiplication by 16, and world object positions could span any value between 0 and 14245. However, that’s not what the game’s developers did. Instead, when converting a map coordinate to world space, values are multiplied by 128. This essentially means that Y positions are stored in subpixel units – a delta of 1 represents one 8th of a pixel. 128 represents a full tile’s height (16 px), 64 is a half-tile, and 8 is a single pixel. This explains why the on-screen check in the previous section’s code uses y - 128 to check the upper half of the bunny sprite.
To convert to screen coordinates then, we need to first subtract the camera position (which again uses the same units as objects) and then divide by 8 (which is achieved via a right shift by 3), as follows:
But there’s one more step we need. When drawing the map, the game takes the HUD into account, and starts rendering at screen coordinates 16,16 – which is where the game viewport starts. We need to apply the same logic to sprite drawing – otherwise sprites would appear offset from their corresponding map coordinate, and a sprite at position 0,0 would draw over the top-left corner of the HUD. This is where things get even weirder. For Y coordinates, the offset is applied when converting from world to screen coordinates. That’s why the second call to BlitMaskedTile_16x16 in the function above adds 16 to the converted Y coordinate6. But there’s no such adjustment for X coordinates. For some reason, it’s handled differently, and in a fairly strange way:
When loading a level, the positions for all actors are converted from map coordinates into world coordinates. The Y coordinate is simply multiplied by 128, but the X coordinate is shifted to the right by one tile. That’s right: To ensure that sprite drawing takes the HUD offset into account, the X coordinate of all actors in the game is offset by 2 world units (1 tile, or 16 pixels)! As a result of this decision, X coordinates have to be adjusted back whenever a world position needs to be converted to the map coordinate system, for example to check for collision with walls and floors. Whereas for Y positions, a simple division is enough to go from world space to map coordinates.
Suffice to say, this system is quite confusing and unintuitive. It would seem much easier to handle the draw offset for X coordinates the same way as for Y coordinates, by applying the offset when drawing, not in the world coordinates. This is how Cosmo and Duke 2 handle it. Having two different units for X and Y is also strange. It does make some sense at least, given the difference in how objects can be positioned on each axis (8-pixel grid restriction for X). But consistently using pixels or subpixels for both axes would make the whole thing much more intuitive and easier to think about. Again, that’s what Cosmo and Duke 2 are doing (they limit the vertical axis to 8-pixel steps too, though).
Well, enough of this, let’s have a look at the low-level drawing function now.
Low-level drawing code
Although the low-level code is conceptually the same as in Cosmo and Duke 2, the actual implementation is quite different. The code is based on ProGraphx Toolbox, a graphics library supplying various EGA/VGA drawing routines written in Assembly. It also provides its own file formats, and came with an image editor. For Cosmo and Duke 2, the sprite drawing functions were completely rewritten alongside the introduction of a new (custom) file format7.
The job of BlitMaskedTile_16x16 is to copy 128 bytes of data from system memory to EGA video memory, while applying the transparency mask. The data is laid out as a sequence of 16 lines. Each line consists of two groups of 8 pixels. Each of those groups consists of 5 bytes of data. The first byte is the mask: It has a bit set for each pixel that should be visible8. Pixels for which the corresponding mask bit is not set will be skipped. The remaining 4 bytes contain the bits for each of the EGA’s color planes9, in order blue, green, red, and intensity. Combining these 4 bytes makes up the 4-bit EGA palette indices for 8 pixels (this happens in hardware).
Data layout of a 16×16 masked tile. Reading four binary numbers vertically from bottom to top gives the color index for each pixel.
To copy this data to video memory, we need to select each of the color planes one by one, and write the corresponding byte at the right location. For applying the mask, the routine makes use of the EGA’s bit mask feature. A hardware register can be set to the desired bit mask, and during subsequent writes to video memory, the EGA will then ignore any bit positions that have a 0-bit in the bit mask10.
The overall process then is as follows:
Read one byte from the source data, write it into the EGA’s bit mask register
Select plane 0
Read another byte, write it to video memory
Select next plane, read another byte, write it, etc., until all 4 planes have been written
Repeat all of the previous steps a 2nd time for the remaining 8 pixels in the current line
Repeat all previous steps 15 more times
In C code, this would look as follows:
void BlitMaskedTile_16x16_C(byte far* src, word x, word y)
{
  word line;
  word group;
  word plane;

  /*
     Pointer to EGA memory matching the given target coordinates.
     Draw page logic omitted for brevity.
  */
  byte far* dest = MK_FP(0xA000, x + y * 40);

  /*
     Select Map Mask register in EGA's Sequencer for subsequent
     writes to port 0x3C5
  */
  outportb(0x3C4, 2);

  for (line = 0; line < 16; line++)
  {
    for (group = 0; group < 2; group++)
    {
      /*
        Read bit mask and send to EGA (Bit Mask register in the
        Graphics Controller)
      */
      outport(0x3CE, 8 | (*src++ << 8));

      for (plane = 0; plane < 4; plane++)
      {
        /* Select current plane in EGA's Map Mask (Sequencer) */
        outportb(0x3C5, (1 << plane));

        /* Read data for current plane and send to EGA */
        *dest = *src++;
      }

      /* Advance to next 8 pixels */
      dest++;
    }

    /*
       Advance to next line on screen. 40 bytes is one full screen
       row. The loop above already advanced by 2, so add the
       remaining 38 here.
    */
    dest += 38;
  }

  /* Reset Map Mask for writing to all planes simultaneously */
  outportb(0x3C5, 0xF);

  /* Reset Bit Mask to allow writing all bit positions */
  outport(0x3CE, 0xFF08);
}
However, writing this in C at the time would produce code that’s a lot slower than handwritten Assembly. The Assembly code implements the algorithm using a single loop over 16 lines, all the inner steps are unrolled for performance. It also makes use of optimized instructions for reading the data. The core logic for handling one 8-pixel span of data is 23 instructions. See the Assembly code. For comparison, this is Cosmo’s equivalent function, and this is Duke 2’s.
Summary
This concludes our look at Duke Nukem 1’s sprite drawing. Although it has a lot in common with later incarnations in Cosmo’s Cosmic Adventure and Duke Nukem II, it’s also quite different. It’s based on the ProGraphx Toolbox whereas the later games have their own routines. The file formats are quite different, and the high-level code has much more work to do in order to define how larger sprites are created out of several smaller tiles. This aspect was moved into a generalized system driven by data files in the later games. But even though the first game’s system is more primitive, it also offered a bit more flexibility, by allowing free positioning at any pixel location on the Y axis. Then again, this capability also led to some strange and confusing design choices. Perhaps that’s why the later games restrict vertical movement to an 8-pixel grid as well?
For the next article in this series, I’m planning to look at the game’s collision detection, which has its own share of quirks and odd choices.
Levels are 90 tiles high, so the bottom-most pixel location is 89*16 = 1424 ︎
I first tried including the +16 offset in the WORLD_2_SCREEN_Y macro, which would make the client code more logical: The 1st tile’s draw call would then subtract 16 from the result of the macro, while the 2nd one would use the result unchanged. This would match the actual visual positioning of the two tiles better. Unfortunately, the original compiler used for this game, Borland Turbo C 2.0, isn’t smart enough to collapse a sequence of + 16 - 16 into nothing – it still generates an instruction (that does nothing). In order to make the decompiled code match the original Assembly, I therefore had to pull the addition of 16 out of the macro. ︎
The latch-copy based map tile drawing routine described in the previous article was kept, and it doesn’t seem to be part of the ProGraphx Toolbox library either. It looks like it was added specifically for Duke 1 as an optimization. ︎
Cosmo and Duke 2 do it the other way around, with 1-bits indicating pixels that should be skipped︎
There are a few areas in Duke Nukem 1 which feature a pitch black background instead of the usual graphical one. Why is that – was it an aesthetic choice? Turns out, it’s actually an interesting trick used to work around limitations in the game’s tile rendering. Compared to its sequel, the first game’s rendering … Continue reading Duke Nukem 1’s tile rendering →
Show full content
There are a few areas in Duke Nukem 1 which feature a pitch black background instead of the usual graphical one. Why is that – was it an aesthetic choice? Turns out, it’s actually an interesting trick used to work around limitations in the game’s tile rendering.
Compared to its sequel, the first game’s rendering engine is very simple. There’s only a single layer of tiles, which includes the background (more on that later). Tiles cannot overlap the background, nor can multiple tiles be stacked on top of each other (these features would be added in Cosmo’s Cosmic Adventure and Duke Nukem II, respectively). Sprites are then drawn on top, and that’s pretty much it. Aside from reflective floors used in some levels, there are no special effects – all the rendering is done by straightforward copying of 16×16 pixel blocks of graphics to the framebuffer.
Since there’s only one layer of tiles, tile drawing does not support any kind of partial transparency (aka masking) – tiles are always drawn as fully solid rectangles. Interestingly, the graphics files storing the tile images actually do contain transparency information (masks), but it’s not used by the game. This brings us back to the black backgrounds.
If you look closely at the screenshot above, you may notice that the girders in the background appear angled/sloped. But we’ve just established that the tile drawing code can’t handle partial transparency, which would be needed to create angled shapes out of rectangular graphics. So how does this work? Simple – the “empty” parts of the sloped tiles are actually black pixels. By making the background itself also pure black, it appears as if parts of the tile are transparent when in fact they aren’t.
To illustrate this, let’s modify the level shown in the screenshot above to use a regular background:
Now the illusion breaks down, and we can see that the sloped tiles are actually quite rectangular. I’m pretty sure that if the game had been able to draw tiles with partial transparency, the designers would’ve used regular backgrounds instead of the plain black ones for these types of scenes.
“But wait!”, you say. “I clearly remember some partially transparent tiles in the game! Here, like these windows or the broken buildings:”
And indeed, this very much looks like masked tiles. But these types of visuals are actually not handled by the tile drawing code. They are essentially actors/sprites that are rendered after the tiles along with other game objects – and those do allow partial transparency. This is another way for the game to work around the limitations of its tile drawing. I’m not sure why the same approach wasn’t used for the angled girders – perhaps it would’ve required too many “decoration” actors and caused performance issues?
Now let’s have a closer look at tile rendering, and how the background drawing works.
Tile drawing
As mentioned above, each tile is 16×16 pixels. The visible viewport shows a section of 13×10 tiles, with the rest of the screen covered by the HUD. The viewport is redrawn every frame, whereas the HUD is only updated when something changes. This reduces the amount of data transferred over the slow ISA bus, and was likely an important performance optimization to get the game to run well on slower machines. The engine also utilizes double buffering, by using two separate “pages” of EGA video memory at addresses 0xA0000 and 0xA2000.
The game uses a single tileset of only 384 tiles throughout all 30 levels (for reference, Cosmo has 3000 tiles, and Duke 2 has multiple tilesets with 1160 tiles each). The entire tileset is copied into EGA video memory when the game starts, at address 0xA4000.
The game’s tileset
This makes it possible to very efficiently draw individual tiles by using the latch copy technique (more about this in my article on Duke Nukem II’s parallax scrolling), at the cost of not being able to draw with partial transparency as discussed. This is implemented by a low-level function written in Assembly (most of the game is written in C), BlitSolidTile (name chosen by me). This function takes two arguments: A source offset, which is an EGA memory offset relative to the base address of 0xA4000, and a destination offset, which is relative to the start of the current screen back buffer (aka “draw page”). The function performs a latch copy of a block of 16×16 pixels from the given source offset to the destination.
Due to the EGA’s planar memory layout, a single byte of EGA video memory address space represents 8 pixels (again, see the article linked above for more details). A 16×16 pixel tile therefore occupies 32 bytes of EGA address space. The very first tile of the tileset is at source offset 0, the second tile at offset 32, etc. Consequently, to address a specific tile index, we need to multiply that index by 32. The level files store tile values with this multiplication already applied – the files essentially contain video memory source offsets, not tile indices. This makes drawing the levels quite straightforward: In the simplest case, all we have to do is go through the currently visible subsection of the level data, and call BlitSolidTile for each tile’s value, along with the correct destination offset to make the tile appear where it’s meant to go on screen.
But things do get a bit more interesting. Even though the game uses 16×16 pixel tiles, horizontal scrolling actually works in 8-pixel steps like it does in Cosmo and Duke 2. Most likely, 16-pixel steps would’ve been too coarse and visually unpleasant, so this seems like a good choice (vertical scrolling does 16-pixel steps, but happens less often). However, it means that we need to show only half of the tiles at the left and right edges of the viewport whenever the camera position is not at a multiple of 16 pixels. This is easy to see when looking at the “nuclear waste barrel” tiles at the left edge of the following scene:
“Even” camera position: All tiles fully visible“Odd” camera position: Left & right edge tiles only partially visible
Instead of using a dedicated routine to draw only half a tile, the game simply shifts the drawing of all tiles to the left by 8 pixels whenever the camera position is “odd”. This causes a bit of a problem though: It draws over parts of the HUD. To fix that, the relevant parts of the HUD are redrawn on top of the rendered tiles at the end of each frame. If we hack the game’s executable to remove the code that does this, we get the following:
Notice how there’s additional HUD overdraw at the bottom from a blue box sprite, and how the right edge is actually overdrawn completely, not just the first 8 pixels. The game is always drawing one extra column of tiles. When at an “even” camera position, that column is completely covered up by the HUD frame drawn on top of it – making it seem pointless. The extra column is important for the “odd” case, though: If we would only draw 13 columns of tiles (the width of the viewport), and then shift the starting position to the left by 8 pixels, an 8-pixel wide gap would appear at the right edge of the viewport. So we have to draw one additional column of tiles to fill that gap. If you look closely at the screenshot above, you can see that the right half of the overdrawn HUD is actually partially showing an image from a previous frame. Since we’re currently at an odd camera position, only the first 8 pixels of the right side of the HUD are covered by the current frame’s tiles. But during a previous frame, we were at an even camera position, and so the entire right edge was previously overdrawn with tiles.
Normally invisible tiles in the 14th column. Current frame highlighted in orange, a previous one in cyan.
I do have to wonder what the performance impact of this overdraw is. The HUD pieces are also drawn using latch copies, so it shouldn’t be too inefficient, but it’s still a chunk of bandwidth that’s essentially wasted since it doesn’t result in any end-user visible output. Perhaps using a dedicated half-tile drawing routine could’ve made the game more efficient. Then again, it would’ve required more complicated clipping logic when drawing sprites. The somewhat brute-force overdraw approach seems to work fine enough, as the game runs well even on a 286.
Now, let’s talk about how the backgrounds fit into this.
Drawing backgrounds
Duke Nukem 1 did something that was very uncommon for DOS games at the time: It had separate layers for the background and foreground. Most games scrolled the entire screen as a whole, including Commander Keen which was famous for introducing console-like smooth scrolling on the PC. But Duke 1 has a static background behind scrolling foreground, creating a simple form of parallax. How was this achieved?
The background graphics are the same size as the visible viewport, i.e. 13×10 tiles or 208×160 pixels. The data is stored as a sequence of tiles. Each level has two backgrounds, a primary and secondary – this is how the game is able to show different backgrounds in different parts of a level. Which images are used for each level is hardcoded into the executable. When the game loads a level, it loads the respective background graphics into video memory just like the tileset, at offsets 0x4000 and 0x8100 (absolute addresses 0xA8000 and 0xAC100). The first two tiles in the tileset, offsets 0 and 32, indicate that part of the respective background should be shown at that location.
In the “even” case, all we have to do then is to check for each tile if it’s one of the “background” tiles, and then draw the corresponding background portion instead of a tile from the tileset. Since the background is arranged like a tileset and resident in EGA memory, we also use BlitSolidTile for drawing the background. But instead of using the current tile value as the source offset, we use a variable which starts out at 0 and then increases by 32 after each tile we draw, regardless if it was a background or foreground tile. This way, the variable goes through the entire background’s memory space, but we only draw background at locations where no foreground tile is visible. To draw the secondary background, we add a fixed offset of 0x4100 to the source offset, which is the distance in bytes between the two background images in memory.
Again, the “odd” case is a bit more involved. If we would draw the background in the same way as before, it would appear to shift back and forth as we alternate between even and odd camera positions, since the starting position is offset to the left for odd positions. But we want the background to always appear in the same place: within the visible viewport. To solve this, the game draws background tiles at 8 pixels to the right of the current position when at odd camera positions, basically cancelling out the 8-pixel left-shift added to the foreground. This causes a problem though: Background tiles now appear half-way inbetween two foreground tiles.
Offset between background and foreground tile locations for odd camera positions
To address this, we need to check both the current and the next tile value, and draw a background tile if either of the two matches. This is easiest to explain by looking at the (decompiled) code:
if (cameraPosX & 1) /* equivalent to cameraPosX % 2 */
{
  if (*mapCell == 0 || *(mapCell + 1) == 0) /* Background A */
  {
    BlitSolidTile(backdropTile, dest + 1);
  }
  else if (*mapCell == 0x20 || *(mapCell + 1) == 0x20) /* Background B */
  {
    BlitSolidTile(backdropTile + 0x4100, dest + 1);
  }
}
else
{
  if (*mapCell == 0) /* Background A */
  {
    BlitSolidTile(backdropTile, dest);
  }
  else if (*mapCell == 0x20) /* Background B */
  {
    BlitSolidTile(backdropTile + 0x4100, dest);
  }
}
backdropTile is the variable mentioned above, which goes through the background tile addresses in sequence. The variable dest holds the current on-screen target location as a memory offset. By passing dest + 1 to BlitSolidTile, we draw at that location + 8 pixels to the right (since 1 byte represents 8 pixels).
Now the final piece of the puzzle is tile animation.
Tile animation
In Duke 2, animated tiles are controlled via attributes in each tileset. Duke 1 keeps it simple: All tile indices between 2 and 47 (inclusive) are considered animated. If we look at the image of the tileset again (see above), that’s the entire top row of tiles (excluding the first two, which are for backgrounds).
Some of the tileset’s animated tiles
All animations consist of exactly 4 frames, which are cycled through in sequence repeatedly. A single global variable is used to keep track of the current animation step. This variable holds a source offset, so to advance to the next step, we add 32. Once we reach 128 (4 * 32), we reset it back to 0. So the variable goes through a repeating sequence of 0, 32, 64, 96. Stepping the variable happens each time the map is rendered – so the animation speed is tied to the game’s frame rate, not to elapsed time. The game does limit its frame rate to a maximum of about 16 FPS, so it will keep running at a reasonable speed on faster systems. But it will also run slightly slower on less powerful machines.
While drawing, we then check if the tile we’re currently drawing is within the animated range, and if it is, we add the current value of the animation step variable to the source offset passed to BlitSolidTile. The actual tile value in the level’s map data does not change, it is just displayed differently depending on the current animation step.
This means that whatever tile value is placed into the level actually acts as an animation starting index. It’s up to the level designer to ensure this starting index falls onto a meaningful sequence of 4 tiles within the tileset.
There’s another neat trick we can see here. Since a single variable governs all tile animations, all animated tiles will normally animate in lockstep. But the flashing lights in the image below seem to have individual animation sequences, creating variety in the flashing. How is that possible?
It works due to the way the animation is laid out in the tileset. The flashing light sequence only has 4 frames of animation, but there are 8 frames in the tileset: The first 4 frames are duplicated. This makes it possible to pick any starting location within the first 4 tiles, and end up with a distinct animation sequence of 4 frames.
Different starting locations within the tileset result in different visible animation sequences
The same approach is also used in Duke 2, and it’s used extensively in Major Stryker, another Apogee game which has a lot of technical details in common with Todd Replogle’s games (Duke 1 &2 and Cosmo) although it was made by Allen H. Blum III.
One special case worth mentioning is conveyor belts. These also appear as animated tiles, but the animation is handled by modifying the actual level data in-place by the actor code.
Conclusion and source code links
This wraps up our look at how the first Duke Nukem game renders tiles. It’s very simple, but quite effective thanks to some clever tricks. And we can already see the foundations for subsequent games: Cosmo’s Cosmic Adventure and Duke Nukem II. Both use a very similar approach at the core. They add additional features like scrolling backgrounds and masked tiles, and their tile drawing logic is more complex as a result, but the basic principle is still the same: Redraw the game each frame, draw background and foreground in one go using latch copies for efficient tile drawing. The main difference is that both games use 8×8 pixel tiles instead of 16×16, and thus can do away with the slightly convoluted shifting and overdrawing logic of the first game.
I hope you enjoyed this look at a classic DOS game’s internals. My intention is to continue writing about various other aspects of the game’s engine, so stay tuned!
Duke Nukem 1 and 2 are getting an official remaster for the Evercade platform, and I was lead developer on the project. Here’s the official showcase video with an overview of all the new features: And the announcement trailer: If you’ve seen or used RigelEngine before, some of the new features will sound familiar – … Continue reading Duke Nukem 1+2 Remastered →
Show full content
Duke Nukem 1 and 2 are getting an official remaster for the Evercade platform, and I was lead developer on the project. Here’s the official showcase video with an overview of all the new features:
And the announcement trailer:
If you’ve seen or used RigelEngine before, some of the new features will sound familiar – the project is in fact based on RigelEngine. But it very much goes above and beyond what the open-source version can offer, with additional features, a completely new menu system, new music and artwork, and of course the biggest one, a remaster of Duke Nukem 1 with the same enhancements and quality of life improvements as Duke 2.
This is my personal blog, it does not represent an official statement or publication by Blaze Entertainment or Gearbox Entertainment. Anything stated here represents solely my own personal opinion and views. My work on this project was as a contractor for Blaze Entertainment.
Duke Nukem 1+2 Remastered main menu
The open-source version of RigelEngine relies on the user providing original game files, so I couldn’t make any changes that go beyond code. But we didn’t have that constraint, so we took the opportunity to tweak the levels so they work properly in widescreen mode, fix some gameplay issues etc. These changes are fairly subtle, as it was important to us to preserve the original design intent, but they help a lot with making the whole thing feel more polished and complete – as you would expect from an official remaster.
Enabling wide-screen mode in the open-source version of RigelEngine reveals parts of a level that aren’t meant to be visibleIn the official remaster, the level has been tweaked to look correct in widescreen mode
When I started working on RigelEngine, it was very much a hobby project. I did it because it was really fun, and a great learning experience. It was also really rewarding to interact with the community and to see people enjoying Duke Nukem 2 anew, or maybe even for the first time, thanks to my work. But I didn’t expect it to turn into a commercial product one day. Needless to say, when the opportunity came up, it was like a dream come true. Duke Nukem 2 is one of my all-time favorite games, and I like the first entry in the series too – classic Apogee platformers is what I grew up with. I really enjoy reverse engineering, and working on games is fun in general, so it really was a no brainer.
So how did this all come to be?
Blaze Entertainment, the folks behind the Evercade consoles, obtained a license to re-release a number of Duke Nukem games on their platform, including Duke 1 and 2. They could’ve used emulation to ship the DOS originals. But their CTO is a big Duke Nukem fan himself – Duke Nukem 1 is the first game he ever played. And so he wanted to do the games justice, and develop native remasters for the first two games. The only issue was that they didn’t have any source code for either title – it really seems to be lost completely.
However, they were familiar with RigelEngine thanks to a YouTube video about my project by Clint Basinger aka LGR. So when they got the license, they reached out to me to see if I’d be interested in working together on this project, and if I could imagine tackling Duke Nukem 1 as well. I said yes, and we got to work.
Duke Nukem 1 Remastered, showing off widescreen support and extended background art
Reverse engineering Duke Nukem 1 was a lot of fun, and it was quite interesting to see the differences in architecture and coding style between the two games – the first one features a lot of copy & pasted code and basically no generalized systems at all. Just to give an example, the game features various messages shown to the player during gameplay. Instead of a ShowMessage function taking the string to display as an argument, each message has its own dedicated function. All of these functions are completely identical except for the message text.
Here’s the recreated C code for two of these functions:
The way enemies, pickups, and other game objects are handled is also peculiar. Instead of a generalized actor system like in Duke Nukem 2, every single type of game object has a dedicated array to hold the state of all objects of that type, and a dedicated update function which processes just this type of game object. Most of these functions have a lot of code in common, like iterating over the object array, calling collision detection functions etc. There’s a lot more weird stuff, but suffice it to say the code bears all the marks of someone still learning how to program. It’s still a very solid game despite the way it was coded though, which is all that counts. And in the end, the reverse engineering process was a lot easier and quicker than for Duke 2, due to the first game’s much simpler and smaller nature.
Load Game menu, now including preview screenshots
Overall, I’m very happy with how the remasters have turned out, and extremely grateful for the opportunity to work on this legendary franchise in an official capacity. The team at Blaze consists of a bunch of great people who are very passionate about what they do, and we get along really well. We had a blast making this, and I hope you’ll enjoy our version of these classic games.


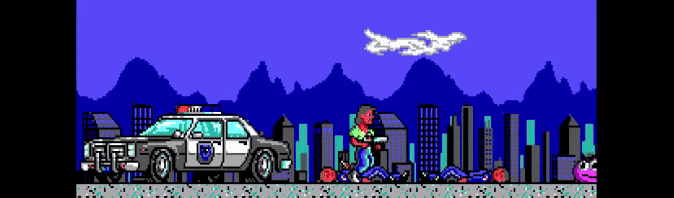


 ︎
︎


