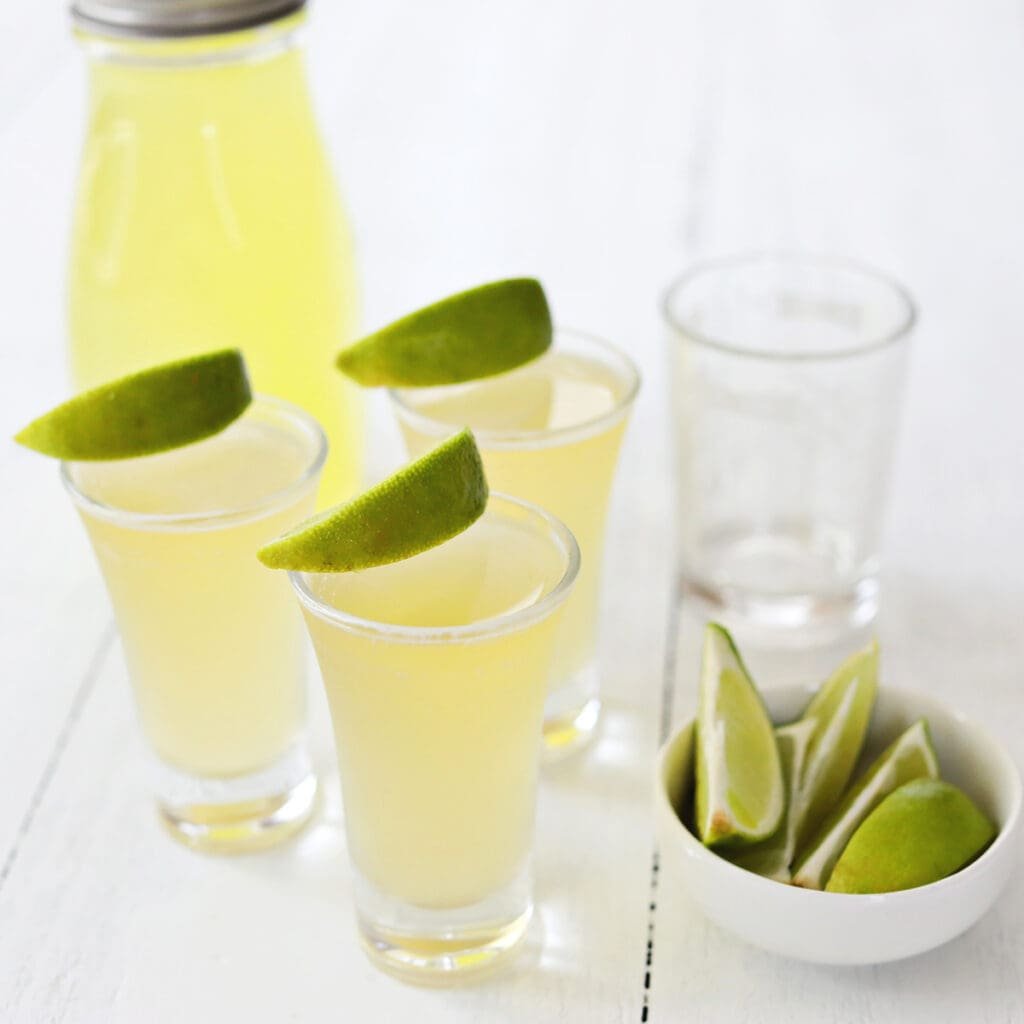
Is there anything better than a classic margarita? This recipe is made with just four ingredients and tastes better than most restaurant margaritas! Years ago, I shared my homemade margarita mix, which I highly recommend trying if you’ve been using store-bought mix (it’s much more delicious). Today, I’m excited to now share the recipe for…
Show full content
Is there anything better than a classic margarita? This recipe is made with just four ingredients and tastes better than most restaurant margaritas!
Years ago, I shared my homemade margarita mix, which I highly recommend trying if you’ve been using store-bought mix (it’s much more delicious). Today, I’m excited to now share the recipe for the best margarita from scratch.
Begin by prepping your glassware. I like to salt just half my glass so people have the choice of a sip with or without salt.
Next, fill a cocktail shaker with tequila, orange liqueur, lime juice and agave. Add a handful of ice cubes and shake for around 15 seconds or until the shaker becomes icy. If you don’t have a cocktail shaker, try using a mason jar with a lid.
Take a quick taste test and make sure you are pleased with the drink. You can add more sweetener if you feel it needs it.
From the shaker, strain and pour the drink into your salted glass. Add a few ice cubes and a garnish of fresh limes to serve.
How To Salt Rim A Glass
I use agave to adhere my salt since it’s a little more hearty and holds more salt than lime juice alone. Lime juice works as well. When you do a salt rim, be sure to only do the outside edge so unwanted salt isn’t falling into your drink. I like to keep some margarita salt on hand for just such an occasion. You can also make your own margarita salt (it’s fun!).
Tips For Making
The best way to serve a margarita on the rocks is in a rocks glass with a few ice cubes.
Add extra citrus flavor with some citrus zest mixed into the salt rim.
Goodbye, margarita mix. You never need to buy the neon yellow store-bought mix again. You can use our margarita mix recipe or skip it entirely with this from scratch recipe.
Margarita Variations
Mezcal Margarita – My favorite margarita variation is swapping tequila for mezcal in this traditional margarita, creating a more smoky and intense flavor.
Skinny Margarita – For a lighter version, skip the orange liqueur and instead add a bit of fresh orange juice. You can also look for a light agave to use.
Spicy Margarita – Add a few slices of fresh jalepeño or serrano chiles before shaking. If you are concerned about heat, start small and add more to taste.
Tajín Rim – Use Tajin Seasoning (mixed with salt or by itself) to create a customized rim. On this note, you can customize your rim with any herbs, citrus zest or flavored salts you choose.
Garden Margarita – Add fresh edible flowers for a beautiful, garden-inspired margarita.
FAQ
Frequently Asked QuestionsWhat is in a classic margarita recipe?
This margarita recipe includes tequila, orange liqueur, lime juice and agave.
When is National Margarita Day?
Feb. 22 is National Margarita Day, so be sure to use this recipe to celebrate.
What is the best ratio for a margarita?
The classic ratio for a margarita is 2-1-1. Which is 2 ounces tequila, 1 ounce orange liqueur and 1 ounce freshly squeezed lime juice. Agave is technically optional (although I never skip it) and I use half an ounce.
Begin by prepping your glassware. I like to salt just half my glass so people have the choice of a sip with or without salt.
Next, fill a cocktail shaker with tequila, orange liqueur, lime juice and agave. Add a handful of ice cubes and shake for around 15 seconds or until the shaker becomes icy. If you don’t have a cocktail shaker, try using a mason jar with a lid.
Take a quick taste test and make sure you are pleased with the drink. You can add more sweetener if you feel it needs it.
From the shaker, strain the drink into your glass. Add a few ice cubes and a garnish of fresh limes to serve.
Notes
The best way to serve a margarita on the rocks is in a rocks glass with a few ice cubes.
Add extra citrus flavor with some citrus zest mixed into the salt rim.
Goodbye, margarita mix. You never need to buy the neon yellow store-bought mix again. You can use our margarita mix recipe or skip it entirely with this from scratch recipe.
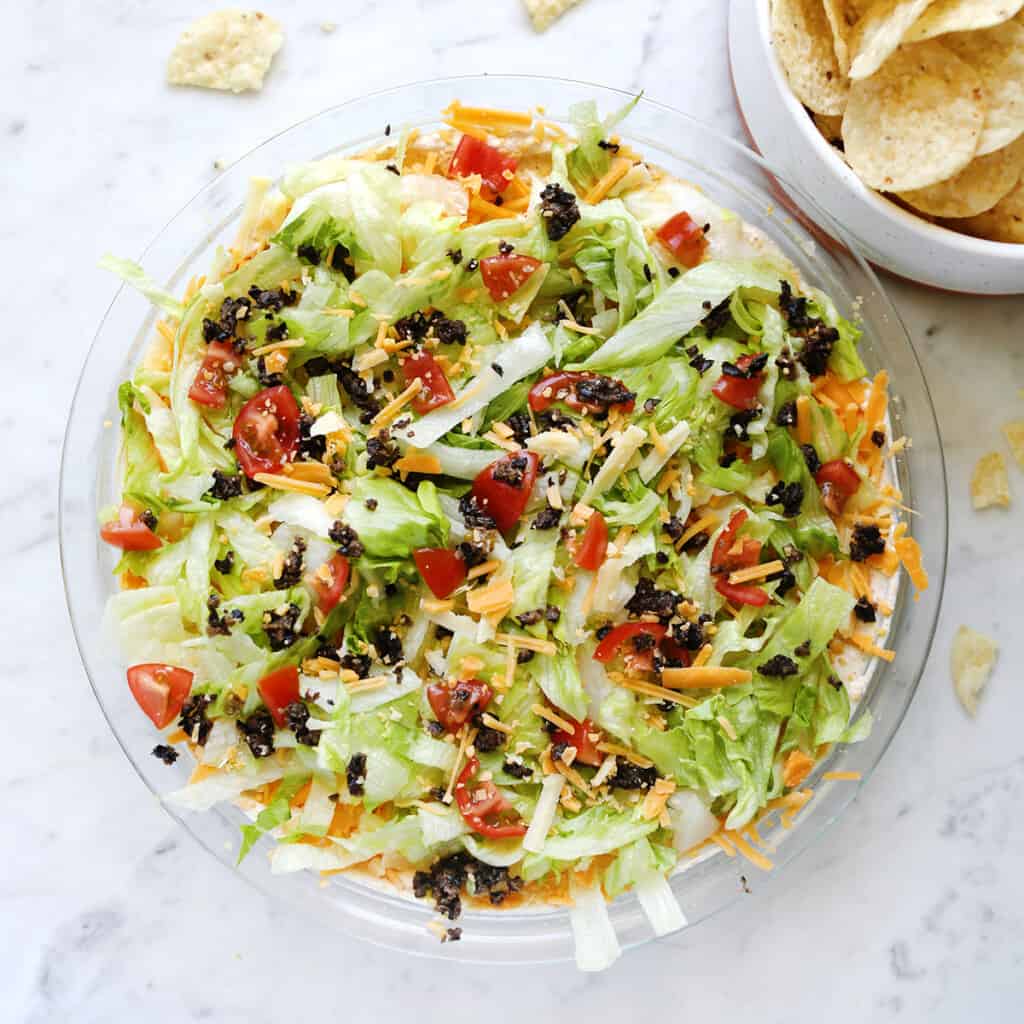
This homemade taco salad recipe is one of those meals I throw together on busy week nights. It’s simple, easy to customize and tastes so fresh. Taco salad is basically a deconstructed taco but heavy on the salad greens or lettuce. I most often make this with ground beef, chicken or turkey but you could…
Show full content
This homemade taco salad recipe is one of those meals I throw together on busy week nights. It’s simple, easy to customize and tastes so fresh. Taco salad is basically a deconstructed taco but heavy on the salad greens or lettuce. I most often make this with ground beef, chicken or turkey but you could also use all beans, tempeh or tofu (like sofritas) for a vegetarian option.
I will sometimes serve taco salad in a tortilla bowl for a pretty presentation. But if I don’t have any my other favorite way to serve this is to melt cheese on to tortilla chips and then serve the taco salad on top. Sort of a taco salad nachos situation.
Toppings: shredded cheese, salsa, sour cream, hot sauce, etc.
How to make Taco Salad
First brown the meat and season with taco seasoning. Drain and add the beans to the last few minutes of cooking so everything gets warm together. Once the meat is cooked, set aside.
Next prep the vegetables. Rinse the lettuce, tomatoes and bell pepper. Chop up everything to how you like it for a salad. Some people prefer big pieces of bell pepper or onion, it’s totally up to you.
If you are using tortilla bowls that need warming or are making your own (like I do for this spicy tempeh taco salad recipe) do that now.
Assemble your taco salad: tortilla bowl or chips, lettuce, meat mixture, cheese, other vegetables, salsa and sour cream. This is how I layer it, you do you. Enjoy warm.
Notes and Substitutions
You can swap the black beans for any canned cook beans you prefer.
If you have leftovers, especially the meat and bean mixture, you can use it in other recipes like tacos, nachos or rice bowls.
First brown the meat and season with taco seasoning.
Drain and add the beans to the last few minutes of cooking so everything gets warm together. Once the meat is cooked, set aside.
Next prep the vegetables. Rinse the lettuce, tomatoes and bell pepper. Chop up everything to how you like it for a salad.
If you are using tortilla bowls that need warming or are making your own do that now.
Assemble your taco salad. Enjoy warm.
Notes
You can swap the black beans for any canned cook beans you prefer.
You can swap the ground beef for ground turkey or ground chicken or tempeh.
If you have leftovers, especially the meat and bean mixture, you can use it in other recipes like tacos, nachos or rice bowls.
You will also want toppings for this like: shredded cheese, salsa, sour cream, hot sauce, etc.
My other favorite way to serve this is to melt cheese on to tortilla chips and then serve the taco salad on top. Sort of a taco salad nachos situation.
This homemade grape salad recipe could not be more simple with only five ingredients needed! You can make this in about 10 minutes, plus chill time. I love the crunchy fresh grapes pair with sweetened cream cheese and a crunchy nutty topping. To some it may seem like an odd combo but it WORKS and…
Show full content
This homemade grape salad recipe could not be more simple with only five ingredients needed! You can make this in about 10 minutes, plus chill time. I love the crunchy fresh grapes pair with sweetened cream cheese and a crunchy nutty topping. To some it may seem like an odd combo but it WORKS and feels very Midwest to me.
Grape salad is one of those dishes that makes me think of big family meals at holidays or potluck dinner or cookout picnics. Of course the word ‘salad’ is being used pretty liberally here. It’s a lot like ambrosia salad or watergate salad. It’s not a green, leafy salad it’s more like a lightly sweet fruit side dish.
Related: Next up try my Great Aunt Ina’s strawberry pretzel salad. We sometimes just call this jello salad at my house.
Ingredients
Red seedless grapes
Cream cheese, softened
Greek yogurt
Brown sugar
Spiced Walnuts or Pecans
How to make Grape Salad
Rinse off the grapes and remove them from the stem. Set aside to dry.
Stir together the softened cream cheese, greek yogurt, and brown sugar. If you want the creamy mixture to be perfectly smooth, free from lumps, I recommend using an electric mixer and blending the cream cheese by itself first and then blending in the other ingredients. Personally, I don’t think it makes a big difference if there are a few lumps. Call me lazy but once you add the nutty topping it doesn’t really show / look smooth anymore anyway.
Fold the cream cheese mixture in with the grapes so they all get coated. Chop the nuts and sprinkle over the top.
Chill the salad for 30 minutes or more so everything is nice and cold before serving.
Notes and Substitutions
I like using all red grapes but you could use a mixture of red and green or all green. But I stick with seedless grapes whatever color you choose.
If you want to lightened this up use reduced fat cream cheese.
I prefer using greek yogurt but sour cream works just as well.
I like using spiced (sweet) nuts for the topping but other options include chopped up Snickers (yes! this is more ‘traditional’ or common where I live) or graham crackers.
If you make this grape salad ahead of time, like the night before you plan to serve it, save the nut topping and sprinkle it on before just before serving.
Print
Grape Salad
#wprm-recipe-user-rating-2 .wprm-rating-star.wprm-rating-star-full svg * { fill: #343434; }#wprm-recipe-user-rating-2 .wprm-rating-star.wprm-rating-star-33 svg * { fill: url(#wprm-recipe-user-rating-2-33); }#wprm-recipe-user-rating-2 .wprm-rating-star.wprm-rating-star-50 svg * { fill: url(#wprm-recipe-user-rating-2-50); }#wprm-recipe-user-rating-2 .wprm-rating-star.wprm-rating-star-66 svg * { fill: url(#wprm-recipe-user-rating-2-66); }linearGradient#wprm-recipe-user-rating-2-33 stop { stop-color: #343434; }linearGradient#wprm-recipe-user-rating-2-50 stop { stop-color: #343434; }linearGradient#wprm-recipe-user-rating-2-66 stop { stop-color: #343434; }
Creamy, sweet salad made with grapes, cream cheese, greek yogurt, brown sugar and nuts.
Course Side DishCuisine AmericanKeyword grape salad
Prep Time 10 minutes minutesChill Time 30 minutes minutesTotal Time 40 minutes minutes
Servings 6
Calories 279kcal
Author Emma Chapman
Ingredients
2 pounds red seedless grapes
4 ounces cream cheese softened
½ cup greek yogurt
¼ cup brown sugar
½ cup spiced walnuts or pecans
Instructions
Rinse off the grapes and remove them from the stem. Set aside to dry.
Stir together the softened cream cheese, greek yogurt, and brown sugar.
Fold the cream cheese mixture in with the grapes so they all get coated.
Chop the nuts and sprinkle over the top.
Chill the salad for 30 minutes or more so everything is nice and cold before serving.
Notes
I like using all red grapes but you could use a mixture of red and green or all green. But I stick with seedless grapes whatever color you choose.
If you want to lightened this up use reduced fat cream cheese.
I prefer using greek yogurt but sour cream works just as well.
I like using spiced (sweet) nuts for the topping but other options include chopped up Snickers (yes! this is more ‘traditional’ or common where I live) or graham crackers.
If you make this grape salad ahead of time, like the night before you plan to serve it, save the nut topping and sprinkle it on before just before serving.
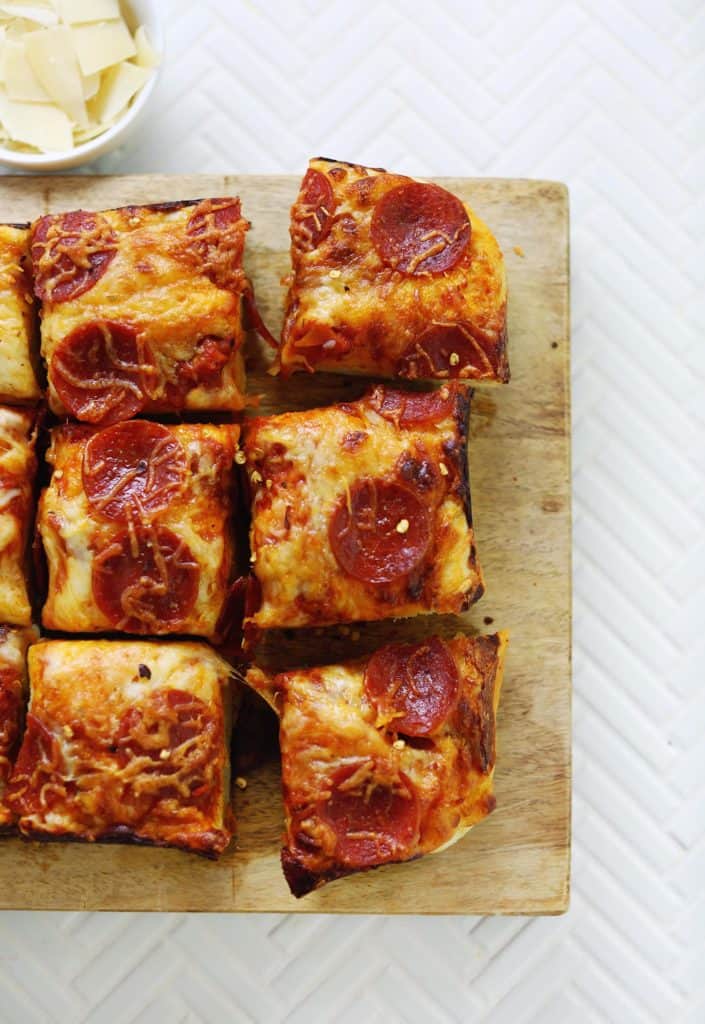
Pizza night is a weekly occurrence at our house and these easy pizza cupcakes a fun swap for a usual weeknight pizza. They are easy to make, and perfect to make with kids, plus delicious! I love pizza cupcakes served as a meal alongside a big salad or fresh fruit. But they also make a…
Show full content
Pizza night is a weekly occurrence at our house and these easy pizza cupcakes a fun swap for a usual weeknight pizza. They are easy to make, and perfect to make with kids, plus delicious! I love pizza cupcakes served as a meal alongside a big salad or fresh fruit. But they also make a really fun appetizer or party snack.
Pizza cupcakes truly could not be easier to make! You only need 5 ingredients and about 25 minutes. Makes these and tell us what you think.
Roll out the pizza crusts and use a 4 inch round cookie cutter to cut into small circles.
Use a pastry brush to brush the inside of each cupcake cavity with oil. You want to see a little bit of oil pooling in the bottom. Not lots but enough that we will get a few crispy areas during baking.
Add the pizza crusts to the prepared cupcake tin. Then add a little bit of cheese in the bottom, topped with sauce, then topped with more cheese, then pepperonis on top. Sprinkle with Italian seasoning if using.
Bake at 400°F for 13-15 minutes. For my oven 13 minutes in a good amount. The edges should turn very golden brown and the cheese will begin to bubble. Remove from the oven and allow to cool for a few minutes before removing from the pan. Serve warm.
Notes
If you want to use other cheeses anything that melts can work. Sometimes I will sprinkle on a little Parmesan cheese during the last couple minutes of baking.
If you want to add other toppings beyond pepperoni feel free.
The recipe card amounts below will make 12 pizza cupcakes in a standard size muffin pan.
Print
Pizza Cupcakes
#wprm-recipe-user-rating-3 .wprm-rating-star.wprm-rating-star-full svg * { fill: #343434; }#wprm-recipe-user-rating-3 .wprm-rating-star.wprm-rating-star-33 svg * { fill: url(#wprm-recipe-user-rating-3-33); }#wprm-recipe-user-rating-3 .wprm-rating-star.wprm-rating-star-50 svg * { fill: url(#wprm-recipe-user-rating-3-50); }#wprm-recipe-user-rating-3 .wprm-rating-star.wprm-rating-star-66 svg * { fill: url(#wprm-recipe-user-rating-3-66); }linearGradient#wprm-recipe-user-rating-3-33 stop { stop-color: #343434; }linearGradient#wprm-recipe-user-rating-3-50 stop { stop-color: #343434; }linearGradient#wprm-recipe-user-rating-3-66 stop { stop-color: #343434; }
easy mini pizzas baked in a muffin pan
Course Main Course, SnackCuisine AmericanKeyword pizza cupcake
Prep Time 5 minutes minutesCook Time 15 minutes minutesTotal Time 20 minutes minutes
Servings 12
Calories 216kcal
Author Emma Chapman
Ingredients
2 cans roll out refrigerated pizza dough each 13 oz.
2 tablespoons olive oil
½ cup pizza sauce
¾ cup shredded mozzarella cheese
¼ cup mini pepperoni
¼ teaspoon Italian seasoning
Instructions
Roll out the pizza crusts and use a 4 inch round cookie cutter to cut into small circles.
Use a pastry brush to brush the inside of each cupcake cavity with oil. You want to see a little bit of oil pooling in the bottom. Not lots but enough that we will get a few crispy areas during baking.
Add the pizza crusts to the prepared cupcake tin.
Then add a little bit of cheese in the bottom, topped with sauce, then topped with more cheese, then pepperonis on top.
Sprinkle with Italian seasoning if using.
Bake at 400°F for 13-15 minutes. For my oven 13 minutes in a good amount. The edges should turn very golden brown and the cheese will begin to bubble.
Remove from the oven and allow to cool for a few minutes before removing from the pan. Serve warm.
Notes
If you want to use other cheeses anything that melts can work. Sometimes I will sprinkle on a little Parmesan cheese during the last couple minutes of baking.
If you want to add other toppings beyond pepperoni feel free.
The recipe card amounts below will make 12 pizza cupcakes in a standard size muffin pan.
This super simple poke sauce makes putting together a homemade poke bowl EASY. You only need seven ingredients and a couple of minutes to make this super fresh and flavorful marinade for poke. Poke is a traditional Hawaiian dish of raw fish marinated in a savory soy based sauce. You can eat poke on its…
Show full content
This super simple poke sauce makes putting together a homemade poke bowl EASY. You only need seven ingredients and a couple of minutes to make this super fresh and flavorful marinade for poke.
Poke is a traditional Hawaiian dish of raw fish marinated in a savory soy based sauce. You can eat poke on its own, much like sashimi or you can serve it over rice with other vegetables or ingredients like edamame or seaweed for a poke bowl. As with any simple dish the quality of ingredients matter so find the best, freshest fish you can when making poke.
Mince the garlic and finely grate the ginger after peeling. I like mincing the garlic with a knife but if you want it even smaller to it dissolves more into the sauce use the smallest holes on a box grater or a zester.
In a small mixing bowl combine all ingredients and stir to combine. Use immediately. You can easily double this recipe if you are planning to marinate more than one pound of fish.
Notes and Substitutions
You can substitute soy sauce with coconut aminos or tamari, espeically if you are avoiding gluten.
Rice vinegar is best but you could also use white wine vinegar or apple cider vinegar if that’s what you have on hand.
Sriracha is great for adding a little heat but a good substitute is 1/4 teaspoon red pepper flakes.
Fresh garlic and ginger is best but if you find buying it only for this recipe (so a very small amount) a problem you can use 1/8 teaspoon garlic powder and powdered ginger instead.
If you want to add sweetness include 1/2 teaspoon of honey or brown sugar.
Frequently Asked QuestionsWhat can you use poke sauce on?
Poke sauce is most often used on raw fish like tuna, salmon or yellow tail for poke bowls. You could also use this soy based savory sauce on shrimp or tofu.
How long do you marinate fish in poke sauce?
Marinate the raw fish in the poke sauce for 20 minutes to two hours for best flavor and texture. You should marinate in a sealed or covered container in the refrigerator.
Print
Poke Sauce
#wprm-recipe-user-rating-4 .wprm-rating-star.wprm-rating-star-full svg * { fill: #343434; }#wprm-recipe-user-rating-4 .wprm-rating-star.wprm-rating-star-33 svg * { fill: url(#wprm-recipe-user-rating-4-33); }#wprm-recipe-user-rating-4 .wprm-rating-star.wprm-rating-star-50 svg * { fill: url(#wprm-recipe-user-rating-4-50); }#wprm-recipe-user-rating-4 .wprm-rating-star.wprm-rating-star-66 svg * { fill: url(#wprm-recipe-user-rating-4-66); }linearGradient#wprm-recipe-user-rating-4-33 stop { stop-color: #343434; }linearGradient#wprm-recipe-user-rating-4-50 stop { stop-color: #343434; }linearGradient#wprm-recipe-user-rating-4-66 stop { stop-color: #343434; }
a simple soy based savory sauce to marinate raw fish like tuna, salmon or yellow tail
Course condiment, Main CourseCuisine AmericanKeyword poke sauce
Prep Time 5 minutes minutesTotal Time 5 minutes minutes
Servings 2
Calories 31kcal
Author Emma Chapman
Ingredients
¼ cup soy sauce
1 teaspoon rice vinegar
½ teaspoon sesame oil
½ teaspoon sriracha
1 clove garlic
¼ teaspoon ginger
1 tablespoon lime juice
Instructions
Mince the garlic and finely grate the ginger after peeling.
I like mincing the garlic with a knife but if you want it even smaller to it dissolves more into the sauce use the smallest holes on a box grater or a zester.
In a small mixing bowl combine all ingredients and stir to combine. Use immediately.
You can easily double this recipe if you are planning to marinate more than one pound of fish.
Notes
You can substitute soy sauce with coconut aminos or tamari, espeically if you are avoiding gluten.
Rice vinegar is best but you could also use white wine vinegar or apple cider vinegar if that’s what you have on hand.
Sriracha is great for adding a little heat but a good substitute is 1/4 teaspoon red pepper flakes.
Fresh garlic and ginger is best but if you find buying it only for this recipe (so a very small amount) a problem you can use 1/8 teaspoon garlic powder and powdered ginger instead.
If you want to add sweetness include 1/2 teaspoon of honey or brown sugar.
It’s that time of year and I’m excited to share this McDonald’s copy cat Shamrock Shake recipe! Lol. Personally the shamrock shake is one of my favorites. I love the flavor of all things mint. We do a lot of little cooking and craft projects at home with our sons around the more minor holidays…
Show full content
It’s that time of year and I’m excited to share this McDonald’s copy cat Shamrock Shake recipe! Lol. Personally the shamrock shake is one of my favorites. I love the flavor of all things mint. We do a lot of little cooking and craft projects at home with our sons around the more minor holidays like St. Patrick’s Day so having a homemade shamrock shake recipe on hand is the way to go.
You can dress this up with crushed Oreos or Lucky Charm marshmallows. Or for a more adult version add a shot or two of espresso. I tend to make these with my kids I really go for it with the green food coloring (ha!) but if you want a more subtle color or even no color at all that’s easy to adjust.
It’s a little tricky to measure ice cream. I use a glass measuring cup but honestly you can simply eyeball it into your blender. Lean toward too much vs too little for a thicker milkshake.
In a blender add the ice cream, milk, extract and green food coloring. Blend until well combined.
Pour into your cup and top with whipped cream.
Tips Notes + Substitutions
I like to use Blue Bunny Soft Vanilla Flavored Frozen Dairy Dessert in this recipe but any vanilla ice cream will work! We tend to buy this kind and the texture is softer and makes the final milkshake a little more airy / foamy and feels even more like the McDonald’s version to me.
Mint extract is more authentic for this recipe but if you already have peppermint extract (maybe from Christmas baking) that is fine too. They do taste slightly different but both make a wonderful Shamrock shake.
I used 10 drops of green food dye to get the vibrant color you see in these photos. Use less if you want a more subtle color or skip the food dye altogether.
Make your own whipped cream or used a canned version for a more authentic copy cat experience.
If you want to make this dairy free you can use dairy free ice cream, milk and whipped cream.
These cups with dome lids are great for a party, otherwise any 12 oz cup will do.
Print
Shamrock Shake
#wprm-recipe-user-rating-5 .wprm-rating-star.wprm-rating-star-full svg * { fill: #343434; }#wprm-recipe-user-rating-5 .wprm-rating-star.wprm-rating-star-33 svg * { fill: url(#wprm-recipe-user-rating-5-33); }#wprm-recipe-user-rating-5 .wprm-rating-star.wprm-rating-star-50 svg * { fill: url(#wprm-recipe-user-rating-5-50); }#wprm-recipe-user-rating-5 .wprm-rating-star.wprm-rating-star-66 svg * { fill: url(#wprm-recipe-user-rating-5-66); }linearGradient#wprm-recipe-user-rating-5-33 stop { stop-color: #343434; }linearGradient#wprm-recipe-user-rating-5-50 stop { stop-color: #343434; }linearGradient#wprm-recipe-user-rating-5-66 stop { stop-color: #343434; }
a thick and creamy green milkshake flavored like mint
Course DessertCuisine AmericanKeyword shamrock shake
Prep Time 5 minutes minutesTotal Time 5 minutes minutes
Servings 1
Calories 736kcal
Author Emma Chapman
Ingredients
2 cups vanilla ice cream
¾ cup milk
¼ teaspoon mint extract
8-10 drops green food dye
½ cup whipped cream
Instructions
It’s a little tricky to measure ice cream. I use a glass measuring cup but honestly you can simply eyeball it into your blender. Lean toward too much vs too little for a thicker milkshake.
In a blender add the ice cream, milk, extract and green food coloring.
Blend until well combined.
Pour into your cup and top with whipped cream.
Notes
I like to use Blue Bunny Soft Vanilla Flavored Frozen Dairy Dessert in this recipe but any vanilla ice cream will work! We tend to buy this kind and the texture is softer and makes the final milkshake a little more airy / foamy and feels even more like the McDonald’s version to me.
Mint extract is more authentic for this recipe but if you already have peppermint extract (maybe from Christmas baking) that is fine too. They do taste slightly different but both make a wonderful Shamrock shake.
I used 10 drops of green food dye to get the vibrant color you see in these photos. Use less if you want a more subtle color or skip the food dye altogether.
Make your own whipped cream or used a canned version for a more authentic copy cat experience.
If you want to make this dairy free you can use dairy free ice cream, milk and whipped cream.
These cups with dome lids are great for a party, otherwise any 12 oz cup will do.
This is a simple chocolate chip cookie recipe elevated to the next level by using brown butter. Yes, we are adding one more step (browning the butter) but I promise it’s worth it. It adds so much flavor and dimension to this classic recipe. Brown butter can be used in pretty much any recipe that…
Show full content
This is a simple chocolate chip cookie recipe elevated to the next level by using brown butter. Yes, we are adding one more step (browning the butter) but I promise it’s worth it. It adds so much flavor and dimension to this classic recipe.
Brown butter can be used in pretty much any recipe that calls for butter. I tend to use it in baked goods, like cookies, sweet breads or scones. It adds an almost nutty flavor bordering on caramel or toffee. Brown butter doesn’t require any ingredients beyond butter (salted or unsalted, but I tend to use unsalted) it simply requires a little extra time and attention.
First make the brown butter. Cut the butter into tablespoon pieces. In a small bot or saucepan heat the butter over medium to high heat for 7-8 minutes. Use a rubber spatula to stir it now and again so it heats evenly. The butter will foam some. Once you see small bits of brown and the butter smells very nutty (almost like caramel or toffee nut) remove from heat. Allow to cool to room temperature or close before using.
In a large mixing bowl add the cooled butter and sugars. Cream together. Then stir in the vanilla extract and egg.
In a smaller bowl combine the flour, salt and baking powder. Whisk together. Then add this dry mixture to the wet mixture and stir to make the dough.
Last add the chocolate chips. Refrigerate the dough for at least an hour to overnight before baking. I like to go ahead scoop all the dough into cookies before refrigerating, I will sometimes put half in the freezer (espeically if I make a double batch).
If using flaky sea salt add it to the tops of dough balls before baking. Bake at 350°F for 10-12 minutes. I tend to bake for 12 minutes but I usually check them after 10.
Tips and Notes
You can use unsalted butter or salted butter to make brown butter. For this recipe (and most baked goods) I tend to use unsalted butter.
Brown butter will not all turn brown, it will have small brown flecks in it. What browns in the milk solids, not the entire mixture. It can go from brown to burnt pretty quickly, so keep it an eye on it.
Crack the egg in a separate, small bowl before adding to the batter. This way if you see some shell go in you can remove it (with a larger piece of shell) before adding to the batter.
Chocolate chips are great but you could also use chopped chocolate or substitute other chips like peanut butter chips, white chocolate chips, toffee chips, etc.
This recipe will make between 12-15 cookies depending how big you make them.
Print
Brown Butter Chocolate Chip Cookies
#wprm-recipe-user-rating-6 .wprm-rating-star.wprm-rating-star-full svg * { fill: #343434; }#wprm-recipe-user-rating-6 .wprm-rating-star.wprm-rating-star-33 svg * { fill: url(#wprm-recipe-user-rating-6-33); }#wprm-recipe-user-rating-6 .wprm-rating-star.wprm-rating-star-50 svg * { fill: url(#wprm-recipe-user-rating-6-50); }#wprm-recipe-user-rating-6 .wprm-rating-star.wprm-rating-star-66 svg * { fill: url(#wprm-recipe-user-rating-6-66); }linearGradient#wprm-recipe-user-rating-6-33 stop { stop-color: #343434; }linearGradient#wprm-recipe-user-rating-6-50 stop { stop-color: #343434; }linearGradient#wprm-recipe-user-rating-6-66 stop { stop-color: #343434; }
classic chocolate chip cookies elevated with nutty, flavorful brown butter
Course DessertCuisine AmericanKeyword brown butter chocolate chip cookies
Prep Time 20 minutes minutesCook Time 12 minutes minutesRefrigerate Time 1 hour hourTotal Time 1 hour hour 32 minutes minutes
Servings 15
Calories 227kcal
Author A Beautiful Mess
Ingredients
½ cup unsalted butter
⅓ cup granulated sugar
⅓ cup brown sugar
1 egg
1 teaspoon vanilla extract
1 ¼ cups all purpose flour
¼ teaspoon salt
½ teaspoon baking powder
10 ounces chocolate chips
1 teaspoon flaky sea salt optional
Instructions
First make the brown butter. Cut the butter into tablespoon pieces. In a small bot or saucepan heat the butter over medium to high heat for 7-8 minutes. Use a rubber spatula to stir it now and again so it heats evenly. The butter will foam some. Once you see small bits of brown and the butter smells very nutty (almost like caramel or toffee nut) remove from heat. Allow to cool to room temperature or close before using.
In a large mixing bowl add the cooled butter and sugars. Cream together. Then stir in the vanilla extract and egg.
In a smaller bowl combine the flour, salt and baking powder. Whisk together.
Then add this dry mixture to the wet mixture and stir to make the dough.
Last add the chocolate chips. Refrigerate the dough for at least an hour to overnight before baking. I like to go ahead scoop all the dough into cookies before refrigerating, I will sometimes put half in the freezer (espeically if I make a double batch).
If using flaky sea salt add it to the tops of dough balls before baking. Bake at 350°F for 10-12 minutes. I tend to bake for 12 minutes but I usually check them after 10.
Notes
You can use unsalted butter or salted butter to make brown butter. For this recipe (and most baked goods) I tend to use unsalted butter.
Brown butter will not all turn brown, it will have small brown flecks in it. What browns in the milk solids, not the entire mixture. It can go from brown to burnt pretty quickly, so keep it an eye on it.
Crack the egg in a separate, small bowl before adding to the batter. This way if you see some shell go in you can remove it (with a larger piece of shell) before adding to the batter.
Chocolate chips are great but you could also use chopped chocolate or substitute other chips like peanut butter chips, white chocolate chips, toffee chips, etc.
Believe it or not but bread pudding was one of the very first recipes I taught myself to make when I first got interested in cooking just after college. I LOVE bread pudding. The flavors are simple and remind me of french toast. The texture is dense and spongy, almost creamy. It’s a simple dessert…
Show full content
Believe it or not but bread pudding was one of the very first recipes I taught myself to make when I first got interested in cooking just after college. I LOVE bread pudding. The flavors are simple and remind me of french toast. The texture is dense and spongy, almost creamy. It’s a simple dessert that manages to feel both special and rustic. Also, it’s a delicious way to use up old bread!
While bread pudding has it’s roots from England (and that’s where I first had it) to me it feels like a dish that could have easily been created in the southern US. It feels like country cooking and reminds me of it’s savory cousin, Stuffing, a Thanksgiving staple.
Tear up the bread into small pieces. Butter or lightly grease your baking dish and add the bread pieces to it.
Melt the butter. Drizzle half the melted butter over the bread pieces.
In a medium sized mixing bowl add the eggs, milk, sugar, vanilla and cinnamon. Whisk until well combined, you really want to break up the eggs so the yolks and whites are well combined. Then stir in the butter (hopefully slightly cooled by now).
Pour the egg batter over the bread pieces. Lightly press the bread down so all the pieces get soaked, it will spring back some and that’s fine.
Bake at 350°F for 40-45 minutes. The bread pudding will puff up toward the end of baking. Once removed from the oven it will settle back down. Cool for 10-12 minutes before slicing into it.
Notes
You can use any type of bread for this but I love sourdough. Sandwich bread, hot dog buns, dinner rolls, etc. will all work though.
You do want the bread stale, this allows it to soak up the egg batter well and that’s what makes the final dish so spongy and delicious. If your bread is not stale then toast in your toaster, air fryer or oven for a few minutes.
Use part brown sugar (up to half) to add more flavor.
Add raisins for classic old fashioned bread pudding.
Add a bread pudding glaze – not really necessary but traditional and easy. Whisk together powdered sugar with a little vanilla extract and just enough milk to make a pourable glaze. Alternative idea- sprinkle the bake with powdered sugar.
Butter or lightly grease your baking dish and add the bread pieces to it.
Melt the butter. Drizzle half the melted butter over the bread pieces.
In a medium sized mixing bowl add the eggs, milk, sugar, vanilla and cinnamon. Whisk until well combined, you really want to break up the eggs so the yolks and whites are well combined.
Then stir in the butter (hopefully slightly cooled by now).
Pour the egg batter over the bread pieces. Lightly press the bread down so all the pieces get soaked, it will spring back some and that’s fine.
Bake at 350°F for 40-45 minutes. The bread pudding will puff up toward the end of baking. Once removed from the oven it will settle back down.
Cool for 10-12 minutes before slicing into it.
Notes
You can use any type of bread for this but I love sourdough. Sandwich bread, hot dog buns, dinner rolls, etc. will all work though.
You do want the bread stale, this allows it to soak up the egg batter well and that’s what makes the final dish so spongy and delicious. If your bread is not stale then toast in your toaster, air fryer or oven for a few minutes.
Use part brown sugar (up to half) to add more flavor.
Add raisins for classic old fashioned bread pudding.
Add a bread pudding glaze – not really necessary but traditional and easy. Whisk together powdered sugar with a little vanilla extract and just enough milk to make a pourable glaze. Alternative idea- sprinkle the bake with powdered sugar.
I love appetizers. Emma and I have been known to order what we call “appetizer feasts” when we go out for dinner, so we try more apps and skip the main course. They’re delish! Today I’m excited to share my own recipe for my favorite classic appetizers: spinach artichoke dip! I’ve been making this spinach…
Show full content
I love appetizers. Emma and I have been known to order what we call “appetizer feasts” when we go out for dinner, so we try more apps and skip the main course. They’re delish! Today I’m excited to share my own recipe for my favorite classic appetizers: spinach artichoke dip!
I’ve been making this spinach and artichoke dip for years and years now and the recipe hasn’t really changed. It’s a classic for a reason! If you are hosting or need a great baked dip to take to a party try this.
Thaw and drain the frozen spinach. If it’s not already chopped then finely chop. Drain the artichoke hearts and cut into small pieces. Mince the garlic.
In a large bowl, combine the spinach, artichoke hearts, softened cream cheese, mayonnaise, sour cream, half the parmesan cheese, garlic and crushed chili flakes. Season with salt and pepper.
Mix until the entire mixture is evenly moist. Pour the mixture into an eight inch cast iron skillet, square pan or pie dish. Top with the remaining parmesan cheese.
Bake for 30 minutes at 350°F until bubbly and the top is golden. Allow it to cool for five minutes before serving.
Notes and Substitutions
For a lighter version use reduced fat cream cheese, Miracle whip and low fat greek yogurt.
I use all Parmesan cheese for this dip most of the time BUT if you like a more melty, sting-y cheese situation feel free to substitute half the Parmesan for mozzarella.
If you don’t like spicy food, omit the chili flakes or cut them in half for something less spicy.
I like to serve this dip with toasted baguette slices or warm pita but crackers or tortilla chips are great as well.
Thaw and drain the frozen spinach. If it’s not already chopped then finely chop.
Drain the artichoke hearts and cut into small pieces.
Minced the garlic.
In a large bowl, combine the spinach, artichoke hearts, softened cream cheese, mayonnaise, sour cream, half the parmesan cheese, garlic and crushed chili flakes. Season with salt and pepper.
Mix until the entire mixture is evenly moist. Pour the mixture into an eight inch cast iron skillet, square pan or pie dish. Top with the remaining parmesan cheese.
Bake for 30 minutes at 350°F until bubbly and the top is golden. Allow it to cool for five minutes before serving.
Notes
For a lighter version use reduced fat cream cheese, Miracle whip and low fat greek yogurt.
I use all Parmesan cheese for this dip most of the time BUT if you like a more melty, sting-y cheese situation feel free to substitute half the Parmesan for mozzarella.
If you don’t like spicy food, omit the chili flakes or cut them in half for something less spicy.
I like to serve this dip with toasted baguette slices or warm pita but crackers or tortilla chips are great as well.
We all pigged out on this during work one day and later I used it to top a salad (SO good). Then I added some to a piece of baked salmon (also really good!) If you don’t make this for a party, expect to have some leftovers. xo. Elsie
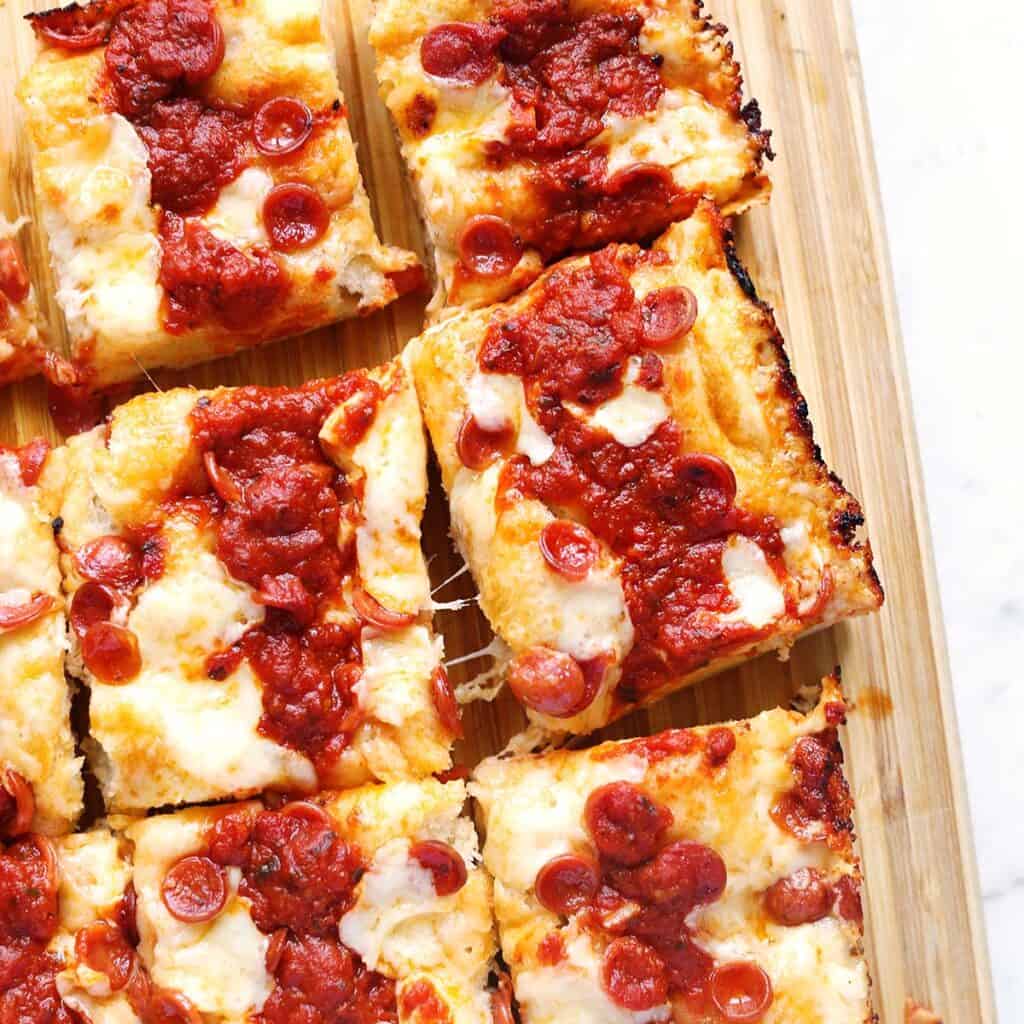
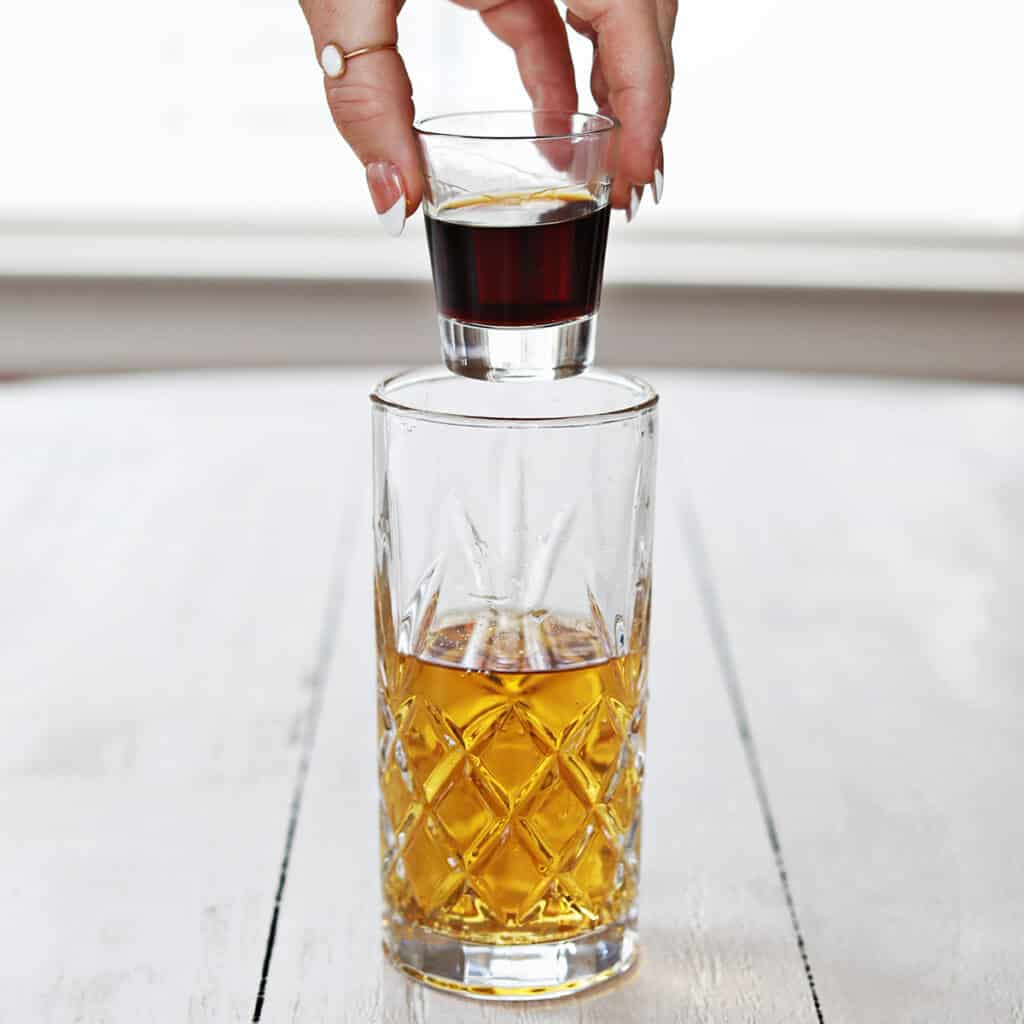
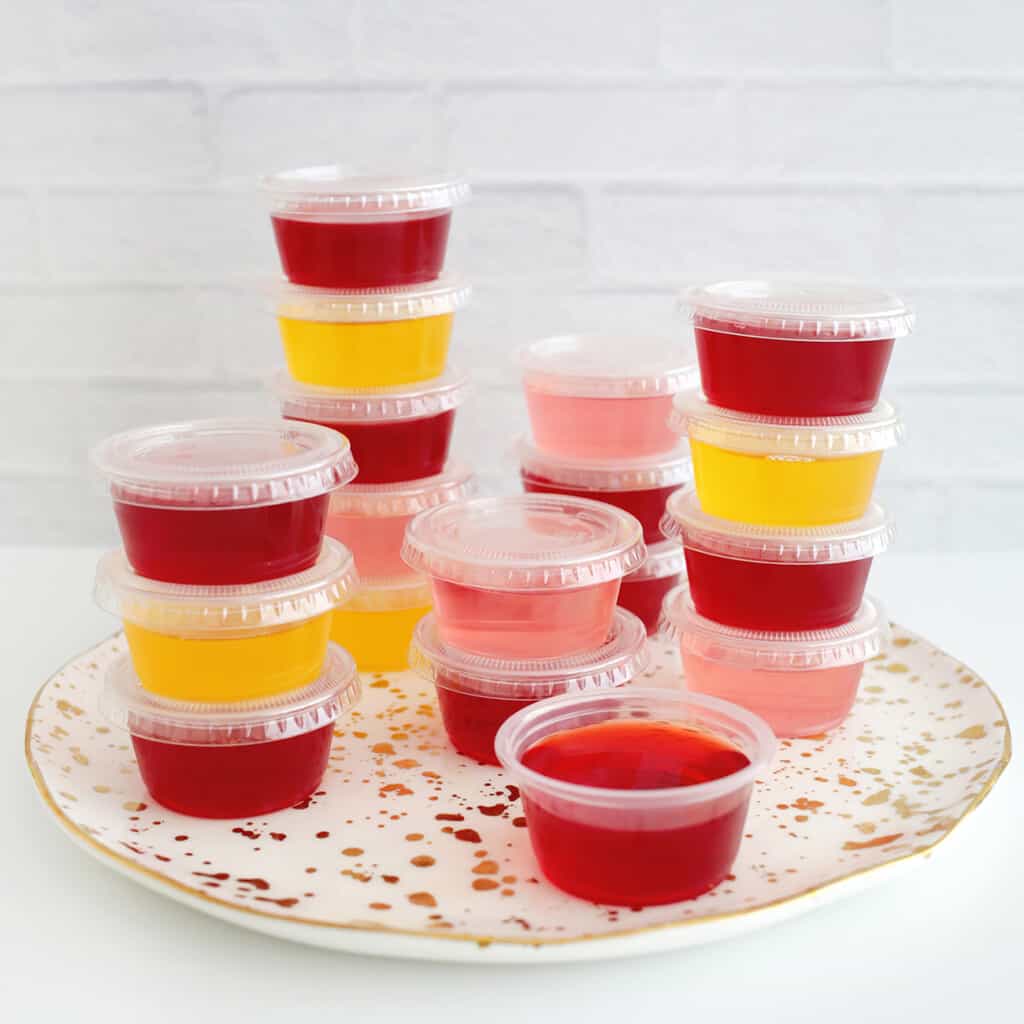
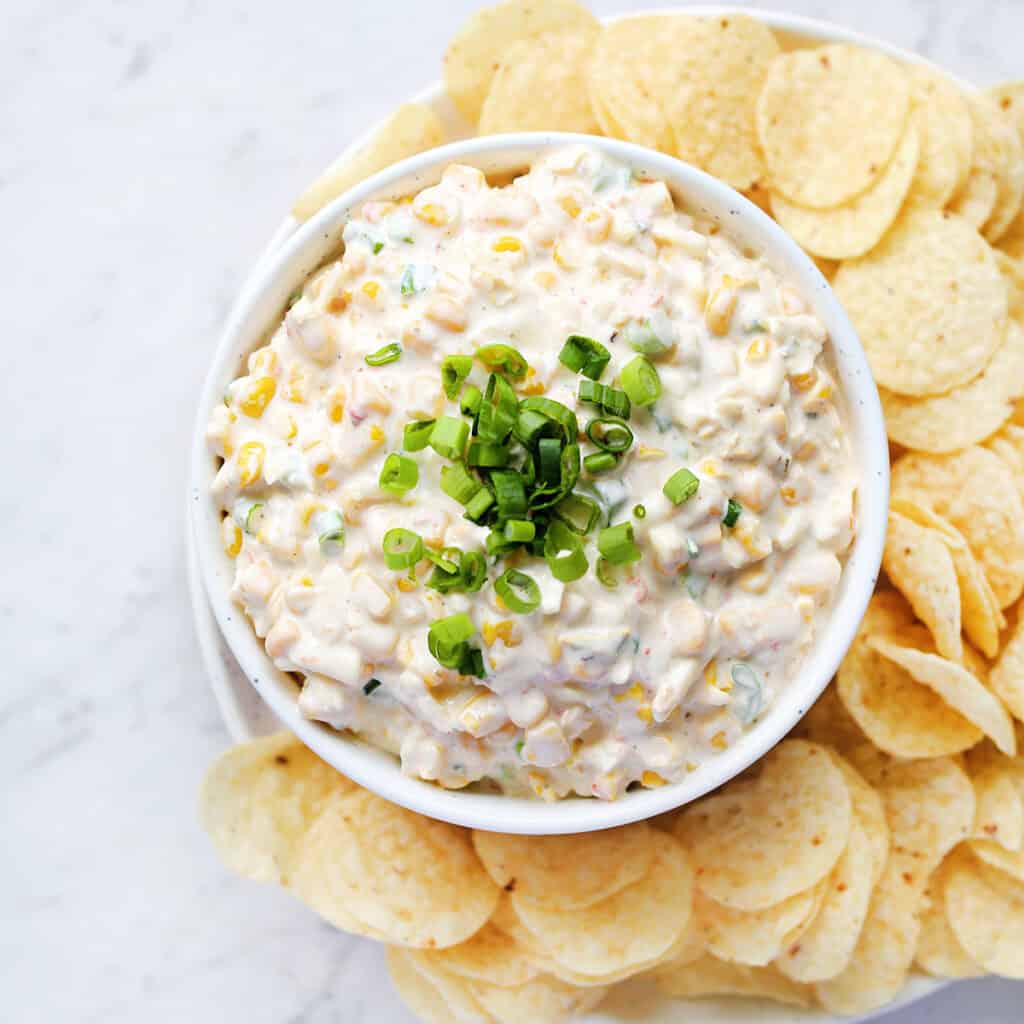
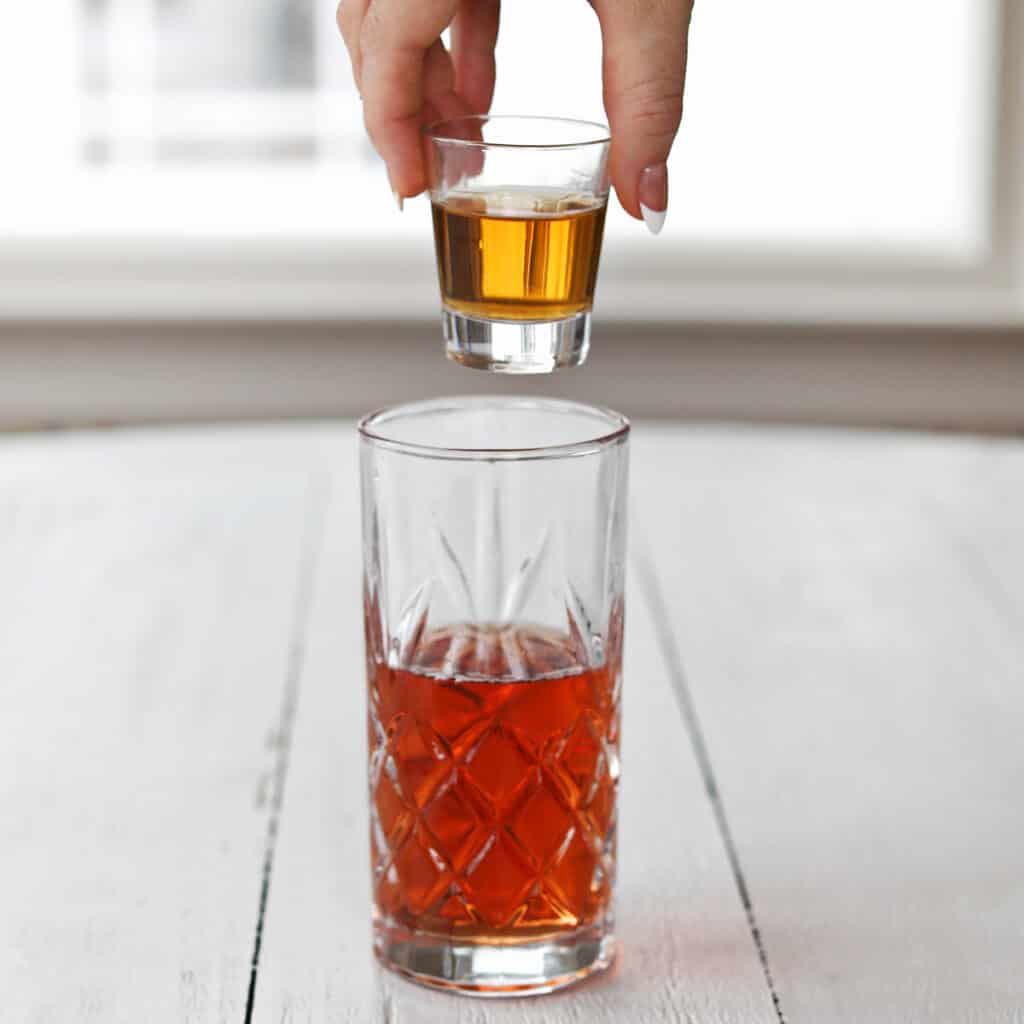
Ready to plan your Super Bowl menu? We’ve got all the classics like Buffalo Chicken Dip, Rotel Dip, Pigs in a Blanket and Deviled Eggs. We’ve also got sweet treats like Peanut Butter Balls and Puppy Chow. If you want some game day drinks, try making our Jello Shots, Jager Bomb or the Bushwacker.
This dip is made with just five ingredients (shredded chicken, hot sauce, cream cheese, sour cream, and cheddar cheese) and only takes about 20 minutes to make and bake.
Get the Recipe
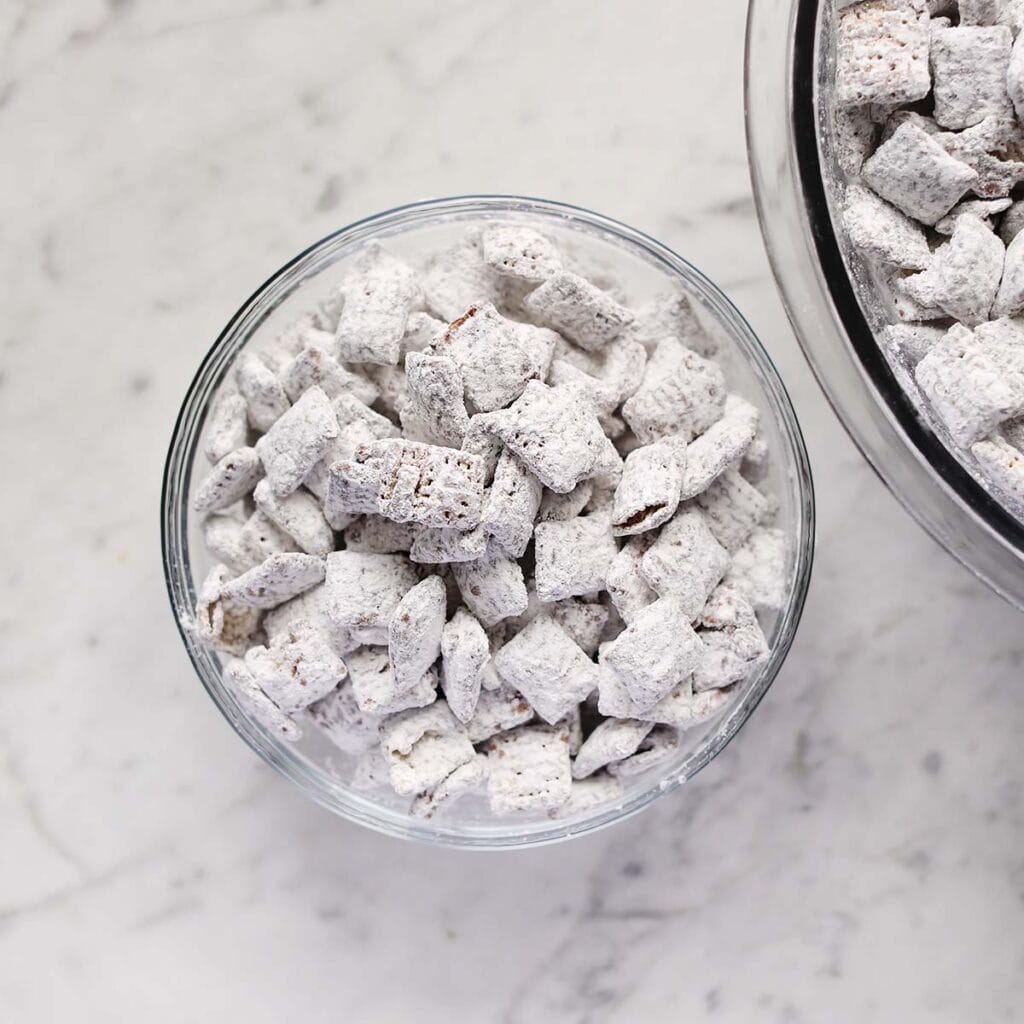
The Best Homemade Chex Mix Recipe (in the Oven or Microwave)
This easy homemade Chex Mix is a delicious combo of crunchy and salty flavors.
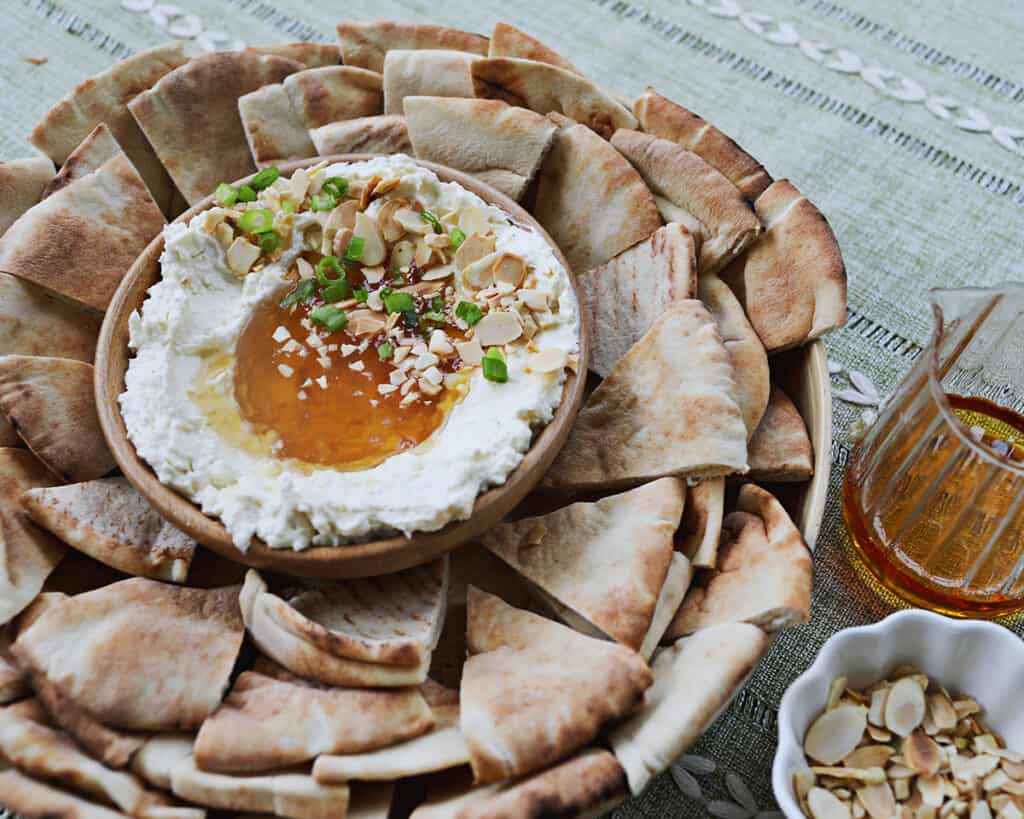
This dip is sweet and salty, creamy, and totally unique. Made with feta crumbles, cream cheese, minced garlic, honey, olive oil, almonds, and pita bread.
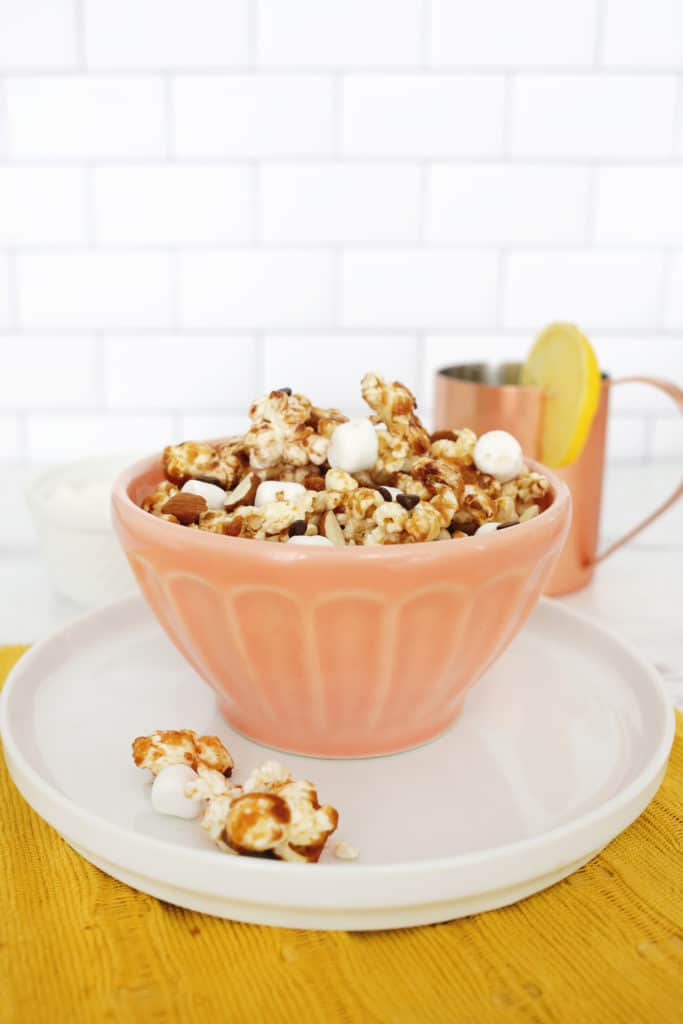
I love setting popcorn out for a party, and a bite-size dessert like rocky road caramel popcorn (with marshmallows and chocolate chips) is a fun twist on a caramel corn. And, as always, homemade popcorn is so much better!
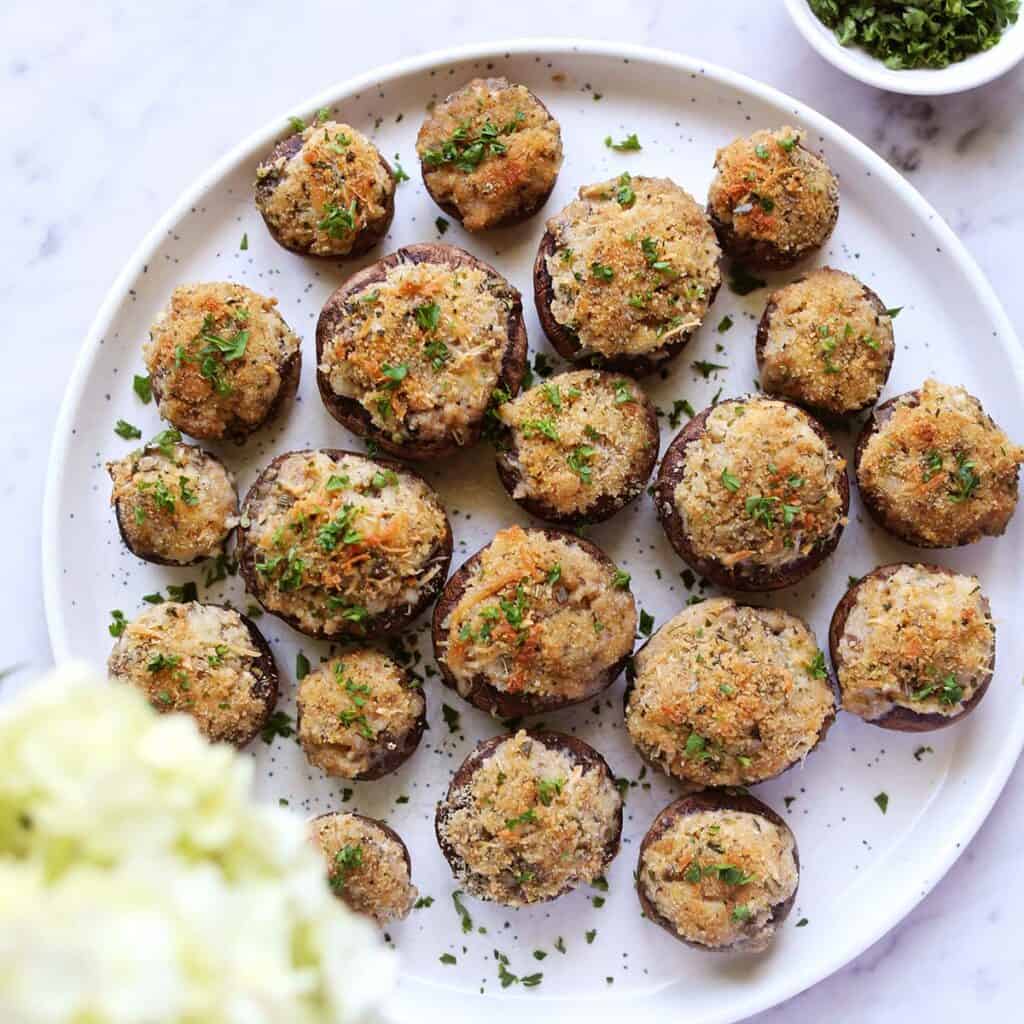
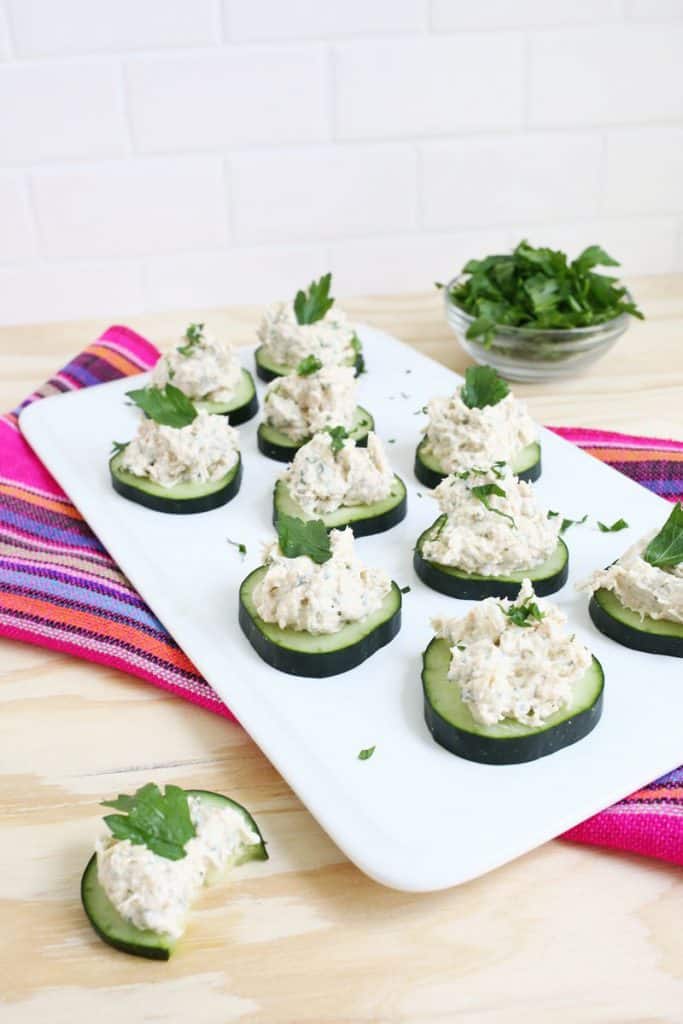
A delicious recipe homemade chicken dip recipe that combines chicken with cream cheese and the salty tang of soy sauce. Serve on top of cucumber slices or with crackers.
These are such an easy and healthy snack you can throw together with very few ingredients like chickpeas, olive oil, seasoning salt, garlic powder, and cayenne.
I used potato chips in these crab cakes, and I love the salty crunch alongside the other ingredients like imitation crab meat, jalapeno, celery, Dijon mustard, seafood seasoning, and eggs.
There are many variations of Jello salad, so here is what you can expect from this recipe. This is a dessert OR sweet side dish in three layers: pretzel crust, cream cheese center, and a strawberry-cranberry Jello top.
These Spicy Pimento Cauliflower Bites are crunchy, spicy and go oh-so-well with the creamy pimento cheese dip I made alongside them. This is vegetarian comfort food at its best if you ask me. You need cauliflower, milk, diced pimento, hot sauce, cream cheese, mayo, and cheddar.
This homemade French onion dip is creamy, decadent and the perfect blend of savory with a little sweet. Made with onions, garlic, chives, cream cheese, sour cream, mayo, and mustard.
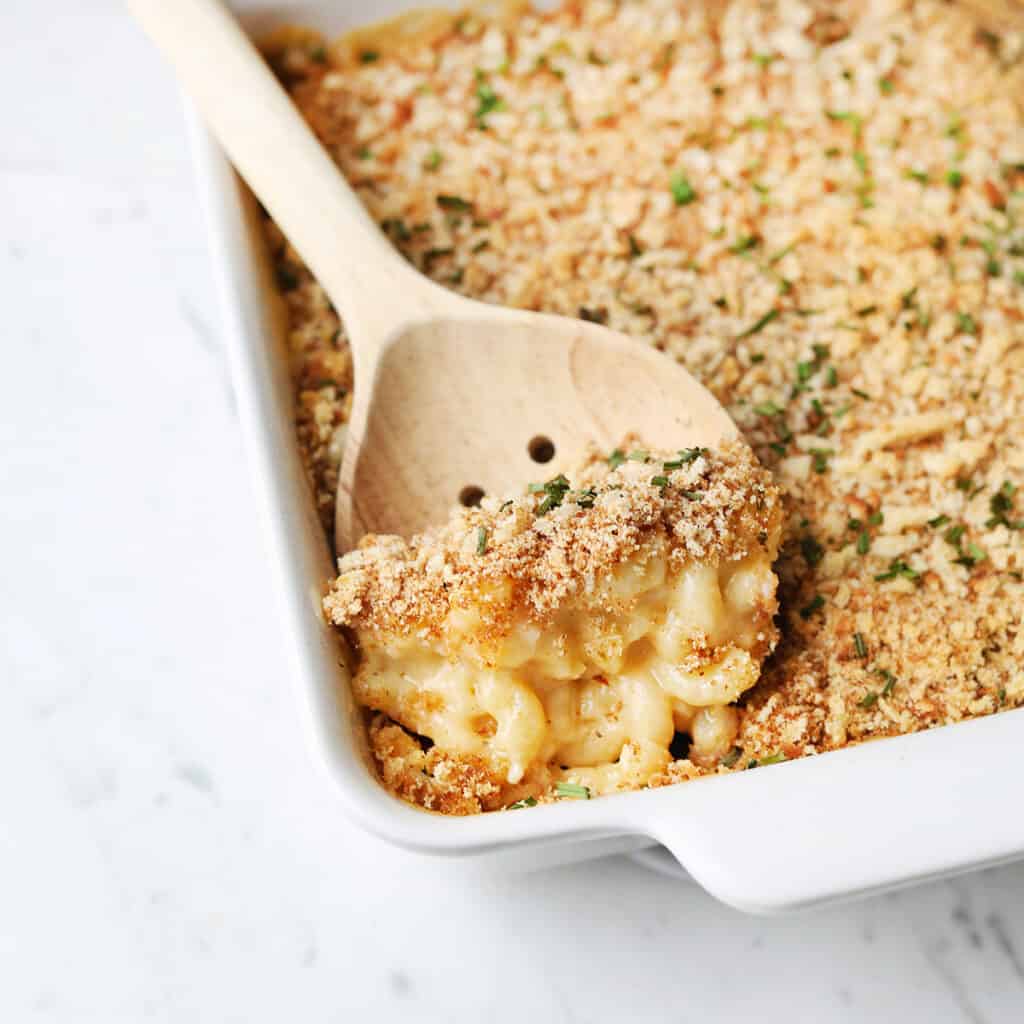
This classic baked macaroni and cheese has no eggs or evaporated milk, but it is made with macaroni noodles, garlic, flour, chicken stock, pepper jack cheese, cheddar cheese, and breadcrumbs.
This is the most delicious fruit salad I have ever had. The honey citrus dressing makes it sweet and slightly tart at the same time. Use any fruit you would like and to make the dressing you need with orange juice, honey, orange zest, lime zest, lime juice, and vanilla extract.
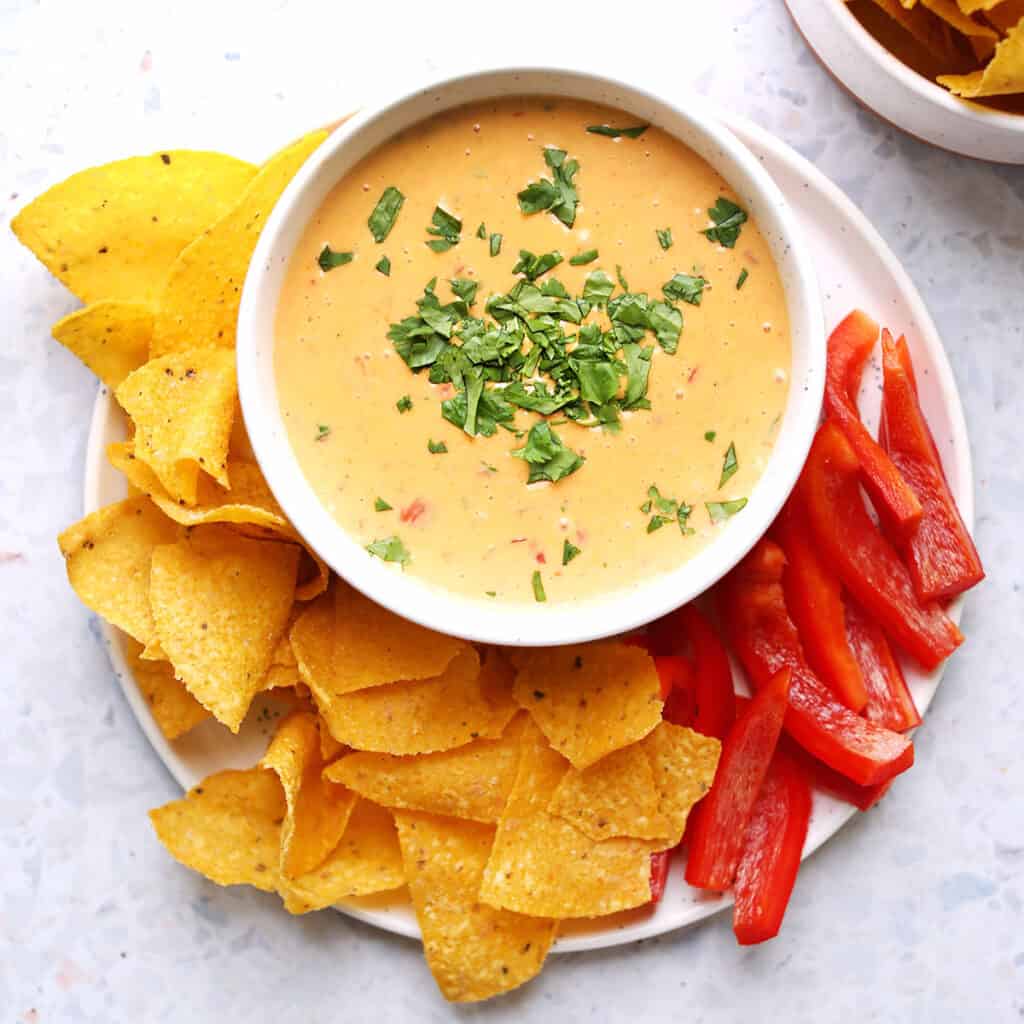
This dip would also be great to serve during a ball game (football or otherwise) or really any casual or semi-casual get together. It’s creamy, salty and just the right amount of spicy. You need cream cheese, mayo, pepper jack cheese, jalapeno peppers, green chilies, and parmesan cheese.
This 7-layer dip recipe includes: refried beans, spiced sour cream and cream cheese, guacamole, salsa, cheddar cheese, olives, and tomatoes as the layers. Bonus points if you throw some cilantro or green onions on top for some additional color.
Taco dip is made of three basic ingredients (cream cheese, sour cream, taco seasoning), but then gets dressed up with any and all toppings you might put on a taco.
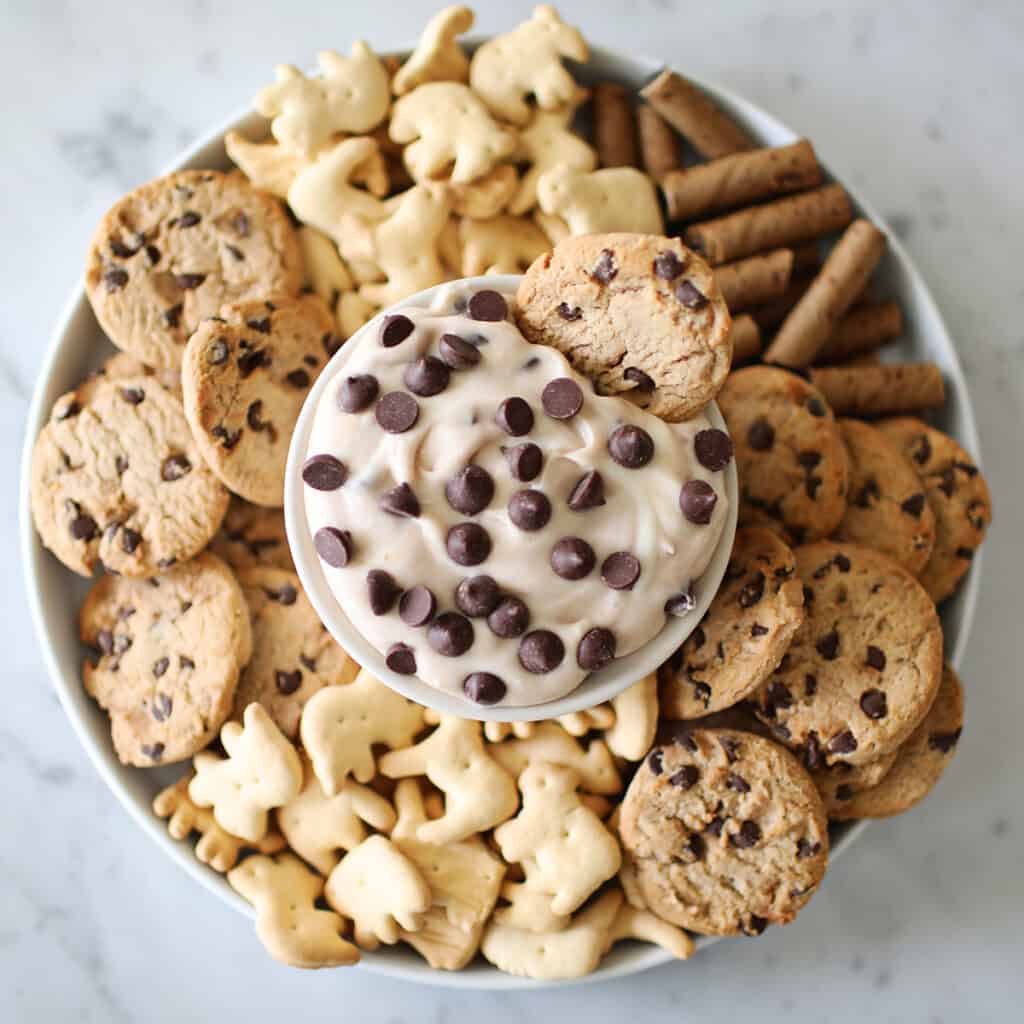
This delicious cream cheese-based dip is soft, creamy and perfect for almost any get-together. You need cream cheese, powdered sugar, vanilla extract, whipped topping, cocoa powder, and chocolate chips.
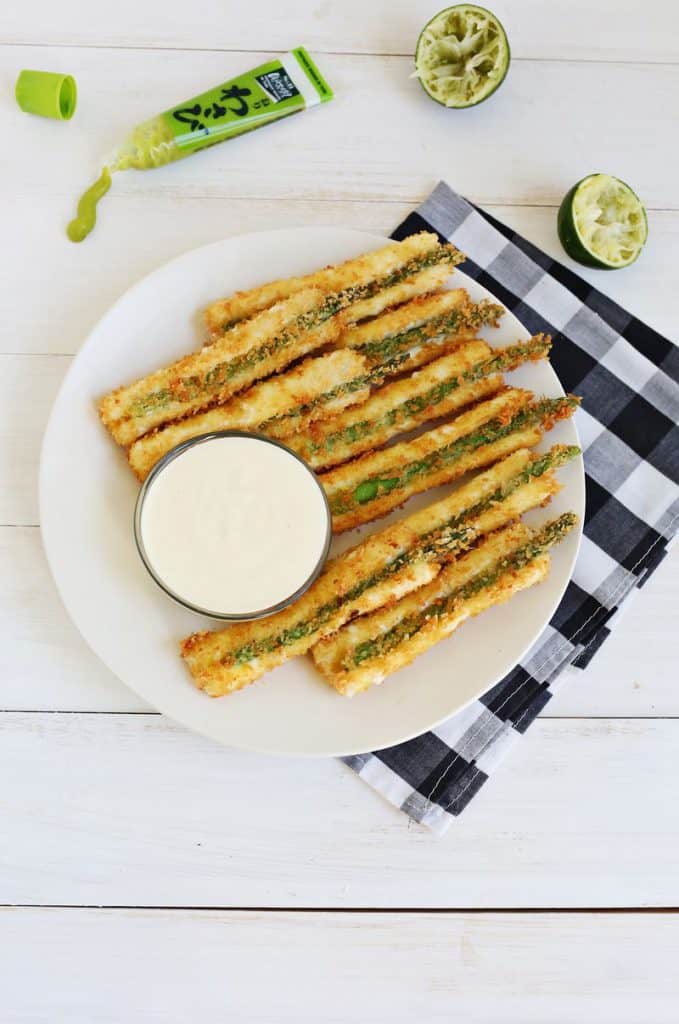
These asparagus sticks make a fantastic party appetizer that is sure to wow your friends. made with cheese sticks, asparagus, eggs, Panko bread crumbs, and flour.
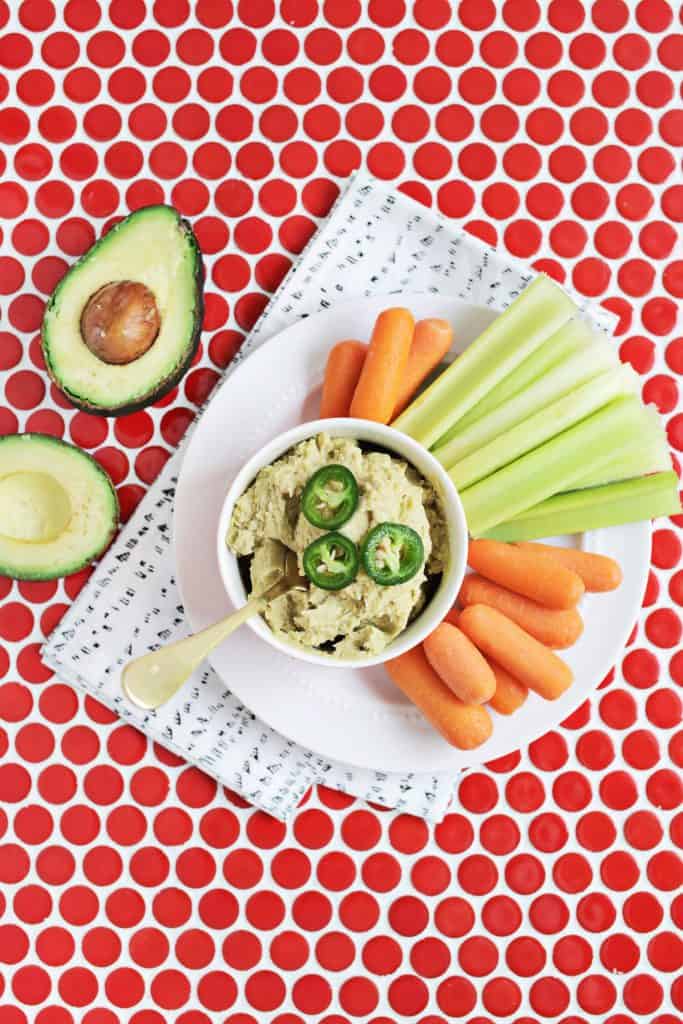
I love serving hummus when hosting a party. This homemade hummus is made with creamy avocado, red pepper, and jalapeños. Serve it with veggies or pita chips for a tasty appetizer. This hummus is great on mini toasts, too.
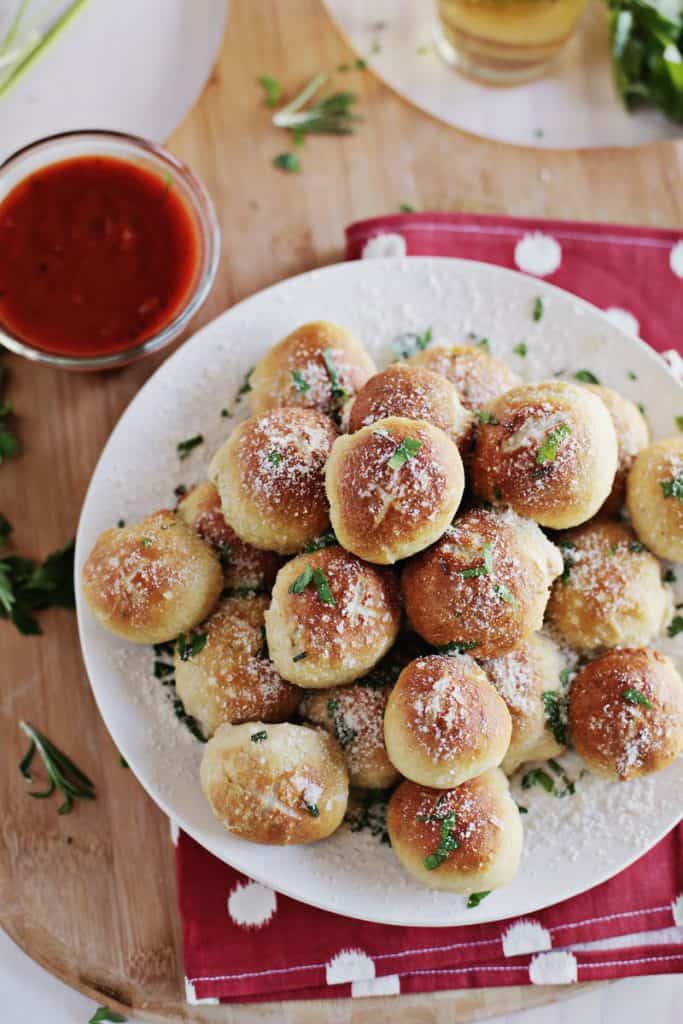
This recipe for pretzel pizza bites is as good as it sounds. Soft chewy pretzels combined with gooey melted cheese get dusted in fresh herbs and then dunked in hot marinara sauce.
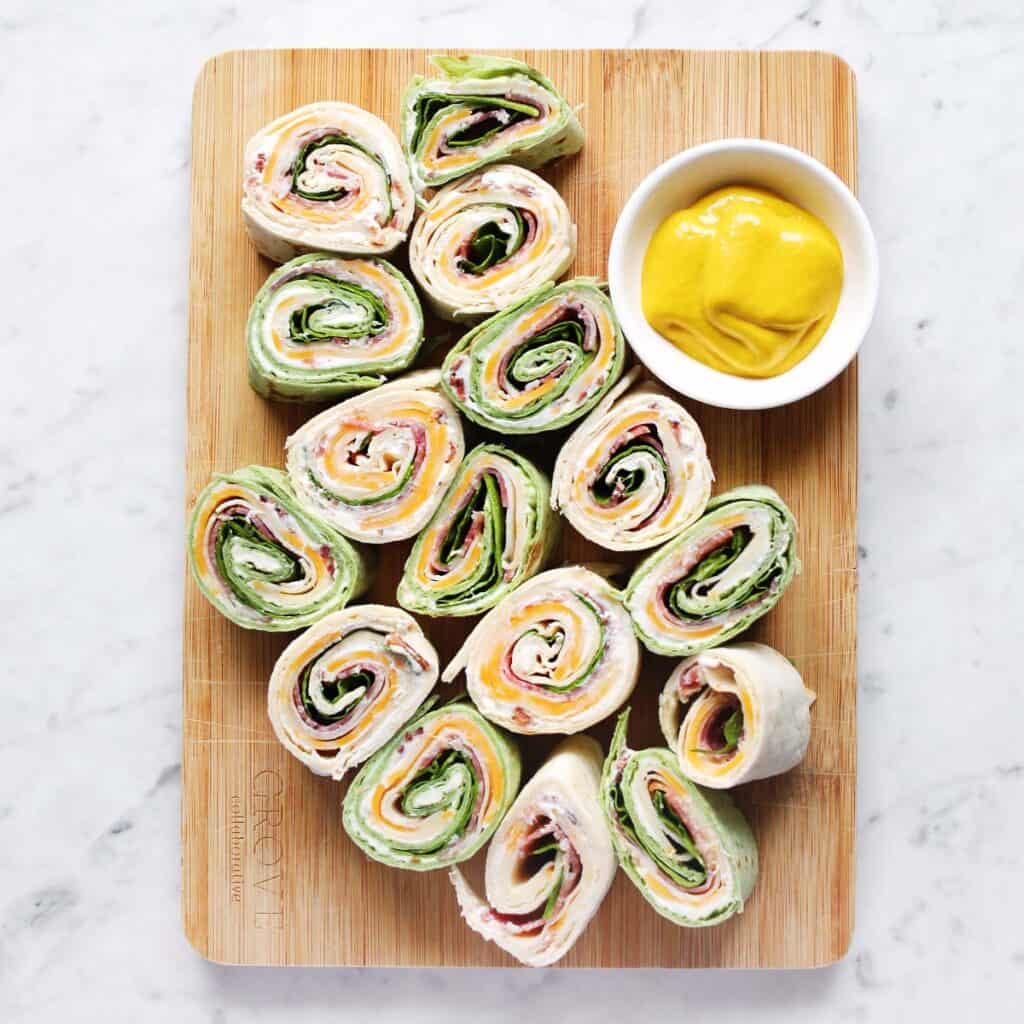
The secret to a great pinwheel sandwich is the cream cheese filling! This is the “glue” that keeps this rolled up sandwich looking great and it tastes amazing. You can fill them with bacon, sliced cheese, deli meat, or anything you want.
Pigs in a blanket is probably the most adorable appetizer name of all time, right? The idea is simple—hot dogs (or other pork sausage) rolled in bread and baked.
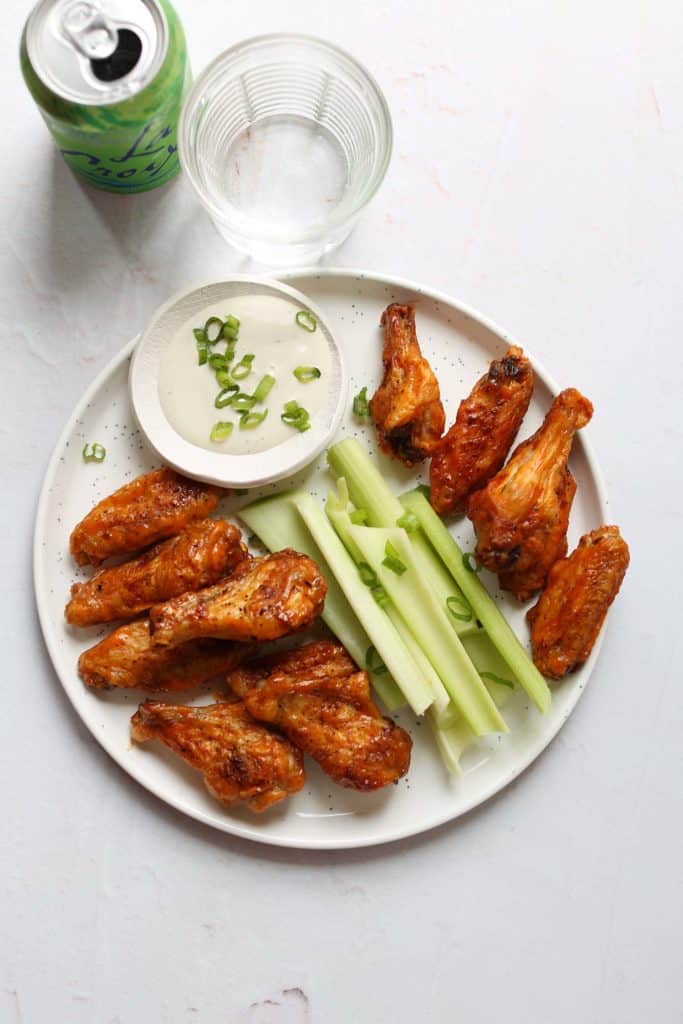
I LOVE air fried wings because they are still super crispy, but more of the fat cooks off without adding oil from frying or even baking. All you need is chicken wings, seasoning, and wing sauce.


 Print
Margarita Cocktail
#wprm-recipe-user-rating-0 .wprm-rating-star.wprm-rating-star-full svg * { fill: #343434; }#wprm-recipe-user-rating-0 .wprm-rating-star.wprm-rating-star-33 svg * { fill: url(#wprm-recipe-user-rating-0-33); }#wprm-recipe-user-rating-0 .wprm-rating-star.wprm-rating-star-50 svg * { fill: url(#wprm-recipe-user-rating-0-50); }#wprm-recipe-user-rating-0 .wprm-rating-star.wprm-rating-star-66 svg * { fill: url(#wprm-recipe-user-rating-0-66); }linearGradient#wprm-recipe-user-rating-0-33 stop { stop-color: #343434; }linearGradient#wprm-recipe-user-rating-0-50 stop { stop-color: #343434; }linearGradient#wprm-recipe-user-rating-0-66 stop { stop-color: #343434; }
Course DrinksCuisine American, MexicanKeyword margarita
Prep Time 5 minutes minutes
Servings 1 cocktail
Calories 138kcal
Author Elsie Larson
Equipment
Print
Margarita Cocktail
#wprm-recipe-user-rating-0 .wprm-rating-star.wprm-rating-star-full svg * { fill: #343434; }#wprm-recipe-user-rating-0 .wprm-rating-star.wprm-rating-star-33 svg * { fill: url(#wprm-recipe-user-rating-0-33); }#wprm-recipe-user-rating-0 .wprm-rating-star.wprm-rating-star-50 svg * { fill: url(#wprm-recipe-user-rating-0-50); }#wprm-recipe-user-rating-0 .wprm-rating-star.wprm-rating-star-66 svg * { fill: url(#wprm-recipe-user-rating-0-66); }linearGradient#wprm-recipe-user-rating-0-33 stop { stop-color: #343434; }linearGradient#wprm-recipe-user-rating-0-50 stop { stop-color: #343434; }linearGradient#wprm-recipe-user-rating-0-66 stop { stop-color: #343434; }
Course DrinksCuisine American, MexicanKeyword margarita
Prep Time 5 minutes minutes
Servings 1 cocktail
Calories 138kcal
Author Elsie Larson
Equipment


 It’s a lot like