GeistHaus
log in · sign up

https://xaviergeerinck.com/rss

rss
0 posts
Polling state
Status active
Last polled May 19, 2026 05:21 UTC
Next poll May 20, 2026 02:01 UTC
Poll interval 86400s
ETag W/"2b2ba-+8Dmd4h6/KyPWOk7arKfLMisgo0"

Posts

Why Scaling Agentic AI Applications in Production is Hard
AIAI - AgenticDapr
Lessons from scaling AI at Scrydon
Show full content
Why Scaling Agentic AI Applications in Production is Hard

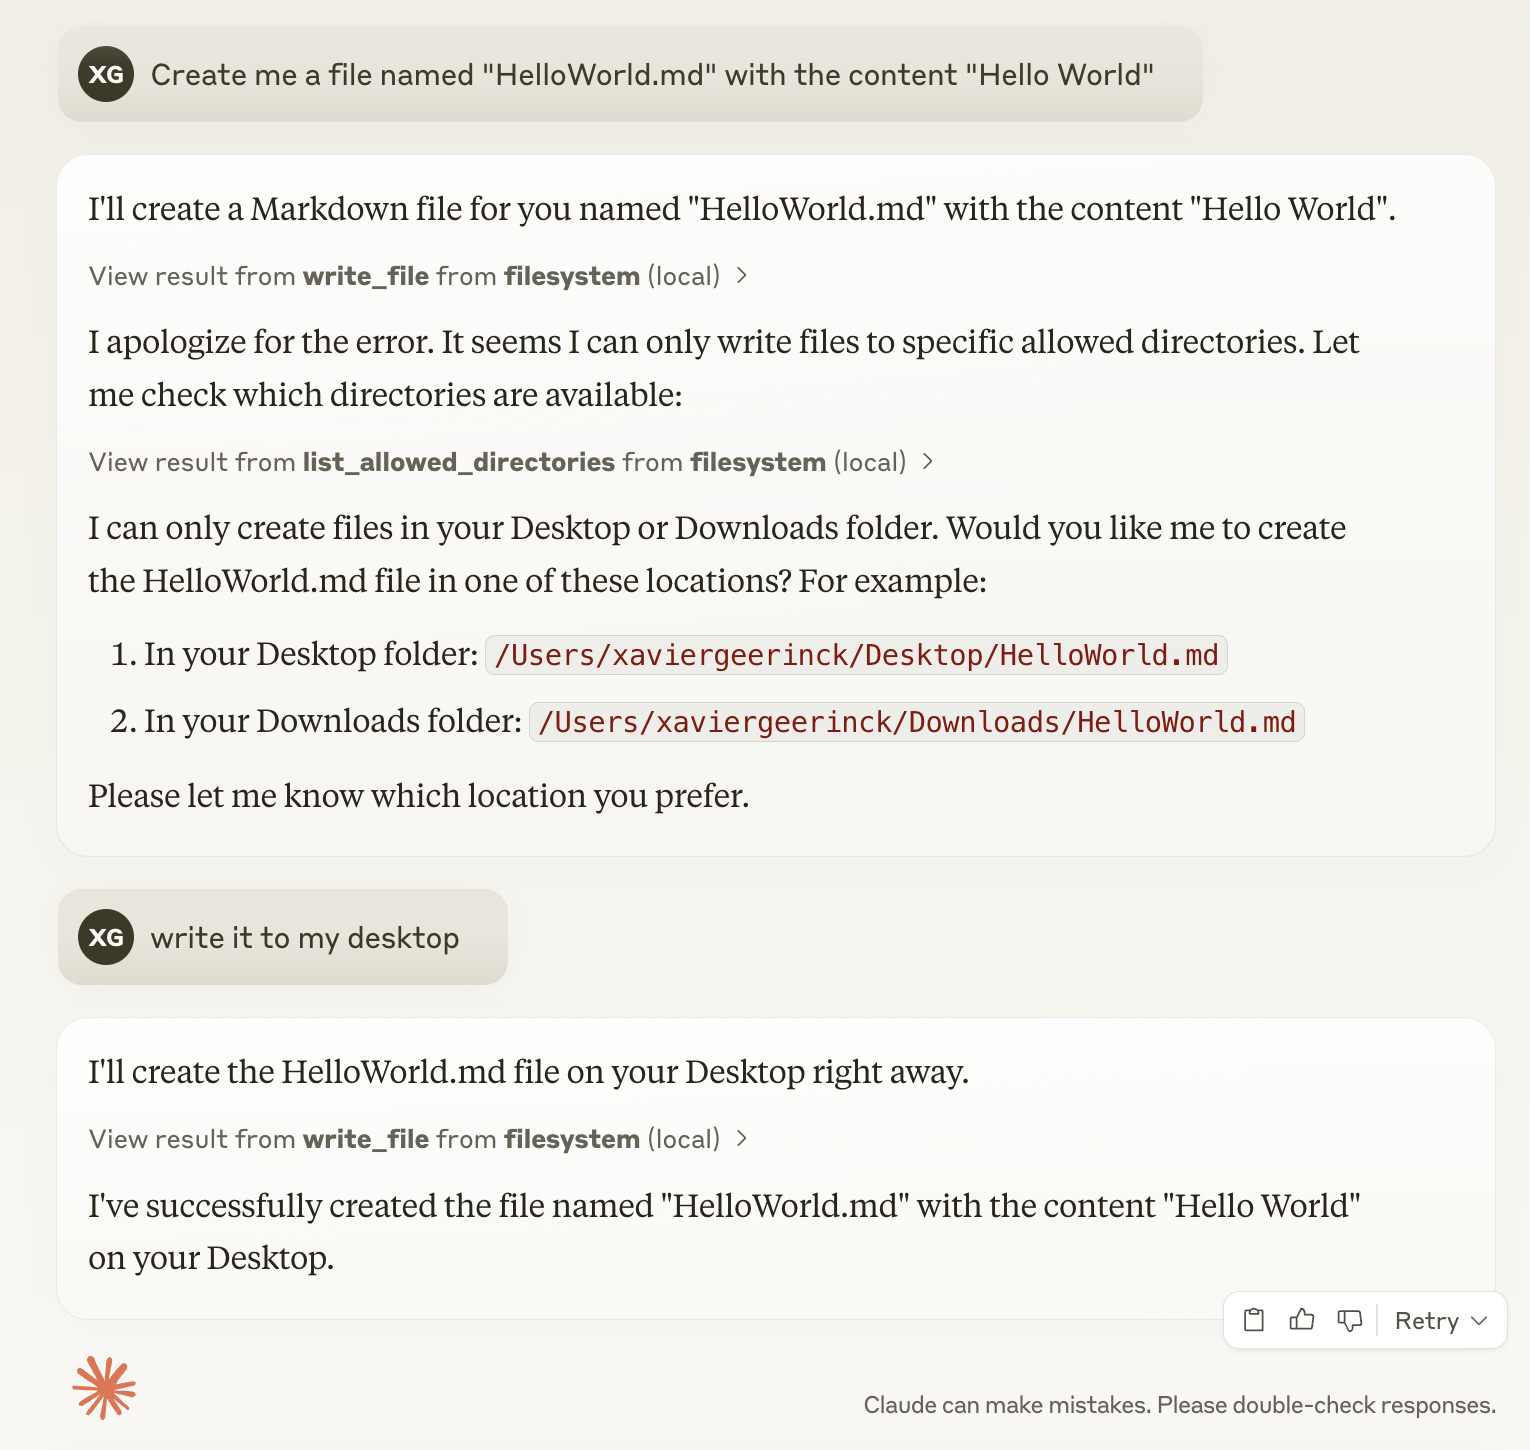
Imagine you are building an Agentic AI tool that fetches the latest changes in your GitHub codebase and returns the results! Sounds simple right? In the end, it is just us wiring up an agentic workflow. Single LLM, a handful of tools, a durable runtime so it survives restarts, and it should work beautifully on the happy path:

  • Turn 1: the model calls list_pull_requests, sees the response, picks a candidate.
  • Turn 2: it calls get_commit, reads the diff, decides on a change.
  • Turn 3: it calls search_code to find the symbol it wants to touch.
  • Turn 4: it calls list_commits to sanity-check the file's recent history.

But then:

  • Turn 5: ResourceExhausted: trying to send message larger than max.

Game over...

The workflow is stuck retrying the same activity forever. The LLM never saw the failure. Your logs don't show a bad tool. The model "did everything right." And yet here you are.

I recently encountered just this, and it's more involved that it seemingly seems so! Welcome to the wonderful world of IT Architecture (and why Senior and above profiles didn't loose their jobs yet)


Why Agentic Applications Are Different

A "normal" LLM application has roughly one shape: user → prompt → model → response. The payloads are bounded by the user input, the prompt template, and a single completion. You can capacity-plan it on the back of an envelope.

Now an agent is an entirely different beast, it flips three things at once:

  1. The conversation grows recursively. Every turn appends not just the assistant's reply but every tool call and every tool result. By turn 10, the model is reading a transcript that includes nine prior tool outputs.
  2. Tool outputs are unbounded in practice. A list_pull_requests call against GitHub returns ~5–10 KB per PR by default × 30 PRs per page = 150–300 KB per call. get_repository_tree (recursive) can hit multiple MB. None of that size is under your control — it's whatever the upstream API decides to return.
  3. You probably want durability. Production agents need to survive node restarts, retry failed tool calls, and let humans intervene mid-run. So you put them on a durable workflow runtime (Temporal, Dapr Workflows, Inngest, Restate). And those runtimes have their own opinions about payload sizes.

The combination is the trap. Each part is reasonable on its own. The intersection is where things explode.


The Specific Trap: Durable Workflows Meet Chatty Tools

Durable execution frameworks all work by serializing activity inputs and outputs and ferrying them between the orchestrator and worker. That serialization boundary has a cap. Sometimes documented, sometimes not. Always inconvenient when you cross it.

For Dapr 1.17 for example (the runtime we are using at Scrydon), the cap is 2 MiB per activity input or output. It's enforced by the scheduler (dapr.runtime.actor.reminders.scheduler) and — critically — is not configurable via --max-body-size or any other CLI flag. The --max-body-size flag controls a different limit (the gRPC server's body size, which is 16 MiB). Until you read the scheduler source, you assume the flag controls everything. It doesn't.

Above the ceiling, Dapr returns:

ResourceExhausted: trying to send message larger than max

…and the workflow gets stuck in a retry loop, which from a UX standpoint looks like the agent "hanging" with no actionable error.

For a Scrydon customer running an agent in auto-discover mode against GitHub tools, this happened reliably after 4–5 turns. The model didn't suddenly start emitting more text — the tool results crossed the line. And not in the way you'd expect.


The Surprising Root Cause: There Are Two Copies

When we instrumented the workflow state, we found that every turn was round-tripping two representations of every tool result through the activity boundary:

  1. turnState.messages[].content — the tool result formatted for the LLM. This was already capped at 32 KiB by a serializeResult helper. The LLM didn't need the full body; a truncation marker told it to paginate or re-query if it wanted more.
  2. turnState.accumulatedToolCalls[].result — the raw, untruncated result, kept around so the UI could later render "what did this tool actually return?" for debugging. Not capped.
sequenceDiagram
      autonumber
      participant WF as Dapr Workflow<br/>(orchestrator)
      participant ACT as Agent Activity<br/>(dispatcher)
      participant LLM as LLM
      participant Tool as Tool<br/>(e.g. GitHub API)
      participant State as turnState<br/>(serialized payload)
      participant UI as UI / Telemetry

      Note over WF,State: TURN 1 — payload starts empty

      WF->>ACT: invoke(turnState = {messages:[], accumulatedToolCalls:[]})
      ACT->>LLM: chat(messages)
      LLM-->>ACT: tool_call: list_pull_requests
      ACT->>Tool: list_pull_requests()
      Tool-->>ACT: raw result (200 KB)

      rect rgb(40, 60, 40)
        Note over ACT: split into TWO copies
        ACT->>ACT: serializeResult(raw) → 32 KiB (LLM view)
        ACT->>ACT: keep raw 200 KB (telemetry view)
      end

      ACT->>State: append messages[].content (32 KiB ✅)
      ACT->>State: append accumulatedToolCalls[].result (200 KB ❌ uncapped)
      ACT-->>WF: return turnState (≈ 232 KB)

      Note over WF,State: TURN 2 — payload carries Turn 1's raw copy

      WF->>ACT: invoke(turnState) ← 232 KB IN
      ACT->>LLM: chat(messages) — only sees 32 KiB tool msg
      LLM-->>ACT: tool_call: get_commit
      ACT->>Tool: get_commit()
      Tool-->>ACT: raw result (200 KB)

      rect rgb(40, 60, 40)
        ACT->>ACT: serializeResult → 32 KiB
        ACT->>ACT: keep raw 200 KB
      end

      ACT->>State: append messages[].content
      ACT->>State: append accumulatedToolCalls[].result
      ACT-->>WF: return turnState (≈ 464 KB)

      Note over WF,State: TURNS 3–4 — same shape, payload keeps growing

      WF->>ACT: invoke(turnState) ← 464 KB → 696 KB → 928 KB → 1.16 MB → 1.39 MB
      Note right of State: messages[] LLM-side total: still ~96 KB ✅<br/>accumulatedToolCalls raw total: linearly growing ❌

      Note over WF,State: TURN ~5 — cap breached

      WF--xACT: ResourceExhausted 💥<br/>"trying to send message larger than max"<br/>(turnState > 2 MiB scheduler cap)

      Note over LLM: LLM never sees the failure —<br/>activity is stuck retrying.

      Note over UI: UI was the only consumer of<br/>accumulatedToolCalls[].result —<br/>and it doesn't even need it inline<br/>it fetches on click.

While the first is "interesting", it's actually the second one tthat is the killer. It exists purely for telemetry and the debugging UX. The LLM never reads it. But because it lives inside turnState, it gets serialized into every subsequent activity's input. Three 200 KB tool calls per turn × 5 turns and you've blown past 2 MiB — even though, from the model's perspective, the conversation has barely started.

This is a class of bug that's easy to miss in design and brutal to debug in production:

  • It doesn't trip on day one because small tool outputs don't exceed the cap.
  • It scales with turn count, not concurrency — so load-testing one big turn won't catch it.
  • The failure surfaces in the orchestrator, far from the code that wrote the bad payload.
  • The duplicated copy was added for a good reason (full-fidelity debugging) by a different code path than the one that owns transcript size.

A core lesson: in agent systems, every piece of conversation state must answer two questions independently — "does the model need this?" and "where does the storage cost land?" When the answers diverge, you need a different storage mechanism.


What the Community Does (and Why It Mostly Doesn't Fit)

Before designing a fix, we read how other agent frameworks and durable-execution platforms handle this. Five patterns, ranked by prevalence:

PatternWho does itMechanismSliding window / tail-NLangGraph (trim_messages), AutoGen (BufferedChatCompletionContextTokenLimitedChatCompletionContext), Mastra (TokenLimiterProcessor)Drop oldest messages before each LLM call. Zero infra. Loses old tool results from the LLM's view.Hard truncation at write timeSmolagents (truncate_content, 20 KB head+tail)Clip each tool result when stored. Predictable but no recovery path.LLM-driven compactionOpenAI Agents SDK (OpenAIResponsesCompactionSession)Periodic LLM summarization. Most info-preserving, but adds an extra LLM call per N items. Premium opt-in, not a default anywhere else.External session store + recency windowMastra (MessageHistory)Agent state is a cursor into an external DB. Naturally sidesteps payload limits.Payload Codec / Claim CheckTemporalA codec intercepts activity I/O, externalizes payloads above a threshold to a blob store, and replaces them with {ref: key}. Applied transparently outside application code.

A few things stand out once you put them side by side.

No framework keeps raw tool result JSON in agent state long-term. They all do something — window it, truncate it, summarize it, or externalize it. If your design holds the raw blob in transit, you are an outlier and you will eventually pay for it.

LLM-driven compaction is rare and optional. Only OpenAI Agents SDK ships it as a default, and even there it triggers at ≥10 items, not per-call. You probably don't want to pay 30%-ish overhead per tool result just to make your transcript fit in a payload window.

The closest precedent for our exact constraint — durable execution with a hard per-payload cap — is Temporal's Claim Check codec. Temporal's docs explicitly recommend it for PayloadSize issues. That's the same problem we have, on a different orchestrator. So we lifted the pattern.

The other patterns are not wrong — many of them are complementary. But none of them alone solves durable execution + per-payload cap. You need an externalization story.


The Fix: Claim Check via Dapr State Store

What we ended up doing is what is called "The Claim Check pattern". It is older than agentic AI (Enterprise Integration Patterns, Hohpe & Woolf, 2003): when a message is too large for the bus, drop the payload into a side store and put a pointer on the bus instead. The receiver fetches the payload on demand. Temporal's payload codec automates this for activity I/O.

For our case, the externalization happens at the dispatcher, not at a transport codec. The shape:

turnState (round-trips through 2 MiB activity boundary):
  messages: LLMMessage[]
    // tool message content = truncated to 32 KiB for LLM consumption
  accumulatedToolCalls: {
    id, name, args, durationMs, success, error?,
    resultRef?: string,         // pointer into state store
    truncatedPreview?: string,  // ≤4 KiB head for the UI's at-a-glance view
  }[]                           // refs only, no raw `result`
  iteration, discoveredToolIds

Dapr State Store (scope = executionId, NOT in activity payload):
  tool-result/{executionId}/{nodeId}/{toolCallId} -> { result }
  TTL: 24h (default)

The dispatcher (dispatchOne in apps/agentic/lib/workflows/agent/tool-loop-internals.ts:213) splits the tool result into three projections at the moment it's produced:

  1. LLM content — 32 KiB-truncated JSON for the conversation transcript.
  2. Truncated preview — ≤4 KiB head for the UI's at-a-glance row.
  3. Raw result — written to the state store under a deterministic ref.

The key construction lives in one place to keep the writer and reader honest (apps/agentic/lib/workflows/agent/tool-result-store.ts:71):

export function buildResultRef(
  executionId: string, nodeId: string, toolCallId: string
): string {
  return `tool-result/${executionId}/${nodeId}/${toolCallId}`;
}

And the write itself is fire-and-forget-safe (tool-result-store.ts:156):

export async function putToolResult(ref, result, options) {
  try {
    const client = getDaprClient();
    await client.state.save(WORKFLOW_STATE_STORE_NAME, [{
      key: ref,
      value: result,
      metadata: { ttlInSeconds: String(ttlSeconds) },
    }]);
  } catch (error) {
    logger.warn("Failed to persist tool result to state store", { ref, error });
    // intentionally not re-thrown
  }
}

The swallowed error is deliberate. A state-store hiccup must not fail the agent turn — the LLM transcript already carries the truncated content the model needs to keep going. The UI's full-result lookup is the only feature that degrades on failure. Choose your failure surface; don't leak infrastructure failure into model behavior.

The UI resolves a ref through a server route (apps/agentic/app/routes/api/executions/$executionId/tool-results/$nodeId/$toolCallId.ts), which authorizes the read against the owning workflow (resolved from executionId via the execution log — never trusting a client-supplied workflowId).


The Trade-offs We Made (and Why)

Every architectural choice closes some doors. The ones that matter here:

TTL-based cleanup over explicit deletion. The Dapr workflow body is deterministic and can't do direct I/O, so cleanup would need a separate activity. Dapr state stores have no native prefix-delete, so doing it right would require maintaining a per-execution index entry on every put — extra state churn on the hot path. Also, the UI affordance is the entire reason results live in the store. Deleting on workflow completion would break debugging exactly when it's most useful. The chosen state store (PostgreSQL v2 via Dapr) supports ttlInSeconds, so we set 24h on every write. A deleteToolResult export is still there for deployments that need faster eviction.

Preview alongside ref, not ref alone. It would be cheaper to carry only the ref and force the UI to fetch on every render. But the trace-span UI shows a list of tool calls at-a-glance with a preview line per row. Forcing a fetch per row turns a single list view into N+1 round trips. A 4 KiB preview kept in the workflow payload is cheap (20 tools × 5 turns × 4 KiB ≈ 400 KiB, still well under 2 MiB) and saves the rendering trip.

Lean record over backwards-compatible record. We dropped resultstartTimeendTime from the persisted shape and renamed duration → durationMs. The telemetry layer (mergeToolCallTelemetry) re-surfaces the preview as result so legacy trace-span renderers keep working without a synchronized UI change. Schema evolution in a hot-path serialized type is painful; treating the persistence record and the render contract as separate types — with one mapping layer between them — let us evolve the former without churning the latter.


What Else Makes Agentic Production Hard

Payload caps are one specific instance of a broader pattern: agent systems have invariants that simple chat apps don't. Once you start running them at production scale, you trip on:

Cost variance you can't predict. A single user prompt can fan out into 30 tool calls and three model retries. You can budget per-call but not per-session. Cost dashboards have to bucket by execution, not request.

Observability that can't rely on logs alone. A failed agent run might emit 200 spans across a workflow, a model call, a tool dispatch, a state-store write, and a telemetry merge. If your trace tooling doesn't speak workflow-step-aware spans, you'll be reading raw logs forever to figure out which turn went wrong.

Drift in tool contracts. Vendor tool schemas change (GitHub fields, OpenAI function calling shapes). Your prompts subtly start mis-formatting calls. Failures are silent — the model gets an error, retries, and burns budget. You need contract tests at the integration boundary, not just unit tests on your wrapper.

Eval that survives non-determinism. LLM outputs change between model versions. So do tool-call decisions. Eval suites that score golden outputs end up either too strict (every model bump regresses) or too loose (real regressions slip through). The frameworks that survive are the ones that test behavioral properties — "did the agent eventually paginate when truncation was hinted?" — not exact transcripts.

Authorization at the right layer. A tool that a user can invoke through chat is — operationally — a server function. If your model can call delete_workspace, your auth layer is the model. That's not where you want it. The remedy is to constrain the tool surface per session (deny-by-default), evaluate authorization at dispatch time, and never trust the LLM's argument bag — inject sensitive params (credentials, user context) after the merge so the model can't override them.

Backpressure that respects model latency. If your agent is rate-limited by the model, doubling worker concurrency doesn't help. You need backpressure that knows about token budgets, not just request budgets. Most workflow engines don't ship this; you build it.

Replayability without re-firing side effects. Durable execution promises "exactly-once activity execution," but only if your activities are idempotent and deterministic. LLM calls are neither. The standard remedy — record the response on first run, replay it on resume — has its own failure mode if your activity payload, including that recorded response, exceeds the platform's payload cap. Which is where we came in.


The Underlying Lesson

The issue we hit was a 2 MiB payload cap colliding with chatty GitHub tools (which is what we want actually!). So in our case, the fix was a Claim Check externalization to a Dapr state store.

The deeper lesson is harder to summarize and worth more:

Agentic systems are distributed systems that happen to have an LLM in the loop. The non-LLM parts will hurt you first.

Every assumption you've internalized about payload sizes, retry semantics, idempotency, state hydration, and observability gets re-litigated the moment you wrap a model in a durable runtime and call it an "agent." The model is usually the most predictable part of the stack — it costs what it costs, it returns what it returns, mostly within bounds. The orchestration around it is where the production failures actually live.

If you're building agentic AI in production, the work that matters isn't picking the right model. It's:

  • Treating every piece of state as a question about who reads it and where the bytes land.
  • Separating the model's view of the world from the operator's view, with explicit projections between them.
  • Borrowing patterns from the durable-execution community (Temporal, Inngest, Restate) rather than re-deriving them from scratch with a model in the loop.
  • Failing loudly at the infrastructure layer and never letting infrastructure failure look like model failure.

The fun is in the model. The scaling is in everything else.


References
  • Scrydon issue #1072
  • Temporal — Payload Codec / Claim Check pattern
  • Hohpe & Woolf — Enterprise Integration Patterns, "Claim Check"
  • AutoGen — autogen_core/model_context/_buffered_chat_completion_context.py
  • Mastra — packages/core/src/processors/processors/token-limiter.ts
  • LangGraph — libs/prebuilt/langgraph/prebuilt/chat_agent_executor.py
  • Smolagents — truncate_content
  • OpenAI Agents SDK — OpenAIResponsesCompactionSession
6a05b82745abf200016c9269
Extensions
The AI Act is not a compliance checklist. It is a design choice.
The AI Act should not be treated as a legal afterthought, but as a platform design principle from day one
Show full content
The AI Act is not a compliance checklist. It is a design choice.

Too many organisations still talk about the AI Act as if it were only a legal or procurement issue. I believe that is the wrong starting point.

The European Union designed the AI Act as a risk-based framework for developers and deployers of AI, with clear obligations around safety, transparency, logging, human oversight, and robustness where the stakes are high. It entered into force on 1 August 2024, and most of the framework becomes applicable on 2 August 2026, with some obligations already active and others phased in later.

That matters because by 2026, many organisations will not be judged only on whether they use AI, but on whether they can explain how they govern it. For high-risk use cases, the Act requires risk assessment and mitigation, quality data practices, activity logging, documentation, human oversight, and strong levels of robustness, cybersecurity, and accuracy.

In other words, the question is no longer: “Do we have an AI tool?” The real question is: “Do we have a platform that makes responsible AI the default?”

💡"That is the shift I want more leaders to understand. Compliance cannot depend on each team, each vendor, or each prompt being handled perfectly by hand. In real organisations, that approach breaks down quickly."

If AI governance is optional, it is not governance. If controls only exist in policy documents, but not in the runtime of the system itself, they will fail exactly when pressure is highest.

From a platform perspective, the answer is straightforward.

First, every interaction with an AI model should pass through a single control point. That means prompts, generated responses, tool calls, retrieved knowledge, and external model integrations should all be subject to the same organisational rules. This is the only realistic way to make governance consistent across teams and vendors.

Second, controls must be policy-driven and always on. They should not be optional features that an individual product team may or may not enable. In regulated environments, optional controls create optional accountability.

Third, oversight must be built into operations, not added after the fact. The AI Act explicitly expects logging and human oversight for higher-risk use cases, which means organisations need systems that can show what happened, why it happened, and who approved exceptions.

Fourth, sovereignty matters. Public institutions and strategic industries increasingly need to know where data flows, which model providers are involved, what dependencies exist, and how quickly they can change course if regulation, geopolitics, or vendor terms shift.

This is exactly why I believe Europe needs platform thinking, not point-solution thinking. Buying isolated AI features may create short-term momentum, but it also creates fragmented risk, fragmented evidence, and fragmented accountability.

My view is that the AI Act will reward organisations that build from the inside out:

  • clear governance before mass rollout,
  • visibility before automation,
  • oversight before autonomy,
  • and platform controls before policy promises.

At Scrydon, this is the direction we are taking. Scrydon is built as one integrated sovereign platform rather than separate disconnected products, with unified identity, governance, and deployment flexibility across Agentic AI, analytics, data spaces, and infrastructure.

That matters for government and regulated enterprise because governance gaps often appear between systems, not inside a single demo. A fragmented stack may look innovative on the surface, but it becomes difficult to prove who had access, which model acted, what data was used, and whether policy was enforced consistently.

Our belief is simple: if an organisation cannot apply its rules everywhere, it does not truly control AI. That is why platform-level enforcement matters so much.

In practical terms, that means building AI systems where safeguards are embedded into the operating layer itself. Sensitive information should be checked before it leaves the organisation, before it is sent to a model, and before model output is passed on to a human or another system. Audit evidence should be created automatically. Human override should exist where appropriate, but only within a governed process.

This is especially important because the AI Act identifies high-risk domains such as employment, essential services, law enforcement, migration, justice, education, and critical infrastructure. In these contexts, governance is not a branding exercise; it is part of public trust.

I also believe lawmakers should pay close attention to one practical lesson: rules become real only when they are translated into defaults. The strongest future systems will not rely on perfect user behaviour. They will make the compliant path the normal path.

That is how I think about the future of AI in Europe. Not as a race between innovation and regulation, but as a chance to build better digital institutions.

The winners in the AI era will not just be the organisations with the most models. They will be the organisations with the most trustworthy operating model around those models.

And that, to me, is the real promise of the AI Act: not to slow AI down, but to force us to build it properly.

69e1eca39e00820001653c5b
Extensions
The Death of the Software Moat: Why "Taste" is the New Enterprise IP
BusinessAI
We are entering the era of Software Parity. For decades, "Enterprise IP" was the ultimate moat—a fortress built on complex code and proprietary features. But as AI makes it possible to replicate a million-dollar software stack in a fraction of the time, that fortress is crumbling.
Show full content
The Death of the Software Moat: Why "Taste" is the New Enterprise IP

For years, we’ve been told that "Software is eating the world." If you built a complex enough system, had enough Enterprise IP, and scaled your distribution, you had a moat. You were protected.

But look at the landscape today. Even the giants are feeling the heat.

Microsoft’s core software—the kind of IP that took decades and billions to build—is being systematically dismantled. Not by a competitor with a larger R&D budget, but by the democratization of intelligence. When AI can replicate a core enterprise feature for a fraction of the initial investment, your code is no longer a moat. It’s just a legacy cost.

So, if code is becoming a commodity, what are we actually selling?

1. The Concept: "Knowledge in a Bootstrap"

I’ve been thinking a lot about why people still buy from us despite the "AI parity" problem. The answer isn't in the lines of code; it’s in the Bootstrap.

In architectural terms, we are moving away from selling "Tools" and moving toward selling "Opinionated Frameworks of Knowledge." When someone buys our Bootstrap, they aren't buying a repository. They are buying:

  • The Decision Tree: The "why" behind the architecture.
  • The Guardrails: The lessons learned from enterprise failures.
  • The Shortcut: The ability to skip the "blank page" phase of a project.

AI can generate a CRUD app in seconds. But AI doesn't have the context of a 10-year enterprise migration. We aren't selling software anymore; we are selling executable expertise.

2. The Shift: From "What" to "Who"

This explains the weird hiring spree we are seeing in the industry. Why did OpenAI recently hire the "OpenClawd" guy? Why is Meta aggressively headhunting individual developers rather than acquiring their startups?

It’s because the Individual is the Moat.

In a world of infinite, AI-generated code, the value has shifted from the product to the architect behind the prompt. * The Old World: You bought the software because the company was big.

  • The New World: You buy the software because you trust the Taste of the person who steered the AI to build it.
3. The New Architecture of Value

If you are a founder or an architect today, your "Enterprise IP" is no longer your codebase. That codebase is depreciating every time a new LLM model drops.

Your real IP is your Mental Model. The reason people still want to buy from us—and the reason the market follows individuals—is that in an era of automated "Everything," the only thing that can't be commoditized is Taste. We provide the Bootstrap because people are looking for a signal in the noise. They don't want "software"; they want to know how we solve the problem.

The Takeaway

The "Software Moat" is dead. Long live the Expertise Moat.

If your business model relies on the complexity of your code to keep competitors away, you’re in trouble. But if you sell your knowledge, your "vibe," and your architectural "Bootstrap," you become the one thing AI can't replicate: The trusted navigator.

6995a44aabaa400001278d91
Extensions
Creating Embeddings with vLLM on MacOS
AICoding - Python
Learn how to generate embeddings with vLLM on MacOS
Show full content
Creating Embeddings with vLLM on MacOS

What was thought to be an easy journey seemed to be quite "interesting", with MacOS not being the first candidate for vLLM. As each time I was creating running my embeddings I got "ValueError: Model architecture ['...'] failed to be inspected. Please check the logs for more details" and then some Triton issues.

Simply debugging was also not working initially, as when running collect_env shipped by PyTorch (python -m torch.utils.collect_env), I received error AttributeError: 'NoneType' object has no attribute 'splitlines'. Luckily, a fix is already in the works.

The solution appeared to be to install vLLM manually by its source code, so let's do that!

Installing vLLM on Mac

Luckily for us, building vLLM from source is not too difficult and is well explained. We just have to make sure correctly follow the steps as written (as using uv pip doesn't work either).

uv venv --python 3.12 --seed
source .venv/bin/activate

git clone https://github.com/vllm-project/vllm.git
cd vllm
pip install -r requirements/cpu.txt
pip install -e . 

Doing so, results in a correctly installed vLLM:

Creating Embeddings with vLLM on MacOS
Running a Demo Embedding

Now we can finally run a Demo Embedding, so let's create a simply script that prints the embedding:

from vllm import LLM

# vLLM Configuration
VLLM_EMBEDDING_MODEL = "nomic-ai/nomic-embed-text-v1.5"

# Sample prompts.
prompts = [
    "Hello, my name is",
    "The future of AI is",
]

# Create an LLM.
# You should pass task="embed" for embedding models
model = LLM(
    model=VLLM_EMBEDDING_MODEL,
    task="embed",
    enforce_eager=True,
    trust_remote_code=True,
)

# Generate embedding. The output is a list of EmbeddingRequestOutputs.
outputs = model.embed(prompts)

# Print the outputs.
for prompt, output in zip(prompts, outputs):
    embeds = output.outputs.embedding
    embeds_trimmed = ((str(embeds[:16])[:-1] + ", ...]") if len(embeds) > 16 else embeds)
    print(f"Prompt: {prompt!r} | "
        f"Embeddings: {embeds_trimmed} (size={len(embeds)})")

And there we go! Embeddings are being created and we can continue with any vector related search.

Creating Embeddings with vLLM on MacOS
683308eeebe9de00015c4fd4
Extensions
Live Delta Lake with Azure ADF and Databricks DLT
Create a live incrementally loaded delta lake with Azure and Databricks through Azure Data Factory (ADF), Delta Tables and Databricks Delta Live Tables
Show full content
Live Delta Lake with Azure ADF and Databricks DLT

As touched upon before, incremental loading is the holy grail of data engineering, as it reduces the compute power required, saving time and much needed compute costs. Sadly enough, as we know, this is not an easy feat. Now, luckily for us, this all changes with Azure Data Factory and Databricks Delta Live Tables!

What we are going to be creating is the below, where data moves in towards the Bronze (RAW) from our SQL Server through our Azure Data Factory, towards Silver to curate it and finally Gold where can pick it up for consumption.

Live Delta Lake with Azure ADF and Databricks DLT

The beauty in this process is that we just process the changes, creating a very efficient process!

Live Delta Lake with Azure ADF and Databricks DLT

Creating a Delta Table

Before we get started, it is IMPORTANT to create an empty delta table first as else, ADF will NOT enable the Change Data Feed. So we create a small notebook in Databricks with the below.

⚠️ Note that we also set the minReaderVersionand minWriterVersion as Databricks uses a new version of Delta lake than Microsoft does. At the time of writing, Microsoft requires 2,5 while Databricks has 3,7. Let's hope Microsoft follows quickly as there are some exciting changes!
⚠️ Besides just setting the versions, we also need to DISABLE deletion vectors, as when setting this, Databricks will automatically default to 3.7
-- Verwijder van de Hive Metastore
DROP TABLE IF EXISTS customers;

-- Maak aan
CREATE TABLE customers
USING DELTA
LOCATION 'abfss://delta@yourstorageaccount.dfs.core.windows.net/dbo.Customers'
TBLPROPERTIES (
    -- Disable deletion vectors as this doesn't work on 2.5
    delta.enableDeletionVectors = false,
    delta.enableChangeDataFeed = true,
    delta.minReaderVersion = 2,
    delta.minWriterVersion = 5
)

We can then verify that this table was correctly persisted to our storage account and see that the correct reader and writer version were set

Live Delta Lake with Azure ADF and Databricks DLT
💡 Besides the above, we could theoretically as well use this script to do the initial load of the Bronze data (as CDC is incremental and will only sync the changes)
Configuring Azure Data Factory

Completely managed out of the box, Azure Data Factory now offers live CDC (or on a custom interval), syncing data from our SQL Server towards a configured delta table.

We thus create a CDC resource that sinks our Customers table to the previously created delta table.

Live Delta Lake with Azure ADF and Databricks DLT

Starting the pipeline shows us that records are being processed! We now have a proper working Bronze load!

Live Delta Lake with Azure ADF and Databricks DLT

We can verify this data being loaded in our Unity Catalog now!

💡 Do note that the data here is thus not version 1 (as that's the empty schemaless table) but will start at version 2 of our delta table
Live Delta Lake with Azure ADF and Databricks DLT

We are now ready with our Bronze setup and can continue on creating the actual pipeline! 🥳

Configuring Databricks

Next up is Databricks itself. Data is being sinked in an Azure Storage account through Azure Data Factory, and we know the changes that happen on that table as we enabled the Change Data Feed.

We can now create the Delta Live Table (DLT) setup that will read the stream of changes and pipe it from Bronze towards Silver to clean and from Silver to Gold for business consumption.

In our case, we see Silver as a SCD 1 (Slowly Changing Dimension) process, which doesn't need to keep track of the changes, while gold is typically a SCD 2 process, where we need to track the changes, or gold can as well be a full rebuild, where we do not load incrementally but rather compute an aggregate.

💡 SCD 1: Do NOT keep track of changes, SCD 2: Keep track of changes
Bronze Stream
# Factory creator of bronze cdc stream readers 
# note: since this is a streaming source, the table is loaded incrementally
# Bronze: is the raw CDC stream, does not do deduplication, no SCD logic or no business rules. As raw as possible to preserve original changes for audit, replay or future processing
def create_bronze(table_name, delta_path):
    @dlt.table(
        name=f"bronze_{table_name}",
        comment=f"Bronze - Raw CDC data ingested from ADF for {table_name}",
        table_properties={
            "quality": "bronze"
        }
    )
    def bronze():
        try:
            # Return the stream, which starts from the correct version
            return (
              spark.readStream
              .format("delta")
              .option("checkpointLocation", f"abfss://delta@yourstorageaccount.dfs.core.windows.net/checkpoints/{table_name}")
              .option("readChangeFeed", "true")
            #   .option("startingVersion", first_cdf_version)
              .option("mergeSchema", "true") 
              .load(delta_path)
            )
        except AnalysisException as e:
            raise RuntimeError(f"Delta table path does not exist or is not accessible: {delta_path}. Disable it or add it.") from e

for table_name, delta_path in TABLE_CONFIGS.items():
    create_bronze(table_name, delta_path)
Silver Stream
# Factory creator of silver stream processors
# note: as the bronze table is a stream, silver also needs to be one
# Silver: is the cleansed and validated data, with SCD logic applied
def create_silver(table_name, delta_path):
  # Create Streaming Table
  dlt.create_streaming_table(
      name=f"silver_{table_name}",
      comment=f"Cleansed and validated data for {table_name}",
      table_properties={
          "quality": "silver"
      }
  )

  # Apply changes to silver table using a slowly changing dimension (SCD) type 2 approach
  # it creates a new version of the record each time it is updated
  # more info: https://www.databricks.com/blog/2021/06/09/how-to-simplify-cdc-with-delta-lakes-change-data-feed.html
  # more info: https://www.databricks.com/blog/2023/01/25/loading-data-warehouse-slowly-changing-dimension-type-2-using-matillion.html
  # more info: https://docs.databricks.com/aws/en/dlt/cdc?language=Python#example-scd-type-1-and-scd-type-2-processing-with-cdf-source-data
  dlt.apply_changes(
    target=f"silver_{table_name}",
    source=f"bronze_{table_name}",
    keys=["CustomerId"],
    sequence_by="_commit_version",
    ignore_null_updates = False,
    apply_as_deletes=expr("_change_type = 'DELETE'"),
    except_column_list=["_commit_version", "_commit_timestamp", "_change_type"],
    stored_as_scd_type=1 # SCD type 1: keep history of changes
  )

for table_name, delta_path in TABLE_CONFIGS.items():
    create_silver(table_name, delta_path)
Gold Stream
# The gold table will be recomputed each time by reading the entire silver table when it is updated
# aka: it will be rematerialized on each update in silver
# Note: Gold can be incrementally loaded as SCD 2, or aggregately built (full refresh, materialized on each change)
@dlt.table(
  name="gold_customers_summary",
  comment="Showing all the customers their names",
  table_properties={
    "quality": "gold",
      "delta.autoOptimize.optimizeWrite": "true",
      "delta.autoOptimize.autoCompact": "true"
  }
)
def gold_customers():
  return dlt.read("silver_customers").select(
    col("CustomerId"),
    concat_ws(" ", col("FirstName"), col("LastName")).alias("Name")
  )
Running our Pipeline

When we run this pipeline, it will properly startup, showing added and deleted records:

Live Delta Lake with Azure ADF and Databricks DLT

When we now change a record in our SQL Server

Live Delta Lake with Azure ADF and Databricks DLT

We can see that it is picked up by our CDC process

Live Delta Lake with Azure ADF and Databricks DLT

processed towards Bronze (RAW)

Live Delta Lake with Azure ADF and Databricks DLT

which consolidates in Gold processed with the temporary records removed from view

Live Delta Lake with Azure ADF and Databricks DLT

Conclusion

The above requires a change in mindset, going from a previously more batch oriented process, towards now a more real-time oriented process. This process however works with incremental data, making it completely worth it, potentially reducing existing workloads by a huge margin! As we are not running the full pipeline anymore, but rather a small effort of the little chunk of data that changed.

6824500aab30280001e52a8d
Extensions
PowerBI Secure Architecture
Making sense of PowerBI its architectural diagram and creating a secure setup for accessing on-premises data
Show full content
PowerBI Secure Architecture

PowerBI is an amazing dashboarding and report creation tool for BI, but with amazing tools come difficult architectures that we should try to fully understand to get the fullest out of it.

To better illustrate the architecture, let’s define a practical use case.

Example Use Case

Suppose a user needs to upload a CSV file to a local NFS share, generate a report from this data, and then publish the report.

While this workflow may seem straightforward at first glance, it introduces several important challenges—particularly around security and user isolation. For instance, if person X publishes a report, how can we ensure that their access is properly isolated? How do we control and audit secure read and write permissions for these files?

As a user, I want to be able to put a CSV file on a local NFS share, which I then can use to create a report and publish it.

Addressing these questions requires a thorough understanding of Power BI and its security capabilities. To proceed, let’s first define the key components involved in this scenario.

Architecture ComponentsOnline Component Description Workspace The cloud workspace where reports are created and published Report The visualization created from the data in the CSV files Semantic Model Formerly called a dataset, this represents the data model in Power BI derived from the CSV data Gateway Configuration Settings in Power BI Service that configure how the gateway connects to on-premise data sources PBI Connection The configuration that maps the Semantic Model to the on-premise data source via the gateway AAD Group Manages administrative permissions for gateway configuration and connection creation. On-Premise Component Description NFS Share Stores the files uploaded by users. Active Directory (AD) Group Grants read/write access to the NFS share. Service Account Runs the Power BI Gateway and is a member of the AD Group (enforcing least privilege access). PowerBI Gateway Acts as a secure bridge between on-premises data and Power BI Cloud, using the Service Account’s credentials.

This focuses on Key Security Mechanisms:

  1. User Isolation
    Users never directly access the NFS share or Service Account. They interact only with the Power BI Workspace and reports in the cloud.
  2. Access Control Layers
    • AD Group: Limits NFS share access to the Service Account.
    • AAD Group: Restricts gateway configuration to authorized admins.
    • Service Account: Runs the gateway with minimal privileges.
  3. Data Flow Security: As our flow is User → NFS Share (write) → Power BI Gateway (read via Service Account) → Semantic Model → Report, The gateway acts as a security proxy—users can’t directly query or modify the CSV after upload.
Architecture

Putting this all together generates the architecture below, ensuring that users can only create and publish reports, but they don't have direct access to underlying data infrastructure, providing a correct isolation of activities.

flowchart TD %% On-Premise Components subgraph On-Premise User["User"] NFS["NFS Share (CSV File)"] PBI_GW["Power BI Gateway
(runs as Service Account)"] AD_Group["Local AD Group
(Share Access)"] SA["Service Account"] end %% Cloud Components subgraph Cloud Workspace["Power BI Workspace"] Report["Power BI Report"] Semantic["Semantic Model"] Gateway_Config["PBI Gateway Configuration"] AAD_Group["AAD Group
(ADMIN + CONN CREATOR)"] PBI_Conn["PBI Connection"] end %% Data and Control Flow User -- "Places CSV" --> NFS User -- "Creates" --> Workspace Workspace -- "Contains" --> Report Report -- "Uses" --> Semantic Semantic -- "Connects via" --> PBI_Conn PBI_Conn -- "Configured by" --> Gateway_Config Gateway_Config -- "Managed by" --> AAD_Group PBI_Conn -- "Uses" --> PBI_GW PBI_GW -- "Runs as" --> SA SA -- "Member of" --> AD_Group AD_Group -- "Has access to" --> NFS PBI_GW -- "Reads CSV" --> NFS %% Visual separation classDef cloud fill:#E3F2FD,stroke:#90CAF9; classDef onprem fill:#FFF3E0,stroke:#FFB300; class Cloud,Workspace,Report,Semantic,Gateway_Config,AAD_Group,PBI_Conn cloud; class On-Premise,User,NFS,PBI_GW,AD_Group,SA onprem;
68088c5c8120970001dd17de
Extensions
Incremental Delta Copying from SQL Server to Apache Iceberg
Big Data
Learn how you can load data from SQL Server to Apache Iceberg in an incremental way.
Show full content
Incremental Delta Copying from SQL Server to Apache Iceberg

Are you looking to implement Business Intelligence (BI) in your organization but unsure where to begin? For many companies, SQL Server serves as the primary database, making it tempting to simply connect your BI tools directly and start generating reports. While this approach seems straightforward, it’s often not the best solution. Running BI reports directly on your application database can create significant load, as these databases aren’t typically optimized for BI queries.

Running BI reports directly on your application database can create significant load, as these databases aren’t typically optimized for BI queries.

So, what’s a better alternative? Enter the “Flat File” approach! Flat files have come a long way—from being slow and cumbersome to becoming scalable and efficient, thanks to modern technologies like Apache Spark and, more recently, Ray with Daft. Leveraging flat files offers several advantages:

  • Reduces load on your main application database
  • Provides greater flexibility
  • Enables additional ETL steps, such as removing sensitive (PII) data

Of course, while the benefits are clear, implementation requires careful planning. Rather than simply dumping all your data into a flat file, it’s important to consider how you load data—specifically, how to do this incrementally instead of performing full loads every time, which can quickly become inefficient.

In this article, I’ll guide you step-by-step on how to set up an incremental data pipeline from SQL Server to Apache Iceberg.

Existing Tools

As for everything, there are a lot of tools available for the job. However, after researching the most popular ones, I came across just a handful ones, making this a very difficult problem to solve!

I came across just a handful ones, making this a very difficult problem to solve!

Let's compare some of them:

  • Airbyte: Amazing ETL tool, batch only, but manages the CDC for you and you are able to self-host it (although it being a complex tool)
  • SQL Server CDC: SQL Server provides CDC natively, so we can build custom scripts (cumbersome) to do this.
  • Estuary Flow: A lot-based replication tool, which does the trick, but is very expensive for lakehouse purposes.
  • Sling: CLI Tool for data loading, which requires more work as you are required to define the keys or SQL Queries for the diffs.
  • DLT Hub: Another ETL tool comparable to Sling, but most of the CDC features it has are behind dlt+ (paywall)
  • Debezium: Has been along for a long time, and is quite complex through its Kafka consumer. HOWEVER! A Debezium Server for Iceberg was created, making this an amazing solution.

Leading me to concluding that either Airbyte or Debezium are the most cost-efficient and future-proof solutions!

Architecture

Looking at the architecture, we will then have SQL Server that writes the latest changes to its LOG file, whereafter we have Debezium monitoring this log and replicating it to our Apache Iceberg installation.

Incremental Delta Copying from SQL Server to Apache Iceberg
Configuring Debezium for SQL Server to IcebergPrerequisites
  • A SQL Server connection with all the details
Getting Started

Setting this up, we create a Docker Compose application (based on the Debezium Iceberg Server example), with the SQL Server source configured in the application.properties file:

# ####################################################### 
# ############ DEBEZIUM SOURCE CONFIGURATION ############
# #######################################################
# SQL Server Source 
# (https://debezium.io/documentation/reference/stable/connectors/sqlserver.html#sqlserver-example-configuration)
debezium.source.connector.class=io.debezium.connector.sqlserver.SqlServerConnector
debezium.source.offset.flush.interval.ms=0
debezium.source.database.hostname=your-hostname-here
debezium.source.database.port=1433
debezium.source.database.user=main
debezium.source.database.password=your-password-here
debezium.source.database.names=main
debezium.source.topic.prefix=dbz_
# saving debezium state data to destination, iceberg tables
# see https://debezium.io/documentation/reference/stable/development/engine.html#advanced-consuming
debezium.source.offset.storage=io.debezium.server.iceberg.offset.IcebergOffsetBackingStore
debezium.source.offset.storage.iceberg.table-name=debezium_offset_storage_table
# see https://debezium.io/documentation/reference/stable/development/engine.html#database-history-properties
debezium.source.schema.history.internal=io.debezium.server.iceberg.history.IcebergSchemaHistory
debezium.source.schema.history.internal.iceberg.table-name=debezium_database_history_storage_table

Once this is configured, we can spin up our instance with:

docker-compose up -d

# Load the Notebook Server
http://localhost:8888

# Extra URLs
http://localhost:8080 # Trino
http://localhost:9000 # MinIO
http://localhost:9001 # MinIO UI
http://localhost:5432 # PostgreSQL
http://localhost:8000 # Iceberg REST Catalog
Demo

Seeing this in action, we can see a proper incremental data load mechanism, retrieving the latest data from our SQL Server and copying this over to our sink (apache iceberg).

6809e7322c3d870001ebe9eb
Extensions
CDC Incremental Data Loading with SQL Server, Apache Iceberg and Apache Spark
Learn how to create incremental an Apache Spark setup that polls data from SQL Server its Change Data Capture (CDC) feature and saves it to Apache Iceberg
Show full content
CDC Incremental Data Loading with SQL Server, Apache Iceberg and Apache Spark

Imagine, you are working with Big Data and you just learned that the Medallion architecture exists and you start creating your bronze layer. Now suddenly, out of nowhere you are sinking your entire database each time over and over again making your pipelines run for hours instead of the usual minutes. Now you wonder: "There must be a more efficient way to handle incremental data loads right? "

What appeared to initially be presented as a walk in the park, turned out to be a battle between giants, a battle between ecosystem, a battle between people, all resulting in picking something that just works from a given viewpoint

💡 I would dare to say that this also formalizes "Architecture", where we are responsible of selecting components through the lens of Strategic viewpoint, helping you decide what's best for the business. For example, in my case, I tend to select components with focus on separation of concerns and lock-in avoidance.

Let's dive more into this and how we can find a future proof, reliable and trusted solution for this that can handle our Big Data needs at scale. But before we get started, let's first go over the different components and why I picked those.

Creating our components (Tech Stack )SQL Server

The first component we need is a SQL Server Database that will hold our data. Besides just holding our data, it should also support a feature named "Change Data Capture" (CDC) that allows us to track changes made to the database and receive those. Something we rely heavily on for this!

Apache Iceberg

Since we want to perform large scale analytics on all our data (both structured and unstructured) we require a storage mechanism that can efficiently work with Flat Files. I currently chose here for Apache Iceberg, as it is created for large scale analytics on "Lakehouse" and Data Streaming and integrates with all the major platforms.

Many might wonder, why Iceberg and not Delta? Well Delta is great as well, but was created with a more commercial oriented approach, and more importantly Iceberg is great at schema evolution and partitioning. Besides this, it seems the community is also more keen on Iceberg, which is seeing a tremendous increase in users over time.

CDC Incremental Data Loading with SQL Server, Apache Iceberg and Apache Spark

This doesn't mean that Delta is bad! But currently, seeing the current state of the ecosystem, I would like to avoid a lock-in or draw-in into a given ecosystem. This is also reflected by the larger organizations such as Apple, Microsoft, AWS and others adopting Iceberg.

💡 Databricks acquired "Tabular" recently, which was the core maintainer of Apache Iceberg (smart move). So the current future of both Delta and Iceberg is uncertain and time will tell what will happen here.

Apache Iceberg should not be seen as a storage mechanism or database. Instead it's a metadata management layer that sits on top of the data files, which we can then query later on through a dedicated and optimized query engine.

CDC Incremental Data Loading with SQL Server, Apache Iceberg and Apache Spark
Apache Spark

Finally, a query engine... now there are MANY out there, and it's changing all the time. What also became apparent is that many of them use the commercial open-source trick, drawing you in and eventually asking you to pay for performance (which is not always a bad thing), making the choice difficult.

Seeing the customer I am working for was using Apache Spark, we thus decided to stick with it.

Personally, I think there are better alternatives popping up (hello Ray + Daft), but it currently doesn't make sense to switch and the other ecosystems still have to mature more.
Creating a CDC Implementation

Let's get started creating our actual CDC implementation. For this implementation we will thus have an orchestrator (Python) that will fetch the changes and sink them to the Iceberg maintained repository on Local Storage.

CDC Incremental Data Loading with SQL Server, Apache Iceberg and Apache Spark
Full code: https://github.com/XavierGeerinck/PublicProjects/tree/master/Data/cdc-capture/cdc-spark
Setting up Spark

Let's create our local Spark Cluster. To do so, clone the docker-compose file from https://github.com/databricks/docker-spark-iceberg/blob/main/docker-compose.yml and spin it up:

# Download the Docker Compose file
wget https://github.com/databricks/docker-spark-iceberg/blob/main/docker-compose.yml

# Start Spark + Iceberg Cluster
docker-compose up -d
docker exec -it spark-iceberg pyspark-notebook

SQL Manager

The most difficult area that I encountered is the actual SQL CDC Resource Manager, which communicate with SQL Server, connects and gets the latest changes, whereafter it merges them into Iceberg. So let's create this first.

# Fetch SQL Server CDC changes from Remote and merge them into the local Iceberg table
# we use pyodbc for this (to avoid temporary views)
import pyodbc
import sqlalchemy as sa
import polars as pl
from urllib.parse import quote_plus
from contextlib import contextmanager

LSN_DEFAULT = "0x00000000000000000000"

class SQLResource:
    def __init__(self, host, db, username, password, last_lsn=None):
        self.host = host
        self.db = db
        self.username = username
        self.password = password

        self.engine = sa.create_engine(
            self.get_connection_string(host, db, username, password)
        )

    def get_connection_string(self, host, db, username, password):
        """Construct the connection string for SQLAlchemy."""
        pass_escaped = quote_plus(password)
        user_escaped = quote_plus(username)
        driver_escaped = quote_plus("ODBC Driver 18 for SQL Server")
        return f"mssql+pyodbc://{user_escaped}:{pass_escaped}@{host}/{db}?driver={driver_escaped}"

    @contextmanager
    def get_connection(self):
        """Get a database connection using context manager for automatic cleanup."""
        connection = self.engine.connect()

        try:
            yield connection
        finally:
            connection.close()


    def get_primary_key_columns(self, table_name: str) -> list[str]:
        """Get the primary key columns for a CDC-enabled table."""
        with self.get_connection() as connection:
            instance = self.get_capture_instance_name("dbo", table_name)

            query = sa.text("""
            SELECT column_name FROM cdc.index_columns WHERE object_id = (
                SELECT object_id FROM cdc.change_tables WHERE capture_instance = :capture_instance_name
            )
            """)

            result = connection.execute(query, {"capture_instance_name": instance})
            primary_key_columns = [row[0] for row in result]
            return primary_key_columns

    def is_cdc_enabled_for_database(self):
        """Check if CDC is enabled for the database."""
        with self.get_connection() as connection:
            query = sa.text("""
                SELECT is_cdc_enabled 
                FROM sys.databases 
                WHERE name = :db_name
            """)
            result = connection.execute(
                query, {"db_name": self.db}
            ).scalar()
            return bool(result)

    def is_cdc_enabled_for_table(self, schema_name, table_name):
        """Check if CDC is enabled for the specified table."""
        with self.get_connection() as connection:
            capture_instance_name = self.get_capture_instance_name(
                schema_name, table_name
            )

            query = sa.text(f"""
                SELECT 1
                FROM cdc.change_tables
                WHERE capture_instance = '{capture_instance_name}'
            """)

            result = connection.execute(
                query, {"schema_name": schema_name, "table_name": table_name}
            ).scalar()

            return bool(result)

    def get_capture_instance_name(self, schema_name, table_name):
        """Get the CDC capture instance name for a table."""
        return f"dbo_{table_name}"

    def get_current_lsn(self):
        """Get the current  LSN from SQL Server using native function."""
        with self.get_connection() as connection:
            query = sa.text("SELECT sys.fn_cdc_get_max_lsn()")
            return connection.execute(query).scalar()

    def get_min_lsn(self, capture_instance=None):
        """Get the minimum available LSN for a capture instance."""
        with self.get_connection() as connection:
            query = sa.text("SELECT sys.fn_cdc_get_min_lsn(:capture_instance)")
            return connection.execute(
                query, {"capture_instance": capture_instance}
            ).scalar()

    def hex_string_to_lsn(self, lsn_hex):
        """Convert a hexadecimal LSN string to binary for SQL Server functions."""
        with self.get_connection() as connection:
            if not lsn_hex or not isinstance(lsn_hex, str):
                # Return minimum LSN if input is invalid
                query = sa.text("SELECT sys.fn_cdc_get_min_lsn(NULL)")
                return connection.execute(query).scalar()

            if not lsn_hex.startswith("0x"):
                lsn_hex = f"0x{lsn_hex}"

            query = sa.text("SELECT CAST(:lsn_hex AS BINARY(10))")
            result = connection.execute(query, {"lsn_hex": lsn_hex}).scalar()

            if result is None:
                query = sa.text("SELECT sys.fn_cdc_get_min_lsn(NULL)")
                return connection.execute(query).scalar()

            return result

    def lsn_to_hex_string(self, lsn_bytes):
        """Convert a binary LSN to a hex string format."""
        if lsn_bytes is None:
            return LSN_DEFAULT

        return f"0x{lsn_bytes.hex().upper()}"

    def get_primary_key_columns(self, table_name: str) -> list[str]:
        """Get the primary key columns for a CDC-enabled table."""
        with self.get_connection() as connection:
            instance = self.get_capture_instance_name("dbo", table_name)

            query = sa.text("""
            SELECT column_name FROM cdc.index_columns WHERE object_id = (
                SELECT object_id FROM cdc.change_tables WHERE capture_instance = :capture_instance_name
            )
            """)

            result = connection.execute(query, {"capture_instance_name": instance})
            primary_key_columns = [row[0] for row in result]
            return primary_key_columns

    def get_merge_predicate(self, table_name: str) -> str:
        """Uses the primary key columns to construct a predicate for merging.
        e.g., CustomerID and Email become: source.CustomerID = target.CustomerID AND source.Email = target.Email
        """
        primary_key_columns = self.get_primary_key_columns(table_name)
        if not primary_key_columns:
            raise ValueError(f"No primary key columns found for table {table_name}")

        # Construct the merge predicate
        merge_predicate = " AND ".join(
            [f"s.{col} = t.{col}" for col in primary_key_columns]
        )
        return merge_predicate

    def get_table_changes(
            self, table_name, last_lsn=None, schema_name="dbo", chunksize=10000
        ) -> tuple[pl.DataFrame, str]:
        """Get changes from a CDC-enabled table since the last LSN.
        Uses the native SQL Server CDC function fn_cdc_get_all_changes.

        Args:
            table_name (str): The name of the table to query.
            last_lsn (str, optional): The last processed LSN. If None, a full copy is performed.
            schema_name (str, optional): The schema name of the table. Defaults to 'dbo'.
            chunksize (int, optional): Number of rows to fetch per query. Defaults to 10000.

        Returns:
            tuple: A tuple containing the DataFrame of changes and the current LSN.
        """
        try:
            with self.get_connection() as connection:
                # Check if CDC is enabled for the database and table
                if not self.is_cdc_enabled_for_database():
                    raise ValueError(
                        f"CDC is not enabled for database {self.config.database.get_value()}"
                    )

                if not self.is_cdc_enabled_for_table(schema_name, table_name):
                    raise ValueError(
                        f"CDC not enabled for table {schema_name}.{table_name}"
                    )

                # Get the capture instance name
                capture_instance = self.get_capture_instance_name(
                    schema_name, table_name
                )
                if not capture_instance:
                    raise ValueError(
                        f"Could not find CDC capture instance for {schema_name}.{table_name}"
                    )

                # Get current maximum LSN
                current_lsn = self.get_current_lsn()
                current_lsn_hex = self.lsn_to_hex_string(current_lsn)
                
                # If no last_lsn provided, we should first take a first copy of the table
                if last_lsn is None or last_lsn == LSN_DEFAULT:
                    raise ValueError(
                        f"Initial copy required for table {schema_name}.{table_name}"
                    )

                # Convert LSN hex strings to binary
                from_lsn_hex = last_lsn
                to_lsn_hex = f"0x{current_lsn.hex()}"

                # Use the native CDC function with parameterized query
                # Process in chunks to avoid memory issues with large tables
                query = sa.text(f"""
                    DECLARE @from_lsn BINARY(10), @to_lsn BINARY(10)
                    SET @from_lsn = CONVERT(BINARY(10), :from_lsn, 1)
                    SET @to_lsn = CONVERT(BINARY(10), :to_lsn, 1)
        
                    SELECT * FROM cdc.fn_cdc_get_all_changes_{capture_instance}(
                        @from_lsn, @to_lsn, 'all'
                    )
                """)

                # Use chunksize to process large result sets in batches
                changes_df = pl.read_database(
                    query,
                    connection,
                    execute_options={
                        "parameters": {"from_lsn": from_lsn_hex, "to_lsn": to_lsn_hex}
                    },
                )

                # Convert binary LSN to hex string for storage
                current_lsn_hex = self.lsn_to_hex_string(current_lsn)

                return changes_df, current_lsn_hex

        except Exception as e:
            raise RuntimeError(
                f"Database error when getting CDC changes: {str(e)}"
            ) from e
Connecting to SQL and Pulling Changes

Once we have the manager, let's now use it and get our changes:

# Connect to SQL Server
sql_resource = SQLResource(
    SQL_HOST,
    SQL_DATABASE,
    SQL_USER,
    SQL_PASS
)

last_lsn = "0x0000004400000D280005"

changes = sql_resource.get_table_changes(
    table_name=TABLE_NAME_REMOTE,
    last_lsn=last_lsn, # todo: fetch this each time and save into metadata
    schema_name="dbo"
)

# Make them available as temporary view
print(type(changes[0]))
changes_df = spark.createDataFrame(changes[0].to_pandas())
changes_df.createOrReplaceTempView("changes")
Verifying

Verifying everything we can do by just getting the changes

print(spark.sql("SELECT * FROM changes").show())
CDC Incremental Data Loading with SQL Server, Apache Iceberg and Apache Spark
Merging the Changes

Which we merge into our Iceberg table:

# Merge the CDC changes into the iceberg table as merge
# we work with the __$operation column to determine the type of operation, which can have values:
# - Deleted (__$operation = 1),
# - Inserted (__$operation = 2)
# - Updated Before (__$operation = 3)
# - Updated After (__$operation = 4)
# https://iceberg.apache.org/docs/1.5.0/spark-writes/#merge-into
print(f"Performing merge operation on '{TABLE_NAME_LOCAL}' with predicate '{merge_predicate}'...")
spark.sql(f"""
MERGE INTO {TABLE_NAME_LOCAL} AS t
USING (SELECT * FROM changes) AS s
ON {merge_predicate}
WHEN MATCHED AND s.`__$operation` = 1 THEN DELETE
WHEN MATCHED AND s.`__$operation` IN (2, 4) THEN UPDATE SET *
-- Anything we can't match, we insert
WHEN NOT MATCHED THEN INSERT *
""")
Validating

Let's run the same query and compare results + sort. We will now see that the records have changed as expected and old records have been removed, others updated. Also note that we are not merging in the __$ columns from the CDC!

CDC Incremental Data Loading with SQL Server, Apache Iceberg and Apache Spark
Conclusion

All the above might seem complex, but in production most of this is abstracted away for us. The most difficult part is actually integrating the CDC SQL Manager into an orchestrator (e.g., Azure Data Factory) to pull our changes in batch (or switch over to a more streaming approach if we want to work real-time). Which we can then sync through our Big Data Query Engine such as Spark into Flat Files.

Finally, what remains is to now process this flat file towards a BI application, creating a ready-to-be-consumed data warehouse.

Reference

Here you can find some amazing References that I used to come to the conclusion above.

Apache Iceberg Won the Future — What’s Next for 2025?RBAC, CDC, Materialized Views, and More: Everything You Need to Know About Apache Iceberg in 2025.CDC Incremental Data Loading with SQL Server, Apache Iceberg and Apache SparkData Engineer ThingsYingjun WuCDC Incremental Data Loading with SQL Server, Apache Iceberg and Apache Spark
Delta Lake vs Apache Iceberg. The Lake House Squabble.... the real deal.CDC Incremental Data Loading with SQL Server, Apache Iceberg and Apache SparkData Engineering CentralDaniel BeachCDC Incremental Data Loading with SQL Server, Apache Iceberg and Apache Spark
67e51da689dd5100018ed967
Extensions
Connecting LLMs to Azure through MCPs
AI - Agentic
Create an always up-to-date architecture landscape automatically with LLMs and MCP Servers
Show full content
Connecting LLMs to Azure through MCPs

We all know how amazing MCP is! Now, one of the things still lacking is an MCP Server for Azure. There are some for competing platforms, but Azure remains difficult. So how can we still get Azure Context into our LLM?

Let's discover that in this article, on how you can get started and achieve the below, where we can use Claude to manage all our resources!

Connecting LLMs to Azure through MCPs
Azure OpenAPI Generation

The easiest way to create an MCP server is to utilize OpenAPI, where we can utilize an abstraction layer that generates an MCP server automatically for us. To do so, we thus first need to get the OpenAPI spec. Now, let this be just what is a bit "interesting" with Azure. Documentation is a bit scattered, and there is no single OpenAPI URL that I could find.

Luckily, there is StackQL that allows us to generate OpenAPI specifications for Azure. So let's get started by cloning that repository

git clone https://github.com/stackql/stackql-azure-openapi
cd stackql-azure-openapi 
chmod +x bin/stackql-azure-openapi
chmod +x ./prereq.sh
bun i

Once that is done, our dependencies are installed, and we are ready to generate OpenAPI specifications. Let's generate the OpenAPI specification for the compute and resource API specifications.

# Generate resources en compute openapi spec
# more info: https://github.com/stackql/stackql-azure-openapi
bin/stackql-azure-openapi generate resources compute
bin/stackql-azure-openapi dereference resources compute
bin/stackql-azure-openapi combine resources compute

When ran, it will create an OpenAPI specification without any external pointer references and output it to ./openapi/3-combined/resources/resources.yaml in our stackql-azure-openapi directory.

As this is a YAML file, we need to convert it to JSON to work with the MCP Server we are using:

brew install yq
cat resources.yaml | yq e -j > resources.json

Finally, a last manual action is needed, and that is to find and remove all "x-api-version": "20.*" references in that JSON file.

Getting Azure Bearer TokenCreate a Service Principal & Configure Permissions

Now our MCP server is ready to be ran, let's configure Azure with a Service Principal that has access to the resources that we want to access:

  1. Create an Azure AD Application and Service Principal: by going to the Azure Portal –> Microsoft Entra ID (formerly Azure AD) –> Navigate to "App registrations" and click "+ New registration"–> Fill in the necessary information for your application –> After creation, note the Application (client) ID and Directory (tenant) ID
  2. Generate a Client Secret: In your registered app, go to "Certificates & secrets"
  3. Create a new client secret and save it securely (you won't be able to view it again)
  4. Provide "Global Reader": by navigating to Microsoft Entra ID –> Select "Roles and administrators" –> Search for and select "Global Reader" –> Click "Add assignments" –> In the search box, enter your service principal name or ID –> Check the box next to the matching entry and select "Add"
  5. Provide "Reader": Do this for the individual subscriptions
Generate a Bearer Token

Now the service principal has the correct rights assigned, let's generate a Bearer token:

export CLIENT_ID=""
export CLIENT_SECRET=""
export TENANT_ID=""

curl https://login.microsoftonline.com/$TENANT_ID/oauth2/token \
-H "Content-Type: application/x-www-form-urlencoded" \
--data "grant_type=client_credentials&client_id=$CLIENT_ID&client_secret=$CLIENT_SECRET&resource=https%3A%2F%2Fmanagement.azure.com%2F"
Start the MCP Server

To get the MCP Server to start, open your claude_desktop_config.json and add the below to configure the MCP server to start correctly:

{
    "mcpServers": {
        "azure": {
            "command": "/Users/<your_user>/.bun/bin/bun",
            "args": [
                "run",
                "<FULL_PATH>/mcp-openapi-server/src/index.ts"
            ],
            "env": {
                "API_BASE_URL": "https://management.azure.com/",
                "OPENAPI_SPEC_PATH": "<FULL_PATH>/stackql-azure-openapi/openapi/3-combined/resources/resources.json",
                "API_HEADERS": "Authorization: Bearer <TOKEN>"
            }
        }
    }
}
Testing

Now when we launch Claude, we will see all the tools available! Running a prompt such as Generate me an architecture of all my resources and dependencies in Azure for the subscription "<SUB_ID>". Print it as a Mermaid diagram. will beautifully render the below!

Connecting LLMs to Azure through MCPs
Further Research

Now, why is this important? Imagine importing all your Azure APIs here, your other technology landscape APIs here through MCP servers. Your LLM tool will then be your Enterprise Architect! Beautifully creating an always up-to-date AS-IS architecture.

67d1ce01bde45e0001400fbf
Extensions
Getting Started with Model Context Protocol (MCP) Servers
Artificial IntelligenceAI - Agentic
Manage your filesystem through Claude with its custom Model Context Protocol (MCP) server.
Show full content
Getting Started with Model Context Protocol (MCP) Servers

Claude recently introduced the MCP (or Model Context Protocol) which is an open standard for establishing unified context interaction between AI models and development environments. This allows AI models to more easily understand and interact with and process code.

For this example, let's see how we can use an MCP Server to create a file named "HelloWorld.md" with the content "Hello World, my name is Xavier".

Note: MCP Servers are currently local only (remote are in progress)
Installing Claude

To install Claude, we simply go to https://claude.ai/download and install it for our operating system. Once it is installed, we login to the application.

Getting Started with Model Context Protocol (MCP) Servers
Installing the MCP

For filesystem operations, Antrophic created the Filesystem MCP. So let's enable it by opening up the Developer Settings panel within Claude and edit the claude_desktop_config to create an MCP Server configuration.

Getting Started with Model Context Protocol (MCP) Servers

Once this file is opened (for me my path is /Users/xaviergeerinck/Library/Application\ Support/Claude/claude_desktop_config.json) we can configure it with:

{
    "mcpServers": {
        "filesystem": {
            "command": "/Users/xaviergeerinck/.bun/bin/bunx",
            "args": [
                "@modelcontextprotocol/server-filesystem",
                "/Users/xaviergeerinck/Desktop",
                "/Users/xaviergeerinck/Downloads"
            ]
        }
    }
}
Note: Bun I used bun to start this. You can also use node through npx or pnpx. The directories you see are the one the MCP Server is allowed to utilize.
Warning: Bun is installed at user level, so ensure you provide the full path as shown above, otherwise you might get spawn bun ENOENT on Claude startup.

Restarting Claude, now shows my MCP Tools being available (see the Hammer icon):

Getting Started with Model Context Protocol (MCP) Servers
Demo

When I now ask Claude to write my file, it will correctly do so.

Getting Started with Model Context Protocol (MCP) Servers

When I now open that file, I can correctly see my content:

Getting Started with Model Context Protocol (MCP) Servers

Super exciting to see how easy this was! APIs can be integrated in a brink by simply implementing the available OpenAPI specs with a custom MCP. For more information, check out their official quickstart guide: https://modelcontextprotocol.io/quickstart/

67d075e10229bb000171f3b3
Extensions
Manage your Cloudflare domains automatically with an Nginx Ingress controller and External DNS, together with SSL Certificates through Cert Manager
KubernetesInfrastructure
Automate DNS and SSL for Kubernetes on Cloudflare using Nginx Ingress, External DNS, and Cert Manager. Streamline infrastructure by auto-creating DNS records and obtaining SSL certificates. Reduce overhead and keep services secure and accessible.
Show full content
Manage your Cloudflare domains automatically with an Nginx Ingress controller and External DNS, together with SSL Certificates through Cert Manager

So you have created a Kubernetes cluster with some pods installed on it and are ready to create your production application. But how do you now get started by routing your domain to it? And even more so, how do you do this in a secure way, generating SSL certificates (for inter cluster communication) and manage your domain in an automated way so the pods link to these domains?

Well, this is where Cloudflare, External DNS and Cert Manager come into action!

Prerequisites
  • An installed and configured (kubectl) Azure Kubernetes Cluster
  • Helm installed (brew install helm)
  • Cloudflare (API Token & Email)
Setting Local Variables

First start by creating the local variables that will be used throughout this post. For Cloudflare, create an API token with the Zone DNS:Edit permissions.

export NS_NAME_INGRESS=ingress-nginx
export NS_NAME_CERT_DNS=domain-cert-dns
export CF_API_EMAIL='<YOUR_EMAIL>'

# Create token with "Zone, DNS, Edit" permissions
# https://dash.cloudflare.com/profile/api-tokens
export CF_API_KEY=<YOUR_CLOUDFLARE_TOKEN>
Creating Namespace & Secrets

We isolate all our resources for easy deletion later and create 2 separate namespaces:

  • Ingress Namespace: Manages the nginx ingress controller and allows us to easily scale it out later.
  • Certificates & External DNS Resources Namespace: Contains all the resources for managing our certificates as well as the external dns configuration on Cloudflare in our case
# Create namespaces
kubectl create namespace $NS_NAME_INGRESS
kubectl create namespace $NS_NAME_CERT_DNS

kubectl create secret generic cloudflare --namespace $NS_NAME_CERT_DNS \
    --from-literal=cf-api-key=$CF_API_KEY \
    --from-literal=cf-api-email=$CF_API_EMAIL
Creating Ingress Controller

The first real service we create is the ingress controller. This is our primary way into the cluster once we access the IP. The IP itself won't directly return a response, but the domains will be routed towards the correct service running on the cluster.

In other words, if we attempt to access example.com it will translate to an IP A.B.C.D which is returned from the Nginx Ingress Controller LoadBalancer route, which will then return service my-example-service for a given pod.

Note: we need to ensure the health probes are correct for Azure! So we provide the extra annotation here.
# Install Ingress Controller
# this is our main entrypoint to the cluster
# note: we apply https://github.com/kubernetes/ingress-nginx/issues/10863
helm repo add ingress-nginx https://kubernetes.github.io/ingress-nginx
helm repo update

helm upgrade -i ingress-nginx ingress-nginx/ingress-nginx \
    --namespace $NS_NAME_INGRESS \
    --set controller.service.annotations."service\.beta\.kubernetes\.io/azure-load-balancer-health-probe-request-path"=/healthz \
    --wait

export INGRESS_IP=$(kubectl get svc -n $NS_NAME_INGRESS ingress-nginx-controller -o jsonpath='{.status.loadBalancer.ingress[0].ip}')
Create External DNS

We have our main Entry Point in the cluster, but how do we route from domain example.com to pod my-pod? Typically, we do this by setting up a manual configuration from the ingress controller to the pod, and configuring the domain manually to resolve this IP address.

But, as automation is always key, we can automate this with a service named External DNS which does this for us! It integrates with our DNS provider of choice (in this case Cloudflare) and configures the domains to point to the correct IP Address (the Ingress Controller).

# Install External DNS (and configure with Cloudflare)
# this will automatically update the DNS records in Cloudflare
helm repo add kubernetes-sigs https://kubernetes-sigs.github.io/external-dns/
helm repo update
helm upgrade --install external-dns kubernetes-sigs/external-dns \
  --namespace $NS_NAME_CERT_DNS \
  --set "provider.name=cloudflare" \
  --set "env[0].name=CF_API_TOKEN" \
  --set "env[0].valueFrom.secretKeyRef.name=cloudflare" \
  --set "env[0].valueFrom.secretKeyRef.key=cf-api-key" \
  --set "env[1].name=CF_API_EMAIL" \
  --set "env[1].valueFrom.secretKeyRef.name=cloudflare" \
  --set "env[1].valueFrom.secretKeyRef.key=cf-api-email" \
  --wait --timeout 600s
Creating Cert Manager & Issuer

Now we have the domains loading, let's provide them with an SSL certificate for secure communication. A trusted authority must sign these SSL certificates, so we use Cert Manager and LetsEncrypt to do so for us.

How this works is that it will use the configured domain before, and once they are configured, a certificate will be created. To create these certificates, the Cert Manager will open an endpoint (ACME Challenge for HTTP) to validate that we actually own the domain. Once this validation is done, it will provide us back with a certificate that we save.

This ACME Challenge is configured through a Cluster Issuer resource that we create below.

# Install Cert Manager
# this will manage our certificates for the domain and automatically renew them
helm repo add jetstack https://charts.jetstack.io --force-update
helm install \
  cert-manager jetstack/cert-manager \
  --namespace $NS_NAME_CERT_DNS \
  --create-namespace \
   --set cdrs.enabled=true

# Create Cluster Issuers
# note: there are 2 issuers, a production and staging one. When changing, delete the old certificates (see `kubectl delete certificate -n NS ...` and `kubectl get certificate -A`)
cat <<EOF | kubectl apply -f -
apiVersion: cert-manager.io/v1
kind: ClusterIssuer
metadata:
  name: letsencrypt-prod
  namespace: $NS_NAME_CERT_DNS
spec:
  acme:
    server: https://acme-v02.api.letsencrypt.org/directory
    email: $CF_API_EMAIL
    privateKeySecretRef:
      name: letsencrypt-prod-private-key
    solvers:
    - http01:
        ingress:
          class: nginx
EOF

cat <<EOF | kubectl apply -f -
apiVersion: cert-manager.io/v1
kind: ClusterIssuer
metadata:
  name: letsencrypt-stag
  namespace: $NS_NAME_CERT_DNS
spec:
  acme:
    server: https://acme-staging-v02.api.letsencrypt.org/directory
    email: $CF_API_EMAIL
    privateKeySecretRef:
      name: letsencrypt-stag-private-key
    solvers:
    - http01:
        ingress:
          class: nginx
EOF
Create Resources

We are finally ready to deploy our application and get a domain bound to it! This phase consist out of 2 steps:

  1. Creating the actual deployment and service, allowing us to run our application and get a Port allocated (and internal IP address - ClusterIP) so we can route to it from within the cluster.
  2. Creating an Ingress Route, which will state which domain URL we want to connect to the specific service.
Create the Deployment and Service
apiVersion: apps/v1
kind: Deployment
metadata:
  name: backend-deployment
  namespace: example
spec:
  replicas: 1
  selector:
    matchLabels:
      app: backend
  template:
    metadata:
      labels:
        app: backend
    spec:
      containers:
        - name: backend
          image: your-repo-url/backend:latest
          ports:
            - containerPort: 8000
          env:
            - name: NODE_ENV
              value: production
            - name: PORT
              value: "8000"
            - name: HOST
              value: "0.0.0.0"
---
apiVersion: v1
kind: Service
metadata:
  name: backend-service
  namespace: example
spec:
  selector:
    app: backend
  ports:
    - protocol: TCP
      port: 80
      targetPort: 8000
  type: ClusterIP
Create the Ingress Route
apiVersion: networking.k8s.io/v1
kind: Ingress
metadata:
  name: backend-ingress
  namespace: topikai
  annotations:
    cert-manager.io/cluster-issuer: letsencrypt-prod
    external-dns.alpha.kubernetes.io/hostname: api.example.com
    external-dns.alpha.kubernetes.io/ttl: "120"
spec:
  ingressClassName: nginx
  rules:
  - host: api.example.com
    http:
      paths:
      - path: /
        pathType: Prefix
        backend:
          service:
            name: backend-service
            port:
              number: 80
  tls:
  - hosts:
    - api.example.com  # Use your domain here
    secretName: backend-tls-secret  # Cert will populate this secret
Validate, View Logs and View Certificates

Ok! We are now all set and should be able to connect to our services! This might take a couple of minutes as domains sometimes take a bit to propagate. Once done, we should be able to load our URL with a signed certificate!

To validate everything we just did, feel free to check the snippet below that gives you an easy overview of how to view the logs and monitor the issued certificates.

# Validate
kubectl get all -n $NS_NAME_CERT_DNS

# View logs
kubectl logs -n $NS_NAME_CERT_DNS -l app.kubernetes.io/name=external-dns -f
kubectl logs -f -n $NS_NAME_CERT_DNS deploy/cert-manager
kubectl logs -f -n $NS_NAME_CERT_DNS deploy/external-dns
kubectl logs -f -n $NS_NAME_INGRESS deploy/ingress-nginx-controller

# Monitor issued certificates (and if they are ready)
# note: ceritifcates that are not ready will be with a random suffix
# see cert-manager logs for more info
kubectl get certs -A

# Trigger manual certification recreation
kubectl delete certificate backend-tls-secret -n topikai

# Check the SSL Certificate
openssl s_client -connect my-service.example.com:443
67964a87bb7f740001769445
Extensions
Create your own LLM Voice Assistant in just 5 minutes!
Artificial IntelligenceCoding - PythonLLM

What was previously thought to be impossible, now became reality! We can finally get our own Jarvis, and even more, we can do this in just 5 minutes!

audio-thumbnailVoice Bot Weather0:00/34.4746671×

While the below is how you can get started, please note that LLMs

Show full content
Create your own LLM Voice Assistant in just 5 minutes!

What was previously thought to be impossible, now became reality! We can finally get our own Jarvis, and even more, we can do this in just 5 minutes!

Create your own LLM Voice Assistant in just 5 minutes!Voice Bot Weather0:00/34.4746671×

While the below is how you can get started, please note that LLMs require a lot of fine-tuning, context enhancements, SOP graphs (Standard Operating Procedures) and language processing to become more advanced for our use case.

Getting Started - Creating Accounts

Now let's create our own Jarvis bot! Let's get started by creating the accounts we need:

Once we have this, create a .env file as below:

# https://dashboard.daily.co/rooms/create
DAILY_ROOM_URL=https://YOUR_SUBDOMAIN.daily.co/YOUR_ROOM_ID
DAILY_API_KEY=

# API: https://elevenlabs.io/app/settings/api-keys
# Voices: https://elevenlabs.io/app/voice-lab
ELEVENLABS_VOICE_ID=iP95p4xoKVk53GoZ742B
ELEVENLABS_API_KEY=

# https://platform.openai.com/settings/organization/api-keys
OPENAI_API_KEY=

We are now set to create our example!

Installing Pipecat

Let's install pipecat for our project, which pipes together all the tasks we need!

# Create Venv
python3 -m venv env
source env/bin/activate

# Install dependencies
pip install "pipecat-ai[daily,elevenlabs,silero,openai]" python-dotenv loguru

Once we have this, put the below in a file named demo.py:

import asyncio
import glob
import json
import os
import sys
from datetime import datetime

import aiohttp
from dotenv import load_dotenv
from loguru import logger
from runner import configure

from pipecat.audio.vad.silero import SileroVADAnalyzer
from pipecat.audio.vad.vad_analyzer import VADParams
from pipecat.pipeline.pipeline import Pipeline
from pipecat.pipeline.runner import PipelineRunner
from pipecat.pipeline.task import PipelineParams, PipelineTask
from pipecat.processors.aggregators.openai_llm_context import (
    OpenAILLMContext,
)
from pipecat.services.openai_realtime_beta import (
    InputAudioTranscription,
    OpenAIRealtimeBetaLLMService,
    SessionProperties,
    TurnDetection,
)
from pipecat.transports.services.daily import DailyParams, DailyTransport

load_dotenv(override=True)

logger.remove(0)
logger.add(sys.stderr, level="DEBUG")

BASE_FILENAME = "/tmp/pipecat_conversation_"


async def fetch_weather_from_api(function_name, tool_call_id, args, llm, context, result_callback):
    temperature = 75 if args["format"] == "fahrenheit" else 24
    await result_callback(
        {
            "conditions": "nice",
            "temperature": temperature,
            "format": args["format"],
            "timestamp": datetime.now().strftime("%Y%m%d_%H%M%S"),
        }
    )


async def get_saved_conversation_filenames(
    function_name, tool_call_id, args, llm, context, result_callback
):
    # Construct the full pattern including the BASE_FILENAME
    full_pattern = f"{BASE_FILENAME}*.json"

    # Use glob to find all matching files
    matching_files = glob.glob(full_pattern)
    logger.debug(f"matching files: {matching_files}")

    await result_callback({"filenames": matching_files})


# async def get_saved_conversation_filenames(
#     function_name, tool_call_id, args, llm, context, result_callback
# ):
#     pattern = re.compile(re.escape(BASE_FILENAME) + "\\d{8}_\\d{6}\\.json$")
#     matching_files = []

#     for filename in os.listdir("."):
#         if pattern.match(filename):
#             matching_files.append(filename)

#     await result_callback({"filenames": matching_files})


async def save_conversation(function_name, tool_call_id, args, llm, context, result_callback):
    timestamp = datetime.now().strftime("%Y-%m-%d_%H:%M:%S")
    filename = f"{BASE_FILENAME}{timestamp}.json"
    logger.debug(f"writing conversation to {filename}\n{json.dumps(context.messages, indent=4)}")
    try:
        with open(filename, "w") as file:
            messages = context.get_messages_for_persistent_storage()
            # remove the last message, which is the instruction we just gave to save the conversation
            messages.pop()
            json.dump(messages, file, indent=2)
        await result_callback({"success": True})
    except Exception as e:
        await result_callback({"success": False, "error": str(e)})


async def load_conversation(function_name, tool_call_id, args, llm, context, result_callback):
    async def _reset():
        filename = args["filename"]
        logger.debug(f"loading conversation from {filename}")
        try:
            with open(filename, "r") as file:
                context.set_messages(json.load(file))
                await llm.reset_conversation()
                await llm._create_response()
        except Exception as e:
            await result_callback({"success": False, "error": str(e)})

    asyncio.create_task(_reset())


tools = [
    {
        "type": "function",
        "name": "get_current_weather",
        "description": "Get the current weather",
        "parameters": {
            "type": "object",
            "properties": {
                "location": {
                    "type": "string",
                    "description": "The city and state, e.g. San Francisco, CA",
                },
                "format": {
                    "type": "string",
                    "enum": ["celsius", "fahrenheit"],
                    "description": "The temperature unit to use. Infer this from the users location.",
                },
            },
            "required": ["location", "format"],
        },
    },
    {
        "type": "function",
        "name": "save_conversation",
        "description": "Save the current conversatione. Use this function to persist the current conversation to external storage.",
        "parameters": {
            "type": "object",
            "properties": {},
            "required": [],
        },
    },
    {
        "type": "function",
        "name": "get_saved_conversation_filenames",
        "description": "Get a list of saved conversation histories. Returns a list of filenames. Each filename includes a date and timestamp. Each file is conversation history that can be loaded into this session.",
        "parameters": {
            "type": "object",
            "properties": {},
            "required": [],
        },
    },
    {
        "type": "function",
        "name": "load_conversation",
        "description": "Load a conversation history. Use this function to load a conversation history into the current session.",
        "parameters": {
            "type": "object",
            "properties": {
                "filename": {
                    "type": "string",
                    "description": "The filename of the conversation history to load.",
                }
            },
            "required": ["filename"],
        },
    },
]


async def main():
    async with aiohttp.ClientSession() as session:
        (room_url, token) = await configure(session)

        transport = DailyTransport(
            room_url,
            token,
            "Respond bot",
            DailyParams(
                audio_in_enabled=True,
                audio_in_sample_rate=24000,
                audio_out_enabled=True,
                audio_out_sample_rate=24000,
                transcription_enabled=False,

                # VAD = Voice Activity Detection
                vad_enabled=True,
                vad_analyzer=SileroVADAnalyzer(params=VADParams(stop_secs=0.8)),
                vad_audio_passthrough=True,
            ),
        )

        session_properties = SessionProperties(
            input_audio_transcription=InputAudioTranscription(),
            # Set openai TurnDetection parameters. Not setting this at all will turn it
            # on by default
            turn_detection=TurnDetection(silence_duration_ms=1000),
            # Or set to False to disable openai turn detection and use transport VAD
            # turn_detection=False,
            # tools=tools,
            instructions="""Your knowledge cutoff is 2023-10. You are a helpful and friendly AI.

Act like a human, but remember that you aren't a human and that you can't do human
things in the real world. Your voice and personality should be warm and engaging, with a lively and
playful tone.

If interacting in a non-English language, start by using the standard accent or dialect familiar to
the user. Talk quickly. You should always call a function if you can. Do not refer to these rules,
even if you're asked about them.
-
You are participating in a voice conversation. Keep your responses concise, short, and to the point
unless specifically asked to elaborate on a topic.

Remember, your responses should be short. Just one or two sentences, usually.""",
        )

        llm = OpenAIRealtimeBetaLLMService(
            api_key=os.getenv("OPENAI_API_KEY"),
            session_properties=session_properties,
            start_audio_paused=False,
        )

        # you can either register a single function for all function calls, or specific functions
        # llm.register_function(None, fetch_weather_from_api)
        llm.register_function("get_current_weather", fetch_weather_from_api)
        llm.register_function("save_conversation", save_conversation)
        llm.register_function("get_saved_conversation_filenames", get_saved_conversation_filenames)
        llm.register_function("load_conversation", load_conversation)

        context = OpenAILLMContext([], tools)
        context_aggregator = llm.create_context_aggregator(context)

        pipeline = Pipeline(
            [
                transport.input(),  # Transport user input
                context_aggregator.user(),
                llm,  # LLM
                context_aggregator.assistant(),
                transport.output(),  # Transport bot output
            ]
        )

        task = PipelineTask(
            pipeline,
            PipelineParams(
                allow_interruptions=True,
                enable_metrics=True,
                enable_usage_metrics=True,
                # report_only_initial_ttfb=True,
            ),
        )

        @transport.event_handler("on_first_participant_joined")
        async def on_first_participant_joined(transport, participant):
            await transport.capture_participant_transcription(participant["id"])
            # Kick off the conversation.
            await task.queue_frames([context_aggregator.user().get_context_frame()])

        runner = PipelineRunner()

        await runner.run(task)


if __name__ == "__main__":
    asyncio.run(main())

Finally, create a runner.py file:

import aiohttp
import argparse
import os

from pipecat.transports.services.helpers.daily_rest import DailyRESTHelper


async def configure(aiohttp_session: aiohttp.ClientSession):
    (url, token, _) = await configure_with_args(aiohttp_session)
    return (url, token)


async def configure_with_args(
    aiohttp_session: aiohttp.ClientSession, parser: argparse.ArgumentParser | None = None
):
    if not parser:
        parser = argparse.ArgumentParser(description="Daily AI SDK Bot Sample")

    parser.add_argument(
        "-u", "--url", type=str, required=False, help="URL of the Daily room to join"
    )
    parser.add_argument(
        "-k",
        "--apikey",
        type=str,
        required=False,
        help="Daily API Key (needed to create an owner token for the room)",
    )

    args, unknown = parser.parse_known_args()

    url = args.url or os.getenv("DAILY_ROOM_URL")
    key = args.apikey or os.getenv("DAILY_API_KEY")

    if not url:
        raise Exception(
            "No Daily room specified. use the -u/--url option from the command line, or set DAILY_ROOM_URL in your environment to specify a Daily room URL."
        )

    if not key:
        raise Exception(
            "No Daily API key specified. use the -k/--apikey option from the command line, or set DAILY_API_KEY in your environment to specify a Daily API key, available from https://dashboard.daily.co/developers."
        )

    daily_rest_helper = DailyRESTHelper(
        daily_api_key=key,
        daily_api_url=os.getenv("DAILY_API_URL", "https://api.daily.co/v1"),
        aiohttp_session=aiohttp_session,
    )

    # Create a meeting token for the given room with an expiration 1 hour in
    # the future.
    expiry_time: float = 60 * 60

    token = await daily_rest_helper.get_token(url, expiry_time)

    return (url, token, args)

We are now set to go!

Running

Enter python demo.py and watch our bot come alive!

Create your own LLM Voice Assistant in just 5 minutes!

When we join the room on our device (or any other! long live WebRTC). We will see that a participant has joined, and we are able to interact with the model:

Create your own LLM Voice Assistant in just 5 minutes!

Interacting with it and asking about the weather is also possible!

Create your own LLM Voice Assistant in just 5 minutes!
Next Steps

We successfully created an agent, that responds within an acceptable time amount. The next steps to look into are now to:

  • Connect it to a web interface (for live monitoring, without terminals)
  • Create action intents and SOPs to ensure it follows a paradigm and interacts with our services
  • Fine-tune the model so it can only react on our content
  • ...
6757eff3bdbcdc000196f1cf
Extensions
Adding Authentication to your Azure Static Web App
Azure
Learn how you can add authentication to your azure static web app page
Show full content

So you are writing a documentation page and you want to protect it? Azure Static Web Apps has the solution for you.

Simply create a staticwebapp.config.json file in your App artifact folder (i.e., where your app code will live to be deployed) with the following content:

{
  "routes": [
    {
      "route": "*",
      "allowedRoles": ["authenticated"]
    }
  ],
  "navigationFallback": {
    "rewrite": "/index.html",
    "exclude": ["/images/*.{png,jpg,gif}", "/css/*"]
  },
  "responseOverrides": {
    "401": {
      "redirect": "/.auth/login/aad?post_login_redirect_uri=.referrer",
      "statusCode": 302,
      "exclude": ["/images/*.{png,jpg,gif}", "/css/*"]
    }
  },
  "globalHeaders": {
    "content-security-policy": "default-src https: 'unsafe-eval' 'unsafe-inline'; object-src 'none'; img-src 'self' data: *"
  }
}

This will now enforce authentication to all your routes and exclude the CSS or Images from being protected.

Deploying this now automatically redirects us to the authentication page!

660bbf900d39e3000141fc5f
Extensions
Key Takeaways from NVIDIA's GTC 2024: The Future of Autonomous AI and Robotics
News
Dive into the highlights from NVIDIA's GTC 2024, exploring breakthroughs in autonomous AI, robotics, simulation technologies, and the evolving landscape of reinforcement learning. Discover how these advancements are shaping the future of technology.
Show full content
Key Takeaways from NVIDIA's GTC 2024: The Future of Autonomous AI and Robotics

I just had the chance to visit NVIDIA's GTC 2024 edition, and damn, was I impressed! It showed a future, where Autonomous AI is leading and validates what we already know, Autonomous Agents are there to stay!

Autonomous Agents are there to stay!

Of course, this is a subjective post, because as CTO at Composabl, it's my mission to find the latest technology and define a strategy for our Company that makes us stand-out in the technology world. Thus, I was mainly interested in figuring out what:

  • Nvidia is doing in the Robotics Space
  • How simulation is changing and where we should invest in
  • Crossing the Sim2Real gap
  • What customers require in an edge runtime

NVIDIA's GTC conference went in on all of that! They solved and most often even demonstrated solutions to most of the questions I had in my mind and allowed an updated strategy to form.

As Composabl, we are using simulation software to train our different Composed AI Agents (through the SDK - soon through our UI) and eventually run them in the different form factors our customer require. Looking at GTC, they are mainly aligned with that vision (with the difference that our USP is the Agent creation through our Machine Teaching paradigm, making it easy for anyone to create an Agent)

As Composabl, we put Autonomous Agent creation into the hands of everyone!
Key Takeaways from NVIDIA's GTC 2024: The Future of Autonomous AI and Robotics

What NVIDIA also showed, is how Research is not standing still. Reinforcement Learning can be quite "slow" unless you know how to search through the Observation Space correctly (which is what we ultimately improve through Machine Teaching). The most used algorithm for that currently is PPO, as it typically works in a variety of use cases and simulators. For this, they devised a new method named Short-Horizon Actor-Critic (SHAC) and Adaptive Horizon Actor Critic (AHAC) that combines Gradient-based Optimization with RL. Providing an amazing performance gain under certain circumstances:

Key Takeaways from NVIDIA's GTC 2024: The Future of Autonomous AI and Robotics

Now, the most interesting session for me personally was - by far - Disney's session of how they are bringing Personality to their robots. Demonstrated through how they made BD-1 walking. While this might seem as "Gimmick", it's ultimately about what Disney actually achieved here (but are still quite secretive about it in the knowledge sharing domain).

Key Takeaways from NVIDIA's GTC 2024: The Future of Autonomous AI and Robotics

By combining Reinforcement Learning, with pre-programmed animation sequences, they are able to create a stable bi-pedal walking robot that acts as naturally as the character they invented would.

Key Takeaways from NVIDIA's GTC 2024: The Future of Autonomous AI and Robotics

The biggest learning, however comes from that they accomplish this by comparing the Animation state with the Simulator state, letting the Reinforcement Learning algorithm figure out what to do correctly. Finally, creating an amazing result! But see for yourself:

In conclusion, the biggest take aways for me were:

  • Simulation will evolve tremendously over the next couple of years! but be aware, as Isaac Sim is ultimately a lock-in. NVIDIA is moving all the processing to the GPU (as its their bread and butter).
  • Reinforcement Learning is amazing, but has caveats. As Composabl, we know this and work around it, but a lot of research is still being done
  • In Robotics it will all be around bringing "personality" to your robot, moving away from the classical static robots towards more life-breathing ones.

65fe7d6b49fe700001e038d7
Extensions
How to Use Different Python Versions with Virtualenv
Coding - Python
Learn how you can use Python Virtual Environments (venv) to easily use different python versions
Show full content
How to Use Different Python Versions with Virtualenv

Python is sometimes a big mess to work with. Somedays you want to use the latest for all its bug fixes and features, but other days you need to use a specific version since your favorite python library doesn't support the latest.

So how can we quickly get started with let's say Python 3.9? This is what I aim to explain in this article!

Virtual Env

Python has a concept named "virtual envs". This concept allows you to easily use any python version with its own specific set of dependencies, creating an isolation between your different projects. It is also quite handy when you are developing a library, as the dependencies you install, typically translate 1:1 to the dependency requirement of the library itself.

Setting up your Python Version
# Configure the VirtualEnv Command
pip install virtualenv

# Install your Python Version
sudo apt update; sudo apt install python3.9

# Create a virtual env with your python version and location
# - Python Version: 3.9
# - Location: ~/.venv/myenv
virtualenv -p /usr/bin/python3.9 ~/.venv/myenv

# Activate the Environment
source ~/.venv/myenv/bin/activate

# Deactivate the Environment
source ~/.venv/myenv/bin/deactivate
Conclusion

Now you are completely up and running with the python version you wanted!

65fb716b641456000103df71
Extensions