A few days ago I suddenly remembered that HTTP/3 is a thing and decided to look up how to get it running on my server.
Show full content
A few days ago I suddenly remembered that HTTP/3 is a thing and decided to look up how to get it running on my server, such as on this very blog that you are reading now.
I'm running a bunch of services terminated by Nginx as a reverse proxy, so thats the place I had to focus on.
The first step is getting a supported build of Nginx. Nginx only supports HTTP/3 in version 1.25 and above. This server is still running Ubuntu 24.04, for which Canonical only shipped version v1.24. Darn. (FYI Ubuntu 25.04 apparently ships v1.26.)
Many Linux distros do this very annoying thing where they get all the software they want to package up and freeze it before launch and never update it again except by the distro maintainers occasionally backporting fixes. If you want the actual latest version from the vendors, you usually have to go to them yourself.
In this case, I went straight to the source and added Nginx's own apt feed. Installing this version got me v1.28.
Next, I updated my config according to the above docs. Annoyingly this never worked. If I only wanted HTTP/3 for one virtual server it worked, but as soon as I tried to enable HTTP/3 for a second one it kept complaining about a duplicate listen directive.
After much trial and error it seems that the key (for me at least) was to omit reuseport from the listen directive. Although the docs say to use listen 443 quic reuseport that keeps breaking for me. Here's the config that works for me:
That Alt-Svc header is important, it's what lets HTTP/1.1 and HTTP/2 connections know that there is a HTTP/3 service available to try.
And lastly, make sure to allow UDP port 443 (yes, UDP) through. If you have a network firewall (e.g. from your cloud provider) make sure to allow it there as well, not just on your host firewall.
h3 protocol as demonstrated by Safari's Web Inspector
A very quick primer on an alternative diff tool that does some very smart highlighting in the terminal.
Show full content
In the last post I did in this little series of tooling improvements, the main draw of Bat was its syntax highlighting. This post is kind of that on steroids.
I came across Difftastic very recently and am already wowed by it.
Difftastic is a command-line diff tool for showing the difference between two files. We already have diff which shows you added, removed, or changed lines, but Difftastic operates on the structure of the parsed document, rather than just the raw lines.
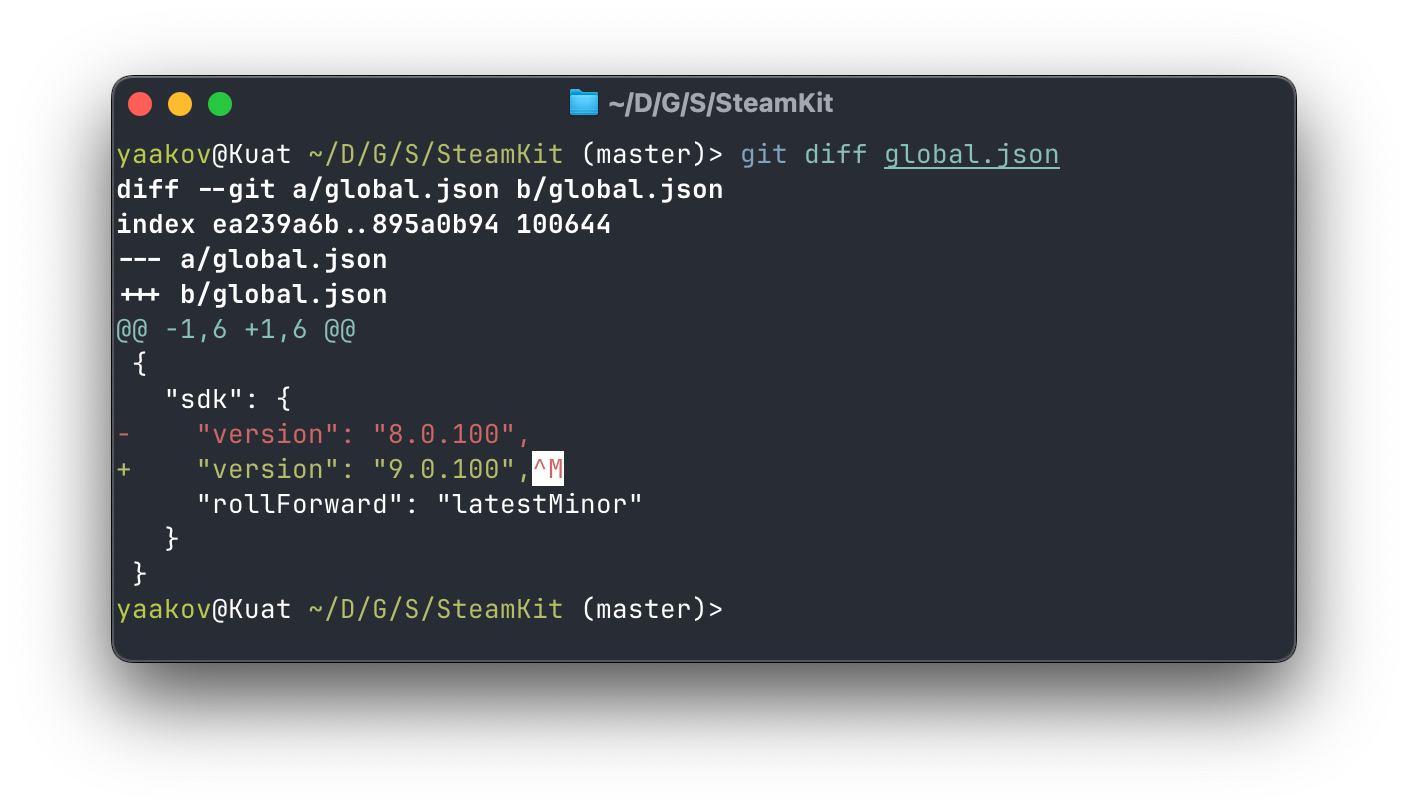
A visual example is probably the best way to describe this. Here is what a traditional diff might look like:
An example diff.
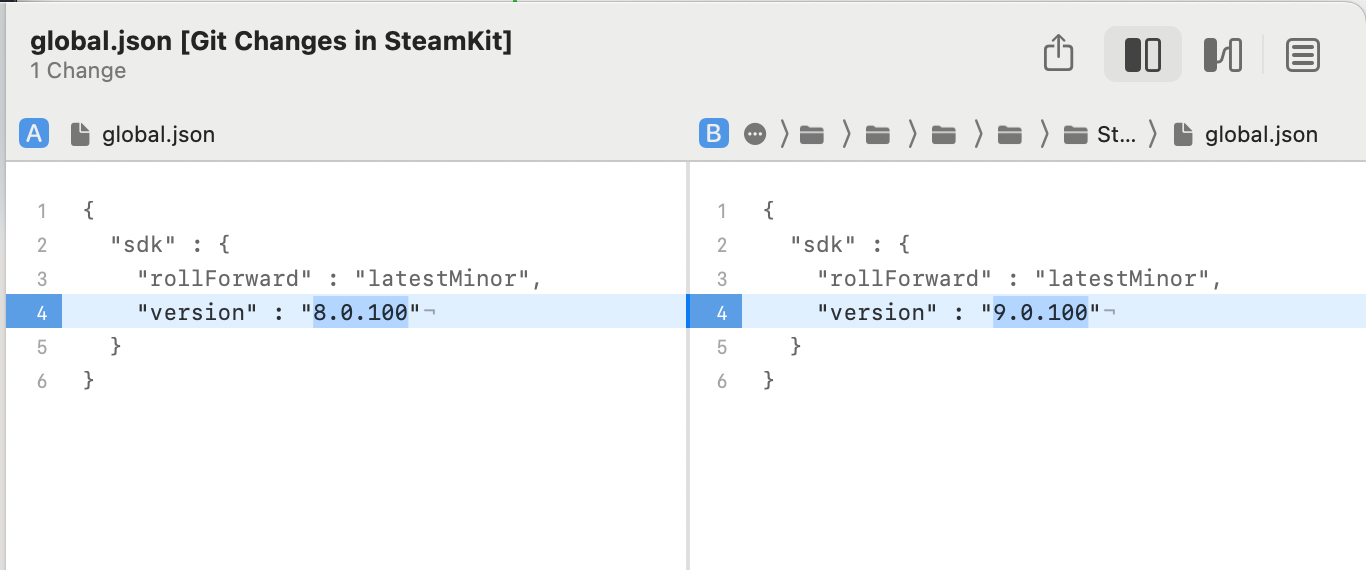
And here is what it looks like in Difftastic:
The same diff in Difftastic.
It highlights not only the change in the line, but also the change in the JSON value.
I've seen stuff like this previously in graphical tools like Kaleidoscope (which I also adored until their recent change in pricing model):
The same diff in Kaleidoscope
However, having this in the Terminal is quite powerful, particularly for remote scenarios such as over SSH (or Mosh now, as per earlier in the series). Difftastic also goes one step further by underlining the segment of the value which changed (in the above screenshots, just the 8 to a 9).
I've only been using this for a short period so far, but it seems quite nice and useful and will probably find a way into my default toolbox.
Difftastic is available for most (if not all) desktop platforms.
Sometimes reinventing the wheel is good and even a task like "show the contents of this file" can be improved upon.
Show full content
No, this post isn't about .bat files.
Continuing on this little series of tooling improvements, the next stop is Bat, an improvement to the good old cat utility, used for displaying files.
cat is really light and efficient and just takes either a file or stdin, and writes that to the screen.
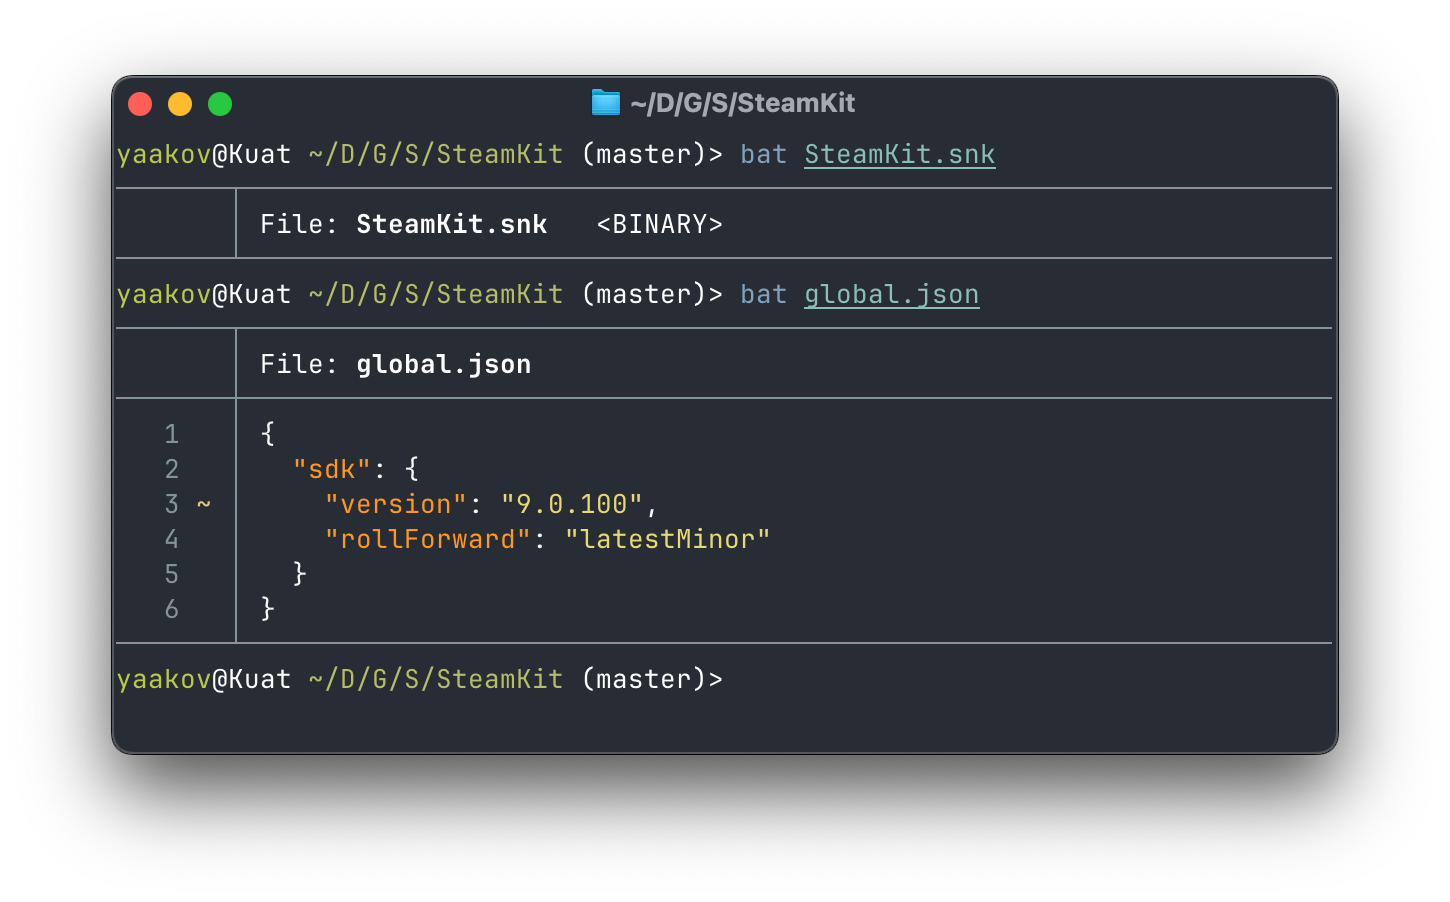
Bat is a bit smarter. For one, if I try print a binary file, it doesn't do that by default, which always risks stuffing up my terminal.
It also has syntax highlighting for some file formats, and can integrate with git to show you changes.
Bat in action
Bat is one of those tools that I am trying to add to my muscle memory instead of cat in most cases. It is available for most (if not all) desktop platforms.
A short post about Mosh "the mobile shell", which handles network interruptions far better than SSH.
Show full content
There are a lot of old tools that do their job pretty well and are fairly standard across the board. Hammers. Wheels. Screwdrivers.
When it comes to software there are also plenty of these. In recent years - particularly with the advent of the "rewrite in Rust" movement, but not limited to it - there have been quite a lot of them.
I try out some from time to time and some are cute, some are pretty darn good, but almost none of them actually land up in my "regular habits" toolbox. There are a few good enough that I've cut over to them entirely or are trying to actively make them part of my habits, so this is a mini-series of posts about these tools. There aren't ads - nobody is paying me for this (unfortunately), I just like them and want to share them.
The first cab off the rank is Mosh. Dubbed "the mobile shell," Mosh is designed for mobile environments as an alternative to interactive SSH. It uses SSH to get started, but then hands off to a UDP protocol that allows for connections to be interrupted and to switch IP address or route entirely.
With a traditional SSH connection, any interruption breaks what I was doing completely. That can also include interruptions like:
I unplugged my laptop from my docking station so it switched from ethernet to Wi-Fi
I took my laptop to work and back
I took switched from Wi-Fi to cellular
Something in the TCP stack is just having a bad day
I've noticed that since switching to Fish (a post for another day) and Ghostty (also a post for another day) I've had a lot more hiccups with my SSH connection. Then I remembered I had mosh installed, so I ran that, and after a week (I kid you not) I realised that I had the exact same connection running for that whole week without terminating.
Mosh is fairly easy to install and use (unless you want to get super pedantic about firewall rules since it asks for a large UDP allowance) and I find it sits quite well now in my toolbox for remotely accessing systems. I just have to remember to use it more, since I'm so used to just typing ssh <host> rather than mosh <host>.
Mosh is available for just about any platform I care about and I strongly recommend giving it a try.
$ cat Program.cs
using System.Security.Cryptography;

using var alg = ECDsa.Create();
alg.ImportFromPem(File.ReadAllText("public.pem"));
var text = "totes legit"u8;
var signature = Convert.FromBase64String("MEQCIEcOOZWYJUZ6y2zJ61GpRwGw0nXOxpCepn2JDa5WCy42AiA100CUhgycKP5LUVUO9clU1omYu0JvX132pK6cT0Vrgw==");
var verified = alg.VerifyData(text, signature, HashAlgorithmName.SHA256);
Console.WriteLine($"Verified: {verified}");
This should work, right?:
$ dotnet run
Verified: False
uhhh, what??
After spending literally hours earlier this week debugging this, it turns out both programs are functioning as intended. Let's have a look at that signature again:
OpenSSL's signature is an ASN.1 blob (yay!), which due to ASN.1 integer signing means it ends up being variable-length. Repeated runs show the same prefix because of the ASN.1 header.
If we create a signature in .NET:
$ cat Program.cs
using System.Security.Cryptography;

using var alg = ECDsa.Create();
alg.ImportFromPem(File.ReadAllText("private.pem"));
var text = "totes legit"u8;
var signature = alg.SignData(text, HashAlgorithmName.SHA256);
Console.WriteLine(Convert.ToBase64String(signature));

$ dotnet run
S7/UdK12MLvUQfw4I+7Avudf5dHNx8XbAOtPISQEP28vKGezDH/8NCn2mb5nL3GYWI87Hv9SuUA0/+dw1cevYg==
This isn't ASN.1, and repeated runs shows that it is fixed-length.
It turns out that these are two different format for DSA-based algorithms. If you target .NET 5 or higher exclusively, then you can switch between these with an overload of SignData or VerifyData that takes in a DSASignatureFormat, which highlights the difference.
.NET defaults to - and .NET Framework/Standard only supports - IEEE P1363, which says "take the two data components and squish them together."
OpenSSL only supports RFC 3279, which describes an ASN.1 format that takes the two data components and puts them in individual fields inside of a SEQUENCE.
You can translate between them by adding or removing the ASN.1 data bytes, but there are no simple APIs to do this. 🙁
Despite my last post about blogging about more normal topics, I came across another weird edge case today that had me googling "how does git clone work" and discovering that most of the documentation on the topic is either wrong or incomplete in ways that probably won't matter to most of you, but did matter for me today.
Cloning a repository in Git comprises of a few different operations:
Initialise the repository.
Add the remote server as a remote named "origin"
Fetch all of the branch heads from the remote
Find the default branch and perform a checkout of that branch
Git is smart enough to figure out what remote's default branch is, so the checkout can pick main or master or something else entirely, depending on your configuration.
It turns out that step (3) above is subtly wrong in all of the posts I have ever read. git fetch or git fetch --all is not the same as what happens in a clone. Instead, git clone calls into git fetch-pack or git index-pack, which fetches packed refs.
Packed refs live in .git/packed-refs rather than .git/refs/remotes/origin/*.
Now you might be wondering, מאי נפקא מינה? What is the practical difference here?
Usually, nothing. But consider the following scenario:
The $REMOTE_URL host is a Linux machine with a case-sensitive filesystem, or is backed by a database that does not care about filesystem semantics (GitHub, Azure DevOps, etc.).
There is a branch on the remote named FOO/abc.
There is also a branch on the remote named foo.
The machine performing the clone/fetch operation has a case-insensitive filesystem.
Oh no. Oh dear.
In this case, git clone will succeed, and .git/packed-refs will look something like this:
On the other hand, if we were to try git fetch then this would fail:
* [new branch]      FOO/abc    -> origin/FOO/abc
error: cannot lock ref 'refs/remotes/origin/foo': there is a non-empty directory '.git/refs/remotes/origin/foo' blocking reference 'refs/remotes/origin/foo'
 ! [new branch]      foo        -> origin/foo  (unable to update local ref)
 * [new branch]      master     -> origin/master
Linux users will by default never see this, but macOS and Windows clients will suffer.
And this is the difference today that I discovered between fetching with git clone and fetching with git fetch, after way too much debugging and hair-pulling.
In which I ponder the value of personal blogs and once again consider writing more frequently.
Show full content
I've often felt like I was a little bit too late for the blogging generation. By the time I got to having an online presence, it was primarily forums which quickly shifted to social media (RIP Twitter).
At the same time, it's hard to find something that adds value. There's already an incredible amount of technical material online, so my posts generally tend towards interesting things I've learned, cool things I've come across, or strange things I've built/done, which I haven't seen anywhere.
I always found people who blogged stuff that I thought was public knowledge a little bit odd. Surely people can look things up in primary sources - that's what I always went for, after all - so what's the point of duplicating it?
It's only over the years that I've found a few key benefits, and one more has reared its head:
Not everyone knows how to look things up in primary sources or where those are. A lot of people don't follow prerelease discussions or read release notes or even documentation at all (lol), but still find some extracts to be interesting and relevant.
Primary documentation can often be disparate and complex, and it can take somebody's real world experience to tie it all together in a single story/tutorial. For example, WireGuard does have docs, and I've used WireGuard too, but I recently came across this post which does a full end to end run of basically the same stuff I built, in a way that is far easier to copy and follow than anything else I had come across. As another example, I have actually received a few emails from people thanking me for my ZIP/ZIP64 post in helping them understand the format and write up their own implementations.
Something that you wrote, the way that you understand it, can be extremely useful for yourself in future. Quite a few times I have actually Googled a problem and found my own blog post on the first page of results with the answer staring straight back at me. Every now and then the same subject might come up at work, and a few times I have linked coworkers to one of my posts instead of explaining it all over again from scratch to them.
Large Language Models are generating absolute garbage left right and center, and it is good to have a source you can trust to be knowledgeable and correct, rather than sources that simply sound plausible and can range from being pretty much correct to being entirely wrong and having you waste hours digging through something only to find that the file or method or config option or environment variable that you are using does not actually exist at all in the first place.
So with that in mind I am once again going to try to write up stuff a bit more for both myself and for you lot. Things I come across, things I'm working on, and probably also some useful bits of the .NET ecosystem that I suspect most developers don't know about yet, even if I've already been using them for a while. After all, that is where I do most of my coding. Maybe even some non-computer stuff, though as tempting as it is these days I'll try stay out of politics (ughhhhh).
Hopefully I'll be able to publish something every week or two, and I hope to see you around here.
And as always, we are well past the era of open comments on blogging platforms, but I'm reachable by email or on social media.
A little bit of a deeper dive into how building cross-platform Linux container images works, thanks to a bug with running .NET.
Show full content
I like to deploy my applications as OCI images. Technically I'm using Podman these days rather than Docker, but everyone who knows what an OCI image is knows what I mean when I say "Docker image."
I also like to build these images for both linux/arm64 and linux/amd64. I have one ARM64 server and my laptop is ARM64 but I also have a bunch of x86_64/x64/amd64 servers that I deploy to as well, and it's nice to have one image that works on both of them.
When doing a multi architecture build with Docker or Podman, it seems that they don't actually know anything about these other architectures or ensure that they can run. They rely on QEMU or more specifically qemu-user-static with binfmt_misc, so that when the Kernel sees and tries to run the executable for the wrong CPU architecture, QEMU kicks in and emulates it.
Unfortunately, .NET does not officially support running in QEMU and since around the .NET 6/7 timeframe has had problems with running the arm64 binaries on amd64 hosts.
This is particularly painful to learn after learning that the bug which causes .NET to fail on QEMU was fixed in version 9.1 in late 2024. Unfortunately that was too late to make the latest Ubuntu releases, which ship QEMU as new as 9.0.
Looking over GitHub Issues and Pull Requests, the binfmt image above has yet to update despite various attempts over the years due to it failing some compatibility test suites, since any change here has the potential to break so many CI/CD pipelines...
Meanwhile, I too have yet to actually manage to build 9.1 from source and get it working, so in the meantime I am stuck with the three-year-old workaround of adding the following magic to my Dockerfile to continue running in QEMU v7:
A rough edge case in Linux kernel configuration ended up taking my public /24 subnet offline regularly. Read this post to find out why.
Show full content
In the early days of the internet, massive blocks of IP addresses were allocated to entire organisations or groups. What we would now call a Class A network, a /8, or about 16 million IPv4 addresses, were handed out to organisations like AT&T (12.0.0.0/8), Apple (17.0.0.0/8), Ford (19.0.0.0/8), and Amateur Radio Digital Communications - also known as ARDC - was given the entire block of 44.0.0.0/8 for amateur radio use.
Amateur Radio operators can ask for a slice of this for amateur radio research and experimentation purposes, and I went through this process a while back and was allocated 44.31.106.0/24. This block is used to host a few Amateur Radio-related services, but to get there I had to learn how to host a public subnet, routing, BGP advertisements, and so on.
To manage this subnet I have a small Linux VPS that acts as the router. It advertises the subnet via BGP and runs a WireGuard server. Every other address on the network is another WireGuard client, or routed via a WireGuard client.
Unfortunately, I soon discovered that from time to time my entire subnet would kind of just fall off the internet. Upon further investigation I found the following in the kernel system logs:
This led me to discover that the Linux kernel can only track so many connections, and likely since this is acting as a router for a /24 network, it probably needs to deal with 255 times higher typical background noise (scanners, scrapers, NMAP, etc.) than that of a single VPS.
Fortunately this can be tweaked by writing a bigger number than the default ~7000 to /proc/sys/net/nf_conntrack_max. That doesn't seem so hard, but what if I want this value to be higher all the time, like after rebooting the server?
Well as the internet would have you believe, that is where sysctl comes in. This little tool can also be used to set kernel parameters, and has a config file in /etc/sysctl.conf - or in more recent systems, multiple config files in /etc/sysctl.d/*.conf which get loaded on startup.
So I set my parameter as a once-off, added it to the configuration file, and all is good. Right?
So after a few months and another reboot, it turns out that the answer is no.
And boy did this have me stumped.
After roping in a friend, checking systemd settings, enabling SSYTEMD_LOG_LEVEL=debug and a bunch of other diagnostics strategies, nothing worked at all.
Now surely you would think that a bug from 2006 wouldn't still be biting me in the latter half of 2024, right?
.... right??
Ha.
Haha.
Hahahahaha.
This is a bug that is seemingly unfixable, but because it is obscurely documented in man sysctl.d, it is considered to be not a problem.
The key to my problems is this little paragraph here:
The settings configured with sysctl.d files will be applied early on boot. The network interface-specific options will also be applied individually for each network interface as it shows up in the system. (More specifically, net.ipv4.conf.*, net.ipv6.conf.*, net.ipv4.neigh.* and net.ipv6.neigh.*).
Many sysctl parameters only become available when certain kernel modules are loaded. Modules are usually loaded on demand, e.g. when certain hardware is plugged in or network brought up. This means that systemd-sysctl.service(8) which runs during early boot will not configure such parameters if they become available after it has run.
To set such parameters, it is recommended to add an udev(7) rule to set those parameters when they become available. Alternatively, a slightly simpler and less efficient option is to add the module to modules-load.d(5), causing it to be loaded statically before sysctl settings are applied (see example below).
It turns out that sysctl tries to run its configuration before nf_conntrack is loaded. And as you might now guess, setting nf_conntrack_max does absolutely nothing if there is no nf_conntrack to max.
The workaround I went with was to add nf_conntrack to /etc/modules-load.d/modules.conf. This makes nf_conntrack load earlier in the boot process, allows sysctl to configure it, gives me more maximum connections to track for my public subnet, and stops my whole subnet periodically maxing its connections and effectively going offline every so often.
I could have probably done something fancier with udev rules, as the docs suggest, but at this point I'm just happy to have it working and not have my status monitoring frequently pinging me that one or more of my Amateur Radio services just went offline.
In this post I build a custom Linux kernel module to teach the computer how to scream.
Show full content
I came across the following Toot today on Mastodon:
A++-grade bait
and I immediately got nerd-sniped into trying this. I've seen the code for some small Linux kernel modules before, I know that kernel modules can create files and filesystems, so how hard could it be?
Very, as it turns out. At least for someone like me who does not know what they are doing.
Essentially I would need to build a Linux kernel modules that defines a new device, /dev/scream. When someone reads from this device, all they get back is an infinite stream of 'a' bytes, with the occasional 'A' byte.
Building a Linux kernel module is supposed to be quite simple. You import a few headers, declare a startup and a shutdown function, and that creates a .ko file that you can load into the kernel.
In the module startup, you can do additional things, which you should effectively undo when you exit.
This gets built by a Makefile which imports most of its logic from the Linux kernel headers code. Mine looked like this:
KERNEL_DIR=/lib/modules/$(shell uname -r)/build

obj-m += scream.o

all:
	make -C $(KERNEL_DIR) M=$(PWD) modules
clean:
	make -C $(KERNEL_DIR) M=$(PWD) clean
Note that the name of the object has to match the name of the source file, which matches the name of the extension. i.e., foo.c becomes foo.o which produces foo.ko.
I have yet to figure out how to change that, how to include additional source files, and how to move things around into subdirs (i.e. src/foo.c produces obj/foo.o which results in bin/foo.ko).
After a lot of research and finding outdated examples (it turns out that over time the kernel function signatures have changed) and even some fun Stack Overflow examples with subtle errors that don't work (and to think that Copilot/GPT gets trained on this junk!!), I eventually had a working sample that created a new device class, created a new device in that class, and then handled function calls for that device. This paragraph alone was about 2-3 hours of experimentation and failure.
And just when I thought I was done, I found based on one random comment on a forum, that there is an easier way to do this all with miscdevice. Since I'm building something very simple and don't need any additional complexities that can be done by the more powerful APIs that I was using, I can remove a whole bunch of that complexity with simpler APIs.
The other advantage is that when creating a miscdevice I can specify a mode for the file - i.e. rw-rw-r-- style permissions for my device. This was quite useful because with the existing APIs only root could use my device, and I wanted any user to hear the computer screen. The only other way I could find would be to chmod it myself but that felt hacky.
So if you are trying to build a custom device driver on Linux, and it is fairly simplistic such as a joke/meme device, I highly recommend looking into the Miscellaneous Devices API.
For me, my device was simple. Opening the file doesn't need to do anything. Closing the file doesn't need to do anything. When reading the file, since I want to scream indefinitely, I just want to completely fill the output buffer.
The actual value (if you can call it that) in my driver comes down to one simple, unoptimised loop, which writes one byte at a time back from kernel space to user space:
static ssize_t scream_device_read(struct file *file, char __user *buf, size_t count, loff_t *offset) {
    uint8_t rand;

    for (size_t i = 0; i < count; i++)
    {
        get_random_bytes(&rand, sizeof(rand));

        char value;

        if (rand > 200) {
            value = 'A';
        } else {
            value = 'a';
        }

        if (copy_to_user(buf + i, &value, 1)) {
            return -EFAULT;
        }
    }

    return count;
}
Then with everything hooked up correctly, it all works:
yaakov@ubuntu-vm:~/Desktop/dev-scream$ ls -l /dev/scream
cr--r--r-- 1 root root 10, 122 Aug 11 18:02 /dev/scream

yaakov@ubuntu-vm:~/Desktop/dev-scream$ head -c50 /dev/scream && echo
aaaAAaAaAaaaaaaaaaaaaaaaaaAaaaAaaAAaaaAaaAaaaaaaAa
I came across a way for Swift code to compile for GameBoy Advance and decided to try it on real Nintendo hardware.
Show full content
Earlier this week whilst scrolling on Mastodon I came across this post:
This immediately got my attention for a few reasons:
Swift was only released in 2014, the same year as the "new" Nintendo 3DS line. It did not exist (publicly) when the GameBoy Advance was released in 2001, nor any of its successors up until the new 3DS and Switch.
I have the tools needed to try and compile this and run it in an emulator.
I have the tools needed to try and compile this and run it on real Nintendo hardware!
Unlike the DSi and the 3DS, the original DS series had two game cartridges - one at the top for DS games, and one at the bottom for GameBoy Advance games.
And I also happen to have an EZ-FLASH Omega Definitive Edition which I got from Retro Gaming Parts here in Australia, which lets you load up multiple ROMs onto a microSD card, and even mimic one entirely which is necessary for Pal Park.
(Also, just as an aside, it kind of hurts to be buying things from a retro gaming store. That's a great way to make me feel old.)
So if I combine all of this I should be able to run Swift code in GameBoy Advance mode on a Nintendo DS. Let's put this all together:
Set up an environment variable for the Swift toolchain. Looking over the Makefile this seems like it should have been automatically detected, but for me it wasn't:
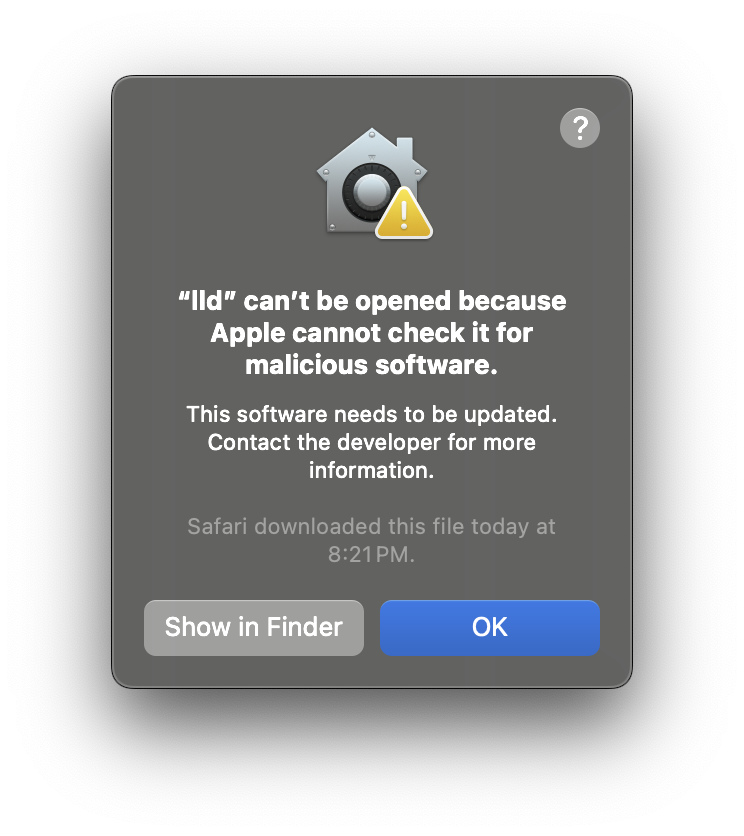
Watch the build fail as Apple get really antsy about running un-notarised binaries from the GBA-LLVM toolkit.
Apple being paranoid.
Every time that this came up I had to click on 'Show in Finder', right-click on that executable, select 'Open,' tell macOS that yes I really do want to open it, then watch it start up and immediately exit because it was launched with no command-line arguments. Still, that is enough to let macOS launch it from make on subsequent attempts.
Loop between steps 7 and 8 above until make succeeds, and produces hello world.gba
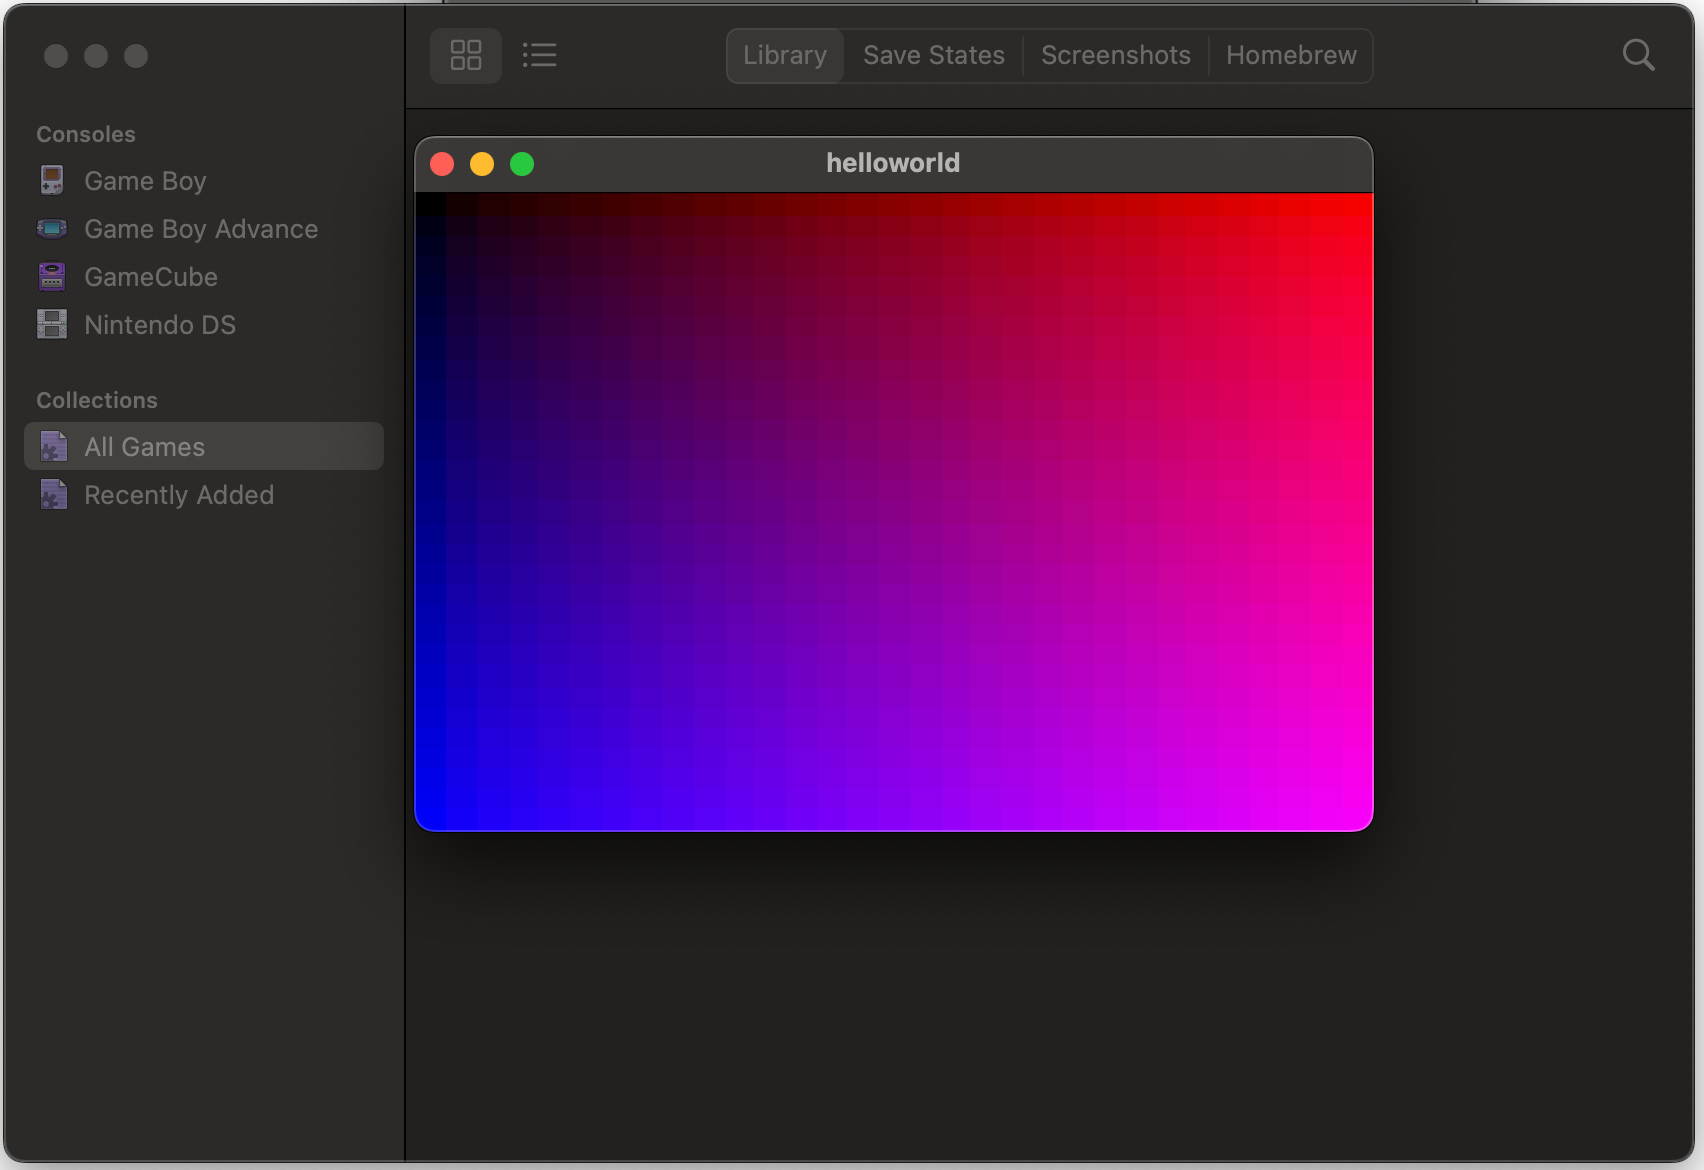
To check that it works before dealing with hardware, drag helloworld.gba into your favourite emulator. I used OpenEMU.
A blue-to-pink gradient rendered in OpenEMU.
Now on to the hardware side. First, find your Nintendo DS and EZ-FLASH cartridge.
Make sure that the switch on the EZ-FLASH cartridge is in the "A" position so that it boots into its own firmware and menu, not into whatever ROM was saved to its NORFLASH memory.
Pop out the microSD card from the cartridge and insert it into your computer, adapter, etc.
Copy helloworld.gba onto the microSD card.
Put the microSD card back into the cartridge.
Put the cartridge into Slot 2 (the bottom GameBoy Advance slot) of the Nintendo DS.
Turn on the Nintendo DS.
Select "GBA Game" from the DS system main menu.
Locate helloworld.gba in the filesystem menu from the EZ-FLASH and press A to launch it
Observe the Swift code rendering a gradient on official Nintendo hardware.
Swift code rendering a gradient on the lower screen of a Nintendo DS, a device which predates Swift by 10 years.
In this post I go through the journey of overusing Kubernetes and how systemd can actually do most of what I use it for.
Show full content
Yes, I'm fully aware those are two separate things, but hear me out here for a moment.
Back in 2018 I was hearing a lot of stuff from all angles and all sorts of friends and influences about Kubernetes, and from what I heard it seemed like a pretty promising piece of kit to use. At the time, I actually went out and bought a NUC to act as a little hypervisor so that I could play around with a small cluster at home.
The main lesson that I learned is that although Kubernetes is made up of all sorts of pieces and web services and sidecars and webhooks, basically acts as a giant while loop as follows:
while (true)
{
    var current_state = GetCurrentState();
    var desired_state = GetDesiredState();
    var diff = CalculateDiff(current_state, desired_state);
    ApplyDiff(diff);
}
If I said there should be a Pod here, and there wasn't, Kubernetes would create it. If I said there should be 3 replicas and there were 4, Kubernetes would get rid of one.
This actually extended out in really cool ways, such as with cert-manager. If I said there should be a valid TLS certificate for some domain, and told Kubernetes how it could request one, then if the certificate was missing or expiring, Kubernetes would go out and get a new certificate and install it in the web server automagically.
But as the memes go, what I was using Kubernetes for was fun to experiment with, but total overkill.
Whilst most problems I encountered did provide a legitimate learning experience, it turns out that Kubernetes, particularly on a NUC, is not bedroom-friendly. Kubernetes chews through a lot of resources, and while (true) loops tend to chew through a lot of CPU. This made my computers run constantly, run hot, keep the fan running, and made it hotter and noisier and harder to sleep.
Even in the cloud, this effect gets felt in different ways. My personal experience on Azure Kubernetes Service was that I immediately lose a massive chunk of RAM to their Kubernetes implementation, and it uses about 7-10% idle CPU on worker nodes. Even with single-instance Microk8s on a small VPS I had an idle CPU load hovering around 12% on a 2x vCPU x86_64 box, and K3S which is supposed to be leaner is at about 6% constant CPU consumption on a 2x vCPU Ampere A1 machine.
(No guesses as to which cloud provider that latter one is running on.)
I even tried running Kubernetes on a Raspberry Pi but I couldn't actually find an implementation that would happily run without kicking up heat/fans and that would actually leave enough CPU behind for my workloads.
Yet the thing that kept bringing me back was the automation. Particularly with GitOps and Flux, making changes was a breeze. With the container image automation and recent addition of webhooks in Flux v2, all I had to do was push a new container image and within seconds my servers had pulled the new container image and were running the new version of the application in production.
Every so often I would stick my head back out of Kubernetes and look at the rest of the world and see if there is something else that can do the same container automation and just like Noah's dove, I would come back empty-handed.
The only solutions I could find were "just recreate the whole container with all of the original command line arguments" as though I have the patience to manage that or remember each flag, or "here is some magic goop that works if you give it full control of docker.sock" which I never really liked the idea of.
I have even been sorely tempted to build my own thing but surely, surely, there is something out there already that does this, right?
Well, recently, I came across Podman auto-updating. The simplest way to explain Podman is an alternative Docker CLI (yes I know that is oversimplified), but it has one particular feature that caught my eye.
Once you create a container, Podman can automatically generate a systemd service file to start and stop that container. Starting the service creates (or replaces) the container, and stopping the service removes the container. So that already takes care of my "manage each original flag" problem.
But the cherry on top if that if you tag your containers with io.containers.autoupdate, then once a day on a timer or on-demand when you podman auto-update, it will check for a new image and if there is one it will recreate the container for you with the new image.
This article from Fedora Magazine basically gave me 99% of the magic sauce. There were only two more components I needed to make this work:
Run systemctl --user enable mycontainer.service to make the container start up automatically, whenever I log in.
Run loginctl enable-linger so that I "log in" when the server starts up.
These three components - Podman, systemd, and user lingering, now give me 99% of the benefit I was getting from Kubernetes with vastly reduced complexity and none of the CPU/memory hits associated with it.
I've migrated a full set of services from one VPS to a new one with half the vCPUs and RAM. It's only been running for a handful of hours so far, but I can see that it is running significantly lighter, snappier, and with a lower compute cost to boot, which gives me higher service density and more bang for my buck.
Of course, as my luck would have it, Podman integration with systemd appears to be deprecated already and they're now talking about defining containers in "Quadlet" files, whatever those are. I guess that will be something to learn some other time.
To migrate Pokémon from the 3rd-gen games all the way to Home is possible, but for how much longer? I did it while I still could, here's how.
Show full content
A couple years ago I wrote up this little post about how to transfer Pokémon between generations.
Unfortunately, since the Generation VI games, moving any Pokémon from an old generation requires an internet service provided by Pokémon, and internet services have a habit of becoming unavailable or discontinued.
Next month the Nintendo 3DS eShop will be shutting down, which means that it will no longer be possible to download some of the software to perform these transfers. After that, it's anyone's guess as to how long the servers stay online.
I wanted to get in one of these maximum-generation transfers before that date, so I bred a few Eeevees in Pokèmon Emerald, with the goal of bringing them into Pokémon Home, and then hopefully soon I can bring them into the Generation IX games (Scarlet/Violet) once they gain Home compatibility.
Generation III to Generation IV
To migrate Pokémon from Generation III (Ruby/Sapphire/Emerald/Fire Red/Leaf Green) to Generation IV (Diamond/Pearl/Platinum/Heart Gold/Soul Silver), you need a Nintendo DS. The original. Not even a DSi will do. You need the original hardware that has both a DS game cartridge slot as well as a GameBoy Advance game cartridge slot.
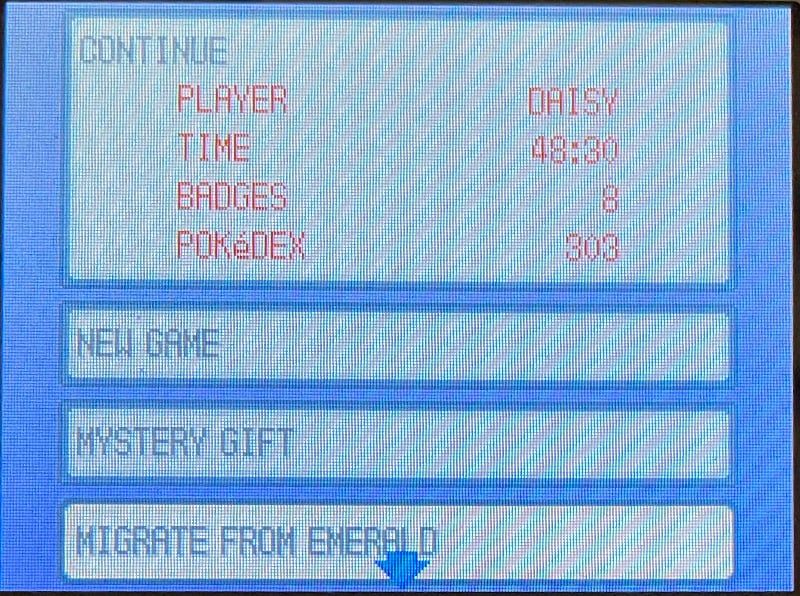
Once you've advanced in your Generation IV game to a point where you've unlocked Pal Park, you can migrate Pokémon from the Generation III game. Simply insert both games into the Nintendo DS at the same time, and select Migrate from the game's startup menu:
The Pokémon Platinum main menu, with "MIGRATE FROM EMERALD" as an available option.
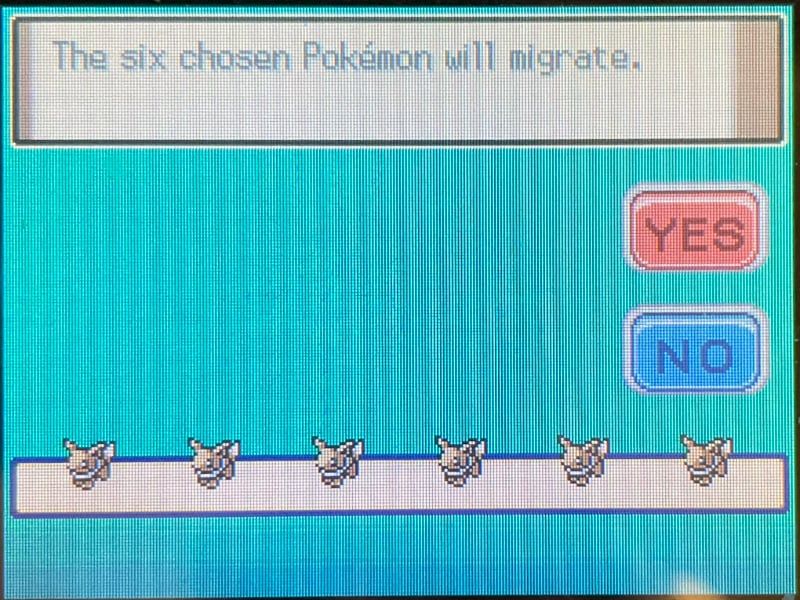
After this you'll be asked to pick exactly 6 Pokémon to migrate - no more and no less.
⚠️If you're playing Diamond/Pearl/Platinum, you can only do this once per day. If you're playing Heart Gold or Soul Silver, there is no such limitation.Migrating 6 Eevees from Pokémon Emerald to Pokémon Platinum
Once you've done that, head over to Pal Park where you'll have to join a Catching Show. This basically entails running around the terrain where your Pokémon will spawn, and throwing special Park Balls at them, which by the way have a 100% catch rate. Your recaptured Pokémon will retain the balls they were originally caught in, as well as their original OT (Original Trainer), nickname, etc.
Catching my own Pokémon, with a special ball that will never be seen again.
After catching all 6 Pokémon, they get placed in your PC boxes, and now we can bring them to Generation V.
Generation IV to Generation V
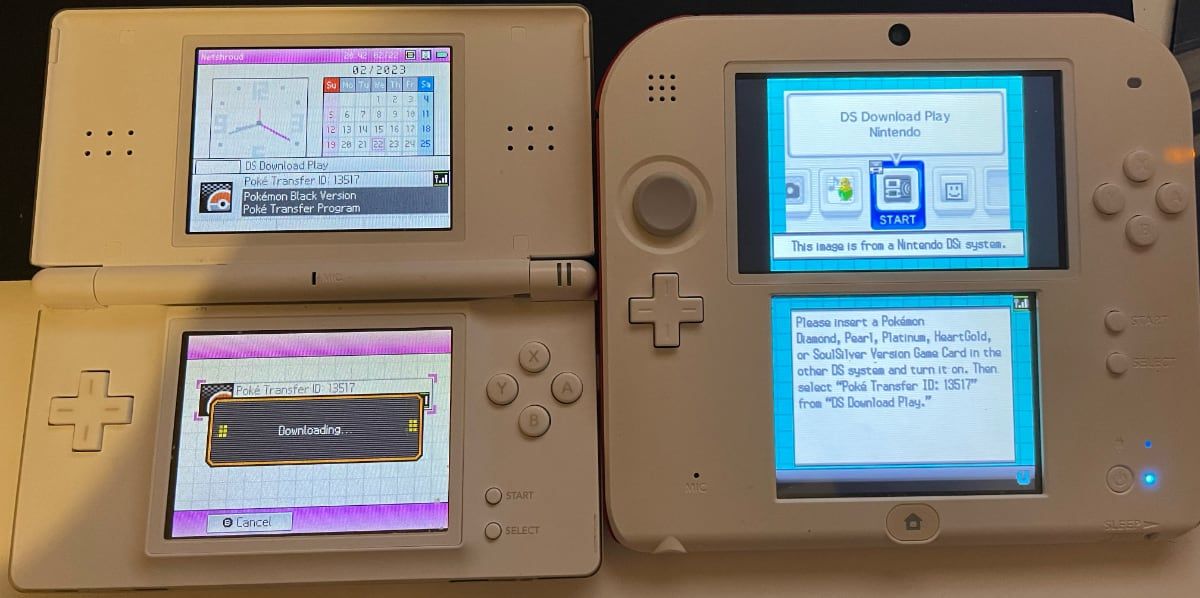
To migrate Pokémon from Generation IV (Diamond/Pearl/Platinum/Heart Gold/Soul Silver) to Generation V (Black/White/Black 2/White 2), you need two Nintendo DS/DSi/2DS/3DS devices. One of them plays the Generation V game, the other opens DS Download Play with the Generation IV game cartridge inserted.
To start the process, you need to make your way to the Poké Transfer Lab on Unova Route 15. There you can start a DS Download Play server, and that's about all you do on this device.
A Nintendo DS (left) downloading the Poké Transfer minigame from Pokémon Black in the Nintendo 2DS (right)
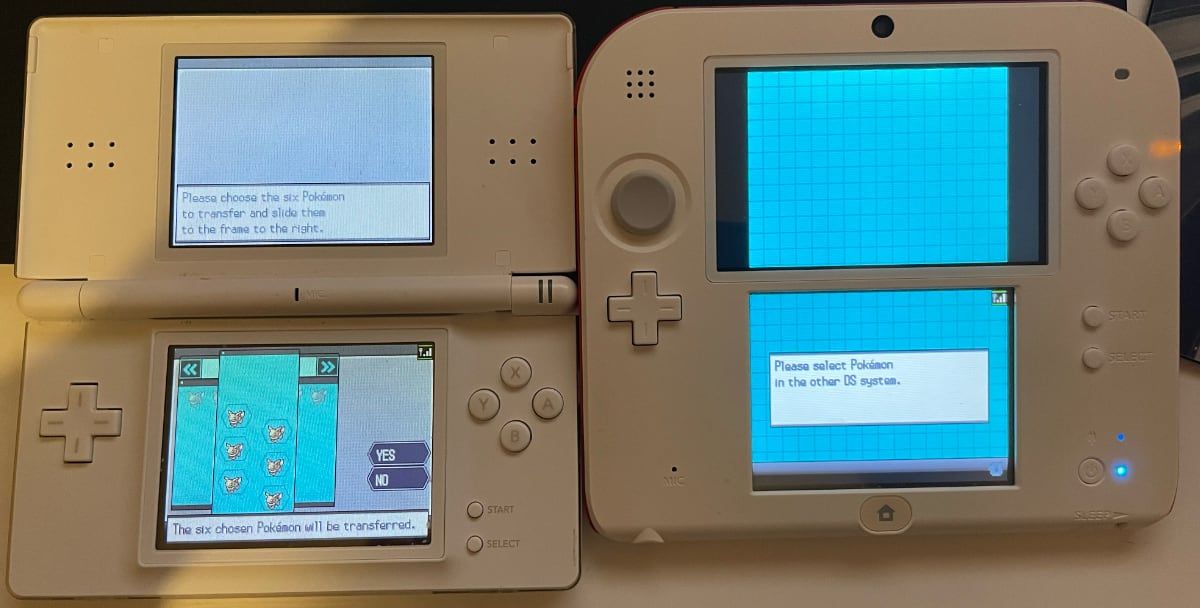
Back on the second device with the Generation IV game loaded, select up to 6 Pokémon to transfer at once.
Selecting Pokémon to transfer from Pokémon Platinum to Pokémon Black.
Now you're faced with one of the most annoying minigames that Pokémon has to offer - you're basically given a Poké Ball catapult and have to launch slow-moving balls at your Pokémon as they run around a field and hide in bushes.
Once you (eventually) complete that, the transferred Pokémon are placed in your PC boxes.
Generation V to Pokémon Bank
This is where things get tricky and annoying with the Nintendo eShop closure looming.
To migrate Pokémon from Generation V (Black/White/Black 2/White 2), to Generation VI or newer, you need to transfer them to Pokémon Bank.
This requires that you have the Pokémon Bank application. For the moment it also requires that you have an active Pokémon Bank subscription. And lastly, it requires that you have downloaded the Poké Transporter application, which you can only do through the Pokémon Bank application.
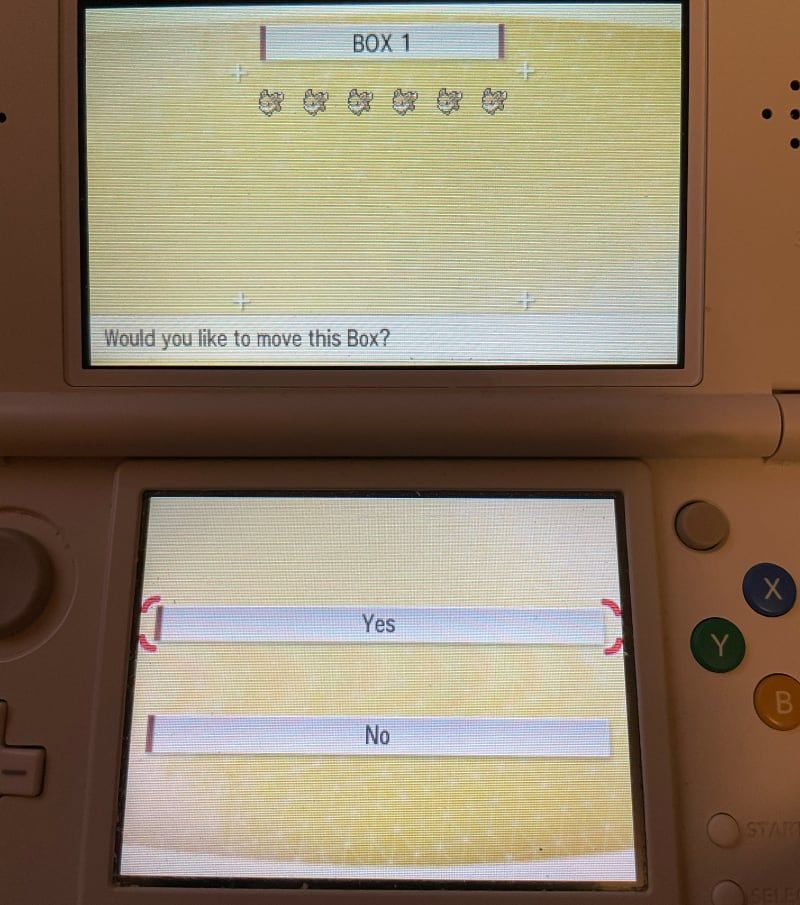
Assuming you have all that, open your Generation V game and make sure that PC Box 1 contains only the Pokémon that you wish to transfer to Pokémon Bank. Then, open Poké Transporter and transport your Pokémon into the cloud.
Migrating Pokémon from Pokémon Black to Pokémon Bank - the very first cross-generation transfer which requires an internet connection, a subscription, and some downloaded applications which won't be available for much longer.
Once they arrive in Pokémon Bank they will be in the Transport Box. I don't know if the Home transfer can see this, so I moved them out into a regular Pokémon Bank Box anyway just to be sure.
⚠️In order to move Pokémon around in the Pokémon Bank boxes you need a Pokémon Bank-compatible Generation VI or VII game, i.e. one of X, Y, Omega Ruby, Alpha Sapphire, Sun, Moon, Ultra Sun, or Ultra Moon.Pokémon Bank to Pokémon Home
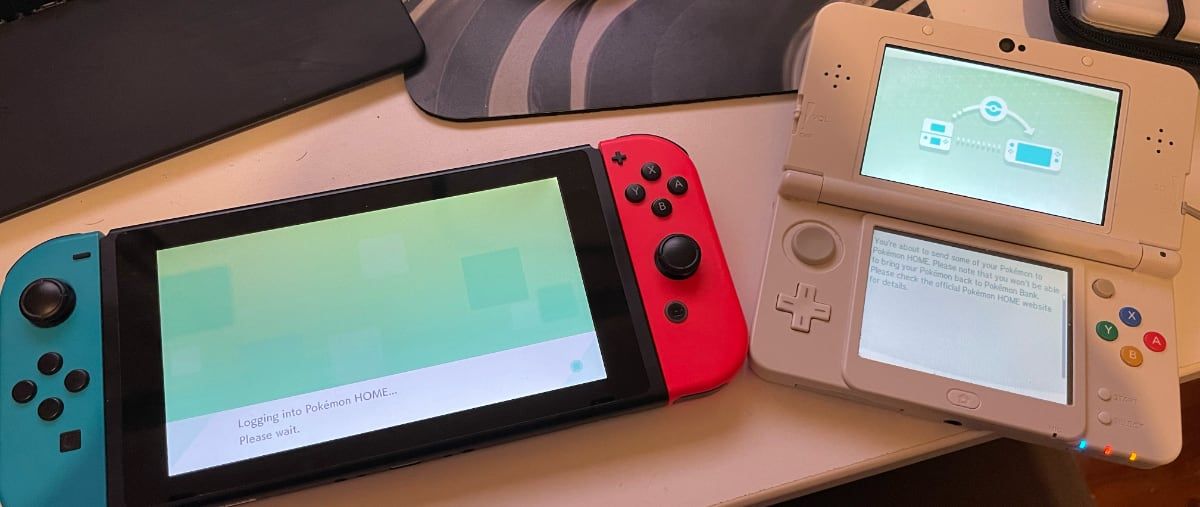
To migrate Pokémon from Pokémon Bank to Pokémon Home, you need an active Pokémon Home Premium subscription, and either Pokémon Home for Nintendo Switch, or Pokémon Home for iOS or for Android. You don't even need the 2DS/3DS anymore, if both Bank and Home are tied to the same Nintendo Network ID.
Preparing to transfer Pokémon from Pokémon Bank on the Nintendo 3DS (right) to Pokémon Home on the Nintendo Switch (left).
On the Nintendo Switch version, there is a migration button on the main screen after the application logs in. On the iOS and Android versions, there is a Move Pokémon button under Options > Account.
Both Pokémon Bank and Pokémon Home have very good inbuilt documentation for this. Press the buttons and follow the instructions and you can't really go wrong.
Conclusion
Nothing that Pokémon or Nintendo could really do at this point would take away the ability to move Pokémon between Generations III and IV, IV and V, or for that matter to trade Pokémon between Generations I and II. All of that happens offline between two devices.
Making Pokémon transfers require cloud services with the launch of Pokémon X and Y in 2013 always made me a little bit uneasy because cloud services are not forever. Although people say that the internet is forever, services die, links rot, and things do actually become unavailable or get forgotten.
With the closure of the eShop next month, only people who are prepared and had the opportunity to be prepared will be able to transfer Pokémon from Generation V, VI, or VII to newer games. New players who want to revisit old games may never be able to do this. Even for those of us who will still be able to perform these migrations are at the mercy of service availability and maintenance.
I do miss technology that used local area networks and could work without an internet connection, and I wish they would bring that back.