If one needs to run neo4j natively on the Apple M1 hardware (for example to analyze/query BloodHound ingestor data from an Active Directory) and benefit from the fast CPU it seems to be possible to build and run from source. … Continue reading →
Show full content
If one needs to run neo4j natively on the Apple M1 hardware (for example to analyze/query BloodHound ingestor data from an Active Directory) and benefit from the fast CPU it seems to be possible to build and run from source.
I have prepared this “experimental” howto so that others can reproduce this
Pre-Requisites :
make or gnu-make
wget or curl (to download sources from terminal – otherwise just use your browser)
git
Xcode full setup (better to have this for development, not entirely sure you need it for neo4j build, but I have it installed since it is a must)
First we need to get a working native version of Java on the M1 ARM64 Apple. This can be achieved by downloading and installing a package from AZUL and selecting the proper options for our platform -> Java 11 (LTS) macOS ARM 64-bit JDK as seen below
Azul Java for MacOS ARM 64-bit
Once installed, verify that we can use Java by running the following in the terminal
I have configured Maven on my Apple M1 ARM64 system as follows
mkdir -p $HOME/SRC/maven
cd $HOME/SRC/maven
wget https://apache.miloslavbrada.cz/maven/maven-3/3.8.1/binaries/apache-maven-3.8.1-bin.tar.gz
gunzip apache-maven-3.8.1-bin.tar.gz
tar -xvf apache-maven-3.8.1-bin.tar
rm apache-maven-3.8.1-bin.tar

# Now we need to define this new path to our environment
# I have added the path to my $PATH as follows (adjust to your needs accordingly)

export PATH=bin:/usr/local/bin:/usr/bin:/bin:/usr/sbin:/sbin:/opt/X11/bin:/opt/pkg/sbin:/opt/pkg/bin:/Library/Apple/usr/bin:/Users/user/.cargo/bin:/usr/local/go/bin:/Users/user/go/bin:/Users/user/SRC/maven/apache-maven-3.8.1/bin
Now we should have mvn in our paths so we can move on to build Neo4j
We will now git clone Neo4j source to our SRC directory and set some variables
cd $HOME/SRC
git clone https://github.com/neo4j/neo4j
cd neo4j
ulimit -n 40000
export MAVEN_OPTS="-Xmx512m"
mvn clean install
Now after a while the build will fail on the following test
maven build tests failNeo4j kernel test fail
Im not really sure why this happens right now and I did not investigate this more right now , but we can build Neo4j without these tests and it will compile and run on the M1
So run the build with these options instead
mvn clean install -DskipTests
Build neo4j success
So now we can test the newly compiled Neo4j instance, but before we do we need to extract the TGZ build
cd $HOME/SRC/neo4j/packaging/standalone/target/
tar -zxvf neo4j-community-4.3.1-SNAPSHOT-unix.tar.gz
To start the Neo4j DB run the following command (if you built it in $HOME/SRC/neo4j)
Following should be visible on your console after it starts
Neo4j running on Apple M1 ARM64
What seems to be broken right now on the M1 is the web console interface to Neo4j – I could not get it to render the web page interface and was left only with a blank window when accessing http://127.0.0.1:7474
I needed to access the console so that I could change the default passwords so instead I tried to connect with the cypher-shell and it allowed me to reset the default credentials and password neo4j (neo4j:neo4j)
So one this was done I wanted to see if I could populate the fresh Neo4j DB with some data – mainly Bloodhound ingestor data from an Active Directory.
BloodHound 4.0.2 can be downloaded from the projects Git and the MacOS x86-64 binary works fine with Rosetta2, however it fails to build for me – I have used pkgsrc/lang/nodejs (version 14.16.0) for this but I could not build yet a native ARM64 BloodHound
cd $HOME/SRC
mkdir BLOODHOUND
cd BLOODHOUND
wget https://github.com/BloodHoundAD/BloodHound/releases/download/4.0.2/BloodHound-darwin-x64.zip
unzip BloodHound-darwin-x64.zip
cd $HOME/SRC/BLOODHOUND/BloodHound-darwin-x64/BloodHound.app/Contents/MacOS
./BloodHound
Before BloodHound is fully executed you need to allow the unsigned app in the MacOS security menu to run.
Login with your new neo4j password (user: neo4j)
BloodHound 4.0.2
Now you can try and upload some BloodHound ingestor data from some AD of yours to test the fresh Neo4j on the Apple M1 ARM64 platform – It would be great to benchmark Neo4j on the M1 compared to other architectures (x86_64) but my expertise on that is limited – what I noticed however is the BloodHound ZIP imports to the DB are faster on the M1 than on my Core i5 Panasonic Toughbook C31 with an SSD disk.
For anybody that wishes to experiment and track NetBSD evbarm(aarch64) -current on the latest Raspberry Pi4 – I have compiled this how-to guide. Pre-requisites RPi4 Model B Working Linux distribution on which we will prepare the environment microSD card + … Continue reading →
Show full content
For anybody that wishes to experiment and track NetBSD evbarm(aarch64) -current on the latest Raspberry Pi4 – I have compiled this how-to guide.
Pre-requisites
RPi4 Model B
Working Linux distribution on which we will prepare the environment
microSD card + USB adapter (4 GB minimum)
2 USB flash drives/sticks (try to use different size USBs – it makes Identification much easier)
one 32 GB minimum to hold the NetBSD system (I have used 32GB SanDisk USB fash)
one 1 GB minimum to hold the NetBSD installer ISO (I have used 8GB Kingston USB flash)
Keyboard + Mouse (best experience is with wireless keyboard + touchpad combo which uses one USB HID slot on the RPI4)
HDMI monitor or LCD attached to the RPi4 (I have used the Waveshare 800×480 LCD)
working network environment (wireless works only with 3rd party USB dongles) – Ethernet
A little note on the USB flash sticks I have used here
32GB USB 3.1 SanDisk 3.2Gen1 attaches to the “blue” USB ports of the RPi4
8 GB USB DataTraveler 2.0 attaches to the “black” USB ports of the RPi4
What does not work on NetBSD
Inbuilt Wireless/Bluetooth – works with 3rd party dongles
Remove the kernel files in firmware-master/boot/ extracted directory
rm -f firmware-master/boot/kernel*
Now we will prepare a microSD card (I have used a 32GB with a USB adapter) Attach it to the computer USB port. We will re-format and re-label the microSD card now. Unmount it first if there as a FS already present when you attached the card
sudo umount /path/to/mount
Make sure to check the partition is W95 FAT32 on the corresponding device node of the microSD card (in this example it is /dev/sdc – make sure you check yours ! ) If unsure run dmesg and check for the last events to see what device node the microSD card registered as. Adjust accordingly ! Otherwise data-loss may occur
sudo fdisk /dev/sdc
Make sure we only have one partition type B (W95 FAT32), if not create it. Next we will need to re-format the microSD and label it as UEFI
sudo mkfs.vfat /dev/sdc1 -n UEFI
Eject the drive or re-insert. If you dont have automount, mount the miscoSD accordingly. In this example it is mounted under /media/user/UEFI Now we will copy over the boot UEFI directory as follows to the microSD
cd $HOME/RPI4/UEFI
sudo cp -rv firmware-master/boot /media/user/UEFI/
sudo cp RPi4_UEFI_Firmware_v1.20.zip /media/user/UEFI
cd /media/user/UEFI
sudo unzip RPi4_UEFI_Firmware_v1.20.zip
sudo rm RPi4_UEFI_Firmware_v1.20.zip
The resulting files should look like this
UEFI layout
Now we should be done with the UEFI microSD card, unmount it and remove the USB adapter ! lets move on to the NetBSD -current installation ISO
sudo umount /media/user/UEFI
1.2 Preparing the NetBSD install ISO
Download the NetBSD -current evbarm (aarch64) installation ISO The daily images change each day so download the one that matches the current day from here http://nycdn.netbsd.org/pub/NetBSD-daily/HEAD/
cd $HOME/RPI4
wget http://nycdn.netbsd.org/pub/NetBSD-daily/HEAD/202105230300Z/images/NetBSD-9.99.82-evbarm-aarch64.iso
I have used an 8GB size drive to make identification easier for the Installer USB. We will take the smaller USB flash drive/stick which should have enough size to hold the NetBSD ISO (minimum 1GB size) and attach it to computer – again if the system automounts the external storage, unmount it and check the device node the USB drive registers under – in this example we use /dev/sdd USB mass-storage device labelled as USB
sudo umount /media/user/USB
And move the NetBSD ISO to a flash drive – I have used an 8GB size drive to make identificiation easier. (unmounted – check the device node it registers under !! Otherwise data-loss may occur – if unsure check dmesg)
cd $HOME/RPI4
sudo dd if=NetBSD-9.99.82-evbarm-aarch64.iso  of=/dev/sdd
This should not take long since the ISO file is about 240MB big, once done remove the USB stick and remember that this is the Installer USB drive.
1.3 Preparing the NetBSD install ISO
Next we prepare the larger 32GB USB flash and completely wipe it so that no partitions exist on it whatsoever. Easiest way is to use sgdisk on the drive after you attached it to a Linux computer and unmounted it (if it contained any partitions) Adjust accordingly and be careful what you do ! Data loss may occur if you mistake the drives
Once done unplug the drive from the Linux machine.
2.1 Booting RPi4 and installing NetBSD
Insert the UEFI microSD card into the RPI4 slot and attach the USB installer flash (8GB to the black USB port) , plus the larger USB flash(32GB to the blue USB port) to the RPi4. Also make sure you have an external keyboard attached to the RPi4.
USB flash disk layout
As you can see above the “Silver” 8GB Kingston drive is in the “black” USB slot and the faster/larger SanDisk is attached to the “blue” USB slot. Once all is in place we can power on the RPi4
When the device powers up a Raspberry Pi logo shows up, make sure to hit <ESC> to get to the boot menu
RPi4 UEFI boot logo
Hit <ESC> and enter the UEFI menu (if you are not fast enough just unplug the power cord the RPi4 and repeat again)
UEFI Firmware
In the menu you can use the arrow keys and choose the Boot Manager
Boot disk selection
Locate the smaller USB drive that hold the NetBSD installer image – in this case it is UEFI Kingston Data Traveler – check those nice USB identifiers Im leaking here :) and hit <ENTER>
NetBSD efiboot installer
The NetBSD installer should load and you will end up in the classic setup ncurses menu
NetBSD sysinst NetBSD sysinst
We will choose to install NetBSD to a hard disk (but we will use USB Flash)
Disk selection
Now this is an important screen to understand which USB drives we can chose (remember the different USB flash sizes ? This helps here greatly) We will chose the larger one sd0 as the disk to install to
Partition scheme
We need to use GPT for the evbarm NetBSD disk
Partition setup
Chose Set the sizes of NetBSD partitions and configure them as follows
NetBSD partition layout
Use MB for input units, set 28299M for root / , 1024 for swap and 5% for /tmp
Distribution selection
Now select what you want to install – we want a: Full installation (there seems to be a bug present in the aarch64 evbarm installer – since the xorg-
packages wont be installed, but we will fix that manually over SSH once the system is installed)
Source install
Next we will tell the sysinst installer from where to install the sets (CD-ROM)
Source install
And tell the installer to use sd1 since it does not know the real CDROM drive (we have none)
Installing NetBSD
Finally the sysinst installer starts installing the filesets ! The speed here depends on how fast your USB flash stick is, but on the USB 3.1 it is really fast. Once done we will need to configure a couple of last things like network passwords etc.
NetBSD configuration
Go on and configure the network (genet0) , users, enable SSHD and NTPD and finish your configuration. Please note here that for static IP address the installer leaves dhcpd=YES in /etc/rc.conf so after you reboot the RPi4 this needs to be changed if you use static IPs (like me) – also remember that because of some bug the Xorg packages don’t get installed so we will do that later once the system is up and usable.
Now exit the installer and reboot the device. Once the device is rebooted – remember to hit <ESC> again in the UEFI firmware to get to the boot menu and choose the new USB disk with the installed NetBSD
UEFI firmware
3.1 Booting RPi4 with NetBSD
Now we will finally boot into the newly installed NetBSD system
NetBSD
Now if you are using static IP, you need to remove the dhcpd=YES from /etc/rc.conf and reboot again to verify the network is working well. Once done lest move on to install the forgotten Xorg packages from the installer ISO (the USB 8GB stick should still be attached to your RPi4)
Now for the convenience I just ssh to the NetBSD system from my Linux machine (static IP assigned to NetBSD is 10.0.2.91)
NetBSD 9.99.82 (GENERIC64) #0: Sun May 23 01:34:17 UTC 2021

Welcome to NetBSD!

This is a development snapshot of NetBSD for testing -- user beware!

Bug reports: https://www.NetBSD.org/support/send-pr.html
Donations to the NetBSD Foundation: https://www.NetBSD.org/donations/
rpi4$
rpi4$ su
Password:
rpi4#
Remember the “CDROM” installer USB was sd1 ? We will mount it and copy over the missing installsets to the root /
rpi4# mkdir /mnt/disk
rpi4# mount /dev/sd1a /mnt/disk
rpi4# cd /mnt/disk/evbarm-aarch64/binary/
rpi4#
rpi4# ls -la
total 20
drwxr-xr-x  4 1003  1002  2048 May 23 01:34 .
drwxr-xr-x  4 1003  1002  2048 May 23 01:34 ..
drwxr-xr-x  2 1003  1002  2048 May 23 01:34 kernel
drwxr-xr-x  2 1003  1002  4096 May 23 01:34 sets
rpi4# cd sets
rpi4# ls
MD5                         kern-GENERIC64.tar.xz       xbase.tar.xz
SHA512                      man.tar.xz                  xcomp.tar.xz
base.tar.xz                 misc.tar.xz                 xetc.tar.xz
comp.tar.xz                 modules.tar.xz              xfont.tar.xz
dtb.tar.xz                  rescue.tar.xz               xserver.tar.xz
etc.tar.xz                  tests.tar.xz
games.tar.xz                text.tar.xz
rpi4#
We will need all the x-packages so copy them over to the root /
rpi4# cp x* /
rpi4# cd /
rpi4# ls -la
total 146422
drwxr-xr-x  21 root  wheel       512 May 23 02:10 .
drwxr-xr-x  21 root  wheel       512 May 23 02:10 ..
-r--r--r--   2 root  wheel      1186 May 23 01:34 .cshrc
-r--r--r--   2 root  wheel       702 May 23 01:34 .profile
drwxr-xr-x   2 root  wheel       512 May 23 01:34 altroot
drwxr-xr-x   2 root  wheel      1024 May 23 01:34 bin
drwxr-xr-x   1 root  wheel     16384 Jan  1  1980 boot
drwxr-xr-x   9 root  wheel     33792 May 23 01:38 dev
drwxr-xr-x  30 root  wheel      2560 May 23 01:57 etc
drwxr-xr-x   3 root  wheel       512 May 23 01:48 home
dr-xr-xr-x   2 root  wheel       512 May 23 02:10 kern
drwxr-xr-x   3 root  wheel      2560 May 23 01:34 lib
drwxr-xr-x   3 root  wheel       512 May 23 01:34 libdata
drwxr-xr-x   5 root  wheel       512 May 23 01:34 libexec
drwxr-xr-x   3 root  wheel       512 May 23 02:08 mnt
-rwxr-xr-x   1 root  wheel  17152160 May 23 01:34 netbsd
dr-xr-xr-x   1 root  wheel       512 May 23 02:10 proc
drwxr-xr-x   2 root  wheel      3072 May 23 01:37 rescue
drwxr-xr-x   2 root  wheel       512 May 23 01:36 root
drwxr-xr-x   2 root  wheel      3072 May 23 01:34 sbin
drwxr-xr-x   3 root  wheel       512 May 23 01:34 stand
drwxrwxrwt   2 root  wheel         0 May 23 01:57 tmp
drwxr-xr-x  12 root  wheel       512 May 23 01:38 usr
drwxr-xr-x  24 root  wheel       512 May 23 01:34 var
-rw-r--r--   1 root  wheel   5925028 May 23 02:10 xbase.tar.xz
-rw-r--r--   1 root  wheel   6046184 May 23 02:10 xcomp.tar.xz
-rw-r--r--   1 root  wheel     27340 May 23 02:10 xetc.tar.xz
-rw-r--r--   1 root  wheel  28993608 May 23 02:10 xfont.tar.xz
-rw-r--r--   1 root  wheel  17439548 May 23 02:10 xserver.tar.xz
rpi4#
And extract them
rpi4# unxz xbase.tar.xz
rpi4# unxz xcomp.tar.xz
rpi4# unxz xetc.tar.xz
rpi4# unxz xfont.tar.xz
rpi4# unxz xserver.tar.xz

rpi4# tar -xvf xbase.tar
rpi4# tar -xvf xcomp.tar
rpi4# tar -xvf xetc.tar
rpi4# tar -xvf xfont.tar
rpi4# tar -xvf xserver.tar

rpi4# rm *.tar
Once we are done we can test th X server if we have an external HDMI attached. Now as user we have created login to the console on the RPi4 and run startx
Xorg session over HDMI
So now a working X session on the HDMI attached to the RPi4 should be available !
One last thing is to shutdown NetBSD now (this is done via root shell # shutdown -p now) command and remove the USB drives (we will not need the Installer anymore) and re-plug the 32GB larger USB flash to the “black” USB port of the RPi4 while keeping the “blue” free.
We will use the “blue” USB port for additional dongles like Wi-Fi.
If you want to use Wi-Fi then attach a compatible USB dongle to the free “Blue” USB port on the RPi4 (generally Realtek based devices work well – DWA-131 example here)
After some time I decided to write another entry here that some might find useful, especially if they wish to run HP-UX (32bit) guest under Qemu on their Apple M1 hardware. What is HP-UX ? Well it is one of … Continue reading →
Show full content
After some time I decided to write another entry here that some might find useful, especially if they wish to run HP-UX (32bit) guest under Qemu on their Apple M1 hardware.
What is HP-UX ? Well it is one of the UNIX systems that was designed by HP (thus it is called HewlettPackard Unix) and runs on PA-RISC and IA64 CPU architectures. Here we will only focus on the PA-RISC1.1 simulation under Qemu
HP-UX can run under qemu-system-hppa simulator but only the PA-RISC1.1 versions and up to 11.11 Since the latest release of Qemu (from git April 2021)
QEMU emulator version 5.2.92 (v6.0.0-rc2-66-gc1e90def01-dirty) Copyright (c) 2003-2021 Fabrice Bellard and the QEMU Project developers
The only version of HP-UX that installs and boots is HP-UX 11.11 2005-09-MCOE release, possibly the HP-UX 11.11 2006-12-MCOE (but I have not tested this one) I have tried to install/run on the Apple M1 10.20 and 11.00 and 11.11 from pre 2005 but none of them installed and qemu crashed (this could be an issue with Qemu)
So here we will use the verified HP-UX 11.11 2005-09-MCOE disk images and procedures to get almost full 32bit HP-UX experience on your modern Apple M1 hardware.
Approximately 20 GB of disk space on the Apple M1 SSD
A lot of patience and time (installation of HP-UX takes time)
HP-UX 11.11 ISOs
Telnet client on the M1 MacOS (I compiled one from pkgsrc, or you can use Putty)
Step 1 Preparation
Lets start by setting up the simulation environment on the Apple M1 for the HP-UX 11.11 and dedicate a working directory $HOME/HPPA/HPUX for the qcow2, ISOs and install/loader scripts
We create a 20GB qcow2 disk image to hold the HP-UX system
$ qemu-img create -f qcow2 disk.img 20G
Download the ISOs (there are 4 ISOs to install HP-UX from and all are needed)
Make both the install.sh and run.sh executable (make sure qemu-system-hppa is in your $PATH)
The contents of you $HOME/HPPA/HPUX directory should have these files now
-rw-r--r--  1 user staff 642865152 Oct  6  2020 hp-ux-1of4.iso
-rw-r--r--  1 user staff 357793792 Oct  6  2020 hp-ux-2of4.iso
-rw-r--r--  1 user staff 648380416 Oct  6  2020 hp-ux-3of4.iso
-rw-r--r--  1 user staff 309100544 Oct  6  2020 hp-ux-4of4.iso
-rw-r--r--  1 user staff    196928 Apr 20 23:47 disk.img
-rwxr-xr-x  1 user staff       195 Apr 18 20:22 install.sh
-rwxr-xr-x  1 user staff       287 Apr 19 20:17 run.sh
Step 2 Installation
Now run install.sh and after a few moments you should see the installer program. Please note that you can use the TAB and arrow keys to move around the menu.
IMPORTANT – The VGA emulation in HPPA is labelled as artist and you need to use a zoom-to-fit and fullscreen mode to see the whole display if you use MacBook Air M1. However what worked better for me is to keep the artist display windowed and move it slightly to a corner of the desktop, since the installer does not take the whole screen.
The console curses interface text gets corrupted during the installation menu/process so we will not use this since it gets really unreadable later on. The final X11/CDE session does not work properly in the artist (VGA) for me – the mouse cursor cannot move the edge of the right side of the desktop, only to some imaginary wall in the middle. I also found out that the mouse gets erratic if you switch between the host MacOS and the HP-UX VM a lot so be prepared for that. It might be a bug in the current qemu-system-hppa git build) so for the final HP-UX we will use the console curses based loader and connect to CDE via ssh tunnel and Xnest for best experience.
install.sh output (To exit from Full screen Qemu-Artist on Mac press Ctrl+Option+g to get a mouse cursor back, and then Command+f)
Chose the keyboard type 62 and confirm by <ENTER>
Here we will choose the default values (unless you want to setup custom partition layouts, filesystems, etc …) since the defaults are quite safe for the qemu-system-hppa simulation, you can use TAB, arrow keys to navigate in the installer.
Hit Next
Keep hitting Next
Keep hitting Next
Keep hitting Next
Keep hitting Next
Keep hitting Next
Keep hitting Next
Keep hitting Next
Keep hitting Next
And finally hit Finish to begin the actual installation, here we need to return to full screen again since the installer will use the full display.
Now this next process will take approx 1 hour during which swinstall extracts content from CD1
When we finish with the CD1 we need to swap the ISOs
Change to the
The ISO swapping can be done via Cocoa menu “Machine” section as seen below or in qemu-monitor over <Ctrl+Alt+Shift+2> – there you need to run “info block” to get the CDROM id and change it like this “change scsi0-cd2 /path/to/iso/cd2.iso”
And point to the $HOME/HPPA/HPUX directory and choose the hp-ux-2of4.iso once done hit <ENTER> in the Qemu artist main console window (Please note that we will have to do this for all the 4 CD ISOs so be patient)
The installer will continue with CD2
Go on and finish the installation (with CD2/3 and 4 its much faster than with CD1) .. eventually the installed gets to the part when the kernel gets built
Once all is done system reboots to the next stage install, yet again be patient for the installer to chew through the 2nd stage setup (it takes some time)
IMPORTANT:
Now the next step during the installation seems to look like the whole system is stuck infinitely – CIM Repository is being built – please be patient
Now you have two choices now, first to be patient, second to break this and move on – break in the console by CTRL+c if you dont do this it can take a few hours but it will eventually finish (its up to you – I left it running to finish) There will be a FAIURE message and the system will reboot yet again
Again choose the keyboard type 62
Now the semi-functional X11 will load – it works but is really ugly and leaves artifacts behind – get a grip of a weird mouse movement and interaction (keyboard helps here :)
Try to choose English language option with TAB and <ENTER> mouse interaction seems to be broken
Hit Finish (with TABs and <ENTER>) and close the GEO CUSTOMS window
Next we will setup networking (DHCP)
So answer Yes (remember that arrow keys work here )
And we choose Yes for DHCP (Qemu on Apple M1 can only do -net user network)
Confirm Yes is above looks the same for you
Next we chose a hostname (keep it max 8 characters and simple)
Hit Yes
Next chose your time-zone
Hit Yes
If time is OK hit Yes (you can always change this stuff later)
Next setup your root password
If all went well you should get the above
And finally an important message about the disk space on the LVM keep this in mind (we used a 20GB qcow2 disk image remember ?)
Hooray – we got to the end finally !
So wait for the system to boot up, login as root
And shut down the system
Once the shutdown procedure gets to this stage you can power-off the Qemu VM
Congratulations you made it to the next stage !
Step 3 Running HP-UX
OK, we are now ready to start the HP-UX, remember the loader script run.sh ? We will use that now to load the system.
$ ./run.sh
NOW BE VERY CAREFUL NOT TO HIT CTRL+C in this session, otherwise you will kill the whole Qemu simulator, it is better to connect over SSH to the host once the system comes up and keep this window open just for emergency operations
So now you are ready to do some HP-UX hacking !
POST INSTALL THINGS TO CONSIDER
In order get to the Qemu monitor console which is needed for the ISO swapping and other useful task use telnet (or putty) on the MacOS to connect to localhost 4441 (keep this in mind if you are on a public WiFi network !!!!! and use a Firewall)
First thing after logging to the HP-UX 11.11 I modified the /.profile for root user
The macos is an alias to 10.0.2.2 host that we need to make sure we define for the Xnest to work over SSH
Create the following file on the HP-UX /etc/nsswitch.conf and add
hosts:files [NOTFOUND=continue] nis[NOTFOUND=continue] dns
And then add macos to /etc/hosts
10.0.2.2 macos
You dont want to run everything as root, so create some users. Keep in mind that on HP-UX 11.11 root is allowed to SSH to the machine by default !
SSH login to HP-UX from MacOS
Since MacOS (BigSur) cannot use tun/tap interfaces we are stuck with the -net user networking, so in order to use SSH a Qemu port forwarding has to be used. In the run.sh script we ports forward the HP-UX TCP 22 to MacOS TCP 2222 (change accordingly)
Also keep in mind that this opens up SSH TCP 2222 on your Mac to the rest of the surrounding network so you can login to HP-UX from other systems in the LAN – so keep this in mind if you are in a public network full of evil hax0rs and setup your firewall accordingly
By default SSH is enabled and running on the HP-UX but it is old so one needs to allow for older weaker algos in their SSH client config (On MacOS $home/.ssh/config I have the following)
This way you can then SSH to the HP-UX Guest from your Mac, but even better is to allow X forwarding so we can use Xnest from XQuartz ! I connect to the HP-UX from the Mac as follows :
ssh -XC -p 2222 user@localhost
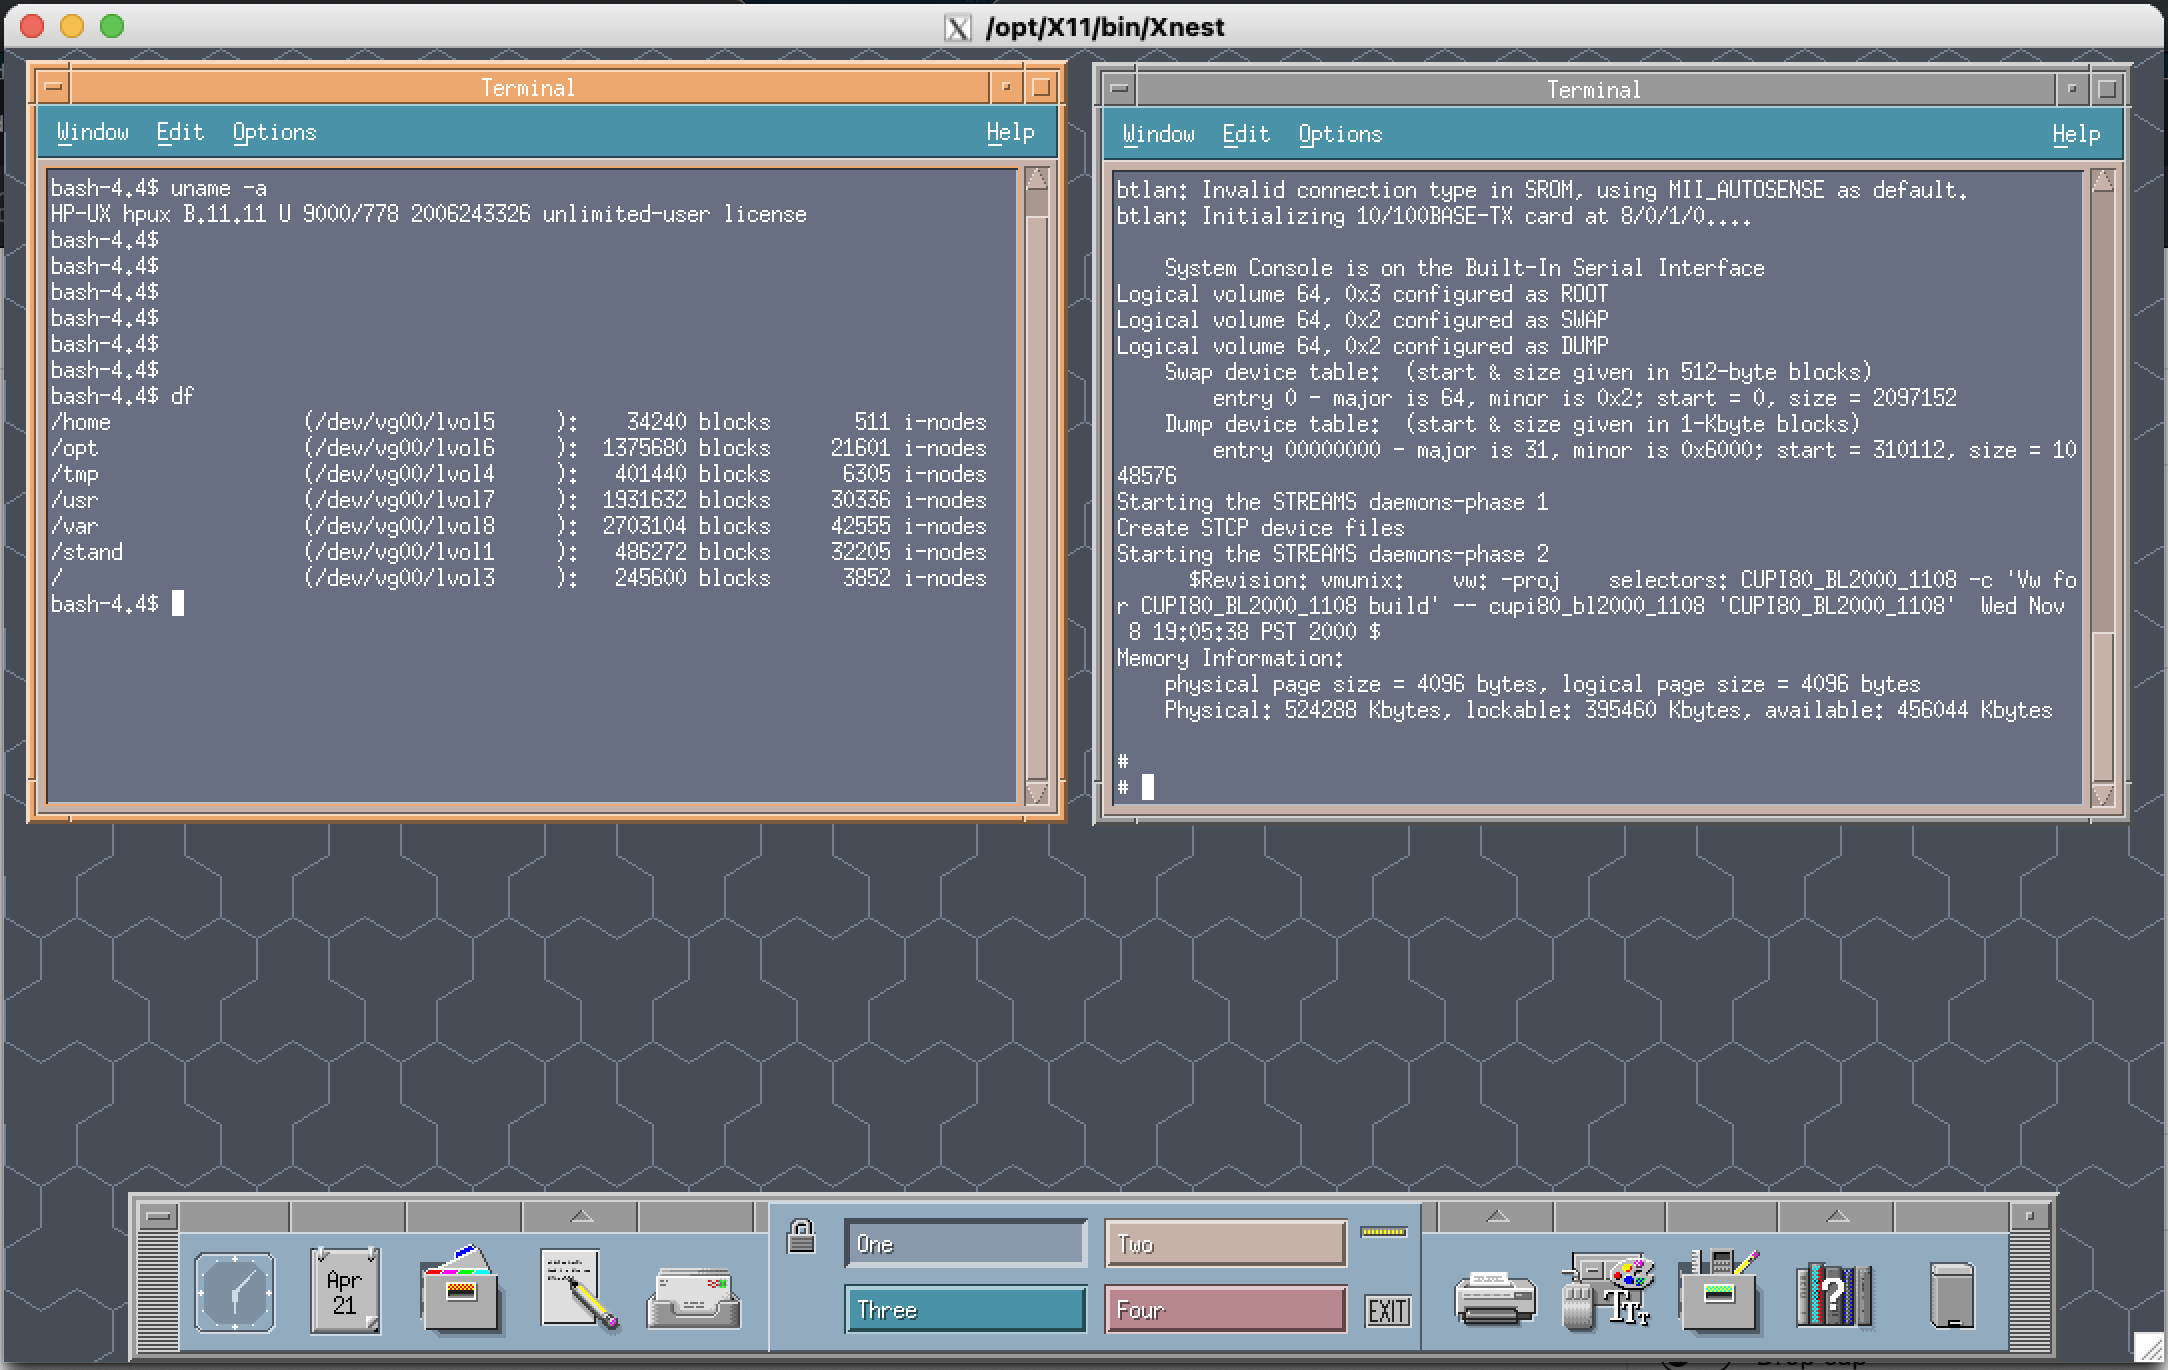
Then on the MacOS I run Xnest as follows (save it as a script on your Mac)
/opt/X11/bin/Xnest :1 -listen tcp -ac :1.0
And from the above ssh session on HP-UX run the following (save it as a shell script in your home user directory)
export DISPLAY=macos:1
/usr/dt/bin/Xsession
You should now catch the CDE session on your Mac – this is much more comfortable way of working that with the unstable artist VGA buffer on Qemu
Installing some useful software
I have put together a small collection of useful tools you can download/upload to HP-UX and play around with. These include the GCC compiler , GNU debugger, bash and links web browser
gcc-3.4-32-11i-hppa1.1.tar
gdb-6.2.1.tar.gz

Extract in /usr/local
Set $PATH to include new GCC

/usr/local/pa11_32/bin
Once you have GCC and GDB installed you can compile some code (which works out of the box without source modification on the HP-UX 11.11) and I leave this to the reader to exercise on
When it is safe to power down the simulator either kill -$PID Qemu process or enter monitor console via telnet localhost 4441 and quit
Known Issues:
If the qemu-system-hppa gets stuck during boot, kill the VM either from shell kill -$PID or from telnet monitor console. If by any chance a disk corruption happens then you would need to run fsck upon next successful boot of HP-UX
Xephyr is probably better to use than Xnest – but for me the session dies within a minute and I have not figured out yet why (if you know please let me know)
Xnest display needs updating if screen-saver hits from CDE session (so right-click on the CDE desktop and refresh) and setup a large timeout for screensaver in CDE (2 hours)
Text only friendly version @ http://45.76.81.249/PPC64/Linux/ - The following entry is dedicated to a Linux PPC64 (Big Endian) platform - All was done on a legendary PowerMac G5 Binary pkgsrc PPC64 (64bit ABI) selected packages for Linux PPC64 (glibc based … Continue reading →
Show full content
Text only friendly version @ http://45.76.81.249/PPC64/Linux/


  - The following entry is dedicated to a Linux PPC64 (Big Endian) platform
  - All was done on a legendary PowerMac G5


 Binary pkgsrc PPC64 (64bit ABI) selected packages for Linux PPC64 (glibc based distros)

 pkgsrc 2020Q3 packages were compiled using native build GCC 10.2.0 and are 64bit
 all are linked against the older legacy  (Ubuntu GLIBC 2.23-0ubuntu11.2) 2.23
 so it should work fine on ppc64 distros using this version of glibc and above

 I have tested the builds on -current OpenSUSE Tumbleweed (September 2020) PPC64
 and it works just fine.

 On the Ubuntu 16.04 PPC64 make sure you have 64bit libc installed

 	linux-vdso64.so.1 =>  (0x00003fff86ed0000)
	libc.so.6 => /lib64/libc.so.6 (0x00003fff86ca6000)
	/lib64/ld64.so.1 (0x00003fff86ea5000)


root@ubuntu-ppc64:/home/user/SRC# dpkg -l | grep libc6
ii  libc6:powerpc                          2.23-0ubuntu11.2                           powerpc      GNU C Library: Shared libraries
ii  libc6-dbg:powerpc                      2.23-0ubuntu11.2                           powerpc      GNU C Library: detached debugging symbols
ii  libc6-dev:powerpc                      2.23-0ubuntu11.2                           powerpc      GNU C Library: Development Libraries and Header Files
ii  libc6-dev-powerpc-cross                2.23-0ubuntu3cross1                        all          GNU C Library: Development Libraries and Header Files (for cross-compiling)
ii  libc6-dev-ppc64                        2.23-0ubuntu11.2                           powerpc      GNU C Library: 64bit Development Libraries for PowerPC64
ii  libc6-dev-ppc64-powerpc-cross          2.23-0ubuntu3cross1                        all          GNU C Library: 64bit Development Libraries for PowerPC64 (for cross-compiling)
ii  libc6-powerpc-cross                    2.23-0ubuntu3cross1                        all          GNU C Library: Shared libraries (for cross-compiling)
ii  libc6-ppc64                            2.23-0ubuntu11.2                           powerpc      GNU C Library: 64bit Shared libraries for PowerPC64
ii  libc6-ppc64-powerpc-cross              2.23-0ubuntu3cross1                        all          GNU C Library: 64bit Shared libraries for PowerPC64 (for cross-compiling)


HOW TO USE THE REPOSITORY
-------------------------

 I have uploaded the compiled GCC 10.2.0 and compiled/bootstraped pkgsrc-2020Q3 to my repo so if you do not want to compile
 the packages yourself, you can use the pre-build tarballs


SPECIFIC STEPS FOR Ubuntu 16.04 PPC64 on the G5
-----------------------------------------------
  - on other pure glibc based PPC64 systems omit the 1.1 step


1.1) Steps to prepare:
     ------------------
     sudo su -
     apt-get install libc6-ppc64 libc6-dev-ppc64 libc6-dev-ppc64-powerpc-cross libc6-ppc64-powerpc-cross

1.2) Get pkgsrc binary tarball
     pkgsrc documentation - https://www.netbsd.org/docs/pkgsrc/
     -------------------------
     sudo su -
     cd /usr
     apt-get install wget    (or curl or whatever to download the tarballs)
     wget http://45.76.81.249/PPC64/Linux/pkg.tar.gz
     gunzip pkg.tar.gz
     tar -xvf pkg.tar


1.3) Get GCC 10.2.0 and binutils for PPC64
     -------------------------------------
     sudo su -
     cd /usr/local
     wget http://45.76.81.249/PPC64/Linux/gcc-10.2.0.tar.gz
     gunzip gcc-10.2.0.tar.gz
     tar -xvf gcc-10.2.0.tar
     cd /opt
     wget http://45.76.81.249/PPC64/Linux/opt.tar.gz
     gunzip opt.tar.gz
     tar -xvf opt.tar

     // Setup LDCONF and paths so that we can use the GCC in the future
     // Make sure to add the following new patsh to /etc/ld.so.conf.d/gcc and gcc64 (create the files)

     root@ubuntu-ppc64:/etc/ld.so.conf.d# cat gcc.conf
     /usr/local/gcc-10.2.0/lib
     root@ubuntu-ppc64:/etc/ld.so.conf.d# cat gcc64.conf
     /usr/local/gcc-10.2.0/lib64

     ldconfig

     Adjust paths to add  /usr/local/gcc-10.2.0/bin if you wish to use GCC 10.2.0 for your projects

1.4) Start using pkgin
     ------------------
     // Full official documentation for pkgin is available here https://pkgin.net/
     // So now that we have binary /usr/pkg installed we can setup some packages
     // by adding the remote repository to the /usr/pkg/etc/pkgin/repositories.conf

     # Remote http repository
     #
     http://45.76.81.249/PPC64/Linux/pkgsrc/2020Q3/All

     // Once we have this in place we can update the pkgin cache and sync it with online repo

     /usr/pkg/bin/pkgin update

     // Search and install some packages

     /usr/pkg/bin/pkgin install dunelegacy

     // Please note the /usr/pkg paths - this is where the new packages get installed
     // So if needed adjust the paths or just remember to use /usr/pkg/bin   prefix
     // All packages are 64bit PPC64 binaries !!!

1.5) Some notable packages you can try

     // Packages here are just an experiment to learn how to build pkgsrc packages
     // on non Intel platforms

     > Development Languages
       LLVM10
       clang10
       rust
       python37
       python27
       php73
       nodejs8

     > Browsers
       Links
       Dillo

     > Games
       devilutionx (Diablo 1 - needs datafiles )
       alephone
       scummvm (Play good old DOS games)
       iortcw  (Return to Castle Wolfenstein - needs datafiles )
       rott (Rise of Triad - needs datafiles)
       tyrquake (Quake 1 - needs datafiles)
       chocolate-doom (Doom,Hexen,Heretic)
       prboom (Doom1/2)
       prboom-plus (Doom1/2)
       dhewm3 (Doom3 - needs data files - issues on BigEndian systems - no menu text)
       dunelegacy (Dune II - needs datafiles)

      > Security
        OpenSSH 8.3.1

      ...and many more ....

Some notes on the PowerMac G5 Ubuntu 16.04 Linux
------------------------------------------------
AUDIO
-----
To get audio working make sure you load the following modules

apm_emu
snd_aoa
snd_aoa_soundbus
snd_aoa_i2sbus
snd_aoa_fabric_layout
snd_aoa_codec_tas
snd-pcm-oss

Unmute the powermac specific sound device in alsamixer

GRAPHICS
--------
To get SDL2 working properly from pkgsrc make sure to install libudev-243 !!!

/usr/pkg/bin/pkgadd libudev-243

The G5 I use comes with  Advanced Micro Devices, Inc. [AMD/ATI] RV350 [Radeon 9550/9600/X1050 Series]
and some games do not seem to work with this hardware or are buggy
 - Yquake2
 - Cube 2: Sauerbraten

But other games perform really well - especially
 - iortcw (Return to Caslte Wolfenstein)
 - tyr-quake
 - SDL1.2 based games
 - SDL2 based games (sometimes there are sound issues)
 - Pentagram (Ultima VIII)
 - RoTT (Rise of the Triad)
 - Prboom/Prboom-pro/Chocolate-Doo/Hexen/Heretic
 - UFO
   (you need to fix the /usr/pkg/bin/ufo script after installation)
    // cd /usr/pkg/share/ufoai; ./ufo $*; exit $?
 - DevillutionX (Diablo1)
 - DuneLegacy (Dune II)
 - SCUMMVM


P.S the package list is still Work in Progress so I will add some more over time

Hope somebody will enjoy this as much as I did :)
Lately Im not updating this blog too much, so if anybody wants to follow some fresh randomness – please check https://twitter.com/astr0baby Added a few HOWTOs for the Pinebookpro here in case anybody is interested Age of Empires II – http://45.76.81.249/Pinebook64/pinebook-pro/GAMES-HOWTO/openage/ … Continue reading →
Show full content
Lately Im not updating this blog too much, so if anybody wants to follow some fresh randomness – please check https://twitter.com/astr0baby
Added a few HOWTOs for the Pinebookpro here in case anybody is interested
WordPress does strange formatting, so if the below text is hard to read use a link here http://45.76.81.249/Pinebook64/NetBSD/CDE/ Not much time to post nicely formatted articles now, so hopefully the below format would do - if you are into some … Continue reading →
Not much time to post nicely formatted articles now, so hopefully the below format would
do - if you are into some retro look on modern systems this might be for you :)
----------------------------------------------
Latest CDE 2.3.2 on NetBSD 9 evbarm Pinebooks
----------------------------------------------
- I have verified the build steps in a vanilla NetBSD 9 arm64 install inside qemu
- And it works on real HW as well (Pinebook/PinebookPro)
- Downloaded a Pinebook image from invisible.ca
- http://www.invisible.ca/arm/netbsd-9/202005010840Z/NetBSD-evbarm-aarch64-202005010840Z-pinebook.img.gz
Installed in KVM accelerated qemu-system-aarch64 for verification process
- Step 1
------
First we need to install a few aarch64 packages that are essential for CDE
We can use the pre-built aarch64 pkgsrc-2019Q4 binary packages on master
ftp.netbsd.org for this
arm64# export PKG_PATH="http://cdn.netbsd.org/pub/pkgsrc/packages"
arm64# export PKG_PATH="$PKG_PATH/NetBSD/aarch64/9.0_2019Q4/All"
arm64# export PATH PKG_PATH
arm64# pkg_add motif
arm64# pkg_add gmake
arm64# pkg_add freetype2
arm64# pkg_add font-adobe-75dpi
arm64# pkg_add font-adobe-100dpi
amr64# pkg_add fontconfig
arm64# pkg_add wget
arm64# pkg_add meson
- Step 2
-------
- Lets create a working directory for CDE
arm64# mkdir $HOME/CDE
arm64# cd $HOME/CDE
- We will first need to download and install ast (korn shell)
- There were numerous issues in the past with the AST kornshell
- on NetBSD, so I have tested my own way of getting in onto
- evbarm
- Original sources were git cloned on December 2019 from
- https://github.com/att/ast
- But the code kept chaning a lot so I have decided to keep my working
- version below which you can use
arm64# wget http://45.76.81.249/Pinebook64/NetBSD/CDE/ast.tar.gz
arm64# gunzip ast.tar.gz
arm64# tar -xvf ast.tar
arm64# cd ast
arm64# meson --prefix=/usr/pkg build
arm64# ninja -C build
arm64# ninja -C build install
arm64# ln -s /usr/pkg/bin/ksh /usr/pkg/bin/ksh93arm64# /usr/pkg/bin/ksh93 --version
version sh (AT&T Research) 2020.0.0
- We are ready now for the CDE
- There are 2 options now, either download the complete DT binary set from me
- or build it from source, both methods are described here
- (Im working on a pkgsrc script to put all this together)
- If you do not wish to compile the CDE sources you can download the /usr/dt
- gzipped tarball for NetBSD 9 evbarm I have built
- --------------------------------------------------------------------------
arm64# cd $HOME/CDE
arm64# wget http://45.76.81.249/Pinebook64/NetBSD/CDE/dt-2.3.2.tar.gz
arm64# mv dt-2.3.2.tar.gz /usr
arm64# gunzip /usr/dt-2.3.2.tar.gz
arm64# tar -xvf /usr/dt-2.3.2.tar
- Now make sure you ger rpcbind enabled in /etc/rc.conf
- by adding a following line
rpcbind=YES rpcbind_flags="-l"
- And start rpcbind
arm64# /etc/rc.d/rpcbind start
- Also make sure your hostname is properly set in /etc/hosts (CDE needs this)
::1 arm64 localhost localhost.
127.0.0.1 arm64 localhost localhost.
- Now we can finally start CDE by running the following command under your user
arm64$ startx /usr/dt/bin/Xsession
- And add these to your $HOME Xdefaults
Xdefaults
*saveLines:32000
*scrollBar:True
- If you wish to build CDE from source
- ------------------------------------
arm64# cd $HOME/CDE
arm64# wget http://45.76.81.249/Pinebook64/NetBSD/CDE/cde-2.3.2.tar.gz
arm64# gunzip cde-2.3.2.tar.gz
arm64# tar -xvf cde-2.3.2.tar.gz
arm64# cd cde-2.3.2
arm64# gmake World.dev
arm64# cd admin/IntegTools/dbTools
arm64# ./installCDE -s $HOME/CDE/cdesktopenv-code/cde
arm64# cd $HOME
- Now make sure you ger rpcbind enabled in /etc/rc.conf
- by adding a following line
rpcbind=YES rpcbind_flags="-l"
- And start rpcbind
arm64# /etc/rc.d/rpcbind start
-Also make sure your hostname is properly set in /etc/hosts (CDE needs this)
::1 arm64 localhost localhost.
127.0.0.1 arm64 localhost localhost.
- To start X with CDE run the following command under our user
arm64$ startx /usr/dt/bin/Xsession
- And add these to your $HOME Xdefaults
Xdefaults
*saveLines:32000
*scrollBar:True
- As a bonus you also get the XNEDIT sources/binaries for NetBSD 9 evbarm
http://45.76.81.249/Pinebook64/NetBSD/CDE/xnedit.tar.gz
I wanted to see how pkgsrc works on aarch64 Linux Manjaro since it is a very mature framework that is very portable and supported by many architectures – pkgsrc (package source) is a package management system for Unix-like operating systems. … Continue reading →
Show full content
I wanted to see how pkgsrc works on aarch64 Linux Manjaro since it is a very mature framework that is very portable and supported by many architectures – pkgsrc (package source) is a package management system for Unix-like operating systems. It was forked from the FreeBSD ports collection in 1997 as the primary package management system for NetBSD.
One might question why use pkgsrc on Arch based Manjaro, since the pacman package repository is very good on its own. I see alternative pkgsrc as a good automated build framework that offers a way to produce independent build environment /usr/pkg that does not interfere with the current Linux distribution in any way (all libraries are statically built)
Next we make sure we have at least 10 GB of disk space (i have used 20 GB for pkgsrc) to place the pkgsrc environment.
We have a choice to use either the stable quarterly branches of pkgsrc or the bleeding edge (current) which contains the latest pieces of software, but can be unstable in certain situations and times of sync. If one decides to experiment with the current, like me, you can always get help from the wonderful NetBSD/pkgsrc community on their mailing lists https://www.netbsd.org/mailinglists/
Downloading pkgsrc-current
# cd /usr
# ftp ftp.netbsd.org
login as anonymous (ftp)
ftp> pass     (I need to enter passive because of my network)
ftp> cd pub
ftp> cd current
ftp> get pkgsrc.tar.xz
After it downloads, exit FTP session
ftp> exit
# unxz pkgsrc.tar.xz
# tar -xvf pkgsrc.tar
After if finishes extracting we can delete pkgsrc.tar
# rm pkgsrc.tar
Next we will bootsrap pkgsrc on our Manjaro Linux aarch64 so that we can start building packages
# cd /usr/pkgsrc/bootstrap
# ./bootstrap
This will take about 10 minutes to finish, and once done we are almost ready to start building packages. There will be a new system independent environment created by default in /usr/pkg (if once wishes to change the location and customize, one can do so by reading the pkgsrc documentation) The pkg directory structure is as follows
All the pkg executable binaries are stored in /usr/pkg/bin and this should be taken into an account if setting up a new binary executable paths.
There is a caveat in Linux Manjaro aarch64 pkgsrc build which results on the dreaded message during certain packages builds (readline, gettext-tools,python … and others)
[builds should fail with compiler cannot create executables]
In order to fix this on Manjaro aarch64 I have edited the following file in /usr/pkgsrc
Now we are ready to build pkgsrc packages on the Manjaro aarch64 Pinebook ! Packages are normally built like this
# cd /usr/pkgsrc/security/bcrypt
# /usr/pkg/bin/bmake install clean clean-depends
Once the build finishes the gzipped package tarball willland in /usr/pkgsrc/packages/All and the binaries will get installed to
# /usr/pkg/bin/bcrypt
As of writing I have managed to successfully compiled a few packages and uploaded them here http://45.76.81.249/pkgsrc/aarch64-linux/All I will update this with more packages if anybody wants to experiment.
My first test was to see if Doom3 (pkgsrc/games/dhewm3) builds and runs on Manjaro aarch64 , and it does (although its not usgin the panfrost drivers for now)
bootstrap pkgsrc-currentinstall pkgsrc/pkgtools/pkgin
# cd /usr/pkgsrc/pkgtools/pkgin
# /usr/pkg/bin/bmake install clean clean-depends
add http://45.76.81.249/pkgsrc/aarch64-linux/All/ to /usr/pkg/etc/pkgin/repositories.conf
# /usr/pkg/bin/pkgin update
Then you can install packages via pkgin install ..etc .. read the manual
This time we will be doing a pure stock Debian 9 Stretch aarch64 that the PinebookPro ships with. I always keep the stock system installed on the eMMC and use other systems off the microSD (Manjaro, NetBSD) I have kept … Continue reading →
Show full content
This time we will be doing a pure stock Debian 9 Stretch aarch64 that the PinebookPro ships with. I always keep the stock system installed on the eMMC and use other systems off the microSD (Manjaro, NetBSD) I have kept this because Debian 9 ships with a 32bit userland and 64bit kernel, and some games/programs are just not ready yet for 64bit space (which Manjaro aarch64 is – the code builds there but crashes and I need to figure out why )
This time we will build a native Linux 32-bit ARM launcher for Half-Life 1 called xash3d and play Half-Life and some of the mods – namely the legendary Counter Strike 1.3 and 1.6
Lets create a working directory for the sources and call it SRC and store the build files there
mkdir ~/SRC
cd ~/SRC
git clone --recursive https://github.com/FWGS/xash3d
cd xash3d
git clone https://github.com/ValveSoftware/halflife hlsdk/
cd engine
git clone https://github.com/FWGS/nanogl
cd ..
mkdir -p build
cd build
cmake -DHL_SDK_PATH=../hlsdk/ -DXASH_VGUI=no -DXASH_NANOGL=yes -DXASH_GLES=yes ..
make -j4

Should say [100%] Built target xash
We have compiled the xash engine, lets get the game done now
cd ~/SRC
git clone https://github.com/FWGS/hlsdk-xash3d
cd hlsdk-xash3d
mkdir build
cd build
cmake ../
make -j4

Should say [100%] Built target server
Now lets prepare the actual Game data directory and copy over the compiled arm32 binaries
Now we need to prepare the actual Game Data and move them from an installed Windows or Wine environment.
You can download the Half Life 1 ISO from Archive.org and install it in Wine on x86_64 Linux or Windows in Qemu :)
Once you install this under Qemu Windows or Linux x86_64 under Wine you need to copy over the valve directory as it is and place it to the PinebookPro ~/HalfLife directory
cd ~/HalfLife

Launch the game with the following command (save it as a launcher script)

LD_LIBRARY_PATH=. ./xash3d -dev 5
The game runs fine and multiplayer works well too.
For MODs to play I have chosen Counter Strike 1.3 (1.3 is better supported) and 1.6
The approach is the same, install the CounterStrike on Windows Qemu or under Wine and copy over the scstrike directory to ~/HalfLife on the Pinebookpro
cd ~/HalfLife

Launch the game with the following command (save it as a launcher script)

LD_LIBRARY_PATH=. ./xash3d -dev 5 -game cstrike
As of now the Counter Strike 1.6 does not work well, you can run around the maps as Gordon Freeman, With 1.3 its better, one can connect to the public servers but cannot choose the team (CS or T) .. need to investigate that ..
There is an older CS16 client source repo before it went close-sourced here
Next chapter in PinebookPro gaming would be for OpenArena Following was tested on the Manajaro Linux (aarch64 with the latest updates) and the Panfrost driver (mesa-git) In order to use the Panfrost drivers please do the following pacman -R xf86-video-fbturbo-git … Continue reading →
Show full content
Next chapter in PinebookPro gaming would be for OpenArena
Following was tested on the Manajaro Linux (aarch64 with the latest updates) and the Panfrost driver (mesa-git)
In order to use the Panfrost drivers please do the following
And make sure you reboot the PinebookPro for the driver to get loaded.
Check that the drivers are working by verifying
glxinfo | grep Panfrost
You should see
 Vendor: Panfrost (0xffffffff)
Device: Mali T860 (Panfrost) (0xffffffff)
OpenGL vendor string: Panfrost
OpenGL renderer string: Mali T860 (Panfrost)
Lets move on to the OpenArena build (assuming we have all the build tools installed)
How to build/compile OpenArena on the PinebookPro Manjaro linux aarch64
We start by creating a working directory
Make sure you have SDL1, SDL2 and openal libraries installed
# pacman -S openal sdl sdl_net sdl_image sdl_mixer sdl2 sdl2_image sdl2_net sdl2_mixer
mkdir ~/OPENARENA
cd ~/OPENARENA
git clone https://github.com/cmatsuoka/libxmp
wget https://fossies.org/linux/misc/xmp-4.1.0.tar.gz
cd libxmp
autoconf
./configure
make -j4
su
# make install
# exit
cd ~/OPEARENA
gunzip xmp-4.1.0.tar.gz
tar -xvf xmp-4.1.0.tar
rm xmp-4.1.0.tar
cd xmp-4.1.0
PKG_CONFIG_PATH=$PKG_CONFIG_PATH:../libxmp/ LDFLAGS=-L../libxmp/lib CFLAGS=-I../libxmp/include ./configure
make -j4
su
# make install
# exit
Dont forget to load ldconfig after installing libraries into /usr/local
And make sure you have /usr/local/lib defined in your /etc/ld.so.conf.d/
Just put /usr/local/lib into /etc/ld.so.conf.d/local.conf
and run ldconfig as root
cd ~/OPENARENA
git clone https://github.com/OpenArena/engine
git clone https://github.com/OpenArena/gamecode
cd engine
Now we need to edit the code/qcommon/q_platform.h to include aarch64 supportAdd the following just below #define ARCH_STRING "arm"
vi code/qcommon/q_platform.h
#elif defined __aarch64__
#define ARCH_STRING "aarch64"
make -j4
cd ~/OPENARENA
cd gamecode
make -j4
cd code/game
./extract_entities.sh > openarena.def
cd ~/OPENARENA
cd gamecode/linux_scripts
Next we need to create a supermake.local build file Make sure to include the full path to the openarena.aarch64 here
BINNAME=/path_to/OPENARENA/engine/build/release-linux-aarch64/openarena.aarch64
ARCH=aarch64
Now in order to run the game you just execute the ./supermake from the OPENARENA/gamecode/linux_scripts
./supermake
It wont work because we need to get the OpenArena PAK files- get the filesIn your home directory there is .openarena directory
cd ~/.openarena/baseoa
total 400688
drwxr-x--- 2 user user 4096 Jan 17 22:45 .
drwxr-x--- 4 user user 4096 Jan 26 15:27 ..
-rw-rw-r-- 1 user user 8192 Jan 19 18:59 challenges.dat
-rw-r----- 1 user user 230 Jan 17 00:13 crashlog.txt
-rw-rw-r-- 1 user user 156 Jan 17 22:29 oax.pk3
-rw-r--r-- 1 user user 38138505 Jan 17 22:29 pak0.pk3
-rw-r--r-- 1 user user 38421794 Jan 17 22:29 pak1-maps.pk3
-rw-r--r-- 1 user user 26754265 Jan 17 22:29 pak2-players-mature.pk3
-rw-r--r-- 1 user user 74389371 Jan 17 22:29 pak2-players.pk3
-rw-r--r-- 1 user user 97077243 Jan 17 22:29 pak4-textures.pk3
-rw-r--r-- 1 user user 2907315 Jan 17 22:29 pak5-TA.pk3
-rw-r--r-- 1 user user 24912892 Jan 17 22:29 pak6-misc.pk3
-rw-r--r-- 1 user user 36972040 Jan 17 22:29 pak6-patch085.pk3
-rw-r--r-- 1 user user 70645224 Jan 17 22:29 pak6-patch088.pk3
-rw-rw-r-- 1 user user 10716 Jan 19 18:56 q3config.cfg
-rw-rw-r-- 1 user user 230 Jan 18 23:30 q3history
So we need to get the pak0 pak1-maps pak2-players-mature pak2-players pak4-texturespak5-TA pak6-misc pak-patch085 pak6-patch088I have used the https://sourceforge.net/projects/oarena/files/latest/download
cd ~/OPENARENA
mkdir DATA
cd DATA
wget https://svwh.dl.sourceforge.net/project/oarena/openarena-0.8.8.zip
unzip openarena-0.8.8.zip
cd openarena-0.8.8/baseoa
cp *.pk3 ~/.openarena/baseoa
We don't need the DATA directory anymore now and it can be deleted
cd ~/OPENARENA
rm -rf DATA
To play OpenArena
cd ~OPENARENA/gamecode/linux_scripts
./supermake
OpenArena gets about 70 FPS on the PinebookPro with the Panfrost driver and is really well playable, you should try the Pine64 community OpenArena server ;)
Sharing my virtualization configurations and howtos here with others in case anybody would find them usable. Currently a full 64bit support for KVM is only possible with Manjaro Linux (https://wiki.pine64.org/index.php/Pinebook_Pro_Software_Release#Manjaro_ARM) which I run off a microSD card (faster the better, … Continue reading →
Show full content
Sharing my virtualization configurations and howtos here with others in case anybody would find them usable.
We are going to use mostly QEMU with KVM support for running the native arm64 systems, HYPERION-HERCULES for running mainframe simulator for z/OS or MVS and lastly the SIMH machine simulator for running VAX systems (OpenVMS and UNIX)
Qemu
git clone https://github.com/qemu/qemu.git
cd qemu
./configure
make -j5
su
# make install
cd hyperion
./configure
make -j4
su
# make install
Next we need to compile x3270 terminal emulator
cd ..
wget http://x3270.bgp.nu/download/03.06/suite3270-3.6ga8-src.tgz
gunzip suite3270-3.6ga8-src.tgz
tar -xvf suite3270-3.6ga8-src.tar
cd suite3270-3.6
./configure
Will fail because we have an old config.guess .. download a recent one from GCC
rm config.guess
wget https://raw.githubusercontent.com/gcc-mirror/gcc/master/config.guess

./configure
make -j4
# make install
SIMH
git clone https://github.com/simh/simh
cd simh
make -j5
All simh binaries will be in simh/BIN directory
Preparing the Pinebook-Pro Manjaro Linux for virtualization
Manjaro aarch64 kernel is compiled with KVM support so we can take full advantage of /dev/kvm acceleration via qemu-system-aarch64 or qemu-system-arm. Once we have the hypervizor and simulators compiled, here are some examples how I handle networking in the VMs
For the networking on the Arch Linux we need to download uml_utilities and compile them, since they do not ship on the Manjaro Linux (arch) since we need the tunctl command from there to setup the network
$ wget http://user-mode-linux.sourceforge.net/uml_utilities_20070815.tar.bz2
$ bunzip uml_utilities_20070815.tar.bz2
$ tar -xvf uml_utilities_20070815.tar
$ cd tools-20070815
$ make
The make will error on uml_net/hoct.c:215 undefined
reference to ` makedev` But this does not really matter, the tunctl binary will be builtwhich we can copy over to /usr/bin like this $ su # cd tunclt # cp tunctl /usr/bin
Also we would need to install the bridge-utils which are installable via pacman package and net-tools (because Im too dumb to learn ip) manager like this
# pacman -S bridge-utils net-tools
Once we have all the above in place we can prepare the network sharing script for Qemu, just make sure we execute this after each system boot
#Setup tap and bridge
#change the username below to match yours
tunctl -t tap0 -u user
ifconfig tap0 up
brctl addbr br0
brctl setfd br0 0
ifconfig br0 10.0.2.2 netmask 255.255.255.0 broadcast 10.0.2.255 up
brctl addif br0 tap0
ifconfig tap0 0.0.0.0
sysctl net.ipv4.ip_forward=1
iptables --table nat -A POSTROUTING --out-interface wlan0 -j MASQUERADE
Also make sure you have this script as /etc/qemu-ifup and executable
#! /bin/sh
# Script to bring a network (tap) device for qemu up.
# The idea is to add the tap device to the same bridge
# as we have default routing to.

# in order to be able to find brctl
PATH=$PATH:/sbin:/usr/sbin
ip=$(which ip)

if [ -n "$ip" ]; then
ip link set "$1" up
else
brctl=$(which brctl)
if [ ! "$ip" -o ! "$brctl" ]; then
echo "W: $0: not doing any bridge processing: neither ip nor brctl utility not found" >&2
exit 0
fi
ifconfig "$1" 0.0.0.0 up
fi

switch=$(ip route ls |
awk '/^default / {
for(i=0;i<NF;i++) { if ($i == "dev") { print $(i+1); next; } }
}'
)

switch=br0

# only add the interface to default-route bridge if we
# have such interface (with default route) and if that
# interface is actually a bridge.
# It is possible to have several default routes too
for br in $switch; do
if [ -d /sys/class/net/$br/bridge/. ]; then
if [ -n "$ip" ]; then
ip link set "$1" master "$br"
else
brctl addif $br "$1"
fi
exit # exit with status of the previous command
fi
done

echo "W: $0: no bridge for guest interface found" >&2
Also please bear in mind that for KVM acceleration to work we only need to use the "BIG" 2 cores of the Pinebookpro; run the following script to disable them before Qemu KVM usage only

#!/bin/bash
echo 0 > /sys/devices/system/cpu/cpu0/online
echo 0 > /sys/devices/system/cpu/cpu1/online
echo 0 > /sys/devices/system/cpu/cpu2/online
echo 0 > /sys/devices/system/cpu/cpu3/online
To re-enable normal CPUs (all 6 cores) on the Pinebookpro execute the floowing script
PLEASE NOT THAT AS OF LATEST Manjaro + Panfrost drivers (Linux kernel 5.5.0) this does not work) – the below setup should be OK for the Vanilla Manjaro from around early December 2019 (Linux kernel 5.4.) – Investigating what happened :)
Create a Win10 working directory and create empty disk image to hold the installation
Working QEMU_EFI.img - USE AT YOUR OWN RISK !!!!
wget http://45.76.81.249/Pinebook64/pinebook-pro/QEMU_EFI.img

Below does not seem to work and just hangs.
wget https://releases.linaro.org/components/kernel/uefi-linaro/latest/release/qemu64/QEMU_EFI.fd
Connect to the simulation via vncviewer -> vncviewer :1
From my experience I recommend to use the onscreen keyboard, because the frequent emulated keyboard/mouse freezes are quite frustrating
Networking works best with a physical USB 1GB realtek dongle identified by Linux as productid=0x8153. During the installation make sure to load the virtio-win-0.1.173.iso drivers so that the disk.img gets detected by the installer !
And use VNC connector to localhost :1 to finish the setup, please note that the virtio network drivers are causing BSOD on Win10 arm64, so its better to use a real USB ethernet dongle on the Pinebook-pro woth the Realtek chip identified as 0x8153, once you have the network up in the VM, use RemoteDesktop or freerdp2 to connect to Windows10 over the network for best performance.
Here is a live recording of some Metasploit framerowk meterpreter testing against it through FreeRDP and running on the Pinebookpro
NON aarch64 systems in simulators on the PinebookPro
Here are example loaders and installers for non arm/aarch64 systems which are fun to play around with (and of course you can run this on more powerful x86_64 platform ) I just wanted to show how powerful the Pinebookpro actually is
AmigaOS 4.1 qemu-system-ppc (search for Sam460InstallCD-53.58.iso on the internet)
Or if you have AIX 7.2 you can use it onwards from Technology Level 3 and Service Pack 1 onwards in qemu-system-ppc64 since IBM added virtio-scsi support to the AIX kernel
Overall performance is not bad, bear in mind that 2 GB RAM is minimum to run AIX 7.2 under qemu-system-ppc64, it takes roughly about 15 minutes to boot on the Pinebook-pro and is quite usable afterwards.
Open 2 x3270 terminals and connect them both to localhost so that Hercules logo shows up , below are some basic commands to run the simulator and the system, Im not goint to cover the z/OS here in deeper detail.
IPL the 0E20 device in Hercules by first doing
Press ESC to go to IPL menu in HerculesShift+l
h
During first run we need to initialize the system like so
R 00,I
Wait till you get either the TSO login or fix the TSO logon by running the following in the primary console windowR 01,RETRY or
R 02,RETRY
The network is tricky to get configured and the whole Mainframe simulation stuff needs a separate blog entry I believe, hopefully if I have time I will create a specific article about exactly that.
But at the end our Pinebook-pro runs Mainframe quite well under hercules :)