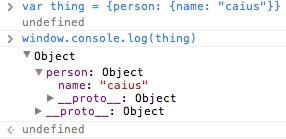
In a similar vein to git git git git git, if you’re using jj and find you’ve accidentally typed one jj too many in the command line, it errors at you. In this case we’re trying to pull the id of the current changeset we’re editing:
$ jj jj show -T 'change_id.short()'
error: unrecognized subcommand 'jj'

Usage: jj [OPTIONS] <COMMAND>

For more information, try '--help'.
How annoying. Now we could solve this with a shell alias, but jj also allows us to define alias’ in the configuration (much like git!), and combined with jj util exec we should be able to have it run the rest of the line nay bother.
Thinking it through, the initial jj will be exec’d by the shell, so that’s gone already. The second jj is then evaluated as the alias, so that’s gone too. The remaining arguments passed to the alias are ["show", "-T", "change_id.short()"] so if we just exec those it’ll error trying to run show as a binary. We can avoid that by having it exec jj then the arguments from the alias.
Drop the alias in a jj config file (jj config edit is super useful for editing these, or there’s jj config set to update it from the shell) and then we can test it works.
[aliases]
# jj all the way down
jj = ["util", "exec", "jj"]
Lets try our original nested command again and see if we get to see our sweet sweet change id:
$ jj jj show -T 'change_id.short()'
error: unexpected argument '-T' found

 tip: to pass '-T' as a value, use '-- -T'

Usage: jj util exec [OPTIONS] <COMMAND> [ARGS]...

For more information, try '--help'.
Oh. Our -T argument is being interpreted by jj util exec, not by the jj command we’re running. Classic nested argument parsing when you’re trying to invoke another command. Luckily shell/exec has a solution to this, passing -- as an argument stops parsing all remaining arguments so they are passed along verbatim.
With that in mind we can amend our alias to run jj util exec and then stop interpreting any further arguments.
[aliases]
# jj all the way down
jj = ["util", "exec", "--", "jj"]
Now we should be able to see our change id without any issues, no matter how many nested jjs there are in the command!
I’ve been wearing an Apple Watch pretty regularly for nearly a decade at this point (October 2015), and have picked up a few bands over time that I swap between. Commonly I’ll swap from a fabric based band to a rubber/silicone based band when doing DIY or sports as they seem to stand up better over time to those activities.
Without fail every single time I swap the band I have to think really hard which way round the new band is going onto the watch body. For the fabric loops is it the single end or the hooped end going on the top of the body? For the two piece bands is it the short or the long band that goes on the top of the body?
I finally figured out a mnemonic to help me remember, and having used it for a few weeks it appears to have lodged in my brain. Pretty simple, it’s a single word:
Longbottom.
For the two piece straps the longer one goes on the bottom (and shorter on the top), and for the fabric loops the hoop goes on the bottom because it has the longer piece of the strap running through it. (The latter is more tenuous.)
To remember longbottom specifically, the first reference that comes to my mind is Neville Longbottom, who went from being a weed to being pretty awesome in a well known series of books1 and films. Secondly it’s a place in Middle-Earth, where Pipe-weed was first grown.
With an author who appears to be doing their best to totally alienate any fanbase. Sigh. ↩︎
Ruby on Rails has built-in support for managing uploaded files with ActiveStorage, which both cleans up your application code and acts as an abstraction over different storage backends. Azure Storage is one of the supported backends, but configuring it securely can take a little figuring out.
The most sensible way I’ve found to have it configured is with files stored having no public access, but allowing temporary access via signed URLs for both uploads & downloads. ActiveStorage happily generates these URLs for us which makes it easy for developers to use and transparent to users, whilst keeping their data as secure and protected as possible. From a technical point of view, this also allows upload and download between Azure Storage and the user’s browser, without proxying all the data through your Rails app.
Azure setup
We’ll be storing the files in Azure as blobs within Azure Blob Storage. Blobs live within a Storage Container which lives within a Storage Account, which is created in a specific geographical region and Resource Group.
To create the above, we’ll need access to an Azure Subscription with permissions to create the resources. (Most of the time you will already be an admin on the subscription, so can ignore checking this. If you get permission errors creating the below, you’ll need to go talk to your admin.)
Most resources in Azure need to live within a Resource Group, which it’s suggested you use to group related resources together. If there isn’t already a resource group for your application resources, create one.
Next we need to create a Storage Account in the main location for the app and nested in the Resource Group from above. The following settings are split across multiple pages, click “Next” to advance to next bit of the form:
Storage account name: 3-24 numbers/lowercase letters only, unique across all storage accounts globally in Azure. Good luck. (eg, st123someappproduksth)
Region: choose for your app location (eg, UK South)
Performance: Standard (general purpose v2 account)
Redundancy: Zone-redundant storage (ZRS) if possible. (Some regions don’t support it, choose Locally-redundant storage (LRS) in those.)
Enable infrastructure encryption: Check the box, it’s free.
Tags: tag the resource according to your internal conventions/policies (eg, terraform:false)
Create the Storage Account and wait for it to complete. Next we’ll create the Storage Container nested under the Storage Account which is where our actual files will be uploaded to. Find the Storage Account we created in the portal and click “Containers” in the sidebar, then “+ Container” above the table listing the containers.
Add a sensible name for the Container, which is easier because there are fewer restrictions on this name. (eg, dragon-myapp-production-uksouth-activestorage.) Create the container and wait for that to complete.
Navigate back to viewing the Storage Account and select “Access Keys” in the sidebar. Make a note of the Key value (for key1) for use later configuring Rails. If you need to rotate the access keys later without causing an outage, you can update the app to use the Key from key2 and then rotate the key for key1 from the UI.
The final configuration we might need to set in Azure is allowing direct uploads from our app to the container. Due to this being client-side requests we need the Cross-Origin Resource Sharing (CORS) headers to allow this from Azure’s side. Without these in place you will get permissions errors from browsers trying to make requests directly to Azure. If you’re not using ActiveStorage’s Direct Upload feature, you can skip this.
Find “Resource Sharing (CORS)” in the sidebar for the Storage Account. Add a new entry to the “Blob service” table:
Allowed origins: comma-separated list of all your app domains using this storage.
Allowed methods: GET, POST, OPTIONS, PUT
Allowed headers: *
Exposed headers: *
Max age: 0
Click out of the fields and the configuration will be saved automagically. (Little green ticks appear in the fields for some visual feedback.)
Rails setup
We can follow the Rails documentation for setting up ActiveStorage, ensures you have the migrations for the required database tables installed and the framework is loaded in your application.
Follow the rails docs for configuring config/storage.yml with Azure, and pulling azure-storage-blob into your app. (In Rails 8.1 this will be azure-blob instead, see test double’s post on the subject for more information) I suggest storing the key in Rails credentials (or however you inject secrets into your rails app), and creating a new block in storage.yml for Azure storage. Using credentials per-environment makes using a different storage account for Staging & Production easy.
Update the appropriate config/environments/*.rb file for the environments you want to use this Azure storage, setting config.active_storage.service to the key of the block in storage.yml.
config.active_storage.service = :azure_storage
Deploy your changes, and you’re good to start using ActiveStorage to manage your uploaded files. Ensure the ActiveStorage JS is added to your frontend (depends on which asset pipeline flavour the app is configured to use, should be there by default) and you won’t be sending all files through your Rails backend, saves you some bandwidth and CPU cycles.
Rake is a Make-like program implemented in Ruby (to quote the website.) It contains tasks written in ruby code you can invoke from the command line. These can run prequisite tasks first too, in this case we configure the setup task to be invoked before the work task is ever invoked.
task :setup do
 puts "Setting up"
end

task work: :setup do
 puts "Doing work"
end
$ rake work
Setting up
Doing work
Rake also supports --trace as an argument which outputs a bunch of debugging information, allowing you to see which tasks have been executed in which order and how often they were invoked.
$ rake --trace work
** Invoke work (first_time)
** Invoke setup (first_time)
** Execute setup
Setting up
** Execute work
Doing work
From the --trace output we can see calling the same task multiple times in the same rake process doesn’t execute the task multiple times, but it is invoked the correct number of times.
$ rake --trace work setup work
** Invoke work (first_time)
** Invoke setup (first_time)
** Execute setup
Setting up
** Execute work
Doing work
** Invoke setup
** Invoke work
For performance reasons (Rails apps can take multiple seconds to start a new process), we might want to run multiple tasks within the same rake process.
task :create_assets do
 puts "Created some assets"
end
We’re now stuck in a catch-22 from the shell in terms of tracing however, if we run both tasks in the same process we can only trace both, or trace neither.
$ rake --trace create_assets work
** Invoke create_assets (first_time)
** Execute create_assets
Created some assets
** Invoke work (first_time)
** Invoke setup (first_time)
** Execute setup
Setting up
** Execute work
Doing work

$ rake create_assets work
Created some assets
Setting up
Doing work
If we’ve previously been calling multiple tasks in different commands and only tracing some of them, we want to maintain the same output in our CI system logs but also reap the performance benefit of not booting the app multiple times over. This means having tracing enabled for some tasks, but not others which we can’t do from the shell.
Luckily there’s another mechanism to invoke multiple rake tasks, we define a new rake task that can then call the other rake tasks and setup tracing before calling the last one by mimicking the internals of rake --trace.
(Rake::Task.[] lets you find rake tasks by their labels, and then Rake::Task#invoke calls the code defined for the task as if you’d run rake whatever on the cli.)
task :ci_perform do
 Rake::Task["create_assets"].invoke

 # Enable `--trace` programatically for remaining tasks invoked
 Rake.application.options.trace = true
 Rake.application.options.backtrace = true
 Rake.application.options.trace_output = $stderr
 Rake.verbose(true)

 Rake::Task["work"].invoke
end
Et voila, we get our trace output for the work task but not until that’s invoked.
$ rake ci_perform
Created some assets
** Invoke work (first_time)
** Invoke setup (first_time)
** Execute setup
Setting up
** Execute work
Doing work
Wanted to fire up OmniOS to play with and didn’t have any spare x86 hardware to hand so decided to figure out running it in UTM on Apple Silicon, meaning it needs emulation as OmniOS is x86 only.
Grab the ISO from the OmniOS downloads page, I used the LTS release but the current stable should work too. Just make sure it’s the ISO version, not USB, etc.
Open UTM and click “Create a New Virtual Machine”. Choose “Emulate” as we need a x86 VM on an aarch64 host. Choose “Other” for the Operating System, then select the iso file you downloaded above from the Browse… button.
Make sure to leave the Hardware Architecture set to x86_64, but adjust the rest to what you require. OmniOS suggests 1GB ram minimum for VMs. Storage is suggested to be 8GB minimum.
On the Summary screen check the “Open VM Settings” and click Save.
On the Settings popover that appears, select Display from the sidebar and change the “Emulated Display Card” to “VGA”. This ensures we don’t get a black screen when booting.
I then chose to make the VM appear as a separate host on my LAN, by changing “Network” -> “Network Mode” to “Bridged (Advanced)”. This isn’t required.
On the post-installation menu I chose “Configure the installed OmniOS system”, then “Configure Networking” and changed it from Static to DHCP, so it will pick up an IP at boot from my router.
Back in 2019 I picked up a pair of Sony WH-1000XM3 Headphones for using in the office. Very useful and work well in an office and on public transport. After a while I was finding my ears were getting quite hot when wearing them all day, especially on hotter days in the summer.
The original earpads had a shiny synthetic surface, after some research I happened across Dekoni’s Synthetic Suede Earpads as a suggested upgrade for the XM3’s. Discovered Electromod are a UK business that imports them for sale here, and ordered them. Arrived promptly, and an unrelated issue around payment was easily resolved by customer services. Would buy from them again without any worries.
Fitting the earpads was pretty simple, the old pads lever off and the new pads are pressed into place. From memory I used a plastic spudger to pop the old pads off. The Synthetic Suede seals much better against my head, is cooler to the touch and doesn’t overheat in the same way. I’ve taken to wiping them off with a soft cloth occasionally to stop muck building up on them.
Electromod also carry upgraded earpads for many other headphones, including Sony XM4/XM5 and Bose QC/700’s.
Installing ruby through asdf on Apple Silicon Macs1 will attempt to build a custom OpenSSL for each install because it can’t find OpenSSL from homebrew in /usr/local, as that’s now installed in /opt/homebrew. This means your brew update no longer pulls in security fixes for your ruby runtimes, as well as wasting disk space.
Ruby 2.6.10 & 2.7.x need OpenSSL 1.1, and are unsupported at time of publishing so you should really upgrade to ruby 3! (Tested with ruby 2.6.10 and 2.7.8 at time of publishing.)
Ruby 3.0 and higher need OpenSSL 3.0+ so we follow the same override but with a different brew name. (Tested with ruby 3.1.4 and 3.2.2 at time of publishing.)
Also if you’re trying to install a version of ruby that exists in rbenv/ruby-buildmaster branch, but not in the version of ruby-build asdf-ruby plugin uses you can override it with ASDF_RUBY_BUILD_VERSION=master when running asdf ruby install x.y.z. Pass as an extra envariable to the above commands.
An amusing idea from @xor@mastodon.xyz for Mastodon instance names (which form part of your username) has been taking three word phrases from Moby Dick and trying to find available domain names, so you could host your instance at famous.whaling.house for example.
Parker has since blogged his idea and some examples which is well worth a read and explains it in more depth, as well as explaining how he did and linking to the script if you want a go.
Many Mastodon instances are on subdomains, and since the early days weirder new-style TLDs have been de rigueur. (The flagship has always been at a .social!) So I set out to find three-word phrases where the third word is a 4+-letter top-level domain, using as my first source text Moby Dick.
Re-reading through the thread on mastodon again, I spotted the following reply from @knowtheory@mastodon.social
Now whilst I don’t think what3words is beneficial in their current form1, they are definitely a great service for comedy purposes. Given they also have three word phrases, and can point to a location anywhere in the world… what’s the funniest location we could put a Mastodon instance on and join the fediverse with?
Say, what’s the Twitter HQ location on W3W? Searching for “Twitter” suggests “Twitter HQ, Market Street, San Francisco”, clicking that shows Twitter’s W3W location as ///define.rental.yoga.
A quick search on the Wikipedia page for Internet Top Level Domains reveals that .yoga is a valid TLD. Further searching on a couple of domain registrars shows that rental.yoga is also available! For a mere £32/year, and hosting a mastodon instance there you could be @you@define.rental.yoga and declare that you haven’t left Twitter!
For some reason this amused me enough to blog about it. I have not registered rental.yoga. Who will? 🙃
HP Microserver Gen8 machines have a HP iLo 4 built in for remote hands management. These are effectively a separate, embedded computer inside the server1, which also means it has its own software (firmware) running on it and needs updating separately.
HP are still releasing firmware updates for the iLo 4, and whilst it’s possible to update them from inside the host OS on the server, you can also do it by uploading the firmware directly to the iLO. I prefer this method as my servers are almost never running the correct operating system to update from the host2.
The easiest way to get ahold of the firmware is to extract it from the Red Hat linux host package, we’re after a .bin file inside the .rpm package HP make available for downloading.
At the time of writing the latest firmware release is v2.8.0, released 2022-04-08, available on HP’s support site here (no login required). Click “View Download Files (2)” and then pick the one ending in .rpm (firmware-ilo4-2.80-1.1.i386.rpm at time of writing.)
Once downloaded, we can unpack the rpm using the rpm2cpio tool and then cpio to output the files on disk for us.
The file we’re after is nested inside a few directories in the unpacked directory. You can find it under usr/lib/i386-linux-gnu/firmware-ilo4-2.80-1.1/ named ilo4_280.bin (at time of writing. Version numbers might differ in future.)
Once you have that bin file on disk, go to your iLO web interface and login. Navigate to “Administration” in the sidebar, then select the “Firmware” tab. Pick the bin file from the file picker and click Upload.
Wait for flashing to complete and the iLO to restart. If you’ve upgraded from < 2.78 then you’ll get a new UI as part of the upgrade which looks better and works just as well as the old one. It also adds new functionality, like a HTML5 remote console rather than having to download a .jar file to take remote control of the machine.
Out the box at least. The iLo can be configured to share eth0 with the host instead I believe. ↩︎
I think both Windows and Red Hat linux are supported for this. ↩︎
RAF Shawbury host an annual 10km running race, and I entered this time because a friend suggested it as an event to aim for over the summer. Given the run is along runways/taxiways it’s going to be one of the flattest courses on offer. Seemed like a good idea at the time.
Got there with plenty of time to register, figure out where the important things—coffee & ice cream vans—were and go for a nervous wee. Decided to start a workout on my watch early, set it to 10(km, I thought) and paused it straight away to wait for the gun. Stood around for another ~5 minutes waiting for the gun to go. Unpaused the watch as I went across the line and we were off.
Started near the front of the midfield and set out at a pace that I thought was around 10:20/mile, didn’t pay too much attention to people coming past me as it was a mass start rather than paced start. Kept pace with some absolute legend running in an Elephant costume (I’d overheard they were targeting a 56 minute finish, something I later realised to be a joke.) Easy enough route, round a taxiway and down the main runway to start.
Mile in, feeling good, lots of energy. Watch buzzes the mile pace … 10:55/mile. Yeesh, that’s way slower than I meant to start, and the rolling mile display hadn’t displayed anything until I’d hit the first mile mark. Oops, time to turn the pace up slightly. Kept going until the rolling mile showed under 10:00/mile, second mile came in at 9:27/mile and then tried to keep it under 10:00/mile whilst not blowing the heart rate up too much.
Marshals around the course were lovely and supportive, although compared to a road 10km through town where people come out of their houses and cheer it felt quite quiet as an event. Seeing someone every time a corner occurred was a welcome sight though, and the water stop was quite well placed just before the halfway mark.
Hit 3.1 miles in around 31-32 minutes which was on pace, legs were feeling okay and I took some water on board whilst running. Second half of the course I started using other people to pace myself, I’d pick someone 50-100 meters ahead who didn’t appear to be vanishing from me and then try and slowly overhaul them without increasing the heart rate too much.
Around the 5 mile mark (~50 minutes) I wondered if I could be on for an hour finish. Also realised as the watch buzzed “Halfway there!” that it was set to a 10 mile run. Useful. Heart rate was creeping up to maximum, legs were starting to ache and the ball of my left foot was starting to complain about repeatedly slamming into the tarmac. Tried elongating my stride and springing off each step a bit more consciously, also hit the point of talking to myself which is a good sign I’m starting to tire and need to start concentrating on what I’m doing form-wise.
Saw the 1km board, then the 500m board and was looking for a 250m board to kick harder from. Sailed past a friend who had already finished about the 200m mark and was really trying not to blow the heart rate through the roof. Found a 150m board—complete with amusingly sarcastic comment along the lines of “ooh, time to put some effort in”—and ramped the pace up slightly. Mindful of keeping the heart rate under control still, pushed a little too high according to my stats afterwards but felt okay doing so for a few seconds.
Crossed the line with a gun time of 1:00:51. Super chuffed I nearly dipped under the 1 hour mark, expected to be around 1:04 having done a 1:06:30 cross-country 10km earlier in the summer. I really must remember not to mess around with my equipment before events though, only make changes before going for training runs because something is always setup wrong.
In this case I’d switched from kilometres to miles for running events, reset my watch yesterday so it had no music/podcasts on to listen to and also changed the display for a running workout, crucially removing the average pace of the whole activity. What I hadn’t foreseen making those changes was I’d have to wait a mile before I got any pace feedback from the watch.
I also discovered uploading straight to Strava (through Rungap) that pausing the watch ahead of time completely screws up the timings. Strava reckoned I’d done an 18:25/mile first mile! I knew it was slow, but it wasn’t that slow. Ended up exporting a GPX and removing the first 6 minutes stood around with it paused to make Strava happy about the timings.
Occasionally I end up with devices on the local network that don’t emit their hostname over DHCP, so when listing the current leases on the EdgeRouter’s cli, they just appear as “?”.1 These usually just irritate me, but occasionally when I’m looking for a machine on the network it means I can’t find it and end up poking the different “?” IPs using nmap or ssh to discover which machines they are.
The EdgeRouter lets me assign static entries in the DHCP subnet, which solves the problem of knowing which hostnames they are, but also pins those devices to (effectively) static IPs within the subnet which leads to me having to know which IPs are free when I assign them, etc. Avoiding that is why I have DHCP on the local network.2
Provided the EdgeRouter is configured to use dnsmasq to provide DHCP services3, you can lean on the dhcp-host option in the dnsmasq configuration to assign a hostname based on MAC address, without prescribing a specific IP address for the machine. This solves the issue of “?” devices showing up in show dhcp leases, whilst also allowing dynamic IP assignment.
You’ll need to know the MAC address in question, and pick a hostname to be assigned to the machine. You’ll then want to inject these through dnsmasq’s configuration file, which set service dns forwarding options xxx nicely injects into on the EdgeRouter.
$ configure
set service dns forwarding options "dhcp-host=14:f6:d8:53:xx:yy,cb1"
set service dns forwarding options "dhcp-host=a8:1d:16:75:xx:yy,cb3"
set service dns forwarding options "dhcp-host=a8:1d:16:74:xx:yy,cb2"
Then follow the usual compare, commit, verify your DNS/DHCP still works, save dance to apply & persist the changes.
Now when you login to the router and list the current DHCP leases, you’ll see the hostnames available - and you can now lookup the machines in local DNS via their hostname too. 🎉
On my network currently these are Chromebooks, and Sonos speakers. I’ve also observed native SmartOS Zones behaving like this previously (I think they might have fixed this now.) I believe the device fails to send the current hostname (option 12) in either the DHCPDISCOVER or DHCPREQUEST packets. ↩︎
Also, if I assign static host mappings to a device they vanish entirely from show dhcp leases, which stops me being lazy and checking one place to figure out where a device is. ↩︎
To find out if you’re using dnsmasq for DHCP, check show service dhcp-server use-dnsmasq returns “enable” ↩︎
I’ve owned a BODUM Bistro Coffee Grinder for a number of years, and aside from occasionally running rice through to clean the grinding surfaces haven’t had any issues with it. Recently bought some new beans which are much oilier than ones I usually get, and after running most of them through ended up with the grinder failing to work.
The failure was the mechanism sounding like it was okay for roughly a second, then the motor straining under load before what sounded like plastic gears jumping teeth. At this point I turned it off. Running it with an empty hopper worked fine, adding anything (either beans or ground coffee) to the hopper caused the load issue. On the third attempt it also had stopped self-feeding from the hopper, and trying to gently push beans/grounds through caused the stoppage above.
David Hagman has previously torn down his grinder and posted a video on YouTube showing the internals. I couldn’t see any obvious part of the internals that would be related to the failure I was experiencing, so I decided to start with cleaning it out and then continue with a strip down if that didn’t reveal anything.
To start with the hopper came off, then the top half of the burr grinder lifts out vertically leaving a worm screw standing proud. I first started gently tapping the grinder unit upside down to free any stuck coffee, then escalated to a small bottle brush. There was still enough grounds stuck around the base of the screw mechanism I couldn’t reach with a narrow brush, so I switched to a bamboo barbequeue stick to loosen grounds and then tip them out.
After clearing out most of the base of the worm gear, whilst I had the unit upside down tapping out the loosened grounds I looked up the chute the grounds fall down into the jar normally to find it was blocked solid with ground coffee. Some gentle rodding with the skewer to break it up and eventually I could see from the grinder mechanism through to the end of the chute.
Once that was clear and everything removable had been thoroughly cleaned and dried, I reassembled and ran rice through it a few times starting with a really coarse grind and fed the result back through the hopper, getting finer each grind. Grinder now works flawlessly, and I guess lesson learned about checking the chute to make sure it’s clear more frequently.
From reading Chrome is Bad, it seems in some situations the updater (also known as keystone) can chew up CPU cycles. Whilst I’m not 100% convinced keystone continuously chews CPU, its launchctl configuration suggests it runs at least once an hour. Given I don’t use Chrome as my main browser, this is undesirable behaviour for me.
With that in mind, I’ve decided to disable the background services rather than delete Chrome entirely. (I need it occasionally.) Stopping/unloading the services and fettling the config files to do nothing achieves this aim (and stops Chrome re-enabling them next launch), whilst leaving Chrome fully functional when needed.
Now when I want to update Chrome once in a blue moon when I need it, I can navigate to chrome://settings/help to update (or from the UI, Chrome -> About Chrome.)
Following a product launch at work earlier this year, I theorised if someone was watching the published lists of SSL Certificates they could potentially sneak a peak at things before they were publicised. Probably far too much noise to monitor continuously, but as a potential hint towards naming of things with a more targeted search it might be useful. Sites like https://crt.sh/ and https://censys.io/certificates make these logs searchable and queryable.
Fast forward to this week, where at HashiConf DigitalHashiCorp are announcing two new products, which they’ve been teasing for a month or so. Watching Boundary get announced in the HashiConf opening keynote I then wondered what the second project might be called.
I’ve spent a chunk of the last month looking at various HashiCorp documentation for their projects, and I noticed they have a pattern recently of using <name>project.io as the product websites. The newly announced Boundary also fits this pattern.
🤔 Could I figure out the second product name 24 hours before public release? Amazingly, yes! 🎉
Searching at random for all certificates issued for *project.io was probably going to be a bit futile, so to narrow the search space slightly I started by looking at when boundaryproject.io had its certificate issued, and who by. The list of things I spotted were:
Common name is “boundaryproject.io”
Issued by LetsEncrypt (no real surprise there)
Issued on 2020-09-23
Leaf certificate
Not yet expired (still trusted)
No alternate names in the certificate
Loading up https://censys.io/certificates and building a query for this, resulted in a regexp lookup against the common name, and an issued at date range of 10 days, just before and a week after the boundary certificate issued date.
parsed.subject.common_name:/[a-z]+project\.io/ AND
parsed.issuer.organization.raw:"Let's Encrypt" AND
parsed.validity.start:["2020-09-20" TO "2020-09-30"] AND
tags.raw:"leaf" AND
tags.raw:"trusted"
Searching brought back a couple of pages of results, I scanned them by eye and copied out the ones that only had the single name in the certificate which resulted in the following shortlist:
boundaryproject.io
essenceproject.io
lumiereproject.io
techproject.io
udproject.io
vesselproject.io
waypointproject.io
We already know about Boundary, so the fact I found it in our list suggests the query might have captured the new product site too. Loading all these sites in a web browser showed some had password protection on them (ooh!) and some just plain didn’t load (ooh!), and some others were blatently other things (boo!). Removing the latter ones left us with a much shorter list:
All domains on the internet have to point somewhere, using DNS records. On a hunch I looked up a couple of the existing HashiCorp websites to see if they happened to all point at the same IP Address(es).
$ host boundaryproject.io
boundaryproject.io has address 76.76.21.21
$ host nomadproject.io
nomadproject.io has address 76.76.21.21
$ host hashicorp.com | head -1
hashicorp.com has address 76.76.21.21
Ah ha, now I wonder if any of the shortlist also points to 76.76.21.21 🤔2
$ host essenceproject.io | head -1
essenceproject.io has address 198.185.159.145
$ host udproject.io | head -1
udproject.io has address 137.74.116.3
$ host waypointproject.io
waypointproject.io has address 76.76.21.21
🎉 Excellent, https://waypointproject.io was a password protected site pointed at HashiCorp’s IP address 🎉
I then wondered if I could verify this somehow ahead of waiting for the second keynote. I firstly tweeted about it but didn’t name Waypoint explicitly, just hid “way” and “point” in the tweet. I got a reply from @ksatirli which suggested it was correct (and then later @mitchellh confirmed it.3)
HashiCorp also does a lot in public, and all the source code and related materials are on GitHub so perhaps some of their commit messages or marketing sites will contain reference to Waypoint. One github search later across their organisation: https://github.com/search?q=org%3Ahashicorp+waypoint&type=issues and I’d discovered a commit in the newly-public hashicorp/boundary-ui repo which references Waypoint: 346f76404
chore: tweak colors to match waypoint and for a11y
Good enough for me, now to wait and see what the project is for. Given it’s now all announced and live, you can just visit https://waypointproject.io to find out! (It’s so much cooler/useful than I’d hoped for.)
I so hope whoever registered this was going for UDP in the name, rather than UD Project. ↩︎
I’m a massive fan of IP address related quirks. Facebook’s IPv6 address contains face:b00c for example. A nice repeating 76.76.21.21 is almost IPv4 art somehow. ↩︎
Secrets are more fun when they are kept secret. 🥳 ↩︎
Edit:Originally this post was written to be a workaround for Tailscale routing all DNS traffic over its own link when you configured it to push out existing DNS Server IPs. This turned out to be a bad assumption on my part. Thanks to apenwarr for helping me understand that shouldn’t be the case, and encouraging me to debug it properly rather than making assumptions.
Naturally it turned out to be a PEBKAC. I’d pushed out 162.159.25.4 as the DNS Server IP which is a nameserver rather than a forwarder. This in turn meant people were getting empty answers back to DNS queries, which stopped once they quit tailscale. (Go figure, Tailscale removes the resolver from the network stack when it quits.) The post has been updated to remove that invalid assumption. 🤦🏻♂️
Imagine we have a fleet of machines sat in a private network somewhere on a 172.16.20.20/24 IP range, with entries pointing at them published on public DNS servers. Eg, dig +short workhorse.fake.tld returns 172.16.20.21.
Initially this all works swimmingly, until someone comes along that is using a DNS forwarder that with DNS rebinding protection enabled. Daniel Miessler has a wonderfully succinct explanation on his blog about DNS Rebinding attacks, but to protect against it you stop your resolver returning answers to DNS queries from public servers which resolve to IP addresses within standard internal network ranges. (ie, rfc1918.)
This means for those users they can successfully connect to our Tailscale network and access everything by IPs directly, but can’t access any of the internal infrastructure by hostname. eg, dig +short workhorse.fake.tld will return an empty answer for them.
Once we figured out the root cause of that, for workarounds we figured we could either run a DNS forwarder within our own infrastructure, or get all our staff to change their home DNS settings and hope they were never on locked down networks ever again.
We chose the former, and thankfully dnsmasq is really easy to configure in this fashion and we already have a node which is acting as the tailscale subnet relay, so we dropped the following config in /etc/dnsmasq.conf on there:
# Only listen for requests from VPN/local for debugging
interface=tailscale0
interface=lo
# Google DNS
server=8.8.8.8
server=8.8.4.4
# Quad9
server=9.9.9.9
# Cloudflare
server=1.1.1.1
server=1.0.0.1
# Race all servers to see which wins
all-servers
# Try and stop DNS rebinding, except where we expect it to happen
bogus-priv
stop-dns-rebind
rebind-localhost-ok
rebind-domain-ok=/fake.tld/
domain-needed
filterwin2k
no-poll
no-resolv
cache-size=10000
One quick puppet run later, and our Tailscale subnet relays are happily running both tailscale and dnsmasq, serving out answers as fast as they can to other Tailscale nodes. Add port 53 to the Tailscale ACL and away we went.
Having a need to write some BDD-esque tests without the need of putting them in front of non-technical people, I was recently playing around with rspec feature specs. Where I’ve used these previously we’ve eventually run into curation issues where the specs are outdated, brittle and require so much maintenance we’ve generally ended up lobbing cucumber into the project as a stopgap.
This is due to ending up with feature specs like the following, which lead you to having to parse the code mentally to work out what it’s testing:
RSpec.feature "Admin: Posts" do
 scenario "Authoring a post" do
 @user = create :user, :admin
 login_as @user

 visit new_admin_post_path

 fill_in "Title", with: "RSpec feature specs"
 fill_in "Body", with: "Some piffle about feature specs"
 click_on "Publish!"

 visit root_url
 expect(page).to have_content("RSpec feature specs")
 end
end
After some reading around, I eventually stumbled back across this idea from Future Learn where they lay out the above test by splitting it into private methods within the feature block, but leaving it more readable to future readers. I then found Made Tech’s take on this same idea, and riffing off the both of them ended up with the following instead:
RSpec.feature "Admin: Posts" do
 scenario "Authoring a post" do
 given_i_am_logged_in_as_an_admin
 when_i_publish_a_new_post
 then_i_see_the_post_on_the_homepage
 end

 protected

 def given_i_am_logged_in_as_an_admin
 @user = create :user, :admin
 login_as @user
 end

 def when_i_publish_a_new_post
 visit new_admin_post_path

 fill_in "Title", with: "RSpec feature specs"
 fill_in "Body", with: "Some piffle about feature specs"
 click_on "Publish!"
 end

 def then_i_see_the_post_on_the_homepage
 visit root_url
 expect(page).to have_content("RSpec feature specs")
 end
end
Now this is fine, but writing lots_of_names_with_underscores_in_is_a_trifle irritating. Now I remember Jim Weirich1 showing off rspec-given at a conference a few years ago, and wondered if that would solve my problem here of wanting to have runtime warn me when my methods are misspelled or missing, without having_to_underscore_them.
Now rspec-given would let me do that, but I’d have to switch from calling them all in turn inside a scenario block to calling them inside context blocks and passing blocks to each of the Given, When, etc methods. I think it would be something like (warning, untested)
Rspec.feature "Admin: Posts" do
 Given { @user = create :user, :admin }
 Given { login_as @user }

 context "authoring a post" do
 When { visit new_admin_post_path }
 When { fill_in :… }
 Then { visit root_url }
 And { expect(page).to have_content("RSpec feature specs") }
 end
end
Now this didn’t quite fit with what I wanted. However, I did wonder if it was possible to go down the route of having a Given method that takes a token to identify the code it should call. (A method if you will.) It’s possible in ruby to call a method starting with a Capital letter, but convention dictates those are usually class/module names (constants) rather than methods.
A little bit of hacking later and this is what I ended up getting working:
RSpec.feature "Admin: Posts" do
 scenario "Authoring a post" do
 Given :"I am logged in as an admin"
 When :"I publish a new post"
 Then :"I see the post on the homepage"
 end

 protected

 def_Given :"I am logged in as an admin" do
 @user = create :user, :admin
 login_as @user
 end

 def_When :"I publish a new post" do
 visit new_admin_post_path

 fill_in "Title", with: "RSpec feature specs"
 fill_in "Body", with: "Some piffle about feature specs"
 click_on "Publish!"
 end

 def_Then :"I see the post on the homepage" do
 visit root_url
 expect(page).to have_content("RSpec feature specs")
 end
end
Now there’s two extra things that makes this easier for me to write than underscored methods. Ruby doesn’t only allow :foo as a symbol, it also allows :"foo bar" for writing a symbol. You can then define a method based on that even though it has spaces in the method name.
My text editor2 also autocompletes ruby symbols from partial matches, which makes it easy to write out what I want in the scenario, run the spec and find out what methods need defining, then define the methods using autocomplete to save copy/pasting everything.
By using actual methods for these, we get a couple of other happy accidents along the way. Most ruby installs now include did_you_mean out the box, which suggests methods like the one you called if your method results in a NoMethodError. This works quite nicely, you end up with something like
undefined method `When I pblish a new post' for #<RSpec::ExampleGroups::AdminPosts:0x00007faf1f9fc4c0>
Did you mean? When I publish a new post
And then if you just run it without implementing any of the helper methods at all, you get a nice NoMethodError telling you exactly what you need to implement:
NoMethodError:
undefined method `Given I am logged in as an admin' for #<RSpec::ExampleGroups::AdminPosts:0x00007fbd06598498>
The magic behind that makes all this work is in spec/support/given_when_then.rb, which is not terrible, but also probably not a great idea. 🙃
Sometimes it’s useful to be able to craft a request to one server, using a DNS name that’s either not defined or currently pointed to a different IP. (Migrating webservers, testing a new webserver config out, etc.)
Historically for HTTP calls this was easy, just set the Host header as you make the http request to the IP directly:
However, HTTPS throws a bit of a spanner in the works, if we just try to connect using an overridden Host header, we get an error back from the server if it’s not configured with a certificate for the IP address:
 $ curl -H "Host: caiustheory.com" https://10.200.0.1/
curl: (51) SSL: no alternative certificate subject name matches target host name '10.200.0.1'
Usually at this point I’d just start editing /etc/hosts to add 10.200.0.1 caius.name to it and carry on testing. This is a pain when you’re testing more than one server, or you’re on a machine where you don’t have root access to edit /etc/hosts.
In later versions of curl there’s a solution for this built into the binary, in the form of the --resolve flag. You can tell it to override the DNS lookup for a specific hostname/port combination. This in turn means that the correct host is forwarded to the server for the correct SSL certificate to be chosen to serve the request based on host.
It takes the form --resolve HOST:PORT:IP where HOST is the human-friendly host, PORT is the webserver’s port (convention is 80 for HTTP, 443 for HTTPS) and IP being the destination IP you want to hit. (As opposed to the one in DNS currently.)
My Mini One 2003 R50 1.6 litre petrol engine takes specific BMW 5w30 Longlife-04 oil. (I believe the R52 and R53 models take the same oil too.) The oil is 5w30 fully synthetic made to BMW’s exacting standards.
The cheapest I’ve found to buy currently is a GM (Vauxhall/Opel) manufactured one, made to BMW’s specifications. Searching for something like “dexos 2 5w30 gm” on ebay finds them at about £20 for 5 litres with free delivery in UK. (Comparatively, an equivalent from Castrol is about £50 at time of writing.)
Sounds like a small saving, but if your Mini is anything like mine it needs topping up once a month or so, and I do a full oil/filter change every 5k miles as an attempt at longevity. Soon adds up.
Over time I’ve managed to build up quite the collection of Gists over at Github, including secret ones there’s about 1200 currently. Some of these have useful code in, some are just garbage output. I’d quite like a local copy either way, so I can easily search1 across them.
Install the gist command from Github
brew install gist
Login to your Github Account through the gist tool (it’ll prompt for your login credentials, then generate you an API Token to allow it future access.)
gist --login
Create a folder, go inside it and download all your gists!
mkdir gist_archive
cd gist_archive
for repo in $(gist -l | awk '{ print $1 }'); do git clone $repo 2> /dev/null; done
Now you have a snapshot of all your gists. To update them in future, you can run the above for any new gists, and update all the existing ones with:
cd gist_archive
for i in */; do (cd $i && git pull --rebase); done
Now go forth and search out your favourite snippet you saved years ago and forgot about!
Working somewhere where we prefix our branches with the creator’s initials, I sometimes forget to do so.1 This leads to me having to rename the branch, typing out the whole name again after adding cd/ to the start of it.
Computers are meant to solve repetitive problems for us, so let’s put it to work in this case too. My ~/bin contains git current-branch, which returns the current branch name.
If we hardcode the initials, this becomes a simple command to recall from our history:2
But computers are supposed to solve all repetitive work, including knowing who I am, right? Correct, my local user account knows my full name, so we can work out my initials from that. Lets lean on the id(1) command to lookup the user’s details then strip it down to just the initials.34
id -F
# => "Caius Durling"

id -F | sed -Ee 's/(^| )(.)[^ ]+/\2/g' | tr 'A-Z' 'a-z'
# => cd
Bingo, we can wrap that into a subshell passed to the branch move command and we’re done in a one-liner.
I don’t follow that policy for my personal repos, or working on forks of other people’s code. And I’m human, so I forget. ↩︎
You can also replace --move --force with -M: git branch -M newname↩︎
On macOS you can use id -F to return the full name of the user. Doing this on other platforms is left as an exercise for the reader. ↩︎
Yes, this is an incredibly naive way to initialize a name, but it’s good enough for the people I work with. Handling edge cases is left as … you got it, an exercise for the reader. ↩︎
In Ruby it’s easy to structure data in hashes and pass it around, and usually that leads to errors with calling methods on nil, or misspelling the name of a key, or some such silly bug that we might catch earlier given a defined object with a custom Class behind it. But it’s so much work to create a Class just to represent some grab bag of data we’ve been handed, right? Well, maybe!
Lets say we have some event data that we’re being sent and we want to do some stuff with it in memory, we could just represent this as an array of hashes:
This is not a bad way to represent the data, but if we want to start asking questions of it like “find all events currently happening” it becomes trickier. We could filter the collection to just those “in progress” events with the following
Next time someone reads this though, they have to figure out what it means to have an event that’s started but not finished. Also what happens when someone in future misremembers :finished as :completed when running over the data in new code?1 Wouldn’t it be better if we could do the following instead?2
events.select { |event| event.in_progress? }
An easy way to do this is to just create a Struct for the event, with the extra method defined internally. Whilst we’re in there, we could add a couple more methods to make us querying the state of boolean attributes nicer to read(eh?)
Event = Struct.new(:name, :duration, :started, :finished) do
 alias_method :started?, :started
 alias_method :finished?, :finished

 def in_progress?
 started? && !finished?
 end
end
And then to create the objects, we can either use the positional arguments to .new (same order as the symbols given to Struct.new), or tap the object and use the setters directly for each attribute.
Now we can use our easier-to-read code for selecting all in-progress events, or ignoring all of those. Or if we just want to grab all finished events, we now have a method to call—Event#finished?—that conveys the intent of what it returns without having to look up the data structure of the hash to work out if that field is a String or Boolean.3
For super-powered structs, you don’t even need to assign them to a Constant. You can just assign them to normal variables and use them locally in that scope without needing to define a constant.
class Grabber
 def call
 result = Struct.new(:success, :output) do
 alias_method :success?, :success
 end

 if (data = grab_data)
 result.new(true, data)
 else
 result.new(false, nil)
 end
 end
end
That’ll handily return you an object you can interrogate for success? and ask for the output if it was successful. And no Constants were created in the making of this method. 🎉
Keep an eye out for where you can Struct-ure your data. It might be more often than you expect.
CircleCI have released their version 2.0 platform, which is based on top of docker and moves the configuration for each project into a config file in the git repository.
They have a bunch of documentation at https://circleci.com/docs/2.0/. Basic gist is the config file lives at .circleci/config.yml and defines which images to run a series of commands in. You can either specify jobs to run in series, or a workflow containing jobs which can depend on each other and/or run in parallel.
The first step is finding a base image that contains ruby, node and chrome/chromedriver so the the app runs, assets compile and rails feature specs work respectively.
Once we have that then we can start on setting up our rails environment to the point we can run tests. First of all we need to install all our ruby dependencies via bundler.
Then we need to sort out our database. There’s a chance that the docker instance for MariaDB hasn’t come up yet, so we can lean on a tool called dockerize to wait for it to be available. Then we can ask rails to go ahead and setup our test database.
 - run:
 name: "Wait for database to be available"
 command: "dockerize -wait tcp://127.0.0.1:3306 -timeout 1m"
 - run:
 name: "Setup database"
 command: "bundle exec rake db:setup"
And then finally we can run our tests as the final step.
Computers are great at automatically checking things, and git has a mechanism for running hooks before events happen. Bosh these two things together and you can have git trigger anything you like before you’re allowed to commit, which in turn means you can sanity check exactly what you’re committing to make sure it meets whatever criteria you have.
To make it easy to manage my git hooks in a consistent fashion, I use a tool called overcommit. This comes with a config file to tell it what you want triggered when, and a bunch of standard plugins to choose from.
For the most part this works absolutely great. I have on occasion noticed that puppet-lint will let invalid puppet syntax slip through though which is irritating to find after you’ve pushed the changes up to the puppetmaster. The puppet command line tool has a validate subcommand however, so we can hook that into overcommit as a custom hook in the repo.
To do this we need to add our custom hook into the right directory, and we’re adding a hook to run before commits, so it goes into .git-hooks/pre_commit. Lets name it for what it does, validating puppet syntax. So into puppet_validate.rb we put the following:
# .git-hooks/pre_commit/puppet_validate.rb
module Overcommit::Hook::PreCommit
 class PuppetValidate < Base
 def run
 errors = []

 result = execute(%w(puppet parser validate), :args => applicable_files)
 return :pass if result.success?

 [:fail, result.stderr]
 end
 end
end
Then we need to tell overcommit that it needs to run this custom hook as a check whenever we commit, that goes into .overcommit.yml under the PreCommit key:
Rubies installed to ~/.rubies (via ruby-install most likely)
Gems for each ruby version installed under ~/.gem (via chruby most likely)
What to do when you want to reclaim some disk space? Delete unused ruby versions of course! Pretty straight forward, look in ~/.rubies for ones you want to remove, then delete them.
Then the problem is we’re left with artifacts hanging around, namely any gems we installed for ruby 2.0.0 or 2.1.7 are still present under ~/.gem using up disk space. We could go through and find them by hand, or we could get the computer to delete anything under ~/.gem that doesn’t have a corresponding runtime under ~/.rubies.
(xargs -pL1 will prompt with each command it wants to run before running it - answer y to proceed, anything else to prevent it running that command. Lets you see what ruby versions it is removing before it does so.)
Something goes here
and something else
over there slowly
wrapping lines a
little each time
oh no, you fucked
up one little comma
and now everything is running away drastically from you
End it.
Ever found you’ve accidentally entered too many gits in your terminal and wondered if there’s a solution to it? I quite often type git then go away and come back, then type a full git status after it. This leads to a lovely (annoying) error out the box:
$ git git status
git: 'git' is not a git command. See 'git --help'.
What a git.
My initial thought was overriding the git binary in my $PATH and having it strip any leading arguments that match git, so we end up running just the git status at the end of the arguments. An easier way is to just use git-config’s alias.* functionality to expand the first argument being git to a shell command.
git config --global alias.git '!exec git'
Which adds the following git config to your .gitconfig file
[alias]
 git = !exec git
And then you’ll find you can git git to your heart’s content
See what other git alias’ I have in my ~/.gitconfig, and laugh at all the typo corrections I have in there. (Yes, git provides autocorrection if you enable it, but I’m used to these typos working!)
My home server is a HP Proliant Microserver Gen 8, which is modestly powerful and runs everything I need at home in a fairly compact footprint without being too noisy or power hungry.
Both the G8 and the previous revision, the G7, are moderately expandable in terms of memory & storage devices. (Not least of which is an internal USB port, which is useful plugging the SmartOS boot device into, no chance of it being knocked out!) I’ve upgraded the memory and HDDs in the time I’ve had the machine. (Here’s how I upgraded the memory on the cheap!)
The Gen 8 specifically is a little more upgradable however, as it comes with a 1155 CPU socket. Mine contained a Celeron G1610T CPU from new, which whilst quicker than the AMD one in the G7, was only two cores / two threads and not massively fast in the grand scheme of things.
Given I run a few different things on the home server, it acts as a NAS for a handful of laptops, plex server, crashplan backup server, gathers various stats from network devices & runs the unifi controller. Mostly it’s fine, but transcoding in Plex specifically burns the CPU and on the odd occasion I’ve noticed it being slower than realtime and having to wait for the server to catch up.
My criteria were more than 2 cores/threads, ECC ram has to be supported and ideally not much higher TDP than the stock CPU. Plex guidelines for CPU power state that as a (very) rough guideline, you need a 2000 PassMark score per 1080p transcode. Given I would like other things running alongside Plex, allowing 2-3x that figure sounds ideal.
Stock CPU is first in the list for comparison. Bold one is the chosen upgrade.
After some deliberation, I decided to pick up the E3-1265L v2 from Ebay. It has a slightly higher TDP, but not so much that I’m worried about the temperature in the server. Most importantly it supports ECC ram & quadruples the physical cores, whilst providing a whopping eight threads for processing power. More than enough for a couple of concurrent Plex transcodes with cycles left over for other things at the same time.
I ordered it from a Hong Kong seller, and it arrived in the UK after 10 days or so as expected. It came with thermal paste, which I applied in a cross formation before refitting everything. The G8 is really easy to pull apart, HP really thought about that!
First boot with the processor went very smoothly, SmartOS recognises it quite happily.
 [root@oscar ~]# sysinfo | grep -i cpu
"CPU Type": "Intel(R) Xeon(R) CPU E3-1265L V2 @ 2.50GHz",
"CPU Virtualization": "vmx",
"CPU Physical Cores": 1,
"CPU Total Cores": 8,
I’m also happy with the temperatures, even after streaming a couple of videos via plex for an hour or so, whilst backing up a laptop via crashplan, as well as the usual stuff that’s always running on the machine, everything was still well within normal ranges.
Sensor
Value
Units
State
Inlet Ambient
22.000
degrees C
ok
CPU
40.000
degrees C
ok
P1 DIMM 1-2
40.000
degrees C
ok
Chipset
56.000
degrees C
ok
Chipset Zone
44.000
degrees C
ok
VR P1 Zone
61.000
degrees C
ok
iLO Zone
49.000
degrees C
ok
PCI 1 Zone
40.000
degrees C
ok
Sys Exhaust
48.000
degrees C
ok
Fan 1
12.544
percent
ok
All in all, great success!
Updated 2018-12-30: @tomwardillnotes the E3-1230L V3 doesn’t fit: “The E3-1230L V3 that you list doesn’t fit, it’s a 1150 socket, not a 1155”. The table of candidates has been altered to remove it.
Second year in a row doing this Tri, last year I came away feeling like I hadn’t given it my best and wanted to return to complete unfinished business. (Spoilers: I managed better this year.)
Started last in a lane of three, didn’t get overtaken which meant swimming at my own pace without being under pressure was easily achieved. Failed to exit the pool initially, dropped a handful of seconds there for sure.
Didn’t feel like I was pushing too hard, certainly felt energetic after leaving the building. Given my lack of swimming this year, I’m surprised at how well it went. Strength training over the winter months has definitely paid off more than I expected.
Took nearly a minute off my previous swim time, which is more than I would’ve expected. Was only +7 seconds off my estimated time when entering too!
The wonderful (👻) cycle route down and back up Wenlock Edge. Ran out of gear heading down the valley side (again), coasted most of the way down. Attempted to pace myself on the climbing, keeping an eye on my heart rate to know whether I could push harder or needed to ease off. Felt strong nearly all the way round, only came close to blowing on the final 15% climb (which was also nearer the end than I remembered/expected!)
Got off the bike with less left in my legs than I thought whilst I was in the saddle. Took a solid 11 minutes 10 seconds off my previous time (which did include walking to be fair - none of that this year) which I’m very happy with. Think I paced it nigh on perfectly on the day. Probably my strongest discipline currently too.
Started the run feeling like crap. First couple of km is a mostly flat trail run, where I didn’t push very hard and was basically attempting to find some energy from somewhere. Pretty sure this was a mental battle rather than physical, no cramps or super tired muscles.
A friend overtook me about 2.5km in and rather handily goaded me on by saying, “See you at the end!” as he went past (Thanks Paul!) which naturally made me kick harder and try to stick with him. Clung on to the halfway point (and the massive hill they make you climb just to turn round at the summit), and pulled ahead coming back down the route.
Resorted to walking some sections of the run (probably about 750m in total), tailing and then dropping back from my mate in the last kilometre. (Dropped a minute in total to him on the run.) Technically I ran a 10k this season, but I’ve not run aside from that.
(Also binned my trainers upon returning home. They’ve finally given up after being beaten on pavements & woodland floors for about 50 miles.)
Total 01:49:27(Previously 02:14:40)
Completed in under two hours! Completely astounded at that, especially as I don’t feel like I’ve been training much this year. (I have, but more socially than on a strict timetable and without doing many previous events this season.)
If you’d told me at the end of last year that my second attempt would take ~25 minutes off my finish time, I’d have laughed at you.
Wenlock Olympian Triathlon is definitely my favourite Triathlon, and also the most challenging I’ve done to date. I’m intending on doing it next year and seriously aiming to take at least another 10 minutes off my total time.
Given a dead router, how do you get back online whilst you wait for the replacement part to arrive? Grab a Raspberry Pi 3 off the shelf, along with a USB to Ethernet adapter and hey presto the internet works again.
This is with a fibre modem (FTTC), using PPPoE to connect out. Plug the modem (WAN) into the RPi’s ethernet port, and plug the LAN switch into the USB adapter.
First thing is to get the WAN link working, get it talking PPPoE to the ISP. Usually this will be configured in /etc/ppp/pppoe.conf (depends on your linux distro). (That’ll require your username/password for your ISP usually too.)
Get it up & connected, and make sure you can ping the internet from the RPi. Then it’s time to get the LAN working. Give it a static IP in the range you want shared out.
And then it’s time to handle WAN -> LAN traffic and the reverse. Make sure you have packet forwarding enabled, and then setup the firewall to handle NAT and also keep out undesirable traffic.
sysctl net.ipv4.ip_forward=1

iptables -F
iptables -X
iptables -t nat -F
iptables -t nat -X
iptables -A INPUT -i lo -j ACCEPT
iptables -A INPUT -i eth0 -j ACCEPT
iptables -A INPUT -p icmp --icmp-type any -j ACCEPT
iptables -A INPUT -p tcp ! --syn -m state --state NEW -j DROP
iptables -A INPUT -f -j DROP
iptables -A INPUT -p tcp --tcp-flags ALL ALL -j DROP
iptables -A INPUT -p tcp --tcp-flags ALL NONE -j DROP
iptables -A INPUT -m state --state ESTABLISHED,RELATED -j ACCEPT
iptables -t nat -A POSTROUTING -o ppp0 -j MASQUERADE
iptables -A INPUT -j DROP
Hey presto, you have a working emergency router. In testing I found my fibre connection (80/20Mb) was slower than the traffic the RPi could push, so didn’t notice any difference vs my normal router. (Although I did disable a bunch of automated stuff, so there was less contention on the WAN link.)
I’ve been wanting to drop more memory in my HP Microserver G8, but hoping to find a cheaper alternative to buying new sticks from Crucial. I needed one or two 4GB sticks, but they had to be ECC of course.
At the time of writing (May 2017), Crucial’s offering for the G8 shows a 4GB stick to be £43.19, and an 8GB stick to be £81.59. This was a little more than I wanted to pay, but I was struggling to find anything on eBay or Amazon UK that I could be sure was ECC, and also cheaper.
Eventually I wondered what else had compatible memory, after all this isn’t a bespoke machine. It should share the same memory specifications as plenty of other machines. The spec I was looking for was:
DDR3 240-Pin UDIMM
ECC
1600Mhz (or faster)
4 or 8GB sticks
After a little while of searching, I happened to find the previous Mac Pro (ie. the tower, not the trashcan) also uses that specification of memory. One quick search on eBay and up turned someone selling off his 4GB sticks where he’d upgrade his Mac Pro to 8GB sticks across the board. £29 for 2x 4GB sticks is better than I was hoping for, and once fitted in the Microserver they work flawlessly.
(The onboard management software warns me that some processor features are disabled because I’m not using HP Approved memory, but it also logged that warning when I was using HP Approved memory previously and the machine worked perfectly then. No doubt it’s to make IT Managers who don’t like warnings spend more money with HP.)
Recently I’ve been writing a bunch of bash scripts for various things. As some up-front safety checks I’ve taken to opening every script with the following:
#!/usr/bin/env bash

[[ "$TRACE" ]] && set -o xtrace
set -o errexit
set -o nounset
set -o pipefail
set -o noclobber
Other things I’m also trying to be good about doing:
using readonly when declaring variables which shouldn’t be mutated
Trapping errors using an error function, and cleaning up anything temporary in there
And some useful reading I ran across in my quest to level up bash-scripts:
My 1996 e36 BMW 328i Convertible was having trouble starting, and it’s always broken up slightly at idle since I took ownership of the car. On a couple of hot days last summer it also stalled during idle, then started doing it again recently (even though the ambient temperature was much colder.)
The main sympton at the point I took notice was it struggling to start, then hunting at idle until warm, then promptly stalling when warm and idling. It would also cut out when coming to a stop at junctions.
Reading the codes showed one related to the crankshaft sensor:
53 Crankshaft Sensor
(Codes can also show up in hex, which would be “83 Crankshaft Sensor”.)
I duly replaced both the Crankshaft Sensor (Part # 12141703277) and the Camshaft Sensor (Part # 12141703221), but it was still throwing the crankshaft sensor code.
Upon closer inspection, the sensor wire in the plug for the crankshaft sensor wasn’t pushed fully into the socket under the intake manifold. This lead to the ECU not being able to get a signal from the sensor, so it quite correctly threw a code and didn’t run correctly.
Made sure all the pins were seated in the plug correctly, and reconnected the plug under the intake manifold and she started up perfectly. Drives much better, and the engine pulls more smoothly all the way up the rev range.
You have some crazy idea for an iOS app that uses HealthKit so you fire up Xcode, create a new project & add the HealthKit entitlement. Follow the tutorial to request authorization from the HKHealthKitStore. Hit run to make sure the app compiles and find that it instantly crashes with a SIGABRT in AppDelegate.
Puzzled by this you go over the minimal amount of code you’ve added and pare it right down to just the HKHealthKitStore.requestAuthorization call which is still causing the SIGABRT as soon as the app tries to boot.
The missing piece of the puzzle is Info.plist needs a key adding to it for the HealthKit authorisation screen. The documentation helpfully forgets to mention this however. Here’s some quick simple steps to fix it:
Open Info.plist in Xcode
Click the (+) at the top to add a new key/value to the file
Enter “Privacy - Health Share Usage Description” for the key
Enter a useful message to the user explaining why they should allow access to their healthkit data for your app for the value
Run your app and see the HealthKit authorisation sheet appear
NB: if you want to update/write any data to healthkit, you’ll need to add the “Privacy - Health Update Usage Description” key with a description as well.
I recently reinstalled a laptop and in doing so setup full disk encryption in a slightly strange fashion. The basic flow I followed was:
Boot into Recovery mode (hold ⌘-R at boot)
Erase the internal HD as HFS+ (Journaled, Encrypted) and set a disk password
Install OS X onto the internal disk
During setup, use Migration Assistant to copy clone containing previous install data from backup disk
This worked great in the end, once I’d recompiling various utilities I had installed. (Downside of moving from one CPU arch to another - can’t just copy all compiled binaries over.)
However, I failed at step 2 above and entered “password” as my disk password since it was only intended to be temporary. Usually OS X’s full disk encryption (FileVault 2) allows the machine users to unlock the disk, and not a standalone password. Due to the slightly odd way I setup the machine, I had the option of either using the disk password or my user account’s password.
Having hunted around trying to find how to change or remove this disk password and leave only my users password, I finally stumbled across the magic incantations in an apple discussion thread asking How to disable “Disk Password” on boot?.
The magic incantations are as follows:
List all the passwords that can currently unlock the drive
Make sure there is a second password listed or removing the disk password will lock you out of the disk.
 $ sudo fdesetup list -extended
ESCROW UUID TYPE USER
28376DDE-B6E1-48BE-A06F-4212067581D6 Disk Passphrase User
4DBF8CEF-40F7-4F00-902F-A47AA643C656 OS User caius
Note the UUID of the “Disk Passphrase” entry, and remove that from the list
The initial pain point when upgrading a rails app is figuring out which of your dependencies are blocking you upgrading the actual rails gem (& immediate dependencies, actionpack, etc.). One way to start this is to update the rails dependency in your Gemfile and run bundle update rails. Then check the error output (it never works first time…) to see which gems are blocking the upgrade. Repeat, rinse until it works.
I figured I’d cheat a little and eyeball the Gemfile.lock to see which gems had an explicit dependency pinning rails (or actionpack, activejob, etc) to a version lower than I want to upgrade to, so I could get an idea of what needs to be upgraded without having to do them all one-by-one.
Then instead of eyeballing Gemfile.lock, I wrote an awk script to pull out the interesting dependencies (ie, anything that depends on rails gems) so I just have to check which versions they depend on by hand.
# Reads a Gemfile.lock and outputs all dependencies that depend on rails

BEGIN {
 parent = 0
 parent_printed = 0
 rails_gems = "^(rail(s|ties)|action(mailer|pack|view)|active(job|model|record|support))$"
}

# We only want the specs from the GEM section
NR == 1, $1 ~ /GEM/ { next }
$1 == "" { exit }

# Skip parent gems we don't care about (rails itself…)
$0 ~ /^ {4}[^ ]/ &&
$1 ~ rails_gems {
 parent = 0
 parent_printed = 0
 next
}

# Parent gems that aren't part of rails core
# Store the name to be printed if we match below
$0 ~ /^ {4}[^ ]/ {
 parent = $0
 parent_printed = 0
 next
}

# If the nested gem (6 space prefix) matches rails-names and we have a parent value
# set then we print them out - making sure to only print the parent once
$0 ~ /^ {6}[^ ]/ &&
$1 ~ rails_gems &&
parent != 0 {
 if (parent_printed == 0) {
 parent_printed = 1
 print parent
 }

 print $0
}
Run it against your Gemfile.lock for the app you’re upgrading:
awk -f rails5.awk Gemfile.lock
And you’ll get output like this, to run through and see if any of the dependencies are pinning to lower versions than you need.
Recently I managed to hose a box in a perfectly self-inflicted storm of idiocy. Imagine a SmartOS server with the following issues:
Root password not noted down anywhere
/usbkey/config edited badly, meaning the network settings are wrong
Rebooting the server to apply some other settings
Needless to say, this caused a tiny issue in the server doing what it’s supposed to. Luckily I had access to a KVM remote console for the box and the following worked.
I brought the machine up, choosing the second option for recovery at the grub menu. Waited for a login prompt, then logged in with root/root.
Realised quite quickly that /usbkey must be persisted on the zones zfs pool otherwise the configuration would be lost after shutdown, so imported the correct pool, created a directory to mount into and then mounted the zfs share.
zpool import zones
mkdir /usbkey
mount -F zfs zones/usbkey /usbkey
Felt good setting off, within a couple of lengths felt like I had no energy. Didn’t have enough to eat/drink during the morning before starting, really makes a huge difference once you set off. Must remember to replace my goggles at some point too, the strap comes loose without warning.
Transition 1: 00:03:06
Rough time for transition. Legs felt good as soon as I was out the pool. Got my kit on without too much trouble, although taking a t-shirt style cycling top instead of a full zip jacket was a mistake—forgot I’d be putting it on wet. Had a gel in transition in the hope it would give me some energy.
19km Cycle: 00:48:03
Lovely start to the cycle route, massive downhill on recently resurfaced roads for the most part. Best part of the cycle ride, with the rest of the route consisting of climbing back up to the start. Couple of nasty steep hills I had to walk sections of, for all I fitted lower gears they still weren’t low enough given my lack of bike fitness currently.
Transition 2: 00:06:57
Bike racked easily, shoes swapped, gel necked and a couple of Lucozade bottles clutched and off to run. Took on another gel.
7km Run: 01:04:37
Needed all the fluid I carried, didn’t take anything else during the run and felt no less energetic than the other disciplines. Legs didn’t really hurt, just felt like lead and had no power. Route was basically a mini trail run then up a tarmac road to the turning point then head back via trail run to finish. Adopted a walk/run approach.
Total: 02:14:17
Certainly the hardest triathlon I’ve done, and I’m probably at my least fittest compared to any of the others I’ve done to boot. The location was lovely, the weather was pretty decent (sunny but not too hot). Don’t feel like I was beaten by it, but definitely haven’t given it my best. One to redo next year and train towards.
Given a FreeBSD instance without a configured network interface that you’d like to configure, first check what the name of the interface you want to configure is with ifconfig. (Mine is em0 in this instance.)
Then we need to add the configuration telling services that we want to use DHCP for this interface, and setting up our default router (use your IP, not mine!) too:
SoundCloud appears to have gained popularity in recent times for hosting podcasts on. As a consumer of their service they’re pretty good at everything except having a visible RSS feed on a profile page for a show! If I want to listen to a show in my podcast app of choice, an RSS feed is the easiest way for me to achieve that.
Turns out SoundCloud do have RSS feeds, they’re just well hidden and unfindable from the profile page itself. Thankfully, you can construct the URL for it from information on the profile page, and here’s a bookmarklet that will do it for you:
Using exec(3) from Go is simple enough, once you figure out to look in the syscall package and how to pass arguments to the new command.
As a simple example, I’m going to exec /bin/echo with a hardcoded string from the go binary. The program built here is in the gecho (Gecko, geddit?) git repo, which each stage as a commit.
In our main function lets setup some variables we’re going to need for arguments to syscall.Exec:
(We could use os.Environ() for cmdEnv to take the ENV from the go binary, but we don’t require anything from the environmnt here so it doesn’t matter that we aren’t.)
Now we have the arguments for syscall.Exec, lets add that in and see what happens:
And running the file (go run gecho.go compiles & runs for us) gives the following output:
World
Err, say what now? Where’s “Hello” gone?!
Took me a while to figure this out when I originally ran into this. The answer is staring us right in the face if we go look at the syscall.Exec docs. Lets have a look at the function signature, argument names and all:
Hmm. The first argument is argv0 (and a string), rather than binaryPath or something similar. The second argument is then argv and an array of strings.
At this point I remember that the first element of argv in other runtimes is the name of the binary or command invoked - $0 in a bash script is the name of the script for example.
The answer is simple. cmdArgs in our script should have /bin/echo as the first element, and then we pass cmdArgs[0], cmdArgs as the first two arguments to syscall.Exec. Lets give that a go:
And running it (go run gecho.go remember) gives the expected output:
Hello World
Excellent. Now I just need to remember argv contains the command name as argv[0] and we’re golden.
There is also the os/exec package in the stdlib, which is intended for executing other binaries as child processes from what I can tell. Tellingly, when you create a exec.Cmd struct with exec.Command() you give it the name as first argument, and args as following arguments. Then it has the following snippet in the documentation:
The returned Cmd’s Args field is constructed from the command name followed by the elements of arg, so arg should not include the command name itself. For example, Command("echo", "hello")
So cmd := exec.Command("echo", "hello"); cmd.Args would return []string{"echo", "hello"} - which is recognisable as what we have to pass to syscall.Exec!
SmartOS mounts /etc/shadow from /usbkey/shadow so we can change the root password for the global zone after install. Here’s how:
Fire up a console or ssh session as root in the global zone
Check the existing permissions on the file
 $ ls -l /usbkey/shadow
-r-------- 1 root root 560 Oct 19 16:45 /usbkey/shadow
Make the file writable
$ chmod 600 /usbkey/shadow
Fire up vi to edit the file
$ vi /usbkey/shadow
Edit the line containing root to change the crypted password. See shadow(4) if you need help with the format of /etc/shadow & use /usr/lib/cryptpass to generate a hash for the password you desire. (Remember to clean the bash history!)
Save the file and exit vi
Make the file readonly again
$ chmod 400 /usbkey/shadow
Double check permissions are correct on the file again
 $ ls -l /usbkey/shadow
-r-------- 1 root root 560 Oct 19 16:49 /usbkey/shadow
Job done. Verify by logging in as root (invoking /usr/bin/login from an ssh session makes this easy to verify.)
There’s a few community-provided patches for SmartOS that enable KVM on AMD processors amongst other things, and given the HP Microserver has an AMD processor, that’s quite useful for turning it into a better lab server. The main list of so called “eait” builds was hiccuping when I tried to download the latest, and all I could find was a 20140812T062241Z image here.
So here’s how to use SmartOS to compile a more up to date AMD-friendly Smartos!
Grab the latest multiarch SmartOS image (which has to be used, or the compile will fail.) The latest at the time of writing was 4aec529c-55f9-11e3-868e-a37707fcbe86, so that’s what I’ll use.
My first Olympic distance triathlon, and the first time I’ve ever run 10km to boot.
1500m Open Water (Freshwater Lake) Swim: 00:38:08
Equally happy and upset with my swim. Basically everything went well except my wetsuit, must get a proper swimming one (possibly sleeveless) before my next wetsuit event. Having to get out at the end of each lap and run down the bank to re-enter the water was a bit strange but not too bad. Worst bit of that was diving back in and forgetting to look down - goggles bruised the edge of my eyesocket!
Transition 1: 00:03:53
Took this at a sedate pace, didn’t rush but didn’t dawdle either. Perhaps could’ve gone a bit quicker but not unhappy with it. Found bike OK this time, although chain fell off as I went to mount which was slightly annoying.
40km Cycle: 01:28:49
Started off really badly, managed to knock my watch from cycle into Transition 2 before I’d gotten out the car park. Had to reset it quickly into just bike mode from multisport mode which wasn’t too bad to be fair, just annoying. Having done the route in training was a big help on the day, I was aiming for about the time I did it in. Didn’t push too hard on the two hills (one of which looks deceptively easy). Very happy with my time and more importantly how little effort it was comparatively.
Transition 2: 00:01:28
Quicker than T1, as normal. Got my shit on quickly, didn’t forget anything and even managed to get my watch in run mode whilst jogging to the exit of the transition area.
10km Run: 01:18:40
The bit I was dreading the most. Very very happy with my performance here though. Walked about 90 seconds of the whole thing and kept plodding away the rest of the time. Given the furthest I’d run solidly in training was about 5.5km, I was exceptionally happy to just keep plodding the whole time. Managed to not take on liquid for the third lap, which lead to some impressive cramping in my right quad, so making sure I take liquid on is a definite thing to watch out for in future. And amazingly I wasn’t even tail end charlie (not that it really matters, given I race the clock, not other people. But still.)
Total: 03:30:51
There’s a tiny part of me that’s gutted I didn’t manage it in under 3:30 hours, but what’s 51 seconds over that period of time. More importantly, I completed the bloody thing! Especially happy with the run, enjoyed the cycle even if it was trying to drown us (there was 6" deep standing water on one of the roundabouts by the end), and mostly happy with my swim.
Looking forward to returning next year and beating 3:30!
I noticed this morning that my volume down button (-) wasn’t working on my iPhone 5 running iOS 7. Pushing the physical button in didn’t change the volume. The volume up button increased the volume successfully still.
As is my normal first step debugging iPhone weirdness, I rebooted the phone by turning it off, leaving it off for a few seconds, then booting it back up with the power button. Once powered off and on in this way, the volume down key still didn’t decrease the volume.
Fearing a physical button issue at this point, I turned to google for suggestions on what else to try. Running across this thread on Apple’s discussion forums, I tried out the solution in there.
Open “Settings”
Scroll down and tap on “General”
Tap on “Accessibility”
Scroll down to the bottom and tap on “AssistiveTouch”
Tap the toggle for AssistiveTouch to turn it on, and you should see a little icon appear on screen (white circle contained in a dark grey rounded square)
Tap the AssistiveTouch icon (was in the top left corner on screen for me)
Tap on “Device”
Tap “Volume Down” a bunch of times and you should see the volume being turned down
Tap outside the AssistiveTouch dialog to close it
Try pushing the physical Volume Down button
In my case, following these steps made my physical volume down button start working again. Makes me wonder if the solution author on the apple discussion thread is right, in that this is a software issue and forcing a volume down action through the on-screen interface makes it remember that there’s a physical button to respond to as well.
Either way, I can stop deafening myself whenever I receive a notification now!
Turns out you can run a swift file without having to compile it into a binary somewhere and then run that binary. Makes swift behave a bit more like a scripting language like ruby or python when you need it to.
Using the xcrun binary, we can reach into the current Xcode /bin folder and run binaries within there. So xcrun swift lets you run the swift binary to compile files for instance. If you view the help with -h, there’s a useful flag -i listed there:
-i Immediate mode
Turns out immediate mode means “compile & run” in the same command, which is what we’re after.
$ cat hello.swift
println("Hello World")
$ xcrun swift -i hello.swift
Hello World
Bingo. But what if we want to make hello.swift executable and call it directly without having to know it needs the swift binary to call it. Unix lets files define their shebang to say how the file needs to be executed, so lets go for that here too!
$ cat hello2.swift
#!/usr/bin/env xcrun swift -i
println("Hello World 2")
$ chmod +x hello2.swift
$ ./hello2.swift
Hello World 2
No more having to fire up Xcode for quick CLI tools, especially ones using the system frameworks!
Successfully completed my second Sprint Triathlon of the season in Nantwich.
500m Swim - 00:10:49
Felt good swimming this. Mixed up my usual breaststroke with some front crawl to overtake and use my legs less towards the end. Think I need to put a shorter time down on paper next time though, was in with people who were swimming much slower than me. (Including one chap who was doing doggy paddle in the deep end and walking as soon as his feet touched bottom. Oh well!) Need to continue with front crawl practice, and aim to do next sprint tri entirely crawl.
Transition 1 - 00:02:43
Went well. Ran from pool to bike and felt OK. Kit on without any fuckups. Didn’t fall off getting on bike. Winning. Need to practice getting on my bike in shoes at a run though.
20km Bike - 00:42:31
10 minutes quicker than same length course last year. (Although a slightly new route this year.) Lost a minute when my water bottle fell out about 12km in though. Barely saw a soul, got stuck at one pedestrian crossing on red. Felt very good on the bike (and finally beat Liam on the same route & day ). Need to fit a tighter bottle carrier to stop the bottle falling out on bumpy roads.
Transition 2 - 00:01:21
Came off bike well and ran to shoes. Couldn’t find where I’d left them, was trying to find Liam’s bike as my marker for it, only someone else earlier in the same row had the same bike as him! Wasted 10 seconds looking probably. Need to remember where my stuff is more accurately in future.
5km Run - 00:39:03
Boiling hot by the point I started running; didn’t feel great in the first few hundred meters and never really got comfortable after that. Walked about 800m of it in total at a guess, really didn’t have much left in my legs. Not convinced pushing less on the bike would’ve helped my run though. On the plus side, only 7 minutes slower than a training run a couple of weeks ago in similar heat, and this was on grass. Need to continue running at 5km distance, and train on grass as well as tarmac I think.
Total time - 01:36:27
8 minutes slower than York a couple of months ago, and felt much worse on the run. Very happy with my bike & swim though. More run training required!
(Amusingly the official time for my swim was 00:10:10, which then makes my official time for T1 00:00:38; Fastest Swim/Bike transition time in the tri on paper! Ahem.)
Happy with my swim, not much different from training speed & felt good getting out the pool. T1 was okay, and I remembered to put my tshirt on before my helmet this time! Quite happy with my cycling, got down on the drop bars going downhill with tailwind, and could maintain 16mph uphill on the return leg, the bike itself had a major service 2 weeks ago and I’d not really ridden much since that either. Legs responded with life in them coming off the bike, second transition was quicker than expected (elastic laces win!). Moderately happy with the run, was hoping to do it in under 40 minutes (and did), but still felt like I had no more distance/pace left before halfway through. Pushed through to the end okay, and didn’t walk at all. Overall very happy for my first sprint distance, and especially happy to be running 5km after swim/bike without walking.
First event of the season done. Main area to work on is my run, but that’s been the case since last season. Winter running training seems to have paid off so far.
One piece of a larger puzzle I’m trying to solve currently, was how to add a given URL to my Apple “Reading List” that is stored in iCloud and synced across all my OS X and iOS devices. More specifically, I wanted to add URLs to the list from my mac running Mavericks (10.9). I had a quick look at the Cocoa APIs and couldn’t see anything in OS X to do this. (iOS has an API to do it from Cocoa-land it seems though.)
I figured Safari.app was the key to getting this done on OS X, given it has the ability itself to add the current page to the reading list, either via a keyboard command, a menu item, or a button in the address bar. One quick mental leap later, and I was wondering if the engineers at Apple had been nice enough to expose that via Applescript for me to take advantage of.
One quick stop in “Script Editor.app” later, and I had the Applescript dictionary open for Safari.app. Lo and behold, there is rather handily an Applescript command called “add reading list item”, which does exactly what I want. It has a few different options you can call it with, depending on whether you want Safari to go populate the title & preview text, or if you want to specify it yourself at save-time.
As I want to be able to call this from multiple runtimes, I’ve chosen to save it as an executable, which leans on osascript to run the actual Applescript. And here it is:
#!/usr/bin/env osascript

on run argv
 if (count of argv) > 0
 tell app "Safari" to add reading list item (item 1 of argv as text)
 end if
end run
Save it as whatever you want (eg. add_to_reading_list), make it executable (chmod +x add_to_reading_list), and then run it with the URL you want saving as the first argument.
The writing group that Carole and Liberty belong to had a homework this month to write a Villanelle. It’s a very specific kind of poem, written to both a repeating line structure and a rhyming pattern. (If you go read Liberty’s villanelle she explains it properly at the start.)
However, after reading both Carole’s and Liberty’s, I was feeling they’d both done very depressing poems. It might be a strict structure of poem, but there’s no need to make the subject matter so down!
So here’s my overly enthusiastically attempt to try and balance the world of villanelle’s into something less depressing!
Striding out down the street at last,
Like I own this town,
Tipping my hat to all that I passed.
Smiling at a friendly chugger who asked,
Grinning at an exuberant clown,
Striding out down the street at last.
Saluting the bookie behind his glass,
Turning frowns upside down,
Tipping my hat to all that I passed.
Tapping my feet and having a blast,
Abusing verbs like they were a noun,
Striding out down the street at last.
Being amused by kids playing on grass,
Seeing the queen in her glorious crown,
Tipping my hat to all that I passed.
Compared to sadness I am a contrast,
Cheering folk up in my dressing gown,
Striding out down the street at last,
Tipping my hat to all that I passed.
In the UK currently we’re moving (slowly) toward the same sex marriage bill making it’s way into law. (It’s got a way to go still, but support seems to be there now at least.)
For the record, I’m glad to see the state moving toward allowing two people to be united under law, irrespective of terminology used - and with equal rights to those currently enjoyed by the uniting of a man & woman to date. But for a while now I’ve been thinking that the discussion is presented in an unclear fashion, which causes people to jump to polarising positions on it, without any common ground.
The way I see it is the UK has been a country with Religion and State intertwined for many, many hundreds of years - and therefore we have some constructs that exist both in law, and religion, but are conflated under one word and changing one appears to be changing them both.
The Church of England is Protestant, because Henry VIII wanted to get a divorce and the Catholics wouldn’t allow him that, so we as a country “forked” our own religion that wasn’t so different, but allowed divorce of marriage. Times were slightly different back then, the church had a lot more direct power in terms of laws & how people lived. We’re a more diverse society today, and the church has less (direct?) involvement in our laws, although older laws are still based upon that original conflation of state and church.
I almost wonder if in this case (and others) we need to start diverging church from state and allowing the state to change things irrespective of the church, whilst still allowing the church to continue unhindered with practices it’s held for many years. Seems like the best of both worlds almost - in law we are a very generic and equal society, and if you wish to belong to or align with a group that has more specific beliefs, then that is open to you as well.
Lets jump back to gay marriage here as an example then. If we define state marriage to be “the unity of two human beings, irrespective of their attributes”, then everyone is equal to join with a partner in the eyes of the law, and all such partnerships are afforded the lawful benefits that come with that unity. The church (and indeed, all religions) are also then free to define religious marriage in their doctrine as they wish, so they can say that for them it’s only permissible between a man and a woman. And if you wish to join with a partner following that doctrine, then you have to meet their rules.
In this circumstance, I wonder how much of it is a hangup on the word “marriage”. I can see how the state wants to keep hold of it to describe partnerships between two people, and also that religions want to keep hold of it as they’ve been using it for years and neither wish to yield the word for the other to use. Which possibly means people think solely of this issue as just being an intertwined construct between state and religion, and not as the state giving everyone equality being a separate issue.
Sometimes (usually in a one-liner) I want to do some work with a value without assigning it to a variable. Chucking an #instance_eval call in there will set self to the value, which saves having to assign it to a local value. Pretty much only used by me in one-off scripts or cli commands.
Good
start_date, end_date = ["24 Dec 2011", "23 Jan 2013"].map {|d| Date.parse(d) }
puts "#{start_date} to #{end_date} is #{(end_date - start_date).to_i} days"
Bad
puts ["24 Dec 2011", "23 Jan 2013"].map {|d| Date.parse(d) }
 .instance_eval { "#{first} to #{last} is #{(last - first).to_i} days" }
See, way less code! cough, cough
Bonus usage: Misdirection
I also dropped some instance_eval on our campfire bot at EmberAds to always blame one person, but without the code reading as such.
%w{Dom Mel Caius CBetta Baz}.sample.instance_eval do
 "(4V5A8F5T=&$`".unpack("u")[0]
end
That does not return one of the array elements as you might think it does from quickly scanning the code…
Set method-local variables in default arguments
You have a method and it takes one argument, which has a default value of nil specified. You then run into the situation where you need to know if nil was passed to the method, or if you’re getting the default value of nil. You could change the default value to something you choose to be the “default value” and unlikely to be passed from elsewhere as the argument’s value, and reset the parameter to nil after checking it, like this:
def output name=:default_value
 if name == :default_value
 name = "caius"
 default = true
 end

 "name: #{name.inspect} -- default: #{default.inspect}"
end

output() # => "name: \"caius\" -- default: true"
output("fred") # => "name: \"fred\" -- default: nil"
That’s quite a lot of code added to the method just to find out if we passed a default value or not. And if we forget to reset the value when it’s :default_value then we end up leaking that into whatever the method does with that value. We also have the problem that one day the program could possibly send that “default value” we’ve chosen as the actual parameter, and we’d blindly change it thinking it was set as the default value, not the passed argument.
Instead we could (ab)use the power of ruby, and have ruby decide to set default = true for us when, and only when, the variable is set to the default value.
As you can see, the output is identical. Yet we have no extra code inside the method to figure out if we were given the default value or not. And as a bonus to that, we no longer have to check for a specific value being passed and presume that is actually the default, and not one passed by the program elsewhere.
I posted this one in a gist a while back (to show Avdi it looks like), and people came up with some more insane things to do with it, including returning early, raising errors or even redefining the current method, all from the argument list! I’d suggest going to read them, it’s a mixture of OMG HAHA and OMFG NO WAY WHYY?!?!.
Don’t do this.
Don’t do the above. No really, don’t do them. Unless you’re writing a one-off thing. But seriously, don’t do them. :-D
Here’s a few things I refactor as I write code down initially. Not entirely convinced it’s strictly refactoring, but it’s how I amend from one pattern I see in a line or three of code into a different structure that I feel achieves the same result with cleaner or more concise code.
Multiple equality comparisons
Testing the equality of an object against another is fairly simple, just do foo == "bar". However, I usually try to test against multiple objects in a slightly different way. Your first thought might be that the easiest way is just to chain a series of == with the OR (||) operator.
I much prefer to flip it around, think of the objects I’m testing against as a collection (Array), and then ask them if they contain the object I’m checking. And for that, I use Array#include?
["bar", "baz", :sed, 5].include?(foo)
(And if you’re only testing against strings, you could use %w(bar baz) as a shortcut to create the array. Here’s more ruby shortcuts.)
Assigning multiple items from a nested hash to variables
Occasionally I find myself needing to be given a hash of a hash of data (most recently, an omniauth auth hash) and assign some values from it to separate variables within my code. Given the following hash, containing a nested hash:
Lets say we want to extract the name and nickname fields from details[:info] hash into their own local variables (or instance variables within a class, more likely.) We should probably handle the case of details[:info] not being a hash, and try not to read from it if that’s the case - so we might end up with something like the following:
name = details[:info] && details[:info][:name]
nickname = details[:info] && details[:info][:nickname]

name # => "Caius Durling"
nickname # => "caius"
And then in the spirit of DRYing up our code, we see there’s duplication in both lines in checking details[:info] exists (not actually that it’s a hash, but hey ho, we rely on upstream to send us nil or a hash.) So we reduce it down using an if statement and give ourselves slightly less to type at the same time.
if (( info = details[:info] ))
 name = info[:name]
 nickname = info[:nickname]
end

name # => "Caius Durling"
nickname # => "caius"
Returning two values conditionally
Sometimes a method will end with a ternary, where depending on a condition it’ll either return one or another value. If this conditional returns true, then the first value is returned. Otherwise it returns the second value. You could quite easily write it out as an if/else longer-form block too.
def my_method
 @blah == foo ? :foo_matches : :no_match
end
My brain finds picking the logic in this apart slightly harder mentally, than if I drop a return early bomb on the method. Then it reads more akin to how I’d think through the logic. Return the first value if this conditional returns true. Otherwise the method returns this second value. I think the second value being on a completely separate line helps me make this mental distinction quicker too.
So I’d write it this way:
def my_method
 return :foo_matches if @blah == foo
 :no_match
end
Returning nil or a value conditionally
Following on from the last snippet, but taking advantage of the ruby runtime a bit more, is when you’re wanting to return a value if a conditional is true, or otherwise false. The easy way is to just write nil in the ternary:
def my_method
 @foo == :bar ? :foo_matches : nil
end
However, we know ruby returns the result of the last expression in the method. And that if a single line conditional isn’t met, it returns nil from the expression. Combining that, we can rewrite the previous example into this:
def my_method
 :foo_matches if @foo == :bar
end
And it will still return nil in the case that @foo doesn’t match :bar.
Returning a boolean
Sometimes you have a method that returns the result of a conditional, but it’s written to return true/false in a conditional instead.
def my_method
 @foo == :bar ? true : false
end
The really easy refactor here is to just remove the ternary and leave the conditional.
def my_method
 @foo == :bar
end
And of course if you were returning false when the conditional evaluates to true, you can either negate the comparison (use != in that example), or negate the entire conditional result by prepending ! to the line.
In a ruby script, there’s a keyword __END__ that for a long time I thought just marked anything after it as a comment. So I used to use it to store snippets and notes about the script that weren’t really needed inline. Then one day I stumbled across the DATA constant, and wondered what flaming magic it was.
DATA is in fact an IO object, that you can read from (or anything else you’d do with an IO object). It contains all the content after __END__ in that ruby script file*. (It only exists when the file contains __END__, and for the first file ruby invokes though. See footnote for more details.)
How can we use this, and why indeed do I love this fickle constant? I mostly use it for quick scripts where I need to process text data, rather than piping to STDIN.
Given a list of URLs that I want to open in my web browser and look at, I could do the following for instance:
DATA.each_line.map(&:chomp).each do |url|
 `open "#{url}"`
end

__END__
http://google.com/
http://yahoo.com/
which upon running (on a mac) would open all the URLs listed in DATA in my default web browser. (For bonus points, use Launchy for cross-platform compatibility.) Really handy & quick/simple when you’ve got 500+ URLs to open at once to go through. (I once had a job that required me to do this daily. Fun.)
Or given a bunch of CSV data that you just want one column for, you could reach for cut or awk in the terminal, but ruby has a really good CSV library which I trust and know how to use already. Why not just use that & DATA to pull out the field you want?
require "csv"

CSV.parse(DATA, headers: true).each do |row|
 puts row["kName"]
end

__END__
kId,kName,kURL
1,Google UK,http://google.co.uk
2,"Yahoo, UK",http://yahoo.co.uk
# >> Google UK
# >> Yahoo, UK
I find when the data I want to munge is already in my clipboard, and I can run ruby scripts directly from text editors without having to save a file, it saves having to write the data out to a file, have ruby read it back in, etc just to do something with the data. I can just write the script reading from DATA, paste the data in and run it. Which also lets me run it iteratively and build up a slightly more complex script that I don’t want to keep. Then do what I need with the output and close the file without saving it.
* technically DATA is an IO handler to read __FILE__, which has been wound forward to the start of the first line after __END__ in the file. And it only exists for the first ruby file to be invoked by the interpreter.
Sometimes you need to have a rough idea of where your website visitor is located. There’s many ways to geolocate them, but if you just want to go to country level then MaxMind have free geo databases available to help you. When we needed to do this quickly on-the-fly at EmberAds, we came up with the trifle gem, which supports ipv4 and ipv6 lookups.
Recently I was searching for something else to do with nginx and ran across a mailing list thread about using the maxmind database with nginx’s HTTP Geo module and do the lookup directly in nginx itself. Finally got a chance to sit down and work out the logistics of doing this. I’ve done this on an ubuntu 12.04 box, with the expected config file layouts that come with ubuntu.
Run the following on your server (as someone with write access to nginx config files):
# Generate the text file for nginx to import
perl <(curl -s https://raw.github.com/nginx/nginx/master/contrib/geo2nginx.pl) \
< <(zip=$(tempfile) && \
curl -so $zip http://geolite.maxmind.com/download/geoip/database/GeoIPCountryCSV.zip \
&& unzip -p $zip) > /etc/nginx/nginx_ip_country.txt

# Tell nginx to work out the IP country and store in variable
echo 'geo $IP_COUNTRY {
 default --;
 include /etc/nginx/nginx_ip_country.txt;
}' > /etc/nginx/conf.d/ip_country.conf
Now go find the http block for the vhost you want to have the header passed to, and assuming it’s passenger, add the following:
Having recently moved my Soundstick III’s into the front room, I’ve been thinking of a way to wall mount them safely to free up table room. Googling eventually turned up just one person who has previously documented mounting his soundsticks on the wall, using 22mm plumbing clips (intended for 22mm central heating pipes).
A quick scrounge round the local Homebase this afternoon yielded a pack of similar clips, 5x 22mm push clips for £1.99. Having just fitted the speakers to the wall, they’re nice and secure (providing no-one hangs on them, which they shouldn’t do), fairly neat and simple to fit.
I’ve left the subwoofer on the floor under the table, and only mounted the “sticks” (tweeters) on the wall, one each side of the mirror over our dining table. I can then conveniently run the cables to the “sticks” behind the mirror and keep it looking neater.
I affixed the clips to the wall, one either side of the mirror with enough space for the speaker to sit without overlapping the mirror. Mostly just held the stick up and guessed at where to put the clip, but it looks ok.
Then I bent the speaker stand backwards behind the stick (don’t worry, it’s on a hinge!) and threaded the cable through the middle of the ring to make it sit flusher against the wall.
And then it was just a case of easing the speaker ring into the clip, with the clip at the top of the ring (picture below if you can’t visualise that easily). I think the rings are more like 24-25mm so it takes a bit of easing to get them in there. Once it’s in there’s no play in the clip for it to wiggle out though, even though it’s plastic. I tried not to fatigue the clip arms too much wiggling it in there as well, so as to minimise the chance of it failing over time. (Something to check periodically!)
Lastly, I just zip tied the cables together behind the mirror, and ran them down vertically from the middle to the floor and plugged them in. Sounds fantastic, and due to being plugged into an Airport Express, anything compatible can stream audio through them wirelessly. Fabulous darling!
The apt package you need to install to use the capybara-webkit rubygem on ubuntu (tested on 10.04 and 11.10) is libqt4-dev. That is, to gem install capybara-webkit, you need to run aptitude install libqt4-dev.
OS X Lion comes with ruby 1.8.7-p249 installed, although it’s compiled against libedit rather than libreadline. Whilst libedit is a mostly-compatible replacement for libreadline, I find there’s a couple of settings I’m used to that don’t work in libedit. (Like history-beginning-search-backward.)
Luckily you can grab the source of ruby and compile just the readline extension, and move it into the right place for it to just work. Here’s what’s been working for me:
# Install readline using homebrew
brew install readline

# Download the ruby source and check out 1.8.7-p249
mkdir ~/tmp && cd ~/tmp
git clone git://github.com/ruby/ruby
cd ruby
git checkout v1_8_7_249
cd ext/readline
ruby extconf.rb --with-readline-dir=$(brew --prefix readline) --disable-libedit
make
Now you should have readline.bundle in the current directory, and it should be compiled against your homebrew-installed readline library, rather than libedit that comes with the system. We can quickly double-check that by using otool to check what the binary is linked against.
$ otool -L readline.bundle
readline.bundle:
/System/Library/Frameworks/Ruby.framework/Versions/1.8/usr/lib/libruby.1.dylib (compatibility version 1.8.0, current version 1.8.7)
/usr/local/Cellar/readline/6.2.2/lib/libreadline.6.2.dylib (compatibility version 6.0.0, current version 6.2.0)
/usr/lib/libncurses.5.4.dylib (compatibility version 5.4.0, current version 5.4.0)
/usr/lib/libSystem.B.dylib (compatibility version 1.0.0, current version 159.1.0)
And in the output you should see a line listing “libreadline”, and no lines listing “libedit”. Which that shows, we’ve compiled it properly then. Now the bundle is built we need to move it into the right place so it’s loaded when ruby is invoked.
RL_PATH="/System/Library/Frameworks/Ruby.framework/Versions/1.8/usr/lib/ruby/1.8/universal-darwin11.0"
# Back up the original bundle, just in cases
sudo mv "$RL_PATH/readline.bundle" "$RL_PATH/readline.bundle.libedit"
sudo mv readline.bundle "$RL_PATH/readline.bundle"
And that’s it. You’ve got a proper compiled-against-readline installed ruby 1.8.7-p249 on 10.7 now.
One gotcha I ran into was needing to pass the same arguments to rvm when installing any other version of 1.8.7 on the same machine. Simple enough, just need to remember to do it though.
I remember watching Steve Jobs’ commencement speech for the first time and being fairly touched by the three stories he told in it. The major one that resonated with me at the time, and has since made more sense to me, is the first story he tells about joining the dots later on when you’re looking backwards. To quote from it:
Of course, it was impossible to connect the dots looking forward when I was in college. But it was very very clear looking backwards ten years later. Again, you can’t connect the dots looking forward, you can only connect them looking backwards. So you have to trust that the dots will somehow connect in your future.
It made me think back to a time when I was a teenager and someone far older and wiser than me told me one way to think about the future and how what we do today affects where we end up. He described it as holding a piece of string in your hand, with the other end dangling free. The end of the string not attached to you is the future, and where you’re holding it is the present. As you do things in life your hand moves around, flicking the string around and amplifying the movements of the present in the future.
I think what he was trying to impart by telling me that story was to be careful not to do anything too extravagant in the present (like get expelled from school for instance), so as not to affect the future too much. Which I never really took on board at the time, but now I look back at the dots of my (some would say) rather short life so far, and connect them to see how some things influenced other things and how everything works out in the end. But that sometimes you need to push yourself or do something unexpected to get there.
Looking Backwards to go Forward
When I look back over the last few years of my life, I find the dots quite amazing to connect. First there was BarCamp Sheffield 2007 where I met Dom, and there was Twitter and BarCamp Manchester & Leeds where I met geeks like Rahoul, John and Jeremy both online and offline. And then in June 2008 I moved to Leeds, sharing a house with Dom and quite quickly ended up being hired into what was basically my dream first job at Brightbox.
And that’s where I’ve been working for the last 1198 days, having far too much fun, solving weird, wonderful and sometimes downright frustrating problems, all with fantastically awesome and hilarious colleagues. And working on a massive variety of things, from tiny utilities to the newly launched Cloud Platform.
And today I flick my wrist ever so slightly more than normal by leaving Brightbox, without really knowing where the future end of the string will eventually end up, but knowing that I’ll look back in a few years and see dots connected that I can’t imagine today. I truly don’t think I could have had a better job to start off as a professional geek, and especially want to thank John and Jeremy for hiring me and helping me start my career in the best way possible.
As for my next challenge, I’m solving interesting problems in the online advertising world with Cristiano, Dom, Melinda and Rahoul. And we’re bloody amazing together. :-)
Screaming ghouls and scary monsters,
Permeating our subconscious,
At night they roam freely through our dreams,
With the sole intent of causing our screams,
Scaring us until we awake,
Annoyingly, for we know they are fake.
Any rubyist that’s defined a class should understand the following class definition:
class Foo < Object
end
It creates a new Constant (Foo) that is a subclass of Object. Pretty straightforward. But what you might not know is that ruby executes each line it reads in as it reads them. So we could do the following to show that:
class Foo < Object
 puts "we just defined object!"
end
And get the following output when we run that file:
# >> we just defined object!
So.. we know ruby is executing things on the fly whilst defining classes for us. How can we use this for profit and shenanigans?! (Err, use this for vanquishing evil and creating readable code I mean. Honest.)
How about if we’ve got a couple of opinionated people who like to think they’ve got the biggest ego in the interpreter? The last one to be loaded likes to have any new people ushered into the interpreter to be a subclass of themselves. Lets abuse a global for storing it in, and use a method to choose that on the fly when creating a new class.
def current_awkward_bugger
 $awkward_bugger
end

class Simon
end
$awkward_bugger = Simon

class Fred < current_awkward_bugger()
end
Fred.superclass # => Simon

class Harold
end
$awkward_bugger = Harold

class John < current_awkward_bugger()
end
John.superclass # => Harold

Fred.superclass # => Simon
Okay, so that looks a bit different to normally defined classes. We create Simon, assign him to the awkward bugger global then create Fred, who subclasses the return value of the current_awkward_bugger method which happens to be Simon currently. Then Harold muscles his way into the interpreter and decides he’s going to be the current awkward bugger, so poor John gets to subclass Harold even though he’s defined in the same way as Fred. (And as you can see on the last line, Fred’s superclass is unchanged even though we changed the awkward_bugger global.)
On a somewhat related note there’s a lovely method called const_missing that gets invoked when you call a Constant in ruby that isn’t defined. (Much like method_missing if you’re familiar with that.) Means you can do even more shenanigans with non-existent superclasses for classes you’re defining.
class Simon
end
class Harold
end

class Object
 def self.const_missing(konstant)
 [Simon, Harold].shuffle.first
 end
end

class Fred < ArrogantBastard
end
Fred.superclass # => Simon

class Albert < ArrogantBastard
end
Albert.superclass # => Harold
So here we’re choosing from Simon and Harold on the fly each time a missing constant is referenced (in this case the aptly named ArrogantBastard constant.) If you run this code yourself you’ll see the superclasses change on each run according to what your computer picks that time.
A while ago I read a blog post that Elizabeth N wrote, on the value of writing self-serving code. Ever since I’ve been moderately aware of when I’ve written self-serving code, usually either at hackdays, or just little projects where I’m either experimenting with something or just bashing out a new idea.
In fact, I even wrote about one of my recent “self-serving” projects I bashed out in an evening, TweetSavr. It has no tests, was written moderately quickly and not refactored immensely (here’s hoping the git history backs me up on that! I certainly didn’t knowingly majorly refactor it at any point at least.) But it “scratched an itch” and solved the problem I had, and it works for the limited use case I need it to, so it’s a success as far as I’m concerned.
More recently a friend remarked to me in a private conversation that everyone needs to procrastinate occasionally, to save them going “stir crazy”. Whilst I agree with what she said, everyone needs to switch gears and do something that perhaps you shouldn’t, or that won’t directly contribute to completing your current task, I couldn’t help but draw a link between procrastinating and writing self-serving code.
Now I’m a programmer, it’s what I did for a hobby through school, it’s what I leapt into a career doing when I was offered the chance and even when I’ve had a particularly exhausting week, it’s something I’ll eventually turn back to. But I realised that often when I procrastinate, I do so by writing self-serving code. My creative output or process if you will is to create things digitally on the computer, be that a web app, hacky script to let me do something I’m not supposed to be able to with someone else’s application, just dicking around or exploring whatever tidbit of interesting info/behaviour in a language or library someone’s just shared on IRC.
Aside: I’ve often joked (semi-seriously) that if/when I have enough cash in the bank to not have to actually have a “day job”, I’ll just spend all day building the random ideas that get tossed out on IRC instead. Quite often the smaller things I code up anyway already of an evening and they end up in my gists.
Now it’s unhealthy and counter-productive to want to program 24/7, at least in the long term. (Doing the odd 24 hour hackday event here and there can mean winning fun prizes to play with however.) And sometimes all that you need to do to solve a problem you’ve been butting your head against for the last couple of hours is to get off the damn computer. (I usually find taking a shower makes my subconscious reveal the answer it’s been quietly computing and hey presto, I know how to solve the problem properly!) At other times it just requires changing gears and flexing a different part of your brain muscle. Like say, writing self-serving code. And procrastinating by doing so.
I’m not entirely sure what the point of this thought process is, or if there can really be a point to it, but it really intrigued me drawing a link between procrastinating and writing self-serving code. I can imagine other creatively minded people might do much the same thing, an artist just sketching for the sake of sketching, or a writer taking a couple of hours off from her next novel to write a short story for her blog. (That last one is actually something a friend’s done, go read her short stories, they’re quite good. Start from the bottom though.)
And of course sometimes you just need to vegetate and read facebook (or twitter), but constructive procrastination does serve a real purpose I think, and can be quite useful as well.
As of Xcode 4.2 Apple have stopped bundling GCC with it, shipping only the (mostly) compatible llvm-gcc binary instead. The suggested fix is to install GCC using the osx-gcc-installer project. However, I wanted to build and install it from source, which apple provides at http://opensource.apple.com/.
You should already have installed Xcode 4.2 from the app store, then basically the following steps are to grab the tarball from the 4.1 developer tools source, unpack & compile it, then install it into the right places.
Update 2016-07-03: I’d suggest just using homebrew to install this these days:
brew install homebrew/dupes/apple-gcc42
Instructions
# Grab and unpack the tarball
mkdir ~/tmp && cd ~/tmp
curl -O http://opensource.apple.com/tarballs/gcc/gcc-5666.3.tar.gz
tar zxf gcc-5666.3.tar.gz
cd gcc-5666.3

# Setup some stuff it requires
mkdir -p build/obj build/dst build/sym
# And then build it. You should go make a cup of tea or five whilst this runs.
gnumake install RC_OS=macos RC_ARCHS='i386 x86_64' TARGETS='i386 x86_64' \
 SRCROOT=`pwd` OBJROOT=`pwd`/build/obj DSTROOT=`pwd`/build/dst \
 SYMROOT=`pwd`/build/sym

# And finally install it
sudo ditto build/dst /
And now you should have gcc-4.2 in your $PATH, available to build all the things that llvm-gcc fails to compile.
I’ve had a dream for a while. A simple webapp that takes the last tweet in a conversation and outputs that conversation in chronological order on a page you can link to forevermore. Occasionally I’ll google to see if anything new’s turned up, but they all seem to do far more, require the start and end tweets or are covered in ads.
So one friday evening I just built it. It’s called TweetSavr. It’s very simple—to the point the error page is just a standard 500 server error page currently. It fetches, caches and displays a conversation, given just the last tweet in said conversation.
KISS extends to the interface as well, I’m quite a fan of URL hacking to use webapps, so TweetSavr works on that basis as well. The homepage sort of has some help telling you how to use it, but you basically take the (old-twitter) URL of the last tweet and paste it after tweetsavr.com in the address bar. Eg, http://tweetsavr.com/http://twitter.com/ElizabethN/status/19766711653765120. It’ll then redirect you through to the actual page for that conversation. You can also put just the status id on the end of the URL, http://tweetsavr.com/19766711653765120 and hey presto, it loads.
The caching layer is moderately rudimentary, after fetching a tweet that isn’t in the cache it writes out a hash of data for that tweet into a yaml file. And when looking up a tweet it checks to see if that file exists, reading it in from disk if it is. Bonus side-effect is it builds up a corpus of tweets as yaml files on disk.
Side note: isn’t it wonderful what we can create given just a few hours, a server somewhere in the cloud, and an idea? Never ceases to amaze me what can be built in just a short amount of time, even the dead simple things.
Imagine you’ve got a blogging app and it’s currently generating URL paths like posts/10 for individual posts. You decide the path should contain the post title (in some form) to make your URLs friendlier when someone reads them. I know I certainly prefer to read http://caiustheory.com/abusing-ruby-19-and-json-for-fun vs http://caiustheory.com/?id=70. (That’s a fun blog post if you’re into (ab)using ruby occasionally!)
Now you know all about how to change the URL path that rails generates—just define to_param in your app. Something simple that generates a slug consisting of hyphens and lowercase alphanumerical characters. For example:
# 70-abusing-ruby-1-9-json-for-fun
def to_param
 "#{id}-#{title.gsub(/\W/, "-").squeeze("-")}".downcase
end
NB: You might want to go the route of storing the slug against the post record in the database and thus generating it before saving the record. In which case the rest of this post is sort of moot and you just need to search on that column. If not, then read on!
Now we’re generating a nice human-readable URL we need to change the way we find the post in the controller’s show action. Up until now it’s been a simple @post = Post.find(params[:id]) to grab the record out the database. Problem now is params[:id] is "70-abusing-ruby-1-9-json-for-fun", rather than just "70". A quick check in the String#to_i docs reveals it “Returns the result of interpreting leading characters in str as an integer base base (between 2 and 36).” Basically it extracts the first number it comes across and returns it.
Knowing that we can just lean on it to extract the id before using find to look for the post: @post = Post.find(params[:id].to_i). Fantastic! We’ve got nice human readable paths on our blog posts and they can be found in the database. All finished… or are we?
There’s still a rather embarassing bug in our code where we’re not explicitly checking the slug in the URL against the slug of the Post we’ve extracted from the database. If we visited /posts/70-ruby-19-sucks-and-python-rules-4eva it would load the blog post and render it without batting an eyelid. This has caused rather a few embarrassing situations for some high profile media outlets who don’t (or didn’t) check their URLs and just output the content. Luckily there’s a simple way for us to check this.
All we want to do is render the content if the id param matches the slug of the post exactly, and return a 404 page if it doesn’t. We already know the id param (params[:id]) and have pulled the Post object out of the database and stored it in an instance variable (@post). The @post knows how to generate it’s own slug, using #to_param.
So we end up with something like the following in our posts controller, which does all the above and correctly returns a 404 if someone enters an invalid slug (even if it starts with a valid post id):
def show
 @post = Post.find(params[:id].to_i)
 render_404 && return unless params[:id] == @post.to_param
end

def render_404
 render :file => Rails.root + "public/404.html", :status => :not_found
end
And going to an invalid path like /posts/70-ruby-19-sucks-and-python-rules-4eva just renders the default rails 404 page with a 404 HTTP status. (If you want the id to appear at the end of the path, alter to_param accordingly and do something like params[:id].match(/\d+$/) to extract the Post’s id to search on.)
Hey presto, we’ve implemented human readable slugs that are tamper-proof (without storing them in the database.)
(And bonus points if in fact you spotted I used my blog as an example, but that it isn’t a rails app. (Nor contains the blog post ID in the pretty URL.) It’s actually powered by Habari at the time of posting!
This is a linked-in invitation I received from Rhys, and my reply.
Update 2011-02-10: As much as recruiters can be scummy twats, Rhys appears to at least care somewhat about his relationship with potential clients/contacts and has responded in the comments. Normally my policy with recruiters is a two strike one, first email gets a polite “No thanks, go away.”, second gets a mini-rant to bugger off and stop contacting me. Rhys hadn’t technically contacted me before, but the unsolicited xmas email showed up when I searched my mailbox (which had annoyed me back when I received it.) And asking amongst my peers around at the time showed he was fairly disliked. (As you can see in some of the comments left below as well.) Since then, including a comment left below, a few people I trust have noted he’s really not that bad as recruiters go, and the fact he’s left a comment acknowledging perhaps his approach is a little misguided is enough for me to see he does still care about trying to be better than the rest of the recruitment crowd.
I still stand by my initial reply to him, and all other recruiters who don’t understand “No.” however.
On 02/09/11 5:30 AM, Rhys Evans wrote:
Hi Caius,
Good afternoon, I hope all is well.
I’ve noticed we are connected to a number of the same people within the Rails space on LinkedIn. I’ve tried you on 07960 268100 to no avail so I’d like to add you to my network and make contact.
Hi Rhys,
I’ve already got you blocked on twitter, so we’ve obviously run across each other in the past. You also appear to have sent me a Merry Xmas email from Devonshire, with no previous contact initiated by me. (I seem to remember a lot of my friends got those emails as well and we eventually worked out you’d scraped Github for them.)
Now it would appear you’re being more intrusive and hunting folk out on linked in, ignoring the fact that they are employed and have specifically set linked in to say they aren’t looking for new jobs currently. From asking around you harass a few of my friends, to the point of ringing one up recently to tell them you knew they’d changed jobs and where they were now working. If you’re going to spend time doing that much research then why not have the decency to not be a completely mannerless cunt and leave them alone when they request you to.
It would also appear you’ve just blanket-spammed me and a few people in my peer group through linked in with the same request, again a pretty dumb thing to do. It’s as if you recruiters think we never talk to each other, and don’t realise how much you lot being a bunch of pestering spammy bastards taints developers against ever dealing with a recruiter.
So no, I don’t think I do want to accept your invitation to connect. And please never phone, email or contact me via any other means. I’m happily employed and if I ever need the services of a recruiter I’ll find someone who actually possesses an ounce of politeness about approaching (potential) candidates.
Ever since I found out about the new hash syntax you can use in ruby 1.9, and how similar that syntax is to JSON, I’ve been waiting for someone to realise you can just abuse eval() for parsing (some) JSON now.
For example, lets say we have the following ruby hash, which could be generated by a RESTful api:
thing = {
 :person => {
 :name => "caius"
 }
}
If we pull in the JSON gem and dump that out as a string, we get the following:
That’s… not quite what we wanted. It’s not going to turn back into valid ruby as it is. Luckily javascript will parse objects without requiring the attributes to be wrapped in quotes, eg: {some: "attribute"}. We could build a JSON emitter that does it properly, or we could just run it through a regular expression instead. (Lets also add a space after the colon to aid readability.)
Okay, so now we’ve turned a ruby hash into a JSON hash, that can still be parsed by the browser. Here’s a screenshot to prove that:
As you can see, it parses that into a valid JS object, complete with person and then (nested) name attributes. If we wanted to, thing["person"]["name"] or thing.person.name would access the nested value “caius” just fine.
Now then, we’ve proved that is successfully parsed into javascript objects by the browser, generated from a ruby hash. No great shakes there, that’s fairly simple and has worked for ages. Now for my next trick, I’m going to turn that string of JSON back into a ruby hash, all without going anywhere near the JSON gem.
Some of you might have guessed what I’m about to do and have started hoping you’ve guessed wrongly — just for the record I don’t condone doing this except for fun and games. The JSON gem is there for a reason ;) With that little disclaimer out the way, here we go!
Oh snap! We just turned javascript objects back into valid ruby objects, in one simple method call. And we’d be able to access the “caius” value by calling thing2[:person][:name], or creating OpenStructs from the hashes and calling thing2.person.name. Which is uncannily like the JS!
Updated 2011-02-07: Jens Ayton pointed out unquoted keys aren’t strictly valid JSON, which is correct. Amended to say they’re parsed as javascript objects instead, with no mention of it being valid JSON.
See the Update at the end before you get excited :(
Having just installed 10.6.6 to use the Mac App Store, I was slightly annoyed that it fills my dock with apps as I install them. I’m a bit strange, in that I use a hidden preference to make the dock uneditable (it stops me accidentally dragging an app off.) But that means I can’t drag off the Mac App Store installed apps either.
Had a quick look through /Applications/App Store.app/Contents/MacOS/App Store with strings (love that tool) and noted a few strings that looked interesting. (There’s a full list in this gist.) There wasn’t anything that explicitly stated it stopped it putting anything in the dock, but I did notice an option that stopped it showing install progress in the dock.
Yank up a terminal window, bash out the following…
defaults write com.apple.appstore FRDebugShowInstallProgress -bool NO
…head back to the MAS and install another (free) app, and hey presto, it’s leaving my dock alone! Hopefully that’s all I needed to continue using my Dock as I like. (Hidden, and left alone.)
Update 2011-01-06:
Seems my joy was short-lived. I’d re-downloaded an app I’d already purchased and it just showed download progress in the MAS app, not in the dock. Installing new applications still shows up in the dock (annoyingly.)
I’ve been having a poke through how it all hangs together, and if it’s possible to actually block downloads from the Dock or not. It doesn’t look like there’s a hidden preference to hide new apps from downloading in the dock, you can just disable the progress bars in the dock with prefs. The MAS.app seems to be codenamed “Firenze”, with the “hidden” prefs being prefixed with “FRDebug”.
As I understand it, the App\ Store.app invokes a binary inside /System/Library/PrivateFrameworks/CommerceKit.framework called “storeagent” to do the actual downloading/talking to the dock. From looking at the class-dump of storeagent it communicates with the dock to place a new type of DockTile. Interesting sounding methods to (potentially?) swizzle are -[DownloadQueue sendDownloadListToDock] and -[DownloadQueue tellDockToAddDownload:].
I’ve given up for now, but I reckon it should be possible to create a bundle that swizzles the right methods in storeagent to stop it placing the downloads on the Dock.
Facebook doesn’t warn users that they are uploading their phone’s address book to Facebook.
And whilst the guardian article never says it happens automatically, it also doesn’t lay it out that you have to explicitly enable that feature, and agree to the facebook app uploading the data.
I was pretty sure that facebook wouldn’t be grabbing all your contact information without telling you, if they did at all, and that both articles were just pure scaremongering. So I fired up the facebook iPhone app, headed into my friends list on there, clicked sync and got the following screen:
Ok, so according to that text, they’re just pulling down profile images and profile links from facebook and putting them in your address book against your contacts. Seems fairly harmless so far. So I toggled the top switch, to enable Contact Sync, and got the following screen:
Reading that, it’s fairly obvious what data facebook are uploading (although a little ambiguous why), and it certainly isn’t happening automatically. As it says, it uploads the “name, email address, phone number” from all your contacts to facebook, and pull down “your friends’ profile photos and other info from Facebook”.
So whilst facebook are collecting more data (albeit stored subject to their Privacy Policy), it’s certainly NOT done automatically, and is very explicit about what is being uploaded at the point you enable it.
If you’ve not heard of it, MacRuby is an implementation of Ruby 1.9 directly on top of Mac OS X core technologies such as the Objective-C runtime and garbage collector, the LLVM compiler infrastructure and the Foundation and ICU frameworks. Basically means you write in Ruby using Objective-C frameworks, and vice versa. It’s pretty damn cool to be honest!
Invoked whenever a class or category is added to the Objective-C runtime; implement this method to perform class-specific behavior upon loading.
This means when your class is loaded, and implements the load method, you get a load message sent to your class. Which means you can start doing stuff as soon as your class is loaded by the runtime.
The main place I’ve seen it used (and used it myself) is in SIMBL plugins. A SIMBL plugin is an NSBundle that contains code which is loaded (injected) into a running application shortly after said application is launched. It lets you extend (or “fix”) cocoa applications with additional features. So you have this bundle of code, that gets loaded into a running application some point after it starts, and you want to run some code as the bundle is loaded - usually to kick off doing whatever you want to do in the plugin. This is where load becomes useful.
Here’s a quick implementation that just logs to the console:
Well I came across a need to do the same in ruby, have some code triggered when the class is loaded into the runtime. Tried implementing Class.load but to no avail. Then remembered MacRuby is just ruby! And I can call any code from within my ruby class definition.
For continuity I still call it Class.load, but then call it as soon as I’ve defined it in the class. Eg:
class MainController
 def self.load
 NSLog "MainController#load called"
 end

 self.load
end
Of course, I’m not sure when the Objective-C method is called, it’s probably after the entire class has been defined rather than as soon as load has been loaded into the runtime. So you might want to move the self.load call to just before the closing end.
Ran into a problem today where I have a class with a few attributes on it, but I only want a certain three of those attributes to appear in the YAML dump of a class instance.
Diving straight into a code example–lets say we have a Contact class, and we only want to dump the name, email and website attributes.
require "yaml"

class Contact
 attr_accessor :name, :email, :website, :telephone

 # helper method to make setting up easy
 def initialize(params={})
 params.each do |key, value|
 meffod = "#{key.to_s}="
 send(meffod, value) if respond_to?(meffod)
 end
 end
end

# And create an instance for us to play with
caius = Contact.new(
 :name => "Caius",
 :email => "dev@caius.name",
 :website => "http://caius.name/",
 :telephone => "12345"
)
As we’d expect when dumping this, all instance variables get dumped out:
Initially I tried to override to_yaml and unset the instance variables I didn’t want showing up, but that just made them show up empty. After digging around a bit more, I happened across the Type Families page in the yaml4r docs, which right at the bottom mentions to_yaml_properties.
Turns out to_yaml_properties returns an array of instance variable names (as strings) that should be dumped out as part of the object. A quick method definition later, and we’re only dumping the variables we want. (See my Ruby Shortcuts post if you don’t know what %w() does)
class Contact
 def to_yaml_properties
 %w(@name @email @website)
 end
end
And now we dump the class, expecting only the three attributes to be outputted:
There’s a few useful shorthand ways to create certain objects in Ruby, a couple of obvious ones are [] to create an Array and {} to create a Hash (Or block/Proc). There’s some not so obvious ones too, for creating strings, regexes and executing shell commands.
With all of the examples I’ve used {} as the delimiter characters, but you can use a variety of characters. Personally I tend to use {} unless the string contains them, in which case I’ll use // or @@. My only exception appears to be %w, for which I tend to use ().
Strings
% and %Q are the same as using double quotes, including string interpolation. Really useful when you want to create a string that contains double quotes, but without the hassle of escaping them.
%w is the equivalent of using String#split. It takes a string and splits it on whitespace. With the added bonus of being able to escape whitespace too. %W allows string interpolation.
%r is just like using // to create a regexp object. Comes in handy when you’re writing a regex containing / as you don’t have to continually escape it.
%s creates a symbol, just like writing :foo manually. It takes care of escaping the symbol, but unlike :"" it doesn’t allow string interpolation however.
%x is the same as backticks (``), executes the command in a shell and returns the output as a string. And just like backticks it supports string interpolation.
Google Groups is a pile of fail and hasn’t posted my message in reply to a thread on Geekup so I’m blogging it instead.
On 27 Jan 2010, at 19:53, Steve Richardson wrote:
Thoughts?
I’ve been searching for a device to fit between my Macbook Pro and iPhone. I work all day on the MBP, and moving it to then watch video in another room or read twitter/news/mail whilst watching telly, etc is a pain.
The iPhone is a great little device on the move, but for trying to multitask at home it’s a bit.. tedious. Even jailbroken and running multiple apps at once it’s still limiting.
I’d been looking around at netbooks, but what put me off actually getting one was my previous experience with one. I know I’d want it to run OS X to keep in sync (easily) with my other Apple devices, but hackintoshing one was a bit too much hassle, plus the fact ones to hackintosh cost more than I really wanted to pay for something that wasn’t quite what I thought I needed.
And then.. the iPad. I’ve been sort of keeping up with the rumours (mainly through Daring Fireball) and whilst I didn’t get excited about it too much ahead of announcement1, having seen the official video of it it’s pretty much guaranteed that I’m going to get one.
Yes, it’s limited (App Store, closed device), but.. I don’t care. Take the iPhone, it’s good enough for doing things on it, even if someone else is in charge of the ecosystem and has a big finger saying yes or no. I (willingly) use iTunes, Mobile Me, all the things that are so wonderfully integrated in the world of Apple, so another device that consumes my media using channels I already know and use is just a massive win for me.
All I’m hoping now is that $499 doesn’t equal £499. Hopefully it’ll be £399, still a good £80 above direct exchange rate, but low enough that it’s a no-brainer for me to get one.
…And I think this is the first Apple product that I’ve seen announced and actually known from the start why I’m going to get one, instead of just a knee-jerk “SHINY!!!! WANT!!!” reaction. Uh oh, does that make me an adult?
1 I miss getting really excited about apple announcements :(
Update
It just got even better. Was lamenting to a friend on IM that it’d be so much nicer once you can directly suck photos off a camera/SD card into it. Turns out there’s an adapter for that. See “iPad Camera Connection Kit” at the bottom of http://www.apple.com/ipad/specs/ for details.
I recently came across the at(1) command, and wondered why it wasn’t executing jobs I gave it on my machine. Had a poke around the man pages, and discovered in atrun(8) that by default launchd(8) has the atrun entry disabled.
To enable it (and have at jobs fire) you simply need to run the following command once:
Personally I’ve taken to using this to sleep my machine after a custom amount of time, mainly because my alarm clock/sleep timer of choice (Awaken) can’t handle playing Spotify for x minutes and then sleeping the machine. The following command puts the machine to sleep, which (quite effectively) silences spotify.
echo "osascript -e 'tell app \"Finder\" to sleep'" | at 1:00am
See the at(1) manpage for how to specify the time, but as I’m only ever scheduling it on the same day (usually 20 minutes or so in advance), just passing the time works fine.
I use a wonderful service for saving text to be read later, instapaper.com. It’s gotten more wonderful as time has gone on and other applications/service’s have gained the ability to save links/articles/webpages there for me to pick up later.
For instance, I’m out and about checking twitter on my iPhone using tweetie and someone tweets a link. Rather than wait for it to load and having to read it then and there I can just hit “Read Later” and it’s saved in my instapaper account for me to read as and when I choose to. Recently the legendary mac feed reader NetNewsWire gained this ability too.
There’s a few ways to send a feed item to instapaper from within NNW. Firstly you can right-click and click “Send to Instapaper”.
Secondly there’s a menu item for it in the News menu, which also provides my chosen way of instapapering an item—the keyboard shortcut! ⌃P (control-P).
So, in NNW I’m happily sending stuff to instapaper with the handy ⌃P shortcut, but that doesn’t exist in the third place I mark things to read later–Safari! Up until now I’ve been using the standard “Read Later” bookmarklet that instapaper.com provides, and it’s got a spot on my Bookmarks Bar so I can easily click it.
That doesn’t really help with the fact I’m hitting ⌃P in NNW, and it doesn’t work in Safari. Quite often I noticed myself hitting the key combination in Safari and wondering for a split second why it wasn’t sending the item to instapaper. Then the solution hit me!
In OS X you can setup (and/or override) menu items with custom key combinations! Why hadn’t I remembered this before. Because the “Read Later” bookmark*(let)* is nested under the Bookmarks menu, it is a menu item! A quick trip into the Keyboards Prefpane in System Preferences and a new binding later and voilâ, “Read Later” in Safari is bound to ⌃P and I can use it in both Safari and NNW.
This is a something that occasionally makes the rounds again, I’ve not seen it for a while and I’ve added some new items since I last remember documenting it. Thus, @macarneasking what the app was that gives me stats prompted me to document my current menubar items.
Spotlight! - Occasionally this vanishes when spotlight decides to be a dick and eat ram/cpu reindexing my disk every few hours. Touch wood it hasn’t done it since 10.6.1.
On a couple of occasions now I’ve wanted to read from STDIN into an Objective-C command line tool, and both times I’ve had to hunt quite a bit to find the answer because nothing shows up in google for the search terms I used. “Objective-c read from stdin” and “objc read stdin” both turn up results ranging from using NSInputStream to dropping some C++ in there.
The answer is quite simple really, just use NSFileHandle. More specifically +[NSFileHandle fileHandleWithStandardInput]. You can then read all data currently in STDIN, monitor it for new data and anything else you can do with a normal NSFileHandle.
And here’s some example code, reads all data from STDIN and stores it into an NSString:
Here’s how to access the self diagnostic / configuration menu on a Nissan Almera 2003 SVE (N16):
Start the engine
Turn the radio on
Turn the radio off
Hold the info button in then:
Turn the volume knob up (clockwise) until:
Diagnostic menu appears
From here you can do various things: run self-diagnostics; reset/change the main service counter; various other tests for the climate control, sat nav system, etc.
Recently I ran into an issue where I was working on a project which had files I wanted git to ignore, but I didn’t want to commit a .gitignore file into the project. In case you don’t know, any files matching a pattern in .gitignore in a git repository are ignored by git. (Unless the file(s) have already been committed, then they need removing from git before they are ignored.)
Initially I figured I could just throw the patterns I needed excluded into my global ~/.gitignore, but quickly realised that I needed files matching these patterns to show up in other git repos, so going the global route really wasn’t an option. After some thought I wondered if you could make git ignore .gitignore, whilst still getting it to ignore files matching the other patterns in the .gitignore.
Lets create a new empty repo to test this crazy idea in:
$ mkdir foo
$ cd foo
$ git init
Initialized empty Git repository in /Volumes/Brutus/Users/caius/foo/.git/
And create a couple of files for us to play with:
$ touch bar
$ touch baz
Ignore one of the files so we can check other matches are still ignored later on:
$ echo "baz" >> .gitignore
$ git status
# On branch master
#
# Initial commit
#
# Untracked files:
# (use "git add <file>..." to include in what will be committed)
#
# .gitignore
# bar
nothing added to commit but untracked files present (use "git add" to track)
Ok so far, but we can still see .gitignore in git, so now for the crazy shindig, ignore the ignore file:
$ echo ".gitignore" >> .gitignore
Lets see if it worked, or if we can still see our .gitignore:
$ git status
# On branch master
#
# Initial commit
#
# Untracked files:
# (use "git add <file>..." to include in what will be committed)
#
# bar
nothing added to commit but untracked files present (use "git add" to track)
And lets just double-check that .gitignore and baz still exist on the filesystem:
$ ls -a
. .. .git .gitignore bar baz
Fantastic! Turns out adding “.gitignore” to .gitignore works perfectly. The file is still parsed by git to ignore everything else too, so it does exactly what I needed in this instance.
This is another old post that I’m republishing. Originally published 27th April 2007.
My text editor TextMate has a nice feature called “Filter through command” whereby you can filter the current document through a command.
Anyway, I’ve never used it before, but today I had a text file with 30 or so url’s in, each on a new line, so I thought I’d test it out. I selected it to input the document & to not replace the output. I then entered the following command, which is a ruby command to take each line that isn’t blank, and run the shell command open $url.
What this does is take ARGF (the document) and read it in line by line, but only the non-whitespace characters (so newlines, space, etc are ignored.) And it assigns it to an array called a. What I then do is for each item of a, we run it past the shell command open, which on OS X if you pass it a URL it just opens that URL in the default browser.
My browser is Safari, and its set to open new links in a new tab in the foremost window. So I ran the command, and hey presto, within a few seconds I had all the URL’s loading in seperate tabs in Safari’s foremost window!
The power of Unix (OS X) & TextMate (amongst other tools) just never ceases to amaze me.
Update
I just realised if you change the regex to scan for http://.* then it’ll select all website URLs.
Here are some mac tips I know and consider “basic” mac knowledge, but no-one else seems to know.
exposé key is on modern mac keyboards, looks like a load of squares on the F3 key.
⌘ + Exposé key => Show Desktop
⌃ + Exposé key => Show Application Windows
⌥ + Brightness keys => Open Displays prefpane in System Preferences.
⌥ + Exposé key => Open Exposé & Spaces prefpane in System Preferences.
⌥ + Dashboard key => Open Exposé & Spaces prefpane in System Preferences.
⌥ + Keyboard Backlight keys => Open Keyboard prefpane in System Preferences. (Only on laptops with keyboard backlighting.)
⌥ + Volume keys => Open Sound prefpane in System Preferences.
⇧ + Volume keys => Adjust the volume with the feedback noise setting toggled. If you normally have feedback “blips”, it’ll be silent. Or vice versa.
⌥ + ⇧ + Volume keys => Adjust the volume in 1/4 of a usual step.
⌃ + Eject key => Shows the Shut Down dialog.
In the shut down dialog, hit R to restart, S to sleep, ⎋ to cancel.
(Pretty much) Any dialog that pops up, hitting ⎋ will push the “cancel” button.
In “Show all windows” or “Show application windows” exposé modes, hit the tab key to cycle through applications.
Hit the space bar in exposé to activate “Quick Look” + windows pop up to 100% size as you mouse over them.
Hold down ⌃ + ⇧ when mousing over the dock to toggle magnification whilst the keys are down.
(Alternative title Peter Cooper suggested, “A miscellany of input device co-ordinations to modulate the response of Apple’s task preview and switching subsystem”)
This is a re-run of an old post I took offline in an old server move and hadn’t re-published.
Having been on two college systems and various university networks, I’m just amazed at the levels of freedom you have on some, and how locked down others are.
Take the first university network I ever used for example. It was pretty much totally open, to the point that I could game quite freely, and the administrator only picked me up because I was logged in as admin and not a normal user. (I didn’t have an account for that machine.)
Going from that to my school network was a very big shock as it was moderately filtered through third party filtering software. This meant you couldn’t go on the usual NSFW stuff, but still had access to other sites that could be seen as bad, such as proxy sites, or IRC java Clients for example.
Having moved from my old (slightly crass) college to my new one, its interesting how filtered this one is. You can’t seem to go on a site with proxy or irc in the URL, except clean sites like the BBC or Wikipedia. The Proxy searching only came about through looking for web based IRC solutions.
Personally I think the universities have got it right. With all the students they have, they just limit the things they definitely have to, and allow everything else. (Blacklisting technique.) Both colleges seem to do the opposite - block everything until its verified and unblocked. (Whitelisting technique.)
The way I see it, the problem with the white listing technique is that people will always find a way around whatever restrictions are in place. For instance, I’m locked out of all of my web based email sites, so I can’t email anyone. Its not the not being able to send that bothers me, its the not being able to save text that I’ve written in college to a website to then retrieve it from home that annoys me.
So how did I work around this restriction? Well I remembered that Google had bought Writely at some point recently, so one quick sign in later and I’ve got my own little area where I can save, organise and edit text based files. All I have to do when I get home is login, copy / paste into my email client and hit send.
One word that isn’t blocked yet is blog, so I can still post this, and edit my posts. However, I’m still writing it in Writely and checking my markdown syntax is correct with Dingus. The writely interface is just that much nicer than notepad.
Backstory: Got myself a first generation iPhone second hand and unlocked it to work on my existing T-Mobile (Official iPhone network in the UK is O2.) Noticed after a week or so of owning it that when you change the volume on the phone, the bezel that comes up says “ringer” across the top. But when you have headphones plugged in, it says “Headphones”. (Note the capitalisation difference.)
Now I’m not usually bothered by stuff like this (honest!) but as soon as I’d noticed the “bug”, I couldn’t help but think of it everytime I changed the volume, whether I was looking at the screen or not. Seeing as I’m running a jailbroken phone, and therefore have SSH access to it, I figured the string would be defined in a .strings file somewhere in the /System folder. And I’d be able to change it!
Fast-forward a few months and I install the iPhone OS 3.0 update (jailbroken of course), and finally decide to turn the phone’s SSH server on and go looking for the setting. To do so I figured I’d just need grep installed on the phone - I could copy the file itself to my mac and edit it there.
So I connect to the phone, have a poke around the filesystem and then start a search to find the correct file:
At which point I stopped the grep search (^C) because I know the home screen of the iPhone is the SpringBoard.app, so I figured it would be in the file SpringBoard.app/English.lproj/SpringBoard.strings. Making sure to have SSH enabled on your mac, a simple scp CoreServices/SpringBoard.app/English.lproj/SpringBoard.strings user@your_mac.local: later and the file is sat in my home folder on my mac.
Switching to the mac, now I try and open the file with TextMate, only to realise its in binary format. I need it in the nice XML format to edit it, so a quick google later and I’ve found a hint on MacOSXHints telling me how to convert from binary to xml plist format.
# On the mac
$ plutil -convert xml1 SpringBoard.strings
Then opening the file in TextMate was a bit more successful! I can actually understand what its defining now. Search through the file for “ringer” and I found the following lines:
<key>RINGER_VOLUME</key>
<string>ringer</string>
Change the “ringer” to “Ringer” between the <string> and my editing work is complete! Yes, it really is that easy to edit an interface string that is defined in a .string. Now I just need to convert the file back to binary, and copy it back to the phone. Converting back to binary file is one line, just change the xml1 in the previous command to binary1.
# On the mac
$ plutil -convert binary1 SpringBoard.strings
And then scp it back to the phone, make a backup of the existing file, and overwrite the existing file with the new one I’ve edited:
# On the iPhone
$ cd ~
$ scp user@mac_name.local:SpringBoard.strings .
$ cd /System/Library/CoreServices/SpringBoard.app/English.lproj/
$ mv SpringBoard.strings SpringBoard.strings.bak
$ cp ~/SpringBoard.strings SpringBoard.strings
And then restart the phone, either in the usual manner or just run reboot on the phone via SSH. Lo and behold once its rebooted and I changed the volume, it read “Ringer”!
At the 2009 Barcamp Leeds I attended a talk by Neil Crosby where he talked about automated testing, and about how he felt there was a gap in everything that people were testing. Everyone has unit tests, and people are doing full stack testing too, but no-one (so he feels) does XHTML/CSS/JS validation as part of their automated test suite. And certainly from what I’ve seen on the mainstream Ruby site’s about testing, I agreed with him.
So after his talk I had a quick look at his frontend test suite, and started wondering where exactly I would fit frontend validation testing into my workflow. Would it be part of my unit tests (RSpec), or part of the full stack tests (Cucumber)? As you’ve probably guessed by the title of this post, its ended up going into my cucumber tests. Since the initial play its been something I’ve mused about occasionally, but not something I’ve actively looked into how to implement as part of my test workflow.
Fast-forward a few weeks from Barcamp Leeds and I see a news article in my feed reader entitled “Easy Markup Validation” which gets me hopeful someone’s solved this frontend validation thing easily for Rubyists. A quick read through and I’m sold on it and installing the gem. Opened an existing project I’m working on which has a fairly extensive test suite (both unit tests & full stack tests) and tried to slot the validation into my controller unit tests.
Problem with doing this is by default RSpec-rails doesn’t generate the views in your controller specs. At that point I realised I was already generating the full page when I was doing a full stack test using culerity and cucumber. So why not just add a cucumber step in my stories to validate the HTML on each page I visit? Mainly because its not enough of a failure for this app to have invalid XHTML markup. Having valid markup would be nice, but I’d rather have it as a separate test to my stories in some way.
Currently I just do that by only validating if ENV["VALIDATION"] is set to anything, so a normal run of my cucumber stories will just test the app does what its supposed to do. If I run them with VALIDATION=true then it will check my markup is valid as well.
features/support/env.rb
require "markup_validity" if ENV["VALIDATION"]
features/step_definitions/general_steps.rb
Then %r/the page is valid XHTML/ do
 $browser.html.should be_xhtml_strict if ENV["VALIDATION"]
end
features/logging_in.feature
Feature: Logging in
 In order to do stuff
 As a registered user
 I want to login

 Scenario: Successful Login
 Given there is a user called "Caius"

 When I goto the homepage
 Then the page is valid XHTML

 When I click on the "Login" link
 Then I am redirected to the login page
 And the page is valid XHTML

 When I enter my login details
 And I click "Login"
 Then I am redirected to my dashboard
 And the page is valid XHTML
Now when I run cucumber features/logging_in.feature, it doesn’t validate the HTML, it just makes sure that I can login as my user and that I am redirected to the right places. But if I run VALIDATION=true cucumber features/logging_in.feature, then it does validate my XHTML on the homepage, the login page and on the user’s dashboard. If it fails validation then it gives you a fairly helpful error message as to what it was expecting and what it found instead.
From a quick run against a couple of stories in my app I discovered that I’ve not been wrapping form elements in an enclosing element, so they’ve been quickly fixed and now they validate. Now I realise this gem is only testing XHTML output, and doesn’t include CSS or JS validation, but from a quick peek at the gem’s source it should be fairly easy to add both of those in I think, although again they aren’t major errors for me yet in this app.
So I’ve got some js I’ve written to update a couple of <select> lists in a form, and it was all working fine for me (under Safari.) John happened to mention it wasn’t working for him under Firefox, so I fired up Firefox and took a look. Could reproduce it perfectly, changing the first popup was populating the second one, but then wasn’t selecting the right value from the list.
Having no idea what was happened I figured I’d enable firebug and watch it execute to figure out what was happening. Enabled firebug, reloaded the page, selected from the first popup… and voila! It updated the second one and selected the correct row! WTF!!!
Turned firebug off and it didn’t work, turned it back on and it worked. Figured it might be something buggy in the Firefox 3.0.5 js runtime, so I grabbed a copy of the new beta 3.5 and tried it in there—still failed to update the page as it should.
Then started poking around the javascript code, the function that was seemingly failing to run was being triggered by a setTimeout() call set to 1 second. We figured it might be the timing causing it, so started playing around with the time, tried anything from ½ a second up to 4 seconds but still no joy in firefox with firebug turned off.
Then John went looking for the javascript errors in firefox (with firebug off) and discovered that it was throwing an error because window.console didn’t exist. All of a sudden it made perfect sense! Safari has window.console.log() for writing to the console log, as does firebug. But of course firefox without firebug doesn’t!
So the function was just exiting on that error. It was very weird initially to have it work perfectly as soon as the developer tools were enabled!
Before I start, I’ll just quickly run through where I put stuff on my server. Apache logs and config are in the ubuntu default folders: /var/log/apache2 and /etc/apache2/ respectively.
So I have a git repo locally, ~/projects/somesite.com/, and want to deploy it to my webserver. I’ll keep the git repo in ~/git/ and set it up so that when I push to the repo (over ssh) it will automatically checkout the new changes into the website’s htdocs folder.
I’m assuming DNS is already setup (or I’ve used ghost to map it locally.) And that I’ve setup the virtualhost in apache pointing at /home/caius/vhosts/somesite.com/htdocs and reloaded apache so the config is in place.
Remote Machine
We create a bare git repo, then point the working tree at the docroot of our website. This means all the git stuff is kept in the somesite.git folder, but the files themselves are checked out to the website’s folder. Then we setup a post-receive hook to update the worktree folder after new changes have been pushed to the repo.
And now on the client machine we add the remote repo as a git remote, and then push to it.
$ git remote add web ssh://myserver/home/caius/git/somesite.git
$ git push web +master:refs/heads/master
Counting objects: 3, done.
Writing objects: 100% (3/3), 229 bytes, done.
Total 3 (delta 0), reused 0 (delta 0)
To ssh://myserver/home/caius/git/somesite.git
* [new branch] master -> master
All Done
And now if you go to somesite.com you’ll see the contents of your git repo there. (somesite.com is just an example url though, I don’t actually own it!)
So I have this command in my $PATH, apachectl. Because I’m on a mac and I’ve installed apache2 through MacPorts, the command that gets found first is my macports install in /opt. Up until now I’ve always known that which apachectl will find that location, but to find any other locations of apachectl I’d usually use locate and egrep together.
Here’s my original workflow, lets find the location of the apachectl being called when I don’t specify a path.
Julius:~ caius$ which apachectl
/opt/local/apache2/bin/apachectl
Simple enough. Now lets figure out what other locations there’s an apachectl installed at.
Right, so now I know where else a command exists in the filesystem called apachectl, but I don’t know if any of those is in my $PATH, or what order they come in when searching through my $PATH. In this (old) workflow I’d have compared them to my $PATH manually as there’s so few of them.
So I noticed Ali googling for the which man page on IRC, and (quite stupidly) poked fun at him for doing so. I then swallowed my ego and actually followed the link to the man page, and boy was I glad I did. Just shows with even a fairly simple command like which, you sure don’t know everything!
What I discovered was that which has a single flag you can pass it, -a. From the man page:
-a print all matching pathnames of each argument
Right. So that locate | grep command plus manually figuring out what is in my $PATH is really hard work then. which -a should give us the same results, but a lot faster and with a lot less manual thought.
Julius:~ caius$ which -a apachectl
/opt/local/apache2/bin/apachectl
/usr/sbin/apachectl
And hey presto, yet another useful bit of bash knowledge for me, thanks to Ali not being afraid to RTFM!
I happened to be sent a link to the OWASP paper on Rails Security recently and started reading it. Partway in there’s a section on Regular Expressions, which opens with the following line:
A common pitfall in Ruby’s regular expressions is to match the string’s beginning and end by ^ and $, instead of \A and \z.
Now I’ve never used \A and \z in my regular expressions to validate data, I’ve only ever used ^ and $ assuming they matched the start and end of the string. This becomes an issue with validating data in rails, because %0A (\n URL encoded) is decoded by rails before passing the string to your model to validate.
Testing our expectations
Lets say we want to validate the string as a username for our app. A username is 5 characters long and consists only of lowercase letters.
regex = /^[a-z]{5}$/
First we make sure it matches the data we want it to:
"caius".validate(regex) # => true
Excellent, that validated. Now we’ll try a shorter string, which we expect to fail.
"cai".validate(regex) # => false
Once more, it behaves how we expected it to. The shorter string was rejected as we wanted it to be. Now, what happens if we test a string with a newline character in it? We’ll make sure the data before the \n is valid, and then add some more data after the newline.
"caius\nfoo".validate(regex) # => true
Uh oh! That validated and would’ve been saved as a username?!
Lets have a look at exactly what’s happening there, the $ matches the \n character, so the regex is only matching the first 5 characters of the string, and just ignores anything after the \n. As it turns out, this is exactly what we’ve asked the regex to match, but we didn’t want this behaviour.
Now you might be thinking, “So what? someone can have a username with a newline in it.” For starters this will probably display weirdly anywhere you use their username, but more importantly it opens your application to an injection attack. Suppose they took advantage of this by setting their username to include some javascript on the page which stole your login cookie and sent it to them. You view their account in the admin section and oh no! They can login as your admin account and do what they want.
Simple example of this is just having it output an alert dialog. (This is actually the code I’ll use to test an application as its not malicious, but blindingly obvious if the javascript is executed or not.)
Ok, so that was the result we were expecting this time, although it’s still not the outcome we wanted. Anytime their username is viewed (providing you aren’t escaping the data to HTML entities) you’ll see the following:
The Solution
Having realised from our testing above that ^$ matches the beginning/end of a line in ruby not the beginning and end of a string, I hear you cry, “How do we make sure we’re matching the entire string?!”
The answer is pretty simple. Just swap out ^$ for \A\z. Lets go ahead and try this with the same data as we have above, but with the modified regular expression.
Updated 2009-06-09: This post is for the Safari 4 beta and will not work with the new Safari 4 released yesterday at the WWDC keynote. I’ve had a look through that release and can’t see any way to revert the address bar, etc sorry.
Having a quick poke through the new Safari binary yields the following strings:
NB: Run these commands in Terminal.app and then you need to restart Safari for them to take effect.
DebugSafari4TabBarIsOnTop
This moves the tab bar back where you expect it to be:
$ defaults write com.apple.Safari DebugSafari4TabBarIsOnTop -bool NO
DebugSafari4IncludeToolbarRedesign and DebugSafari4LoadProgressStyle
When both set to NO it restores the blue loading bar behind the URL. Also puts a page loading spinner in the tab itself, which looks odd with the new tabs.
$ defaults write com.apple.Safari DebugSafari4IncludeToolbarRedesign -bool NO
$ defaults write com.apple.Safari DebugSafari4LoadProgressStyle -bool NO
DebugSafari4IncludeFancyURLCompletionList
Switches off the new URL autocomplete menu and goes back to the original one.
$ defaults write com.apple.Safari DebugSafari4IncludeFancyURLCompletionList -bool NO
DebugSafari4IncludeGoogleSuggest
Turns off the new Google suggest menu.
$ defaults write com.apple.Safari DebugSafari4IncludeGoogleSuggest -bool NO
DebugSafari4IncludeFlowViewInBookmarksView
Removes CoverFlow from the Bookmarks view entirely. (Credit to Erik)
$ defaults write com.apple.Safari DebugSafari4IncludeFlowViewInBookmarksView -bool NO
NB: Installing Ruby 1.9.1 through macports sudo port install ruby19 means I get ruby1.9, gem1.9 and rake1.9 installed alongside my usual 1.8 ruby, gem and rake.
That grabs the list of installed gems from gem, searches for lines containing “(” so it only grabs the gem names, spits out the first section of the line, which is the name of the gem, and finally calls gem1.9 install for each line via xargs -L 1. Make sure to run it as root or prefix gem1.9 with sudo. (Or let it install in your home folder, but I hate that.)
From my quick run of the above snippet, 75% of my gems installed (73 out of 98) and the other few that failed to install were ones like Hpricot that require native extensions compiling. You can see the entire list of failures and successes of the gems in this pastie
So I write this blog using Markdown because I’m a human and writing stuff <strong>with</strong> tags is just WRONG. Thankfully, Gruber solved this problem by writing markdown.
The best way to get a feel for Markdown’s formatting syntax is simply to look at a Markdown-formatted document. For example, you can view the Markdown source for the article text on this page here: http://daringfireball.net/projects/markdown/index.text
(You can use this ‘.text’ suffix trick to view the Markdown source for the content of each of the pages in this section, e.g. the Syntax and License pages.)
And ever since I noticed that I’ve always read his articles using the ‘.text’ trick. One of the plugins I’ve been meaning to write for habari is one that replicates this ‘.text’ behaviour. So tonight I decided to try and write it, started picking through the Plugin documentation in preparation. Got a bit stuck with it as I’ve been out of the habari development loop for a few months, popped into #habari and asked if I was thinking along the right lines.
Few minutes later Owen pops up and sends me a link to plaintext.plugin.php, which does exactly what I was trying to do! Couple of tweaks later (switching it to ‘.text’ instead of ‘.md’) and its installed and working on this blog. Feel free to view the raw source of this post. Or any other post on this site.
Updated 2009-01-31
Added to the habari-extras repo as the Plaintext plugin.
As some friday fun in #geekup we ended up converting the US Marines Creed to a geekier version.
This is my compiler.
There are many like it, but this one is MINE.
My compiler is my best friend. It is my life.
I must master it as I must master my life.
My compiler without me is useless. Without my compiler, I am useless.
I must run my compiler true.
I must run faster than my bug who is trying to kill me.
I must squash him before he squashes me. I will…
My compiler and myself know that what counts in war is not the warnings we squash,
the builds we create, nor the optimisations we make.
We know it is the build errors fixed that count. We will fix…
My compiler is human, even as I, because it is my life.
Thus, I will learn it as a brother.
I will learn its weaknesses, its strengths, its output, its code,
its quirks, and its errors.
I will ever guard it against the ravages of virii and disk failures.
I will keep my compiler clean and ready, even as I am clean and ready.
We will become part of each other. We will…
Before Assembler I swear this creed.
My compiler and myself are the defenders of good code.
We are the masters of our bugs.
We are the saviors of our code.
So be it, until code is compiling and there are no bugs, but compiled code.
Our Compiler, who art in memory. GNU be thy name.
Thy source code come, thy will be done.
On script as it is in memory.
Give us this day our daily data, and forgive us our segfaults as we forgive those who segfault against us.
And lead us not into /dev/null but deliver us from M$,
for thine is the domain, the cpu and the peeps.
for (x=0; x<2; x++){ x=0; }
Amen